Page 51 of 492
– Child restraint anchor points are de-signed to withstand loads from child
restraints that are properly fitted.
– Never use the anchor points for adult seat belts or harnesses.
– A child restraint with a top tether strap should not be used in the front
passenger seat.
– Keep seatbacks as upright as pos- sible after fitting the child restraint.
– Infants and children should always be placed in an appropriate child re-
straint while in the vehicle.
● When the child restraint is not in use,
keep it secured with the LATCH system
or a seat belt. In a sudden stop or colli-
sion, loose objects can injure occu-
pants or damage the vehicle.
CAUTION
A child restraint in a closed vehicle can
become very hot. Check the seating sur-
face and buckles before placing a child in
the child restraint. This vehicle is equipped with a universal child
restraint anchor system, referred to as the LATCH
(Lower Anchors and Tethers for CHildren) sys-
tem. Some child restraints include rigid or
webbing-mounted attachments that can be con-
nected to these anchors. For details, see “LATCH
(Lower Anchors and Tethers for CHildren) sys-
tem” later in this section.
If you do not have a LATCH compatible child
restraint, the vehicle seat belts can be used.
Several manufacturers offer child restraints for
infants and children of various sizes. When se-
lecting any child restraint, keep the following
points in mind:
● Choose only a restraint with a label certifying
that it complies with Federal Motor Vehicle
Safety Standard 213 or Canadian Motor
Vehicle Safety Standard 213.
● Check the child restraint in your vehicle to be
sure it is compatible with the vehicle’s seat
and seat belt system. ●
If the child restraint is compatible with your
vehicle, place your child in the child restraint
and check the various adjustments to be
sure the child restraint is compatible with
your child. Choose a child restraint that is
designed for your child’s height and weight.
Always follow all recommended procedures.
All U.S. states and Canadian provinces or
territories require that infants and small
children be restrained in an approved child
restraint at all times while the vehicle is
being operated. Canadian law requires the
top tether strap on forward-facing child
restraints be secured to the designated an-
chor point on the vehicle.
1-34Safety—Seats, seat belts and supplemental restraint system
Page 52 of 492
LATCH (Lower Anchors and Tethers
for CHildren) SYSTEM
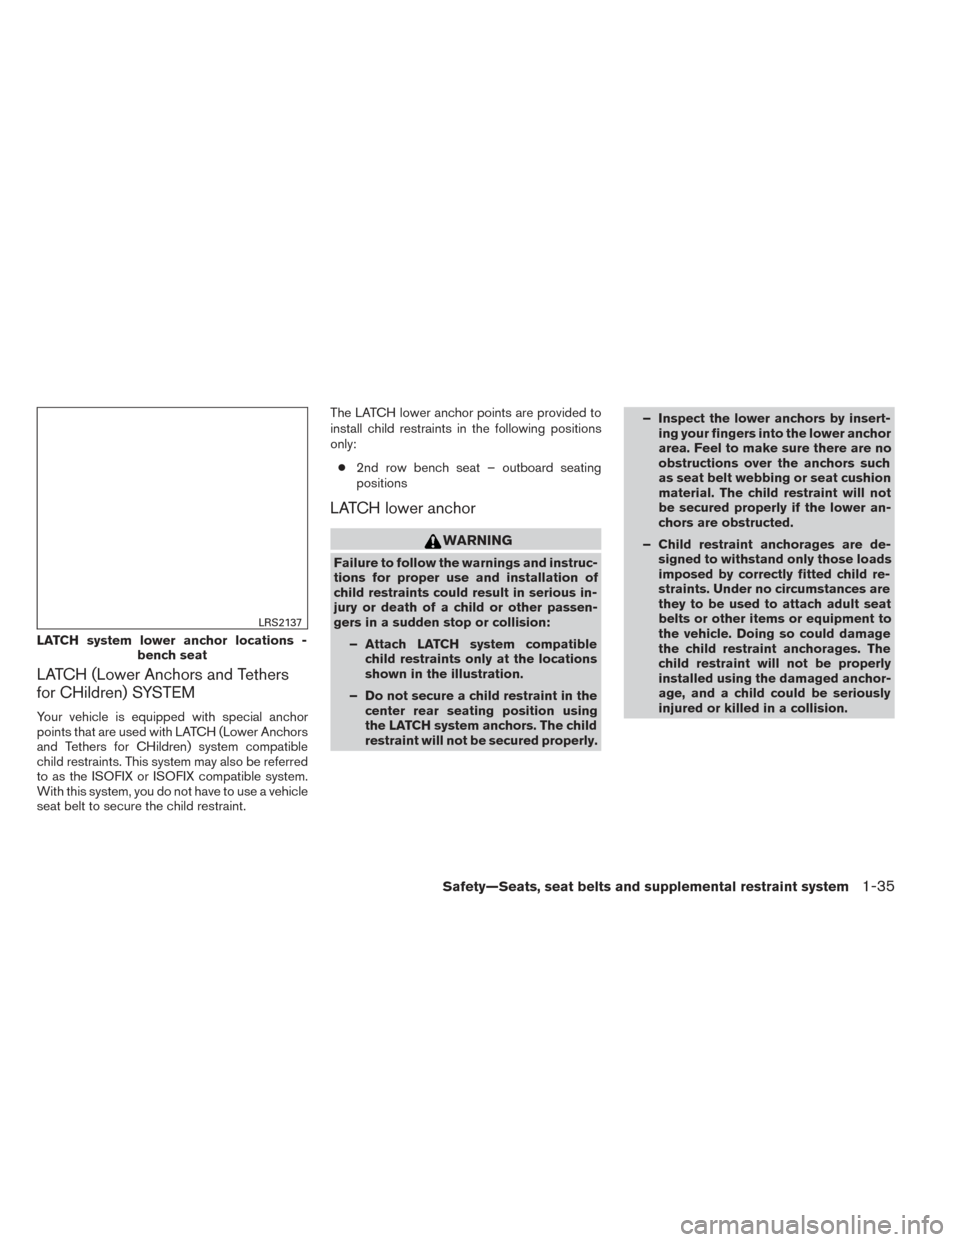
Your vehicle is equipped with special anchor
points that are used with LATCH (Lower Anchors
and Tethers for CHildren) system compatible
child restraints. This system may also be referred
to as the ISOFIX or ISOFIX compatible system.
With this system, you do not have to use a vehicle
seat belt to secure the child restraint.The LATCH lower anchor points are provided to
install child restraints in the following positions
only:
● 2nd row bench seat – outboard seating
positions
LATCH lower anchor
WARNING
Failure to follow the warnings and instruc-
tions for proper use and installation of
child restraints could result in serious in-
jury or death of a child or other passen-
gers in a sudden stop or collision:
– Attach LATCH system compatible child restraints only at the locations
shown in the illustration.
– Do not secure a child restraint in the center rear seating position using
the LATCH system anchors. The child
restraint will not be secured properly. – Inspect the lower anchors by insert-
ing your fingers into the lower anchor
area. Feel to make sure there are no
obstructions over the anchors such
as seat belt webbing or seat cushion
material. The child restraint will not
be secured properly if the lower an-
chors are obstructed.
– Child restraint anchorages are de- signed to withstand only those loads
imposed by correctly fitted child re-
straints. Under no circumstances are
they to be used to attach adult seat
belts or other items or equipment to
the vehicle. Doing so could damage
the child restraint anchorages. The
child restraint will not be properly
installed using the damaged anchor-
age, and a child could be seriously
injured or killed in a collision.
LATCH system lower anchor locations - bench seat
LRS2137
Safety—Seats, seat belts and supplemental restraint system1-35
Page 53 of 492
LATCH lower anchor location
The LATCH lower anchors are located at the rear
of the seat cushion near the seatback. A label is
attached to the seatback to help you locate the
LATCH lower anchors.
Installing child restraint LATCH lower
anchor attachments
LATCH compatible child restraints include two
rigid or webbing-mounted attachments that can
be connected to two anchors located at certain
seating positions in your vehicle. With this sys-
tem, you do not have to use a vehicle seat belt to
secure the child restraint. Check your child re-
straint for a label stating that it is compatible with
LATCH. This information may also be in the in-
structions provided by the child restraint manu-
facturer.
LATCH lower anchor location
WRS0700
LATCH label locations 2nd row bench
LRS2146
LATCH webbing-mounted attachment
LRS0661
1-36Safety—Seats, seat belts and supplemental restraint system
Page 54 of 492
When installing a child restraint, carefully read
and follow the instructions in this manual and
those supplied with the child restraint.
Top tether anchor
WARNING
Do not allow cargo to contact the top
tether strap when it is attached to the top
tether anchor. Properly secure the cargo
so it does not contact the top tether strap.
Cargo that is not properly secured or
cargo that contacts the top tether strap
may damage it during a collision. A child
could be seriously injured or killed in a
collision if the top tether strap is
damaged.1. Top tether strap
2. Anchor point
LATCH rigid-mounted attachment
LRS0662
2nd row bench seat
LRS2138
Safety—Seats, seat belts and supplemental restraint system1-37
Page 55 of 492
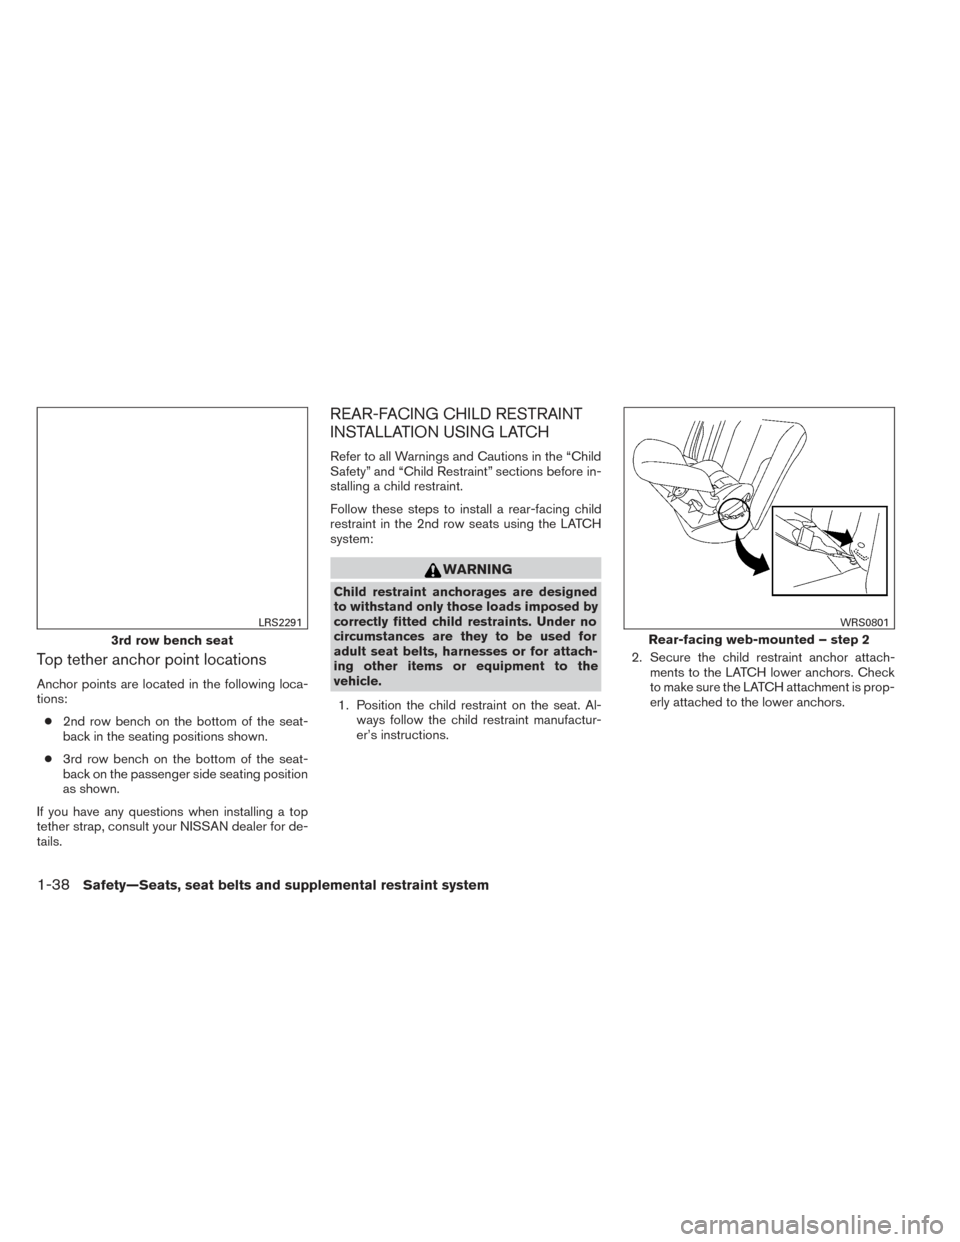
Top tether anchor point locations
Anchor points are located in the following loca-
tions:● 2nd row bench on the bottom of the seat-
back in the seating positions shown.
● 3rd row bench on the bottom of the seat-
back on the passenger side seating position
as shown.
If you have any questions when installing a top
tether strap, consult your NISSAN dealer for de-
tails.
REAR-FACING CHILD RESTRAINT
INSTALLATION USING LATCH
Refer to all Warnings and Cautions in the “Child
Safety” and “Child Restraint” sections before in-
stalling a child restraint.
Follow these steps to install a rear-facing child
restraint in the 2nd row seats using the LATCH
system:
WARNING
Child restraint anchorages are designed
to withstand only those loads imposed by
correctly fitted child restraints. Under no
circumstances are they to be used for
adult seat belts, harnesses or for attach-
ing other items or equipment to the
vehicle.
1. Position the child restraint on the seat. Al- ways follow the child restraint manufactur-
er’s instructions. 2. Secure the child restraint anchor attach-
ments to the LATCH lower anchors. Check
to make sure the LATCH attachment is prop-
erly attached to the lower anchors.
3rd row bench seat
LRS2291
Rear-facing web-mounted – step 2
WRS0801
1-38Safety—Seats, seat belts and supplemental restraint system
Page 56 of 492
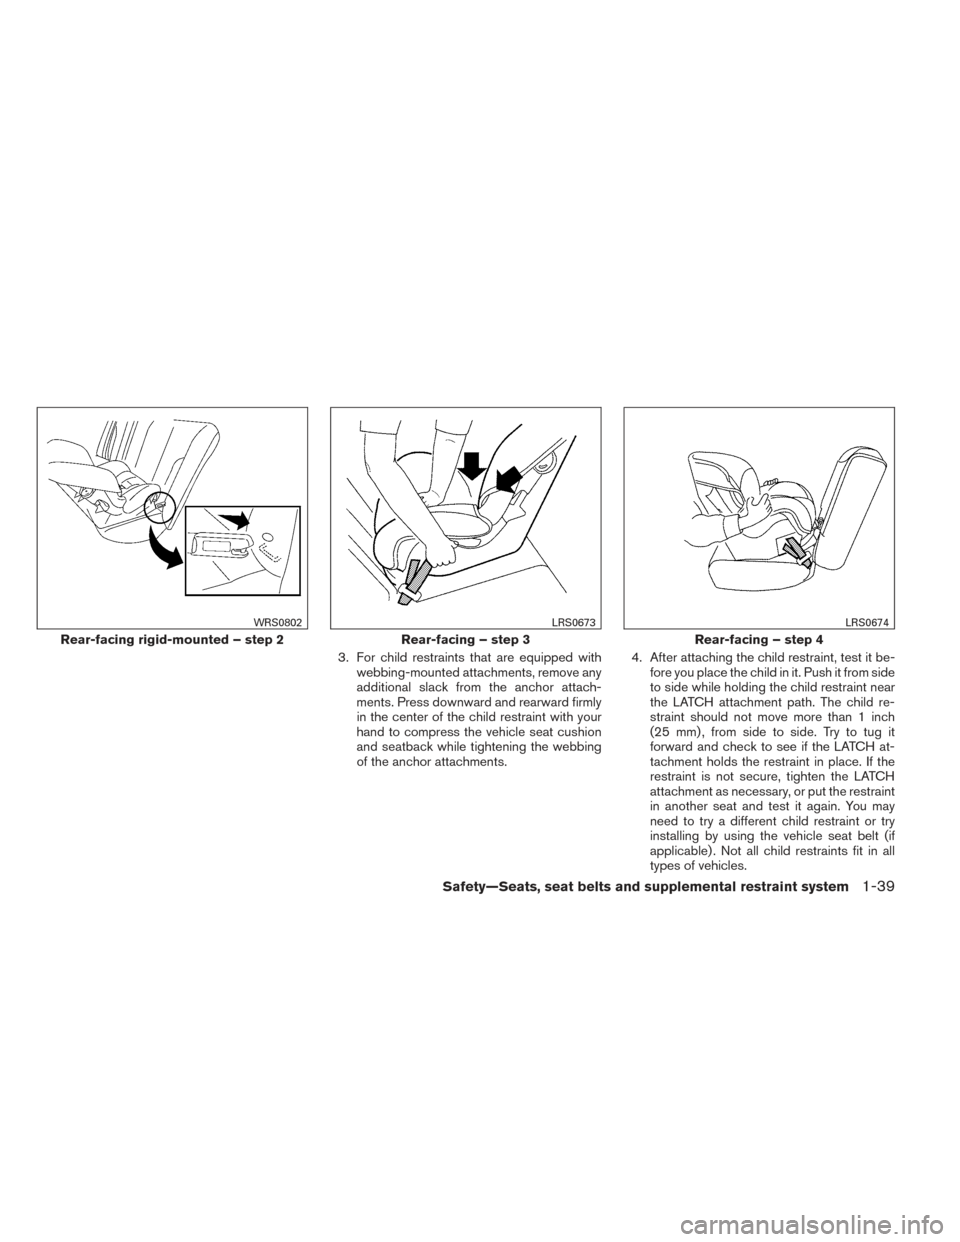
3. For child restraints that are equipped withwebbing-mounted attachments, remove any
additional slack from the anchor attach-
ments. Press downward and rearward firmly
in the center of the child restraint with your
hand to compress the vehicle seat cushion
and seatback while tightening the webbing
of the anchor attachments. 4. After attaching the child restraint, test it be-
fore you place the child in it. Push it from side
to side while holding the child restraint near
the LATCH attachment path. The child re-
straint should not move more than 1 inch
(25 mm) , from side to side. Try to tug it
forward and check to see if the LATCH at-
tachment holds the restraint in place. If the
restraint is not secure, tighten the LATCH
attachment as necessary, or put the restraint
in another seat and test it again. You may
need to try a different child restraint or try
installing by using the vehicle seat belt (if
applicable) . Not all child restraints fit in all
types of vehicles.
Rear-facing rigid-mounted – step 2
WRS0802
Rear-facing – step 3
LRS0673
Rear-facing – step 4
LRS0674
Safety—Seats, seat belts and supplemental restraint system1-39
Page 57 of 492
5. Check to make sure the child restraint isproperly secured prior to each use. If the
child restraint is loose, repeat steps 2
through 4.
REAR-FACING CHILD RESTRAINT
INSTALLATION USING THE SEAT
BELTS
WARNING
The three-point seat belt with Automatic
Locking Retractor (ALR) must be used
when installing a child restraint. Failure to
use the ALR mode will result in the child
restraint not being properly secured. The
restraint could tip over or be loose and
cause injury to a child in a sudden stop or
collision. Also, it can change the opera-
tion of the front passenger air bag. See
“Front passenger air bag and status light”
later in this section.
WRS0256
1-40Safety—Seats, seat belts and supplemental restraint system
Page 59 of 492
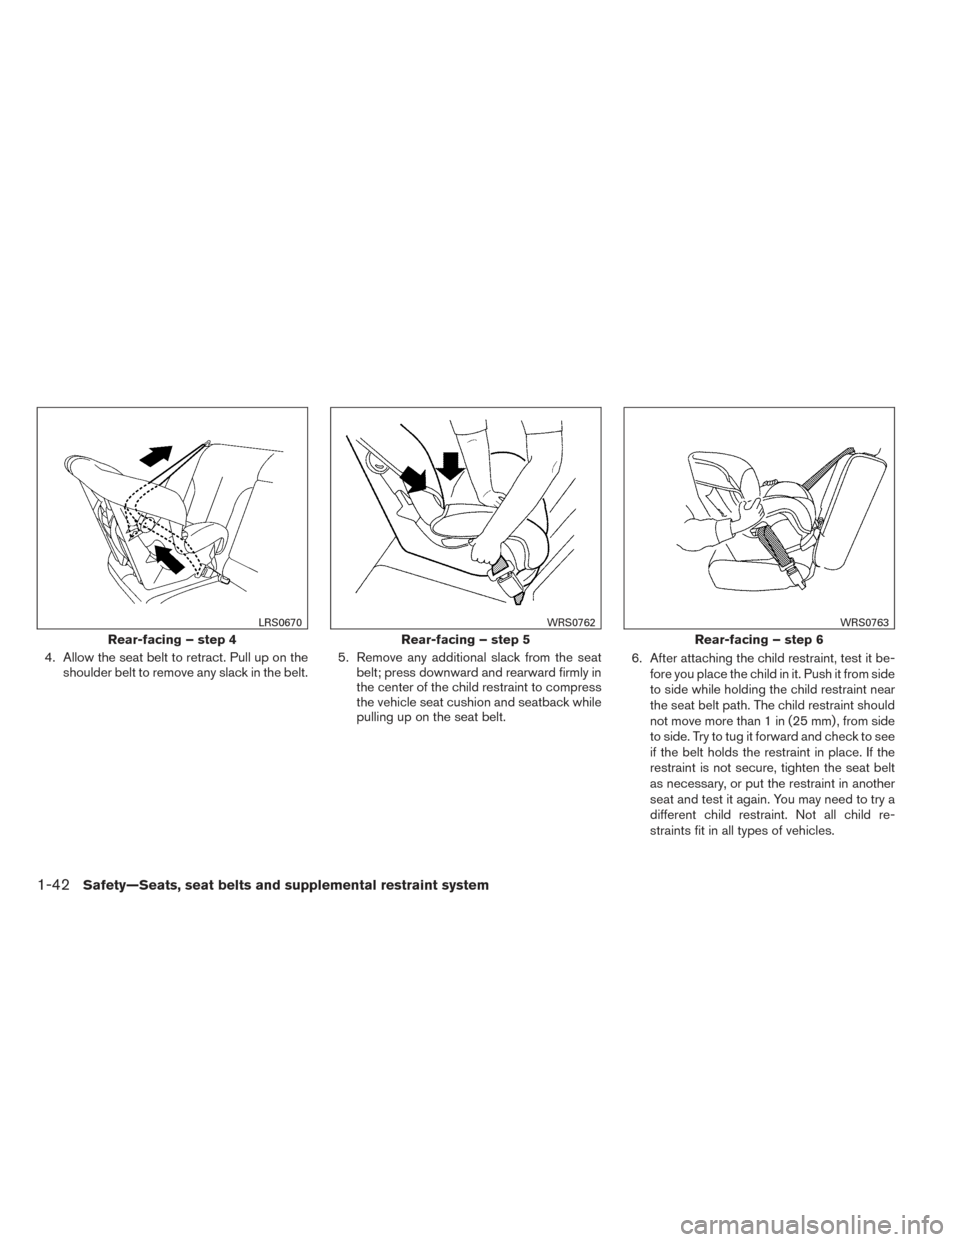
4. Allow the seat belt to retract. Pull up on theshoulder belt to remove any slack in the belt. 5. Remove any additional slack from the seat
belt; press downward and rearward firmly in
the center of the child restraint to compress
the vehicle seat cushion and seatback while
pulling up on the seat belt. 6. After attaching the child restraint, test it be-
fore you place the child in it. Push it from side
to side while holding the child restraint near
the seat belt path. The child restraint should
not move more than 1 in (25 mm) , from side
to side. Try to tug it forward and check to see
if the belt holds the restraint in place. If the
restraint is not secure, tighten the seat belt
as necessary, or put the restraint in another
seat and test it again. You may need to try a
different child restraint. Not all child re-
straints fit in all types of vehicles.
Rear-facing – step 4
LRS0670
Rear-facing – step 5
WRS0762
Rear-facing – step 6
WRS0763
1-42Safety—Seats, seat belts and supplemental restraint system