2014 NISSAN MAXIMA headrest
[x] Cancel search: headrestPage 30 of 432
Install
1. Align the head restraint/headrest stalks withthe holes in the seat. Make sure the head
restraint/headrest is facing the correct di-
rection.
2. Push the head restraint/headrest down until it locks in place.
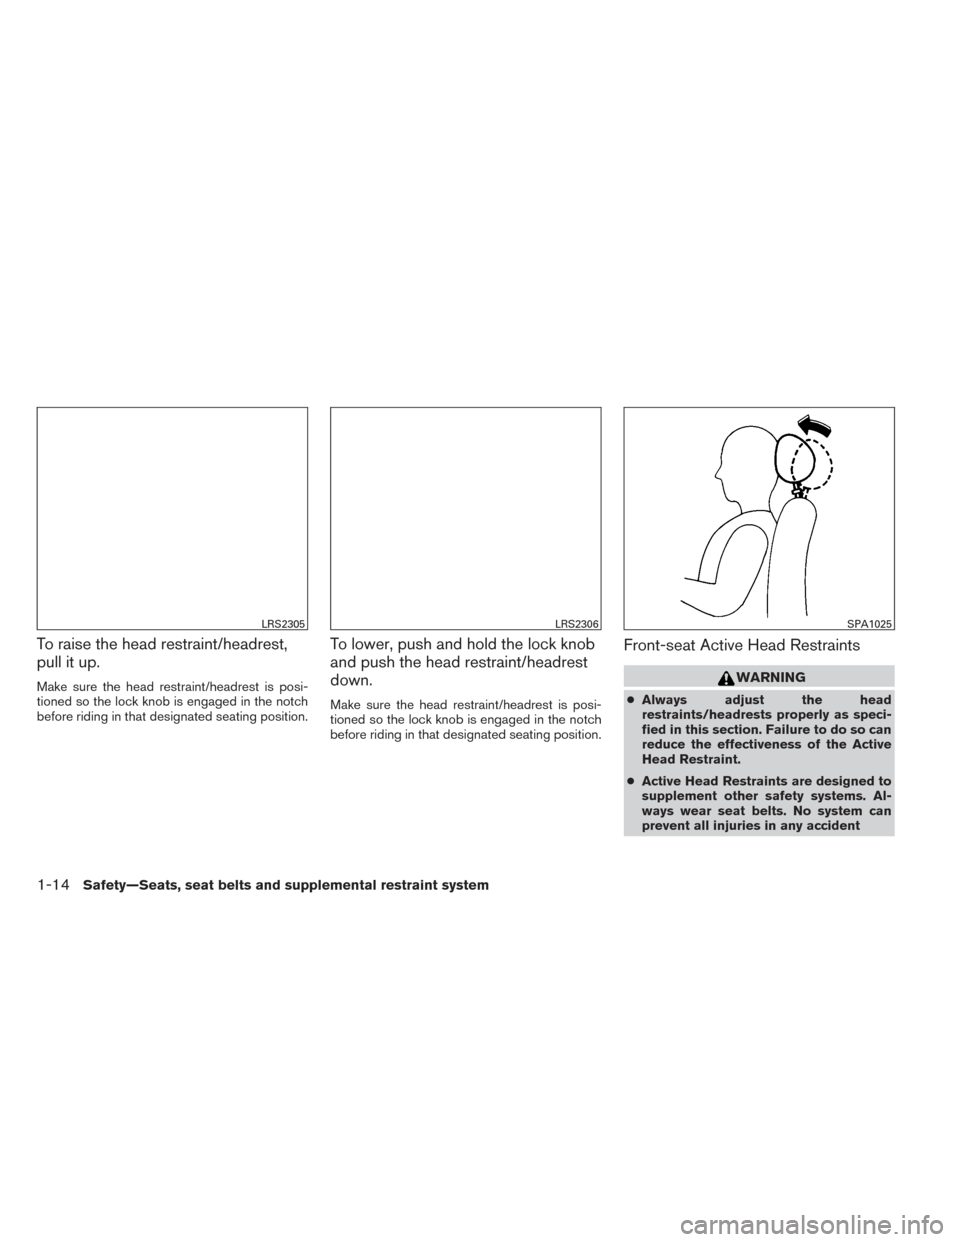
For adjustable head restraint/headrest
Adjust the head restraint/headrest so the center
is level with the center of your ears. If your ear
position is still higher than the recommended
alignment, place the head restraint/headrest at
the highest position.
For non-adjustable head restraint/
headrest
Make sure the head restraint/headrest is posi-
tioned so the lock knob is engaged in the notch
before riding in that designated seating position.
LRS2075WRS0134LRS2351
Safety—Seats, seat belts and supplemental restraint system1-13
Page 31 of 432
To raise the head restraint/headrest,
pull it up.
Make sure the head restraint/headrest is posi-
tioned so the lock knob is engaged in the notch
before riding in that designated seating position.
To lower, push and hold the lock knob
and push the head restraint/headrest
down.
Make sure the head restraint/headrest is posi-
tioned so the lock knob is engaged in the notch
before riding in that designated seating position.
Front-seat Active Head Restraints
WARNING
●Always adjust the head
restraints/headrests properly as speci-
fied in this section. Failure to do so can
reduce the effectiveness of the Active
Head Restraint.
● Active Head Restraints are designed to
supplement other safety systems. Al-
ways wear seat belts. No system can
prevent all injuries in any accident
LRS2305LRS2306SPA1025
1-14Safety—Seats, seat belts and supplemental restraint system
Page 32 of 432
●Do not attach anything to the head
restraint/headrest stalks. Doing so
could impair Active Head Restraint
function.
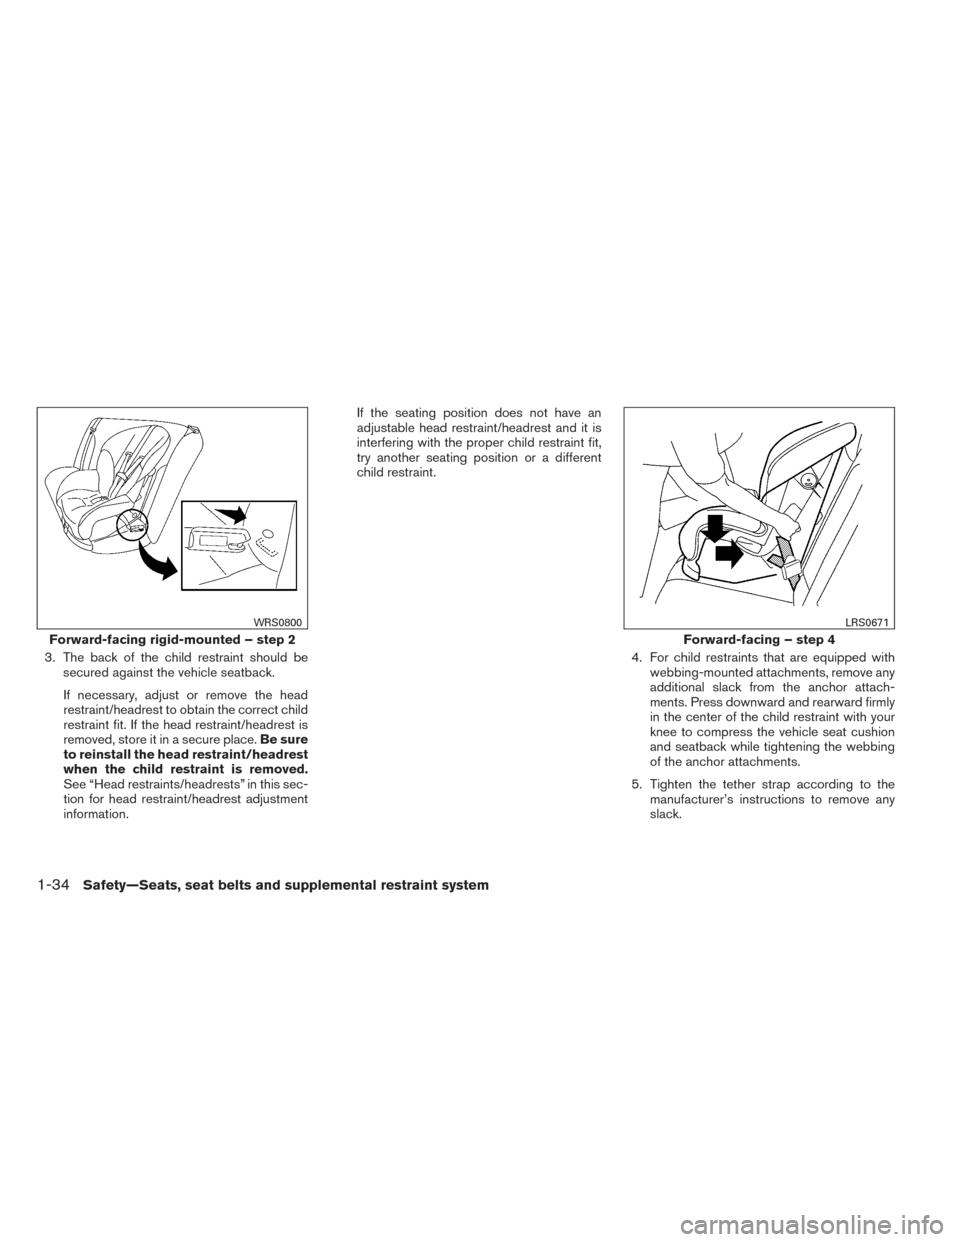
The Active Head Restraint moves forward utiliz-
ing the force that the seatback receives from the
occupant in a rear-end collision. The movement
of the head restraint/headrest helps support the
occupant’s head by reducing its backward move-
ment and helping absorb some of the forces that
may lead to whiplash-type injuries.
Active Head Restraints are effective for collisions
at low to medium speeds in which it is said that
whiplash injuries occur most.
Active Head Restraints operate only in certain
rear-end collisions. After the collision, the head
restraint/headrests return to their original posi-
tions.
Properly adjust the Active Head Restraints as
described earlier in this section.
PRECAUTIONS ON SEAT BELT
USAGE
If you are wearing your seat belt properly ad-
justed and you are sitting upright and well back in
your seat with both feet on the floor, your chances
of being injured or killed in an accident and/or the
severity of injury may be greatly reduced.
NISSAN strongly encourages you and all of your
passengers to buckle up every time you drive,
even if your seating position includes a supple-
mental air bag.
Most U.S. states and Canadian provinces or
territories specify that seat belts be worn at
all times when a vehicle is being driven.
SSS0136
SEAT BELTS
Safety—Seats, seat belts and supplemental restraint system1-15
Page 51 of 432
3. The back of the child restraint should besecured against the vehicle seatback.
If necessary, adjust or remove the head
restraint/headrest to obtain the correct child
restraint fit. If the head restraint/headrest is
removed, store it in a secure place. Be sure
to reinstall the head restraint/headrest
when the child restraint is removed.
See “Head restraints/headrests” in this sec-
tion for head restraint/headrest adjustment
information. If the seating position does not have an
adjustable head restraint/headrest and it is
interfering with the proper child restraint fit,
try another seating position or a different
child restraint.
4. For child restraints that are equipped withwebbing-mounted attachments, remove any
additional slack from the anchor attach-
ments. Press downward and rearward firmly
in the center of the child restraint with your
knee to compress the vehicle seat cushion
and seatback while tightening the webbing
of the anchor attachments.
5. Tighten the tether strap according to the manufacturer’s instructions to remove any
slack.
Forward-facing rigid-mounted – step 2
WRS0800
Forward-facing – step 4
LRS0671
1-34Safety—Seats, seat belts and supplemental restraint system
Page 53 of 432
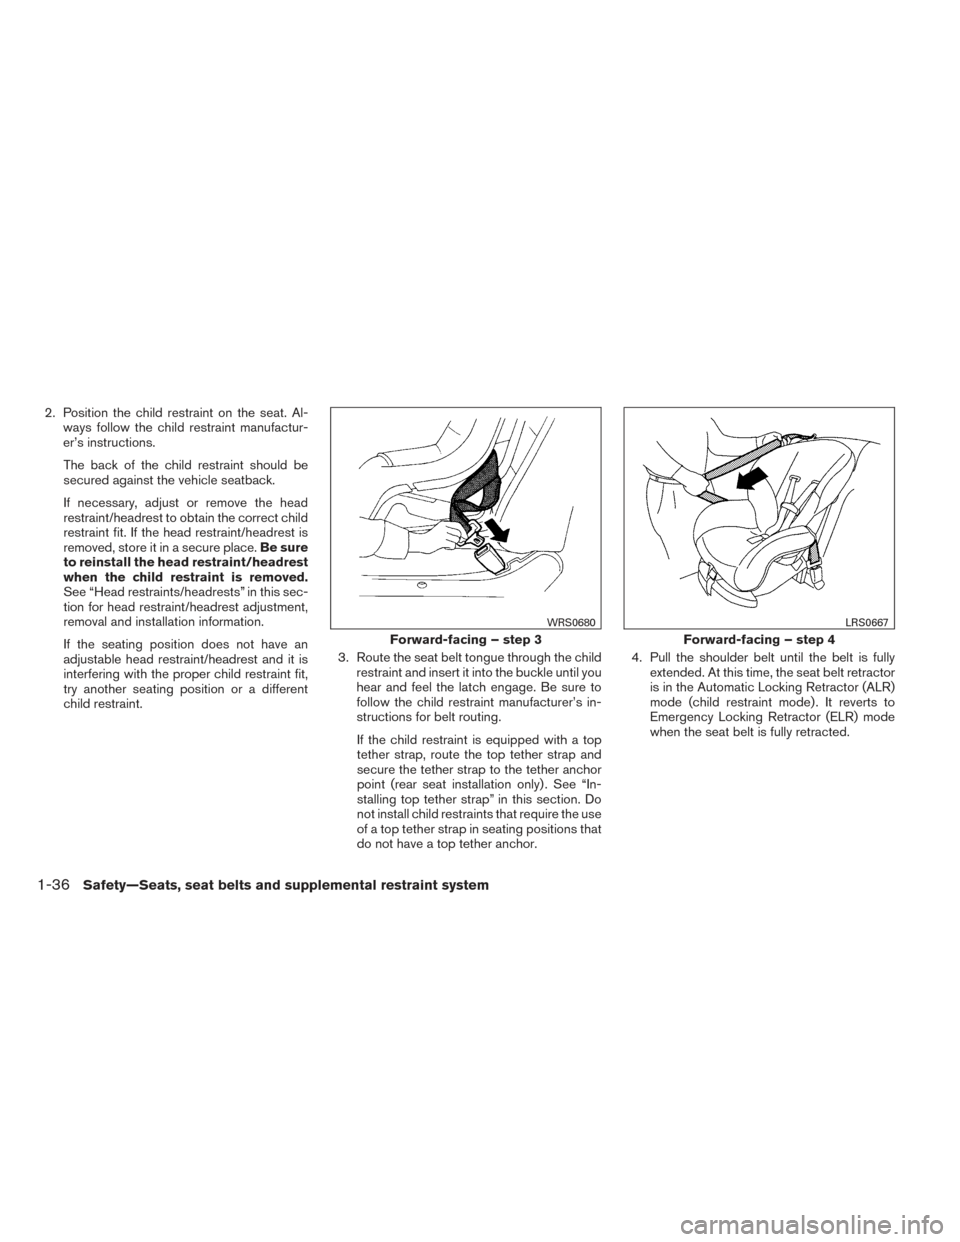
2. Position the child restraint on the seat. Al-ways follow the child restraint manufactur-
er’s instructions.
The back of the child restraint should be
secured against the vehicle seatback.
If necessary, adjust or remove the head
restraint/headrest to obtain the correct child
restraint fit. If the head restraint/headrest is
removed, store it in a secure place. Be sure
to reinstall the head restraint/headrest
when the child restraint is removed.
See “Head restraints/headrests” in this sec-
tion for head restraint/headrest adjustment,
removal and installation information.
If the seating position does not have an
adjustable head restraint/headrest and it is
interfering with the proper child restraint fit,
try another seating position or a different
child restraint. 3. Route the seat belt tongue through the child
restraint and insert it into the buckle until you
hear and feel the latch engage. Be sure to
follow the child restraint manufacturer’s in-
structions for belt routing.
If the child restraint is equipped with a top
tether strap, route the top tether strap and
secure the tether strap to the tether anchor
point (rear seat installation only) . See “In-
stalling top tether strap” in this section. Do
not install child restraints that require the use
of a top tether strap in seating positions that
do not have a top tether anchor. 4. Pull the shoulder belt until the belt is fully
extended. At this time, the seat belt retractor
is in the Automatic Locking Retractor (ALR)
mode (child restraint mode) . It reverts to
Emergency Locking Retractor (ELR) mode
when the seat belt is fully retracted.
Forward-facing – step 3
WRS0680
Forward-facing – step 4
LRS0667
1-36Safety—Seats, seat belts and supplemental restraint system
Page 58 of 432
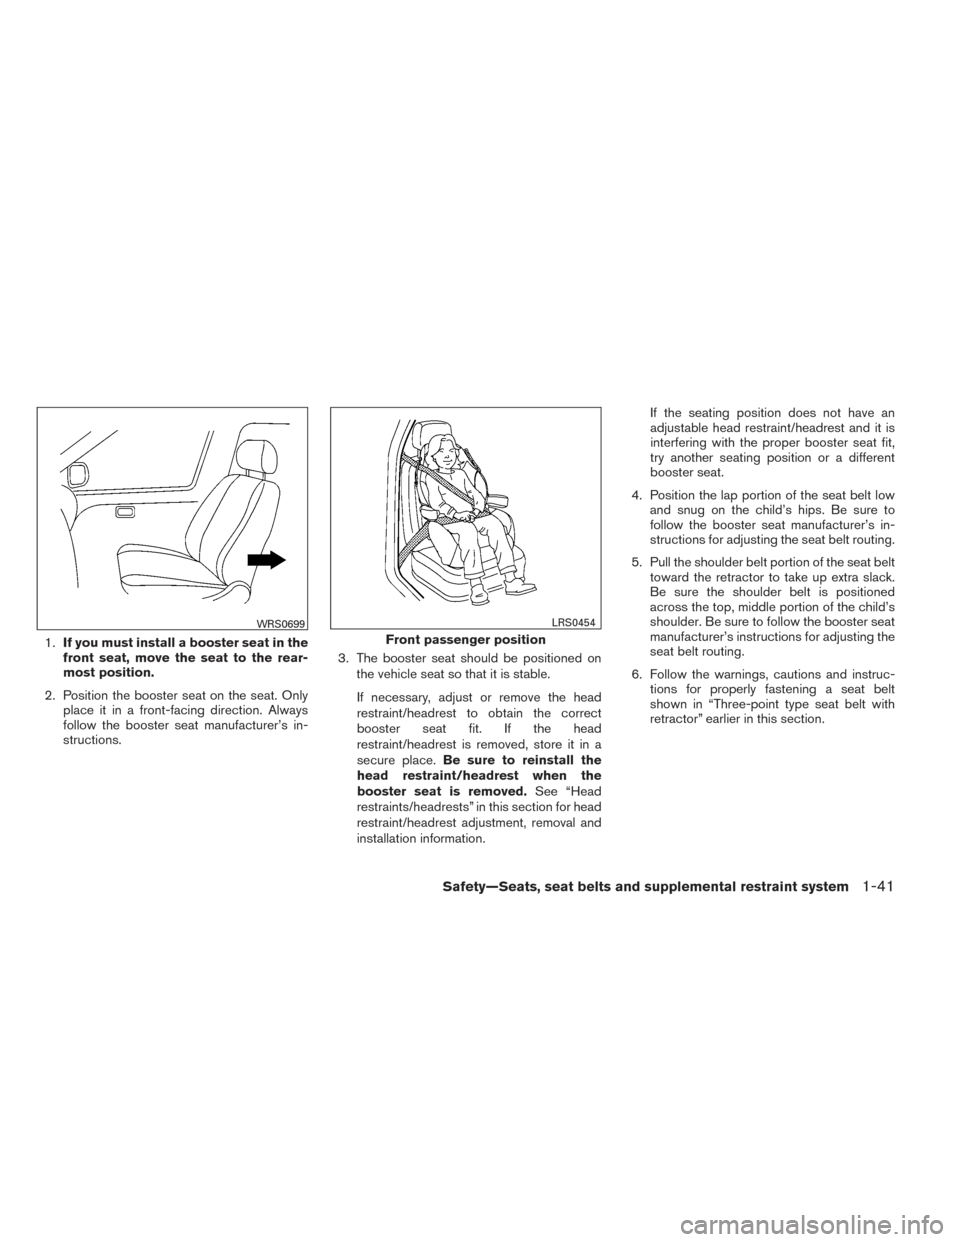
1.If you must install a booster seat in the
front seat, move the seat to the rear-
most position.
2. Position the booster seat on the seat. Only place it in a front-facing direction. Always
follow the booster seat manufacturer’s in-
structions. 3. The booster seat should be positioned on
the vehicle seat so that it is stable.
If necessary, adjust or remove the head
restraint/headrest to obtain the correct
booster seat fit. If the head
restraint/headrest is removed, store it in a
secure place. Be sure to reinstall the
head restraint/headrest when the
booster seat is removed. See “Head
restraints/headrests” in this section for head
restraint/headrest adjustment, removal and
installation information. If the seating position does not have an
adjustable head restraint/headrest and it is
interfering with the proper booster seat fit,
try another seating position or a different
booster seat.
4. Position the lap portion of the seat belt low and snug on the child’s hips. Be sure to
follow the booster seat manufacturer’s in-
structions for adjusting the seat belt routing.
5. Pull the shoulder belt portion of the seat belt toward the retractor to take up extra slack.
Be sure the shoulder belt is positioned
across the top, middle portion of the child’s
shoulder. Be sure to follow the booster seat
manufacturer’s instructions for adjusting the
seat belt routing.
6. Follow the warnings, cautions and instruc- tions for properly fastening a seat belt
shown in “Three-point type seat belt with
retractor” earlier in this section.
WRS0699
Front passenger position
LRS0454
Safety—Seats, seat belts and supplemental restraint system1-41
Page 310 of 432
●Make sure the area around the vehicle is
clear.
● Check fluid levels such as engine oil, cool-
ant, brake fluid, and window washer fluid as
frequently as possible, or at least whenever
you refuel.
● Check that all windows and lights are clean.
● Visually inspect tires for their appearance
and condition. Also check tires for proper
inflation.
● Lock all doors.
● Position seat and adjust head
restraints/headrests.
● Adjust inside and outside mirrors.
● Fasten seat belts and ask all passengers to
do likewise.
● Check the operation of warning lights when
the ignition switch is pushed to the ON
position. See “Warning/indicator lights and
audible reminders” in the “Instruments and
controls” section of this manual. 1. Apply the parking brake.
2. Move the shift lever to P (Park) or N (Neu-
tral) . P (Park) is recommended.
The starter is designed not to operate if
the shift lever is in any of the driving
positions.
3. Push the ignition switch to the ON position. Depress the brake pedal and push the igni-
tion switch to start the engine.
To start the engine immediately, push and
release the ignition switch while depressing
the brake pedal with the ignition switch in
any position.
● If the engine is very hard to start in ex-
tremely cold weather or when restarting,
depress the accelerator pedal a little (ap-
proximately 1/3 to the floor) and while
holding, crank the engine. Release the
accelerator pedal when the engine starts.
● If the engine is very hard to start because
it is flooded, depress the accelerator
pedal all the way to the floor and hold it.
Push the ignition switch to the ON posi-
tion to start cranking the engine. After 5 or
6 seconds, stop cranking by pushing the
ignition switch to LOCK. After cranking
the engine, release the accelerator pedal.
Crank the engine with your foot off the accelerator pedal by depressing the
brake pedal and pushing the push-button
ignition switch to start the engine. If the
engine starts, but fails to run, repeat the
above procedure.
CAUTION
Do not operate the starter for more than
15 seconds at a time. If the engine does
not start, push the ignition switch to the
OFF position and wait 10 seconds before
cranking again, otherwise the starter
could be damaged.
4. Warm-up
Allow the engine to idle for at least 30 sec-
onds after starting. Do not race the engine
while warming it up. Drive at moderate
speed for a short distance first, especially in
cold weather. In cold weather, keep the en-
gine running for a minimum of2-3minutes
before shutting it off. Starting and stopping
the engine over a short period of time may
make the vehicle more difficult to start.
5. To stop the engine, shift the shift lever to the P (Park) position and push the ignition
switch to the OFF position.
BEFORE STARTING THE ENGINE STARTING THE ENGINE
Starting and driving5-11