2014 NISSAN JUKE automatic transmission
[x] Cancel search: automatic transmissionPage 85 of 402
2-10Instruments and controls
OUTSIDE AIR TEMPERATURE
The outside air temperature is displayed in8For
8C.
When the outside air temperature becomes
378F(3 8C) or lower, the outside air temperature
display blinks to give a warning. The display will
stop blinking after 1 minute or when the outside
air temperature becomes 398F(4 8C) or above.
The display may differ from the actual outside
temperature displayed on various signs or bill-
boards.
CONTINUOUSLY VARIABLE TRANS-
MISSION (CVT) POSITION INDICATOR
(if so equipped)
The Continuously Variable Transmission (CVT)
position indicator indicates the shift lever posi-
tion when the ignition switch is in the ON
position.
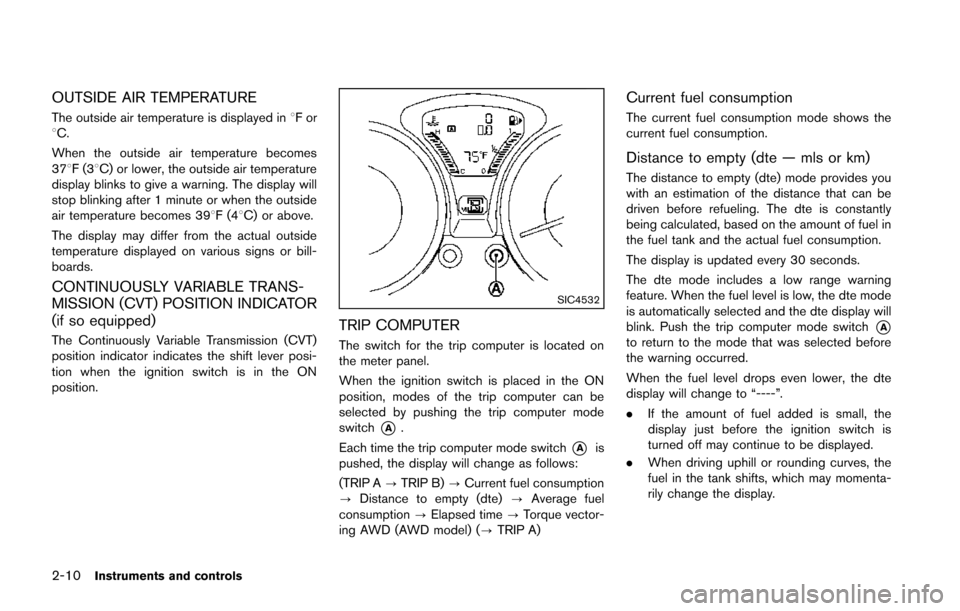
SIC4532
TRIP COMPUTER
The switch for the trip computer is located on
the meter panel.
When the ignition switch is placed in the ON
position, modes of the trip computer can be
selected by pushing the trip computer mode
switch
*A.
Each time the trip computer mode switch
*Ais
pushed, the display will change as follows:
(TRIP A ?TRIP B) ?Current fuel consumption
? Distance to empty (dte) ?Average fuel
consumption ?Elapsed time ?Torque vector-
ing AWD (AWD model) (? TRIP A)
Current fuel consumption
The current fuel consumption mode shows the
current fuel consumption.
Distance to empty (dte — mls or km)
The distance to empty (dte) mode provides you
with an estimation of the distance that can be
driven before refueling. The dte is constantly
being calculated, based on the amount of fuel in
the fuel tank and the actual fuel consumption.
The display is updated every 30 seconds.
The dte mode includes a low range warning
feature. When the fuel level is low, the dte mode
is automatically selected and the dte display will
blink. Push the trip computer mode switch
*Ato return to the mode that was selected before
the warning occurred.
When the fuel level drops even lower, the dte
display will change to “----”.
.If the amount of fuel added is small, the
display just before the ignition switch is
turned off may continue to be displayed.
. When driving uphill or rounding curves, the
fuel in the tank shifts, which may momenta-
rily change the display.
Page 141 of 402
3-14Pre-driving checks and adjustments
Locking doors
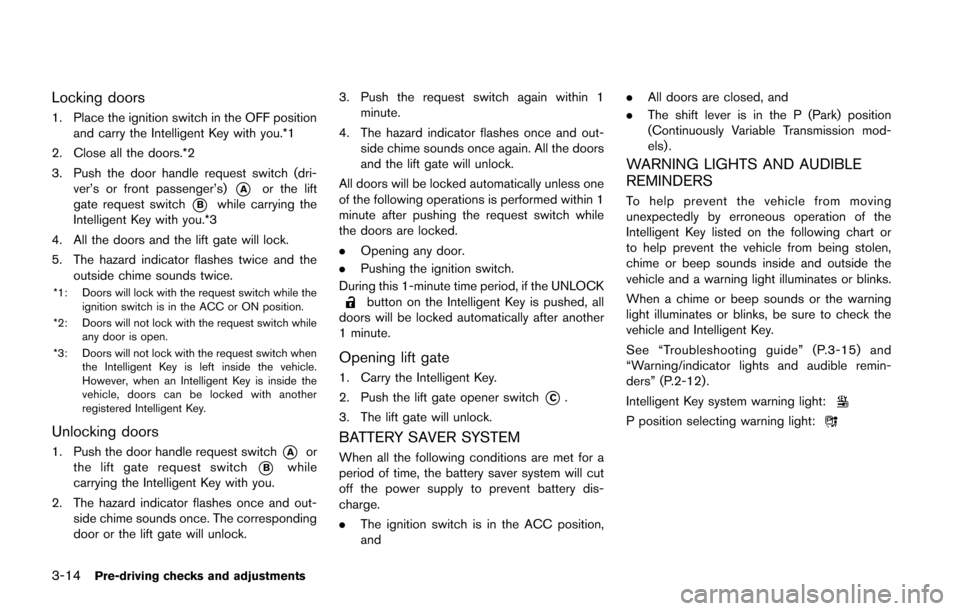
1. Place the ignition switch in the OFF positionand carry the Intelligent Key with you.*1
2. Close all the doors.*2
3. Push the door handle request switch (dri- ver’s or front passenger’s)
*Aor the lift
gate request switch
*Bwhile carrying the
Intelligent Key with you.*3
4. All the doors and the lift gate will lock.
5. The hazard indicator flashes twice and the outside chime sounds twice.
*1: Doors will lock with the request switch while the
ignition switch is in the ACC or ON position.
*2: Doors will not lock with the request switch while any door is open.
*3: Doors will not lock with the request switch when the Intelligent Key is left inside the vehicle.
However, when an Intelligent Key is inside the
vehicle, doors can be locked with another
registered Intelligent Key.
Unlocking doors
1. Push the door handle request switch*Aor
the lift gate request switch
*Bwhile
carrying the Intelligent Key with you.
2. The hazard indicator flashes once and out- side chime sounds once. The corresponding
door or the lift gate will unlock. 3. Push the request switch again within 1
minute.
4. The hazard indicator flashes once and out- side chime sounds once again. All the doors
and the lift gate will unlock.
All doors will be locked automatically unless one
of the following operations is performed within 1
minute after pushing the request switch while
the doors are locked.
. Opening any door.
. Pushing the ignition switch.
During this 1-minute time period, if the UNLOCK
button on the Intelligent Key is pushed, all
doors will be locked automatically after another
1 minute.
Opening lift gate
1. Carry the Intelligent Key.
2. Push the lift gate opener switch
*C.
3. The lift gate will unlock.
BATTERY SAVER SYSTEM
When all the following conditions are met for a
period of time, the battery saver system will cut
off the power supply to prevent battery dis-
charge.
. The ignition switch is in the ACC position,
and .
All doors are closed, and
. The shift lever is in the P (Park) position
(Continuously Variable Transmission mod-
els) .
WARNING LIGHTS AND AUDIBLE
REMINDERS
To help prevent the vehicle from moving
unexpectedly by erroneous operation of the
Intelligent Key listed on the following chart or
to help prevent the vehicle from being stolen,
chime or beep sounds inside and outside the
vehicle and a warning light illuminates or blinks.
When a chime or beep sounds or the warning
light illuminates or blinks, be sure to check the
vehicle and Intelligent Key.
See “Troubleshooting guide” (P.3-15) and
“Warning/indicator lights and audible remin-
ders” (P.2-12) .
Intelligent Key system warning light:
P position selecting warning light:
Page 265 of 402
5-12Starting and driving
KEY POSITIONS
LOCK (0)
The key can only be removed from the ignition
switch at this position.
OFF (1)
The engine is turned off. The power supply is
turned off.
ACC (2)
The electrical accessory power activates without
the engine turned on.
ON (3)
The ignition system and the electrical accessory
power activate without the engine turned on.
START (4)
The engine starter activates and the engine will
start. The ignition switch, when released, will
automatically turn to the ON position.
CAUTION
As soon as the engine has started,
release the ignition switch immediately.
WARNING
Do not operate the push-button ignition
switch while driving the vehicle except
in an emergency. (The engine will stop
when the ignition switch is pushed 3
consecutive times or the ignition switch
is pushed and held for more than 2
seconds.) If the engine stops while the
vehicle is being driven, this could lead
to a crash and serious injury.
Before operating the push-button ignition
switch, be sure to move the shift lever to the P
(Park) position (for Continuously Variable Trans-
mission models) or the shift lever to the N
(Neutral) position (for manual transmission
models) .
SSD0436
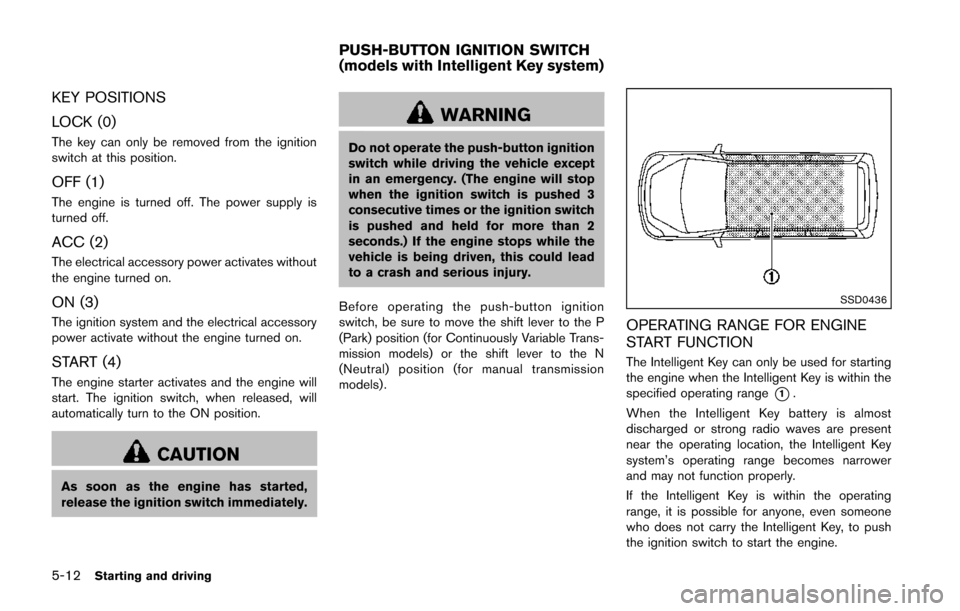
OPERATING RANGE FOR ENGINE
START FUNCTION
The Intelligent Key can only be used for starting
the engine when the Intelligent Key is within the
specified operating range
*1.
When the Intelligent Key battery is almost
discharged or strong radio waves are present
near the operating location, the Intelligent Key
system’s operating range becomes narrower
and may not function properly.
If the Intelligent Key is within the operating
range, it is possible for anyone, even someone
who does not carry the Intelligent Key, to push
the ignition switch to start the engine.
PUSH-BUTTON IGNITION SWITCH
(models with Intelligent Key system)
Page 270 of 402
position to start cranking the engine.
After 5 or 6 seconds, stop cranking by
pushing the ignition switch to OFF. After
cranking the engine, release the accel-
erator pedal. Crank the enginewith your
foot off the accelerator pedal by
depressing the brake pedal and pushing
the push-button ignition switch to start
the engine. If the engine starts, but fails
to run, repeat the above procedure.
CAUTION
Do not operate the starter for more
than 15 seconds at a time. If the engine
does not start, push the ignition switch
to OFF and wait 10 seconds before
cranking again, otherwise the starter
could be damaged.
4. Warm-up
Allow the engine to idle for at least 30
seconds after starting. Do not race the
engine while warming it up. Drive at
moderate speed for a short distance first,
especially in cold weather. In cold weather,
keep the engine running for a minimum of 2 -
3 minutes before shutting it off. Starting and
stopping the engine over a short period of time may make the vehicle more difficult to
start.
When racing the engine up to 4,000 rpm or
more under no load condition, the engine
will enter the fuel cut mode.
5. To stop the engine, move the shift lever to the P (Park) position (CVT models) or move
the shift lever to the N (Neutral) position (MT
models) , and push the ignition switch to the
OFF position.
NOTE:
Care should be taken to avoid situations
that can lead to potential battery discharge
and potential no-start conditions such as:
1. Installation or extended use of electro-
nic accessories that consume battery
power when the engine is not running
(Phone chargers, GPS, DVD players,
etc.)
2. Vehicle is not driven regularly and/or
only driven short distances.
In these cases, the battery may need to be
charged to maintain battery health.
CONTINUOUSLY VARIABLE TRANS-
MISSION (CVT)
The Continuously Variable Transmission (CVT)
in your vehicle is electronically controlled to
produce maximum power and smooth operation.
The recommended operating procedures for this
transmission are shown on the following pages.
Follow these procedures for maximum vehicle
performance and driving enjoyment.
Engine power may be automatically re-
duced to protect the CVT if the engine
speed increases quickly when driving on
slippery roads or while being tested on
some dynamometers.
Starting the vehicle
1. After starting the engine, fully depress the foot brake pedal before moving the shift
lever out of the P (Park) position.
This CVT is designed so that the foot
brake pedal must be depressed before
shifting from P (Park) to any driving
position while the ignition switch is in
the ON position.
The shift lever cannot be moved out of
the P (Park) position and into any of
the other positions if the ignition
switch is placed in the LOCK, OFF or
ACC position or if the key is removed.
Starting and driving5-17
DRIVING THE VEHICLE
Page 273 of 402
5-20Starting and driving
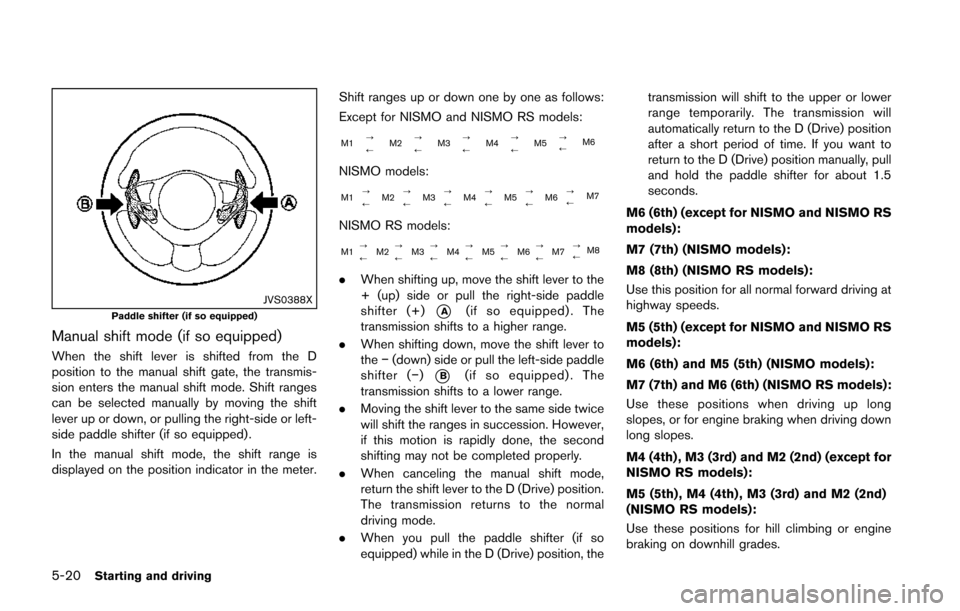
JVS0388XPaddle shifter (if so equipped)
Manual shift mode (if so equipped)
When the shift lever is shifted from the D
position to the manual shift gate, the transmis-
sion enters the manual shift mode. Shift ranges
can be selected manually by moving the shift
lever up or down, or pulling the right-side or left-
side paddle shifter (if so equipped) .
In the manual shift mode, the shift range is
displayed on the position indicator in the meter.Shift ranges up or down one by one as follows:
Except for NISMO and NISMO RS models:
M1
?
M2?
M3?
M4?
M5?
M6
//// /
NISMO models:
M1?
M2?
M3?
M4?
M5 ?
M6 ?
M7
///// /
NISMO RS models:
M1?
M2 ?
M3 ?
M4 ?
M5 ?
M6 ?
M7 ?
M8
////// /
.
When shifting up, move the shift lever to the
+ (up) side or pull the right-side paddle
shifter (+)
*A(if so equipped) . The
transmission shifts to a higher range.
. When shifting down, move the shift lever to
the−(down) side or pull the left-side paddle
shifter (− )
*B(if so equipped) . The
transmission shifts to a lower range.
. Moving the shift lever to the same side twice
will shift the ranges in succession. However,
if this motion is rapidly done, the second
shifting may not be completed properly.
. When canceling the manual shift mode,
return the shift lever to the D (Drive) position.
The transmission returns to the normal
driving mode.
. When you pull the paddle shifter (if so
equipped) while in the D (Drive) position, the transmission will shift to the upper or lower
range temporarily. The transmission will
automatically return to the D (Drive) position
after a short period of time. If you want to
return to the D (Drive) position manually, pull
and hold the paddle shifter for about 1.5
seconds.
M6 (6th) (except for NISMO and NISMO RS
models):
M7 (7th) (NISMO models):
M8 (8th) (NISMO RS models):
Use this position for all normal forward driving at
highway speeds.
M5 (5th) (except for NISMO and NISMO RS
models):
M6 (6th) and M5 (5th) (NISMO models):
M7 (7th) and M6 (6th) (NISMO RS models):
Use these positions when driving up long
slopes, or for engine braking when driving down
long slopes.
M4 (4th) , M3 (3rd) and M2 (2nd) (except for
NISMO RS models):
M5 (5th) , M4 (4th) , M3 (3rd) and M2 (2nd)
(NISMO RS models):
Use these positions for hill climbing or engine
braking on downhill grades.
Page 274 of 402
M1 (1st):
Use this position when climbing steep hills
slowly or driving slowly through deep snow,
sand or mud, or for maximum engine braking on
steep downhill grades.
.Remember not to drive at high speeds for
extended periods of time in lower than M6
(except for NISMO and NISMO RS models) ,
M7 (NISMO models) or M8 (NISMO RS
models) range. This reduces fuel economy.
. In the manual shift mode, the transmis-
sion may not shift to the selected
range. This helps maintain driving per-
formance and reduces the chance of
vehicle damage or loss of control.
When this situation occurs, the Con-
tinuously Variable Transmission (CVT)
position indicator light will blink and
the chime will sound.
. In the manual shift mode, the transmis-
sion automatically shifts down to 1st
gear before the vehicle comes to a
stop. When accelerating again, it is
necessary to shift up to the desired
range.
. When the CVT fluid temperature is extre-
mely low, the manual shift mode may not
work and automatically shift as a drive mode.
This is not a malfunction. In this case, return the shift lever to the D position and drive for
a while and then shift to the manual shift
mode.
. When the CVT fluid temperature is high, the
shift range may upshift at a lower engine
speed than usual. This is not a malfunction.
Accelerator downshift — In D position —
For passing or hill climbing, fully depress the
accelerator pedal to the floor. This shifts the
transmission down into a lower gear, depending
on the vehicle speed.
High fluid temperature protection mode
This transmission has a high fluid temperature
protection mode. If the fluid temperature be-
comes too high (for example, when climbing
steep grades in high temperature with heavy
loads), engine power and, under some condi-
tions, vehicle speed will be decreased auto-
matically to reduce the chance of transmission
damage. Vehicle speed can be controlled with
the accelerator pedal, but the engine and vehicle
speed may be limited.
Fail-safe
If the vehicle is driven under extreme
conditions, such as excessive wheel spin-
ning and subsequent hard braking, the
fail-safe system may be activated. The MIL
may illuminate to indicate the fail-safe
mode is activated. (See “Malfunction In-
dicator Light (MIL)” (P.2-18) .) This will
occur even if all electrical circuits are
functioning properly. In this case, place
the ignition switch in the OFF position and
wait for 10 seconds. Then turn the switch
back to the ON position. The vehicle
should return to its normal operating
condition. If it does not return to its normal
operating condition, have a NISSAN dealer
check the transmission and repair if ne-
cessary.
WARNING
When the high fluid temperature pro-
tection mode or fail-safe operation
occurs, vehicle speed may be gradually
reduced. The reduced speed may be
lower than other traffic, which could
increase the chance of a collision. Be
especially careful when driving. If ne-
cessary, pull to the side of the road at a
Starting and driving5-21
Page 283 of 402
5-30Starting and driving
PRECAUTIONS ON CRUISE CON-
TROL
.If the cruise control system malfunctions, it
will cancel automatically. The CRUISE in-
dicator light on the meter panel will then
blink to warn the driver.
. If the engine coolant temperature becomes
excessively high, the cruise control system
will cancel automatically.
. If the CRUISE indicator light blinks, turn the
cruise control MAIN switch off and have the
system checked by a NISSAN dealer.
. The CRUISE indicator light may blink when
the cruise control MAIN switch is turned ON
while pushing the ACCEL/RES, COAST/
SET or CANCEL switch. To properly set the
cruise control system, perform the following
procedures.
WARNING
Do not use the cruise control when
driving under the following conditions:
.when it is not possible to keep the
vehicle at a set speed
. in heavy traffic or in traffic that
varies in speed .
on winding or hilly roads
. on slippery roads (rain, snow, ice,
etc.)
. in very windy areas
Doing so could cause a loss of vehicle
control and result in an accident.
CAUTION
On Manual Transmission (MT) models,
do not shift into N (Neutral) without
depressing the clutch pedal when the
cruise control is set. Should this occur,
depress the clutch pedal and turn the
MAIN switch off immediately. Failure to
do so may cause engine damage.
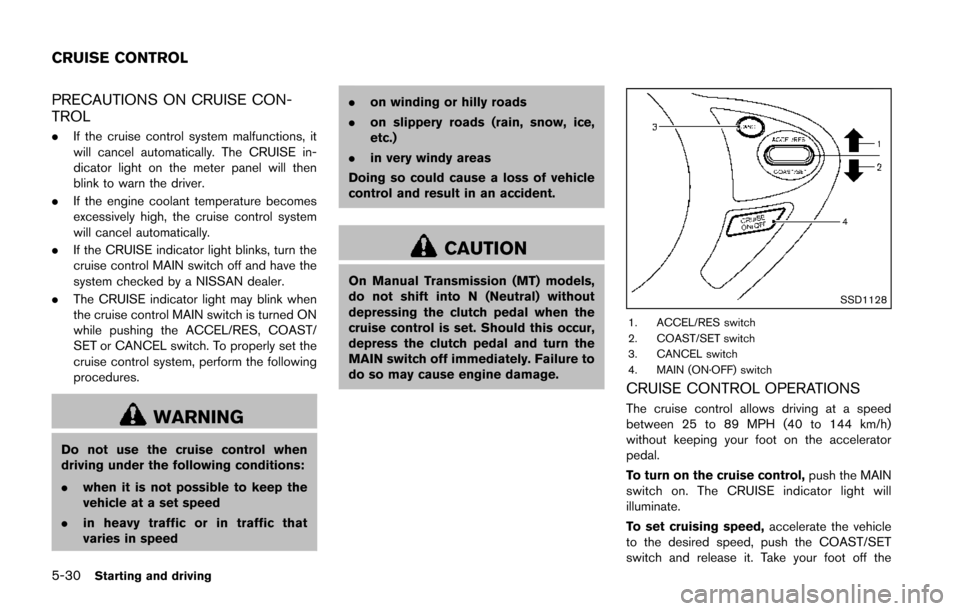
SSD1128
1. ACCEL/RES switch
2. COAST/SET switch
3. CANCEL switch
4. MAIN (ON·OFF) switch
CRUISE CONTROL OPERATIONS
The cruise control allows driving at a speed
between 25 to 89 MPH (40 to 144 km/h)
without keeping your foot on the accelerator
pedal.
To turn on the cruise control, push the MAIN
switch on. The CRUISE indicator light will
illuminate.
To set cruising speed, accelerate the vehicle
to the desired speed, push the COAST/SET
switch and release it. Take your foot off the
CRUISE CONTROL
Page 284 of 402
accelerator pedal. Your vehicle will maintain the
set speed.
.To pass another vehicle, depress the
accelerator pedal. When you release the
pedal, the vehicle will return to the previously
set speed.
. The vehicle may not maintain the set speed
on winding or hilly roads. If this happens,
drive without the cruise control.
To cancel the preset speed, use one of the
following methods:
a) Push the CANCEL switch.
b) Tap the brake pedal.
c) Turn the MAIN switch off. The CRUISE indicator light will turn off.
.If you depress the brake pedal while pushing
the ACCEL/RES or COAST/SET switch and
reset at the cruising speed, the cruise
control will disengage. Turn the MAIN switch
off once and then turn it on again.
. The cruise control will automatically cancel if
the vehicle slows more than 8 MPH (13
km/h) below the set speed.
. If you move the shift lever to the N (Neutral)
position (Continuously Variable Transmis-
sion models) or depressing the clutch pedal
(Manual Transmission models) , the cruise
control will be canceled.
To reset at a faster cruising speed, use oneof the following methods:
.
Depress the accelerator pedal. When the
vehicle attains the desired speed, push and
release the COAST/SET switch.
. Push and hold the ACCEL/RES switch.
When the vehicle attains the desired speed,
release the switch.
. Push, then quickly release the ACCEL/RES
switch. Each time you do this, the set speed
will increase by about 1 MPH (1.6 km/h).
To reset at a slower cruising speed, use one
of the following methods:
. Lightly tap the brake pedal. When the
vehicle attains the desired speed, push the
COAST/SET switch and release it.
. Push and hold the COAST/SET switch.
Release the switch when the vehicle slows
down to the desired speed.
. Push, then quickly release the COAST/SET
switch. Each time you do this, the set speed
will decrease by about 1 MPH (1.6 km/h).
To resume the preset speed, push and
release the ACCEL/RES switch. The vehicle
will resume the last set cruising speed when the
vehicle speed is over 25 MPH (40 km/h).
CAUTION
During the first 1,200 miles (2,000 km) ,
follow these recommendations to ob-
tain maximum engine performance and
ensure the future reliability and econo-
my of your new vehicle. Failure to
follow these recommendations may
result in shortened engine life and
reduced engine performance.
. Avoid driving for long periods at constant
speed, either fast or slow. Do not run the
engine over 4,000 rpm.
. Do not accelerate at full throttle in any gear.
. Avoid quick starts.
. Avoid hard braking as much as possible.
Starting and driving5-31
BREAK-IN SCHEDULE