Page 148 of 332
SAA3391
System setup
Select the “System” key to select and/or adjust
various functions of the system. A screen with
additional options will appear.
SAA3392
Display:
Select the “Display” key to adjust the appear-
ance of the display. The following settings can
be adjusted:
.Brightness:
The brightness of the display can be set to Very
Bright, Bright, Default, Dark or Very Dark. Touch
the “Brightness” key to cycle through the
options.
. Display Mode:
The display can be adjusted to fit the level of
lighting in the vehicle. Touch the “Display Mode”
key to cycle through the options. “Day” and
“Night” modes are suited for the respective times of day, while “Automatic” controls the
display automatically.
.
Scroll Direction:
The direction that menus scroll can be adjusted.
Choose either “up” or “down”.
Center display, heater, air conditioner, audio and phone systems4-7
Page 149 of 332
4-8Center display, heater, air conditioner, audio and phone systems
SAA3393
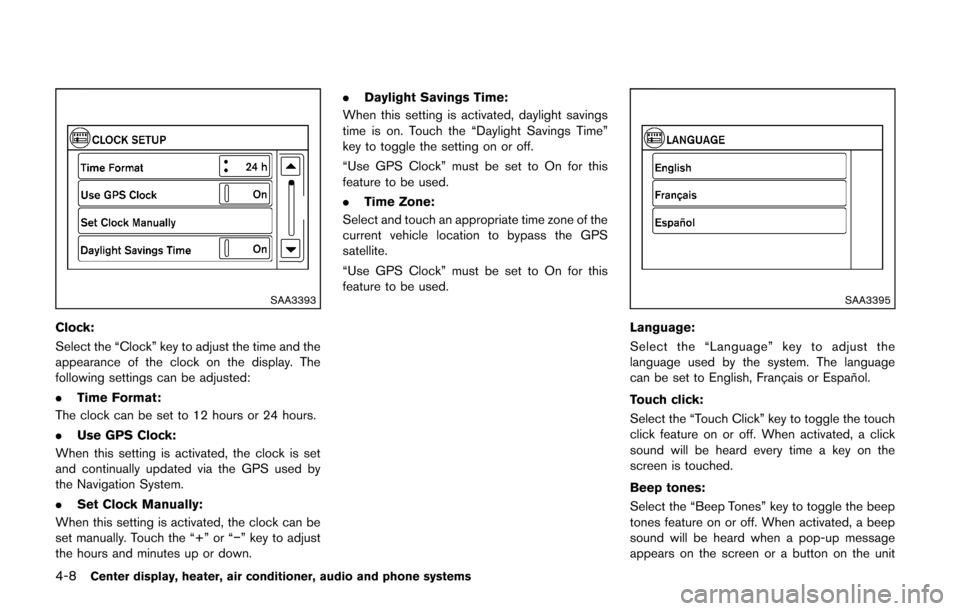
Clock:
Select the “Clock” key to adjust the time and the
appearance of the clock on the display. The
following settings can be adjusted:
.Time Format:
The clock can be set to 12 hours or 24 hours.
. Use GPS Clock:
When this setting is activated, the clock is set
and continually updated via the GPS used by
the Navigation System.
. Set Clock Manually:
When this setting is activated, the clock can be
set manually. Touch the “+” or “−” key to adjust
the hours and minutes up or down. .
Daylight Savings Time:
When this setting is activated, daylight savings
time is on. Touch the “Daylight Savings Time”
key to toggle the setting on or off.
“Use GPS Clock” must be set to On for this
feature to be used.
. Time Zone:
Select and touch an appropriate time zone of the
current vehicle location to bypass the GPS
satellite.
“Use GPS Clock” must be set to On for this
feature to be used.
SAA3395
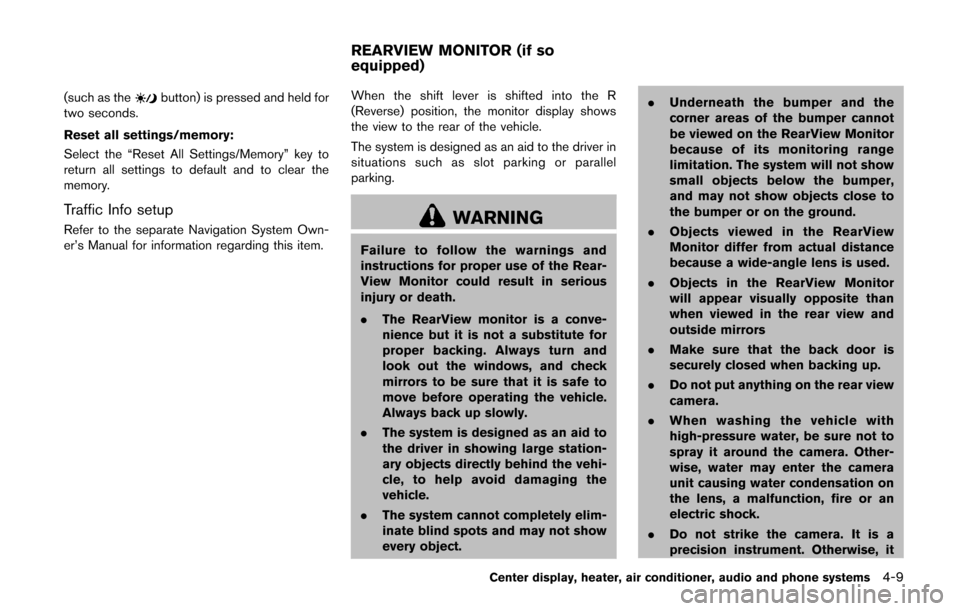
Language:
Select the “Language” key to adjust the
language used by the system. The language
can be set to English, Franc¸ ais or Espan ˜
ol.
Touch click:
Select the “Touch Click” key to toggle the touch
click feature on or off. When activated, a click
sound will be heard every time a key on the
screen is touched.
Beep tones:
Select the “Beep Tones” key to toggle the beep
tones feature on or off. When activated, a beep
sound will be heard when a pop-up message
appears on the screen or a button on the unit
Page 150 of 332
(such as thebutton) is pressed and held for
two seconds.
Reset all settings/memory:
Select the “Reset All Settings/Memory” key to
return all settings to default and to clear the
memory.
Traffic Info setup
Refer to the separate Navigation System Own-
er’s Manual for information regarding this item. When the shift lever is shifted into the R
(Reverse) position, the monitor display shows
the view to the rear of the vehicle.
The system is designed as an aid to the driver in
situations such as slot parking or parallel
parking.WARNING
Failure to follow the warnings and
instructions for proper use of the Rear-
View Monitor could result in serious
injury or death.
.
The RearView monitor is a conve-
nience but it is not a substitute for
proper backing. Always turn and
look out the windows, and check
mirrors to be sure that it is safe to
move before operating the vehicle.
Always back up slowly.
. The system is designed as an aid to
the driver in showing large station-
ary objects directly behind the vehi-
cle, to help avoid damaging the
vehicle.
. The system cannot completely elim-
inate blind spots and may not show
every object. .
Underneath the bumper and the
corner areas of the bumper cannot
be viewed on the RearView Monitor
because of its monitoring range
limitation. The system will not show
small objects below the bumper,
and may not show objects close to
the bumper or on the ground.
. Objects viewed in the RearView
Monitor differ from actual distance
because a wide-angle lens is used.
. Objects in the RearView Monitor
will appear visually opposite than
when viewed in the rear view and
outside mirrors
. Make sure that the back door is
securely closed when backing up.
. Do not put anything on the rear view
camera.
. When washing the vehicle with
high-pressure water, be sure not to
spray it around the camera. Other-
wise, water may enter the camera
unit causing water condensation on
the lens, a malfunction, fire or an
electric shock.
. Do not strike the camera. It is a
precision instrument. Otherwise, it
Center display, heater, air conditioner, audio and phone systems4-9
REARVIEW MONITOR (if so
equipped)
Page 151 of 332
4-10Center display, heater, air conditioner, audio and phone systems
may malfunction or cause damage
resulting in a fire or an electric
shock.
CAUTION
Do not scratch the camera lens when
cleaning dirt or snow from the lens.
SAA2776
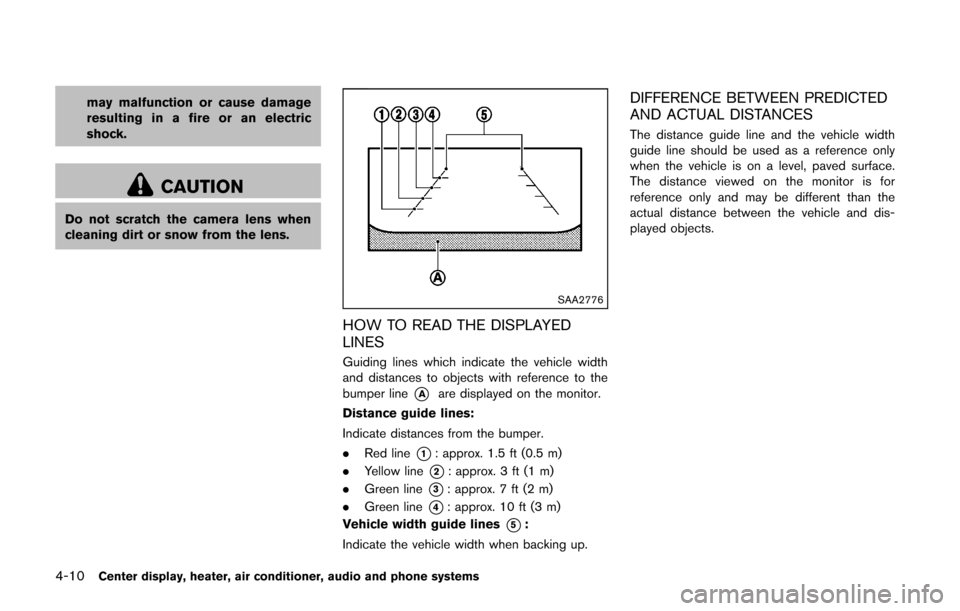
HOW TO READ THE DISPLAYED
LINES
Guiding lines which indicate the vehicle width
and distances to objects with reference to the
bumper line
*Aare displayed on the monitor.
Distance guide lines:
Indicate distances from the bumper.
. Red line
*1: approx. 1.5 ft (0.5 m)
. Yellow line
*2: approx. 3 ft (1 m)
. Green line
*3: approx. 7 ft (2 m)
. Green line
*4: approx. 10 ft (3 m)
Vehicle width guide lines
*5:
Indicate the vehicle width when backing up.
DIFFERENCE BETWEEN PREDICTED
AND ACTUAL DISTANCES
The distance guide line and the vehicle width
guide line should be used as a reference only
when the vehicle is on a level, paved surface.
The distance viewed on the monitor is for
reference only and may be different than the
actual distance between the vehicle and dis-
played objects.
Page 152 of 332
SAA2777
Backing up on a steep uphill
When backing up the vehicle up a hill, the
distance guide lines and the vehicle width guide
lines are shown closer than the actual distance.
For example, the display shows 3 ft (1 m) to the
place
*A, but the actual 3 ft (1 m) distance on
the hill is the place
*B. Note that any object on the hill is viewed further than it appears on the
monitor.
SAA2778
Backing up on a steep downhill
When backing up the vehicle down a hill, the
distance guide lines and the vehicle width guide
lines are shown further than the actual distance.
For example, the display shows 3 ft (1 m) to the
place
*A, but the actual 3 ft (1 m) distance on
the hill is the place
*B. Note that any object on
Center display, heater, air conditioner, audio and phone systems4-11
Page 153 of 332
4-12Center display, heater, air conditioner, audio and phone systems
the hill is viewed closer than it appears on the
monitor.
SAA3440
Backing up near a projecting object
The vehicle may seem to nearly clear the object
in the display. However, the vehicle may hit the
object if it projects over the actual backing up
course.
SAA3569
Backing up behind a projecting object
The position*Cis shown further than the
position
*Bin the display. However, the
position
*Cis actually at the same distance
as the position
*A. The vehicle may hit the
object when backing up to the position
*Aif
the object projects over the actual backing up
Page 154 of 332
course.
HOW TO ADJUST THE SCREEN
The brightness can be adjusted by performing
the following procedure.
1. Push the SETUP button and then select the“System” key.
2. Select the “Display” key. The “Brightness” key is displayed.
3. Select the preferred brightness level.
OPERATING TIPS
. When the shift lever is shifted to the R
(Reverse) position, the monitor screen auto-
matically changes to the RearView Monitor
mode. However, the radio can be heard.
. When the view is switched, the display
images on the screen may be displayed with
some delay.
. When the temperature is extremely high or
low, the screen may not clearly display
objects. This is not a malfunction.
. When strong light is directly coming on the
camera, objects may not be displayed
clearly. This is not a malfunction.
. Vertical lines may be seen in objects on the
screen. This is due to strong reflected light
from the bumper. This is not a malfunction. .
The screen may flicker under fluorescent
light. This is not a malfunction.
. The colors of objects on the RearView
Monitor may differ somewhat from the actual
color of objects. This is not a malfunction.
. Objects on the monitor may not be clear in a
dark environment. This is not a malfunction.
. If dirt, rain or snow accumulates on the
camera, the RearView Monitor may not
display object clearly. Clean the camera.
. Do not use alcohol, benzine or thinner to
clean the camera. This will cause discolora-
tion. To clean the camera, wipe with a cloth
dampened with diluted mild cleaning agent
and then wipe with a dry cloth.
. Do not damage the camera as the monitor
screen may be adversely affected.
. Do not use wax on the camera window.
Wipe off any wax with a clean cloth
dampened with mild detergent diluted with
water.
SAA2343
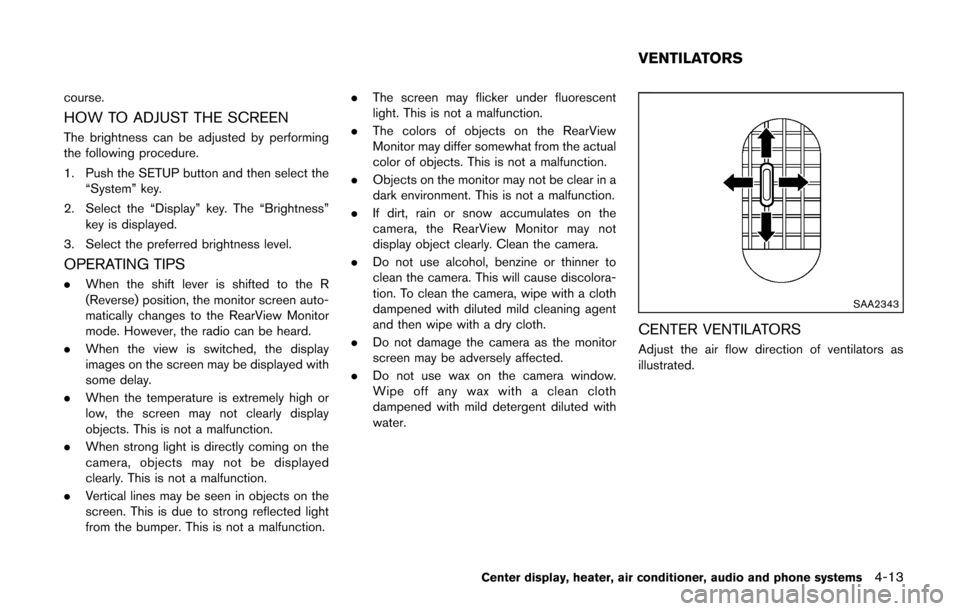
CENTER VENTILATORS
Adjust the air flow direction of ventilators as
illustrated.
Center display, heater, air conditioner, audio and phone systems4-13
VENTILATORS
Page 155 of 332
4-14Center display, heater, air conditioner, audio and phone systems
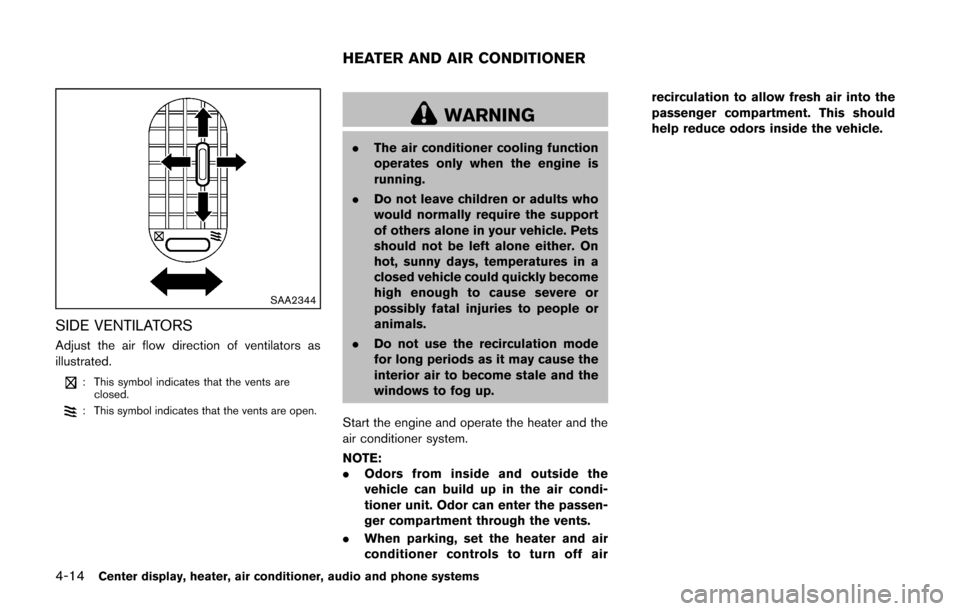
SAA2344
SIDE VENTILATORS
Adjust the air flow direction of ventilators as
illustrated.
: This symbol indicates that the vents areclosed.
: This symbol indicates that the vents are open.
WARNING
. The air conditioner cooling function
operates only when the engine is
running.
. Do not leave children or adults who
would normally require the support
of others alone in your vehicle. Pets
should not be left alone either. On
hot, sunny days, temperatures in a
closed vehicle could quickly become
high enough to cause severe or
possibly fatal injuries to people or
animals.
. Do not use the recirculation mode
for long periods as it may cause the
interior air to become stale and the
windows to fog up.
Start the engine and operate the heater and the
air conditioner system.
NOTE:
. Odors from inside and outside the
vehicle can build up in the air condi-
tioner unit. Odor can enter the passen-
ger compartment through the vents.
. When parking, set the heater and air
conditioner controls to turn off air recirculation to allow fresh air into the
passenger compartment. This should
help reduce odors inside the vehicle.
HEATER AND AIR CONDITIONER