2014 NISSAN CUBE ECO mode
[x] Cancel search: ECO modePage 146 of 332
SAA3388
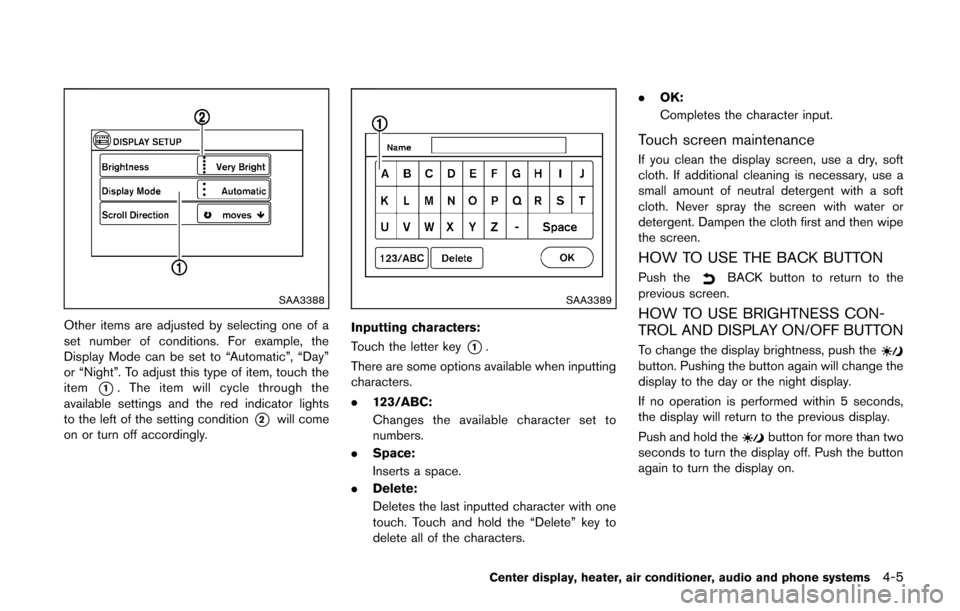
Other items are adjusted by selecting one of a
set number of conditions. For example, the
Display Mode can be set to “Automatic”, “Day”
or “Night”. To adjust this type of item, touch the
item
*1. The item will cycle through the
available settings and the red indicator lights
to the left of the setting condition
*2will come
on or turn off accordingly.
SAA3389
Inputting characters:
Touch the letter key
*1.
There are some options available when inputting
characters.
. 123/ABC:
Changes the available character set to
numbers.
. Space:
Inserts a space.
. Delete:
Deletes the last inputted character with one
touch. Touch and hold the “Delete” key to
delete all of the characters. .
OK:
Completes the character input.
Touch screen maintenance
If you clean the display screen, use a dry, soft
cloth. If additional cleaning is necessary, use a
small amount of neutral detergent with a soft
cloth. Never spray the screen with water or
detergent. Dampen the cloth first and then wipe
the screen.
HOW TO USE THE BACK BUTTON
Push theBACK button to return to the
previous screen.
HOW TO USE BRIGHTNESS CON-
TROL AND DISPLAY ON/OFF BUTTON
To change the display brightness, push thebutton. Pushing the button again will change the
display to the day or the night display.
If no operation is performed within 5 seconds,
the display will return to the previous display.
Push and hold the
button for more than two
seconds to turn the display off. Push the button
again to turn the display on.
Center display, heater, air conditioner, audio and phone systems4-5
Page 155 of 332
4-14Center display, heater, air conditioner, audio and phone systems
SAA2344
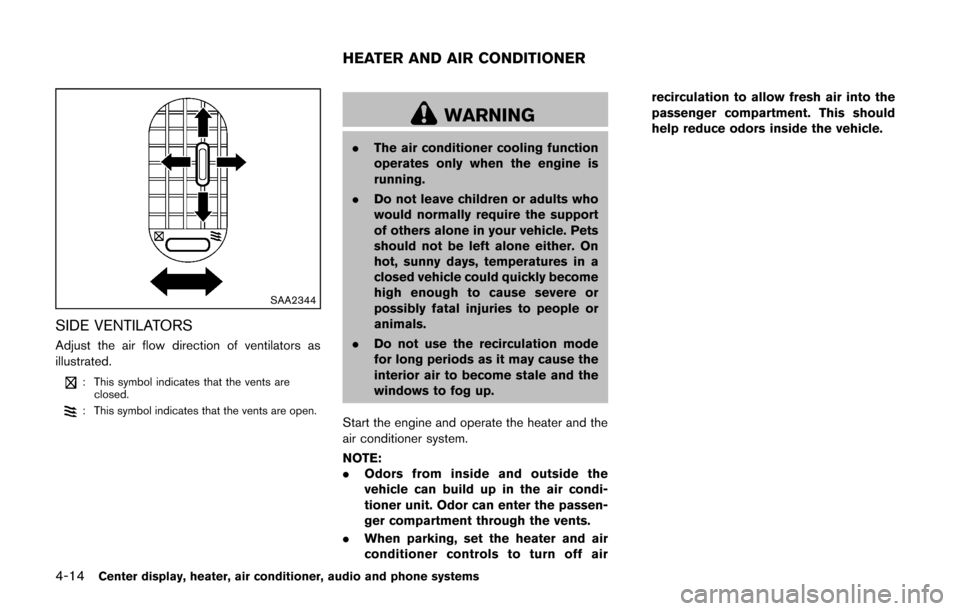
SIDE VENTILATORS
Adjust the air flow direction of ventilators as
illustrated.
: This symbol indicates that the vents areclosed.
: This symbol indicates that the vents are open.
WARNING
. The air conditioner cooling function
operates only when the engine is
running.
. Do not leave children or adults who
would normally require the support
of others alone in your vehicle. Pets
should not be left alone either. On
hot, sunny days, temperatures in a
closed vehicle could quickly become
high enough to cause severe or
possibly fatal injuries to people or
animals.
. Do not use the recirculation mode
for long periods as it may cause the
interior air to become stale and the
windows to fog up.
Start the engine and operate the heater and the
air conditioner system.
NOTE:
. Odors from inside and outside the
vehicle can build up in the air condi-
tioner unit. Odor can enter the passen-
ger compartment through the vents.
. When parking, set the heater and air
conditioner controls to turn off air recirculation to allow fresh air into the
passenger compartment. This should
help reduce odors inside the vehicle.
HEATER AND AIR CONDITIONER
Page 159 of 332
4-18Center display, heater, air conditioner, audio and phone systems
SAA2346
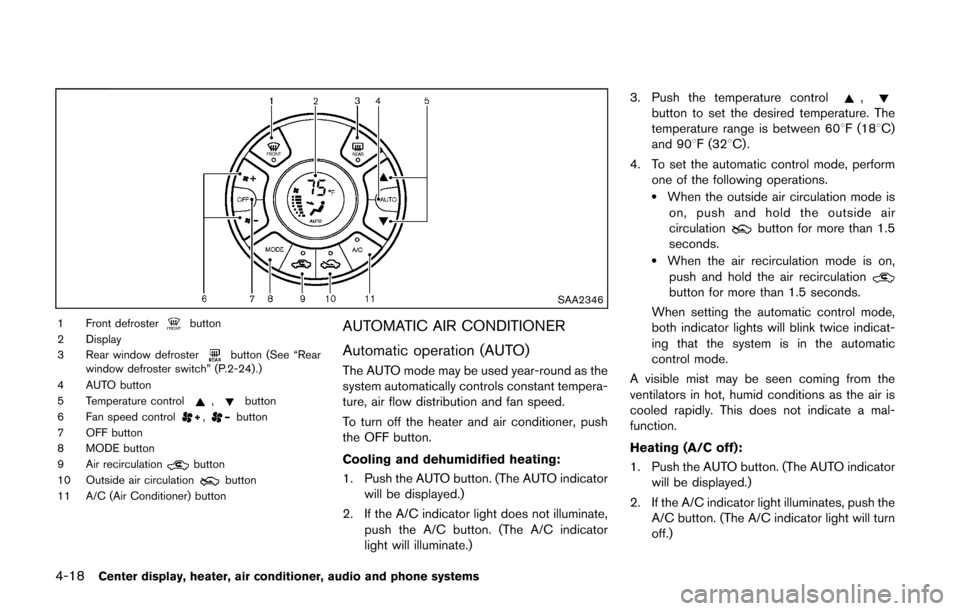
1 Front defrosterbutton
2 Display
3 Rear window defroster
button (See “Rear
window defroster switch” (P.2-24) .)
4 AUTO button
5 Temperature control
,button
6 Fan speed control,button
7 OFF button
8 MODE button
9 Air recirculation
button
10 Outside air circulationbutton
11 A/C (Air Conditioner) button
AUTOMATIC AIR CONDITIONER
Automatic operation (AUTO)
The AUTO mode may be used year-round as the
system automatically controls constant tempera-
ture, air flow distribution and fan speed.
To turn off the heater and air conditioner, push
the OFF button.
Cooling and dehumidified heating:
1. Push the AUTO button. (The AUTO indicator will be displayed.)
2. If the A/C indicator light does not illuminate, push the A/C button. (The A/C indicator
light will illuminate.) 3. Push the temperature control
,button to set the desired temperature. The
temperature range is between 608F (188C)
and 908F (328C) .
4. To set the automatic control mode, perform one of the following operations.
.When the outside air circulation mode ison, push and hold the outside air
circulation
button for more than 1.5
seconds.
.When the air recirculation mode is on,
push and hold the air recirculation
button for more than 1.5 seconds.
When setting the automatic control mode,
both indicator lights will blink twice indicat-
ing that the system is in the automatic
control mode.
A visible mist may be seen coming from the
ventilators in hot, humid conditions as the air is
cooled rapidly. This does not indicate a mal-
function.
Heating (A/C off):
1. Push the AUTO button. (The AUTO indicator will be displayed.)
2. If the A/C indicator light illuminates, push the A/C button. (The A/C indicator light will turn
off.)
Page 160 of 332
3. Push the temperature control,button to set the desired temperature. The
temperature range is between 608F (188C)
and 908F (328C) .
.Do not set the temperature lower than the outside air temperature. Doing so may
cause the temperature to not be con-
trolled properly.
.If the windows fog up, use dehumidifiedheating instead of the A/C off heating.
Dehumidified defrosting/defogging:
1. Push the front defroster
button. (The
indicator light will illuminate.)
2. Turn the temperature control
,button to set the desired temperature..To remove moisture or fog on the front window quickly, set the temperature to
the high temperature and the fan speed
to their maximum level.
.After the windshield is cleared, push thefront defrosterbutton again. (The
indicator light will turn off.)
.When the front defrosterbutton is
pushed, the air conditioner will automa-
tically turn on to defog the windshield.
The outside air circulation mode will be
selected to improve the defogging per-
formance.
Manual operation
The manual mode can be used to control the
heater and air conditioner to your desired
settings.
To turn off the heater and air conditioner, push
the OFF button.
Fan speed control:
Turn the fan speed control
,dial to
adjust the fan speed.
Air flow control:
Push the MODE button to change the air flow
mode.
— Air flows from the center and side ventilators.
— Air flows from the center and sideventilators and foot outlets.
— Air flows mainly from the foot outlets.
— Air flows from the defroster outlets andfoot outlets.
Temperature control:
Push the temperature control
,button
to set the desired temperature.
The temperature range is between 608F (188C)
and 908F (328C) .
Air recirculation:
Push the air recirculation
button to change
the air circulation mode. When the indicator light illuminates, the flowing air is recirculated inside
the vehicle.
Outside air circulation:
Push the outside air circulation
button to
change the air circulation mode. When the
indicator light illuminates, the flowing air is
drawn from outside the vehicle.
Automatic air intake control:
To set the automatic control mode, perform one
of the following operations.
. When the outside air circulation mode is on,
push and hold the outside air circulation
button for more than 1.5 seconds.
. When the air recirculation mode is on, push
and hold the air recirculation
button for
more than 1.5 seconds.
When setting the automatic control mode, both
indicator lights will blink twice indicating that the
system is in the automatic control mode.
Center display, heater, air conditioner, audio and phone systems4-19
Page 163 of 332
4-22Center display, heater, air conditioner, audio and phone systems
Static and flutter: During signal interference from
buildings, large hills or due to antenna position,
usually in conjunction with increased distance
from the station transmitter, static or flutter can
be heard. This can be reduced by lowering the
treble setting to reduce the treble response.
Multipath reception: Because of the reflective
characteristics of FM signals, direct and re-
flected signals reach the receiver at the same
time. The signals may cancel each other,
resulting in momentary flutter or loss of sound.
AM radio reception:
AM signals, because of their low frequency, can
bend around objects and skip along the ground.
In addition, the signals can be bounced off the
ionosphere and bent back to earth. Because of
these characteristics. AM signals are also
subject to interference as they travel from
transmitter to receiver.
Fading: Occurs while the vehicle is passing
through freeway underpasses or in areas with
many tall buildings. It can also occur for several
seconds during ionospheric turbulence even in
areas where no obstacles exist.
Static: Caused by thunderstorms, electrical
power lines, electric signs and even traffic lights.Satellite radio reception (if so equipped):
When the satellite radio is first installed or the
battery has been replaced, the satellite radio
may not work properly. This is not a malfunction.
Wait more than 10 minutes with the satellite
radio ON and the vehicle away from any metal or
large buildings for the satellite radio to receive all
of the necessary data.
The satellite radio mode requires an active
SiriusXM Satellite Radio subscription. The sa-
tellite radio is not available in Alaska, Hawaii and
Guam.
Satellite radio performance may be affected if
cargo carried on the roof blocks the satellite
radio signal.
If possible, do not put cargo near the satellite
antenna.
A buildup of ice on the satellite radio antenna
can affect satellite radio performance. Remove
the ice to restore satellite radio reception.
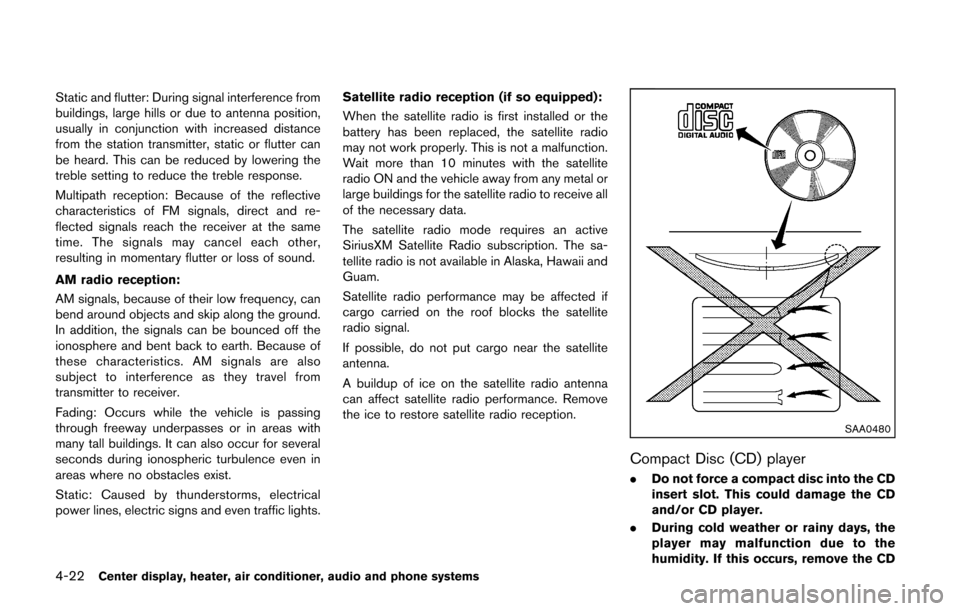
SAA0480
Compact Disc (CD) player
.
Do not force a compact disc into the CD
insert slot. This could damage the CD
and/or CD player.
. During cold weather or rainy days, the
player may malfunction due to the
humidity. If this occurs, remove the CD
Page 164 of 332
and dehumidify or ventilate the player
completely.
. The player may skip while driving on
rough roads.
. The CD player sometimes cannot func-
tion when the passenger compartment
temperature is extremely high. De-
crease the temperature before use.
. Only use high quality 4.7 in (12 cm)
round discs that have the “COMPACT
disc DIGITAL AUDIO” logo on the disc
or packaging.
. Do not expose the CD to direct sun-
light.
. CDs that are of poor quality, dirty,
scratched, covered with fingerprints,
or that have pin holes may not work
properly.
. The following CDs may not work prop-
erly:
—Copy control compact discs (CCCD)
— Recordable compact discs (CD-R)
— Rewritable compact discs (CD-RW)
. Do not use the following CDs as they
may cause the CD player to malfunc-
tion.
—3.1 in (8 cm) discs —
CDs that are not round
— CDs with a paper label
— CDs that are warped, scratched, or
have abnormal edges
. This audio system can only play pre-
recorded CDs. It has no capabilities to
record or burn CDs.
. If the CD cannot be played, one of the
following messages will be displayed.
Check Disc:
—Confirm that the CD is inserted
correctly (the label side is facing
up, etc.) .
— Confirm that the CD is not bent or
warped and it is free of scratches.
Push Eject:
This is an error due to the temperature
inside the player is too high. Remove
the CD by pushing the EJECT button,
and after a short time reinsert the CD.
The CD can be played when the tem-
perature of the player returns to nor-
mal.
Unplayable Track:
The file is unplayable in this audio
system (only MP3 or WMA CD) .Interface System for iPod®(if so
equipped)
. Some characters used in other languages
(Chinese, Japanese, etc.) are not displayed
properly on the vehicle audio display. We
recommend using English language char-
acters with an iPod
®.
. Large video podcast files cause slow
responses in the iPod
®. The vehicle audio
display may momentarily black out, but it will
soon recover.
. If the iPod
®automatically selects large video
podcast files while in the shuffle mode, the
vehicle audio display may momentarily black
out, but it will soon recover.
. Improperly plugging in the iPod
®may cause
a checkmark to be displayed on and off
(flickering) . Always make sure that the iPod
®
is connected properly.
. The iPod nano®(2nd Generation) will
continue to fast forward or rewind if it is
disconnected during a seek operation.
. An incorrect song title may appear when the
Play Mode is changed while using the iPod
nano
®(2nd Generation) .
. Audiobooks may not play in the same order
as they appear on the iPod
®.
Center display, heater, air conditioner, audio and phone systems4-23
Page 165 of 332
4-24Center display, heater, air conditioner, audio and phone systems
.The iPod nano®(1st Generation) may
remain in fast forward or rewind mode if it
is connected during a seek operation. In this
case, please manually reset the iPod
®.
. If you are using an iPod®(3rd Generation
with Dock connector) , do not use very long
names for the song title, album name or
artist name to avoid the iPod
®from resetting
itself.
. Be careful not to do the following, or the
cable could be damaged and a loss of
function may occur.
— Bend the cable excessively (1.6 in (40
mm) radius minimum).
— Twist the cable excessively (more than 180 degrees) .
— Pull or drop the cable.
— Store objects with sharp edges in the storage where the cable is stored.
— Spill liquids on the cable and connectors.
. Do not connect the cable to the iPod
®if the
cable and/or connectors are wet. It may
damage the iPod
®.
. If the cable and connectors are exposed to
water, allow the cable and/or connectors to
dry completely before connecting the cable
to the iPod
®(wait 24 hours for it to dry) . .
If the connector is exposed to fluids other
than water, evaporative residue may cause a
short between the connector pins. In this
case, replace the cable, otherwise damage
to the iPod
®and a loss of function may
occur.
. If the cable is damaged (insulation cut,
connectors cracked, contamination such as
liquids, dust, dirt, etc. in the connectors) , do
not use the cable and contact a NISSAN
dealer to replace the cable with a new one.
. When not in use for extended periods of
time, store the cable in a clean, dust free
environment at room temperature and with-
out direct sun exposure.
. Do not use the cable for any other purposes
other than its intended use in the vehicle.
. iPod
®charging is only possible for devices
that support charging via a FireWire®
connection.* 12V-charge iPod®s are not chargeable with this
system.
*iPod
®, iPhone®and FireWire®are trademarks of
Apple Inc., registered in the U.S. and other
countries.
Compact Disc (CD) with MP3 or WMA
(if so equipped)
Explanation of terms:
. MP3 — MP3 is short for Moving Pictures
Experts Group Audio Layer 3. MP3 is the
most well-known compressed digital audio
file format. This format allows for near “CD
quality” sound, but at a fraction of the size of
normal audio files. MP3 conversion of an
audio track from CD-ROM can reduce the
file size by approximately 10:1 ratio (Sam-
pling: 44.1 kHz, Bit rate: 128 kbps) with
virtually no perceptible loss in quality. MP3
compression removes the redundant and
irrelevant parts of a sound signal that the
human ear doesn’t hear.
. WMA — Windows Media Audio (WMA) is a
compressed audio format created by Micro-
soft as an alternative to MP3. The WMA
codec offers greater file compression than
the MP3 codec, enabling storage of more
digital audio tracks in the same amount of
space when compared to MP3s at the same
level of quality.
. Bit rate — Bit rate denotes the number of
bits per second used by a digital music files.
The size and quality of a compressed digital
audio file is determined by the bit rate used
when encoding the file.
Page 166 of 332
.Sampling frequency — Sampling frequency
is the rate at which the samples of a signal
are converted from analog to digital (A/D
conversion) per second.
. Multisession — Multisession is one of the
methods for writing data to media. Writing
data once to the media is called a single
session, and writing more than once is
called a multisession.
. ID3/WMA Tag — The ID3/WMA tag is the
part of the encoded MP3 or WMA file that
contains information about the digital music
file such as song title, artist, album title,
encoding bit rate, track time duration, etc.
ID3 tag information is displayed on the
Album/Artist/Track title line on the display.
* Windows®and Windows Media®are registered
trademarks or trademarks of Microsoft Corpora-
tion in the United States of America and other
countries of Microsoft Corporation of the USA.
USB (Universal Serial Bus) (if so
equipped)
WARNING
Do not connect, disconnect or operate
the USB device while driving. Doing so
can be a distraction. If distracted you
could lose control of your vehicle and cause an accident or serious injury.
CAUTION
.
Do not force the USB device into the
USB port. Inserting the USB device
tilted or up-side-down into the port
may damage the port. Make sure
that the USB device is connected
correctly into the USB port.
. Do not grab the USB port cover (if
so equipped) when pulling the USB
device out of the port. This could
damage the port and the cover.
. Do not leave the USB cable in a
place where it can be pulled unin-
tentionally. Pulling the cable may
damage the port.
The vehicle is not equipped with a USB device.
USB devices should be purchased separately
as necessary.
This system cannot be used to format USB
devices. To format a USB device, use a personal
computer.
In some states/area, the USB device for the
front seats plays only sound without images for regulatory reasons, even when the vehicle is
parked.
This system supports various USB memory
devices, USB hard drives and iPod
®players.
Some USB devices may not be supported by
this system.
. Partitioned USB devices may not be played
correctly.
. Some characters used in other languages
(Chinese, Japanese, etc.) are not displayed
properly on display. Using English language
characters with a USB device is recom-
mended.
General notes for USB use:
Refer to your device manufacturer’s owner
information regarding the proper use and care
of the device.
Notes for iPod
®use:
iPod®is a trademark of Apple Inc., registered in
the U.S. and other countries.
. Improperly plugging in the iPod
®may cause
a checkmark to be displayed on and off
(flickering) . Always make sure that the iPod
®
is connected properly.
. An iPod nano®(1st Generation) may remain
in fast forward or rewind mode if it is
connected during a seek operation. In this
case, please manually reset the iPod
®.
Center display, heater, air conditioner, audio and phone systems4-25