2014 NISSAN ALTIMA Indicator light
[x] Cancel search: Indicator lightPage 167 of 428
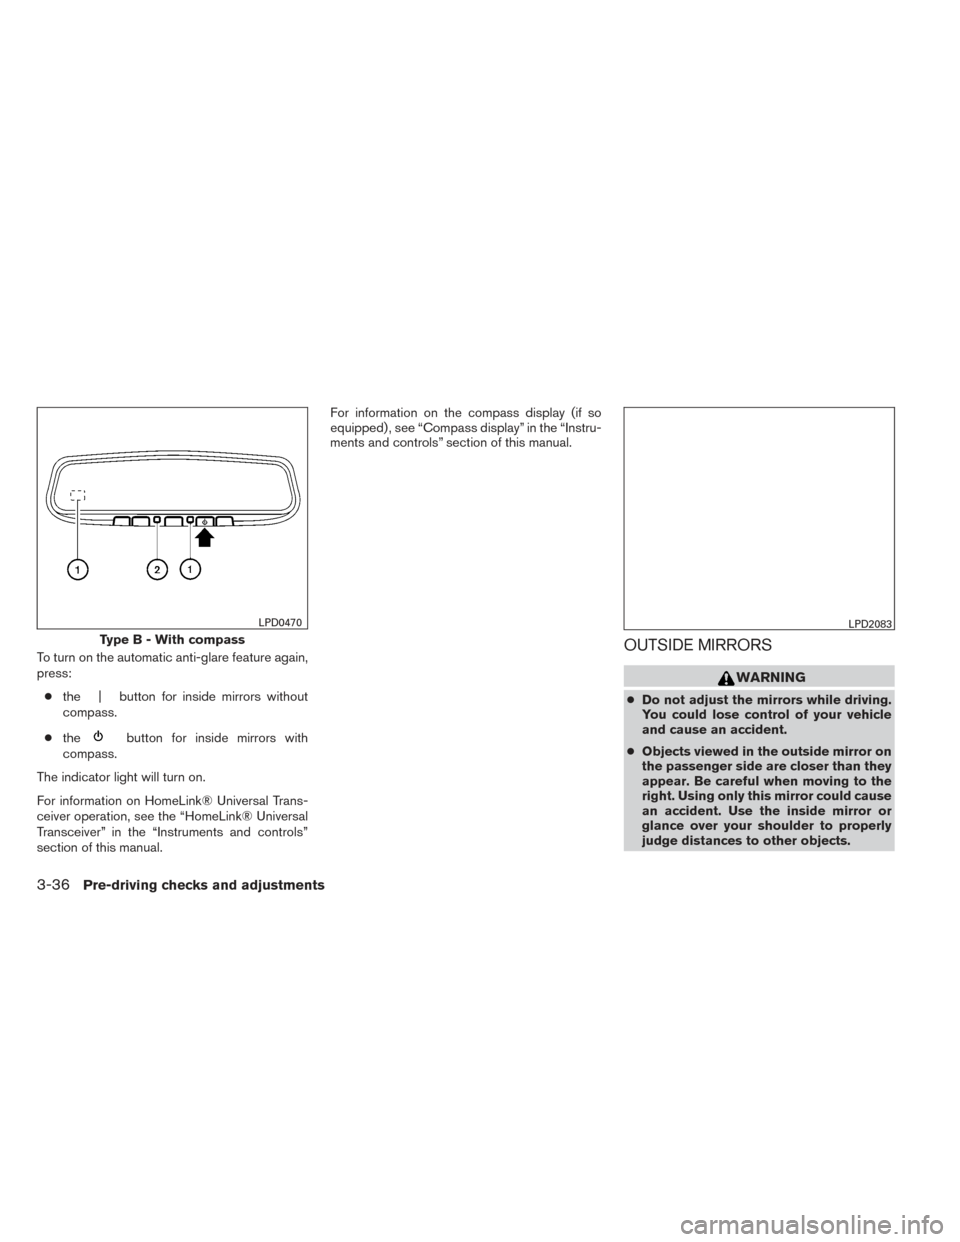
To turn on the automatic anti-glare feature again,
press:● the | button for inside mirrors without
compass.
● the
button for inside mirrors with
compass.
The indicator light will turn on.
For information on HomeLink® Universal Trans-
ceiver operation, see the “HomeLink® Universal
Transceiver” in the “Instruments and controls”
section of this manual. For information on the compass display (if so
equipped) , see “Compass display” in the “Instru-
ments and controls” section of this manual.
OUTSIDE MIRRORS
WARNING
●
Do not adjust the mirrors while driving.
You could lose control of your vehicle
and cause an accident.
● Objects viewed in the outside mirror on
the passenger side are closer than they
appear. Be careful when moving to the
right. Using only this mirror could cause
an accident. Use the inside mirror or
glance over your shoulder to properly
judge distances to other objects.
Type B - With compass
LPD0470LPD2083
3-36Pre-driving checks and adjustments
Page 194 of 428
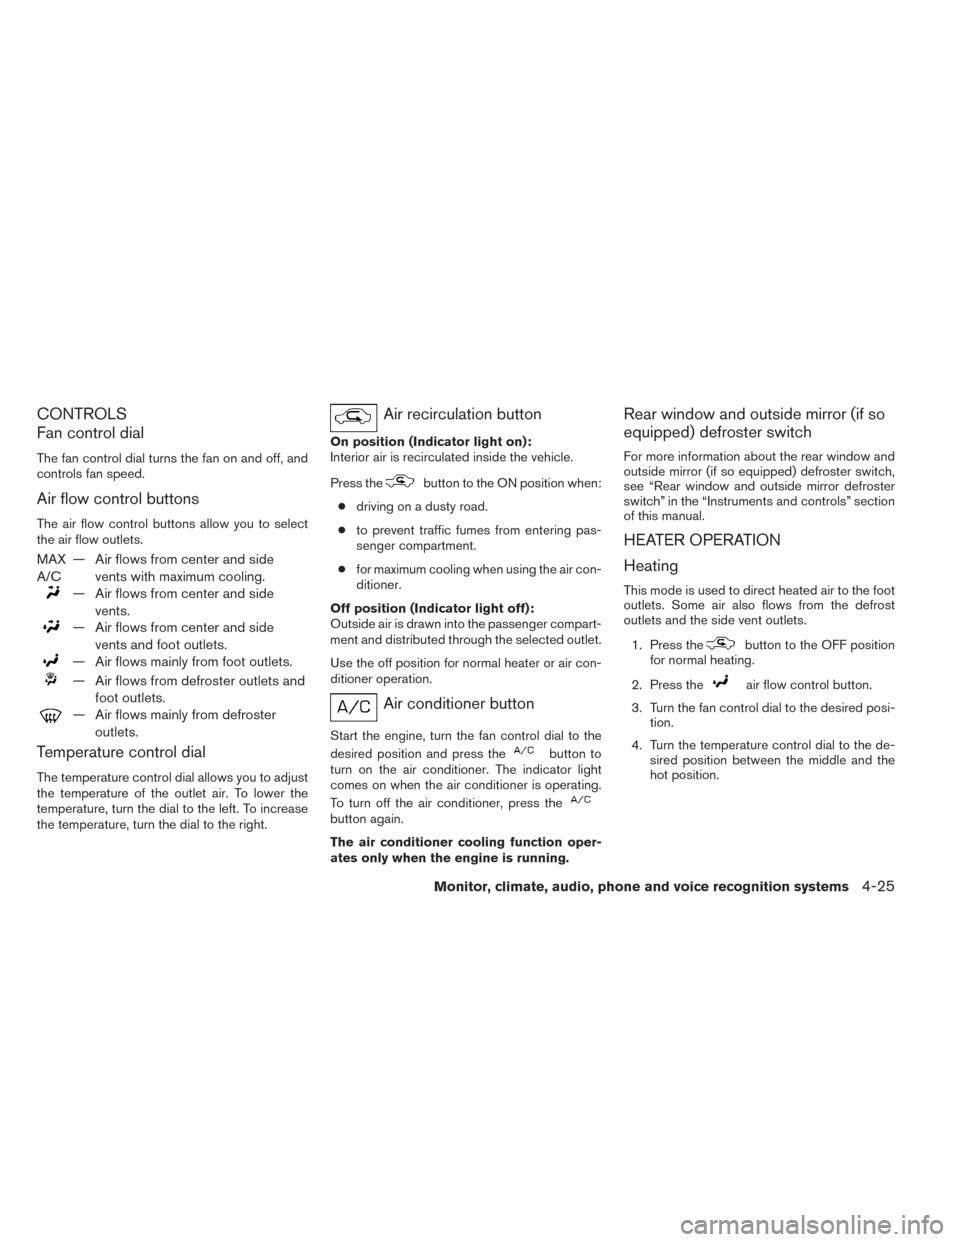
CONTROLS
Fan control dial
The fan control dial turns the fan on and off, and
controls fan speed.
Air flow control buttons
The air flow control buttons allow you to select
the air flow outlets.
MAX
A/C— Air flows from center and side
vents with maximum cooling.
— Air flows from center and sidevents.
— Air flows from center and sidevents and foot outlets.
— Air flows mainly from foot outlets.
— Air flows from defroster outlets andfoot outlets.
— Air flows mainly from defrosteroutlets.
Temperature control dial
The temperature control dial allows you to adjust
the temperature of the outlet air. To lower the
temperature, turn the dial to the left. To increase
the temperature, turn the dial to the right.
Air recirculation button
On position (Indicator light on):
Interior air is recirculated inside the vehicle.
Press the
button to the ON position when:
● driving on a dusty road.
● to prevent traffic fumes from entering pas-
senger compartment.
● for maximum cooling when using the air con-
ditioner.
Off position (Indicator light off):
Outside air is drawn into the passenger compart-
ment and distributed through the selected outlet.
Use the off position for normal heater or air con-
ditioner operation.
Air conditioner button
Start the engine, turn the fan control dial to the
desired position and press the
button to
turn on the air conditioner. The indicator light
comes on when the air conditioner is operating.
To turn off the air conditioner, press the
button again.
The air conditioner cooling function oper-
ates only when the engine is running.
Rear window and outside mirror (if so
equipped) defroster switch
For more information about the rear window and
outside mirror (if so equipped) defroster switch,
see “Rear window and outside mirror defroster
switch” in the “Instruments and controls” section
of this manual.
HEATER OPERATION
Heating
This mode is used to direct heated air to the foot
outlets. Some air also flows from the defrost
outlets and the side vent outlets.
1. Press the
button to the OFF position
for normal heating.
2. Press the
air flow control button.
3. Turn the fan control dial to the desired posi- tion.
4. Turn the temperature control dial to the de- sired position between the middle and the
hot position.
Monitor, climate, audio, phone and voice recognition systems4-25
Page 195 of 428
Ventilation
This mode directs outside air to the side and
center vents.1. Press the
button to the OFF position.
2. Press the
air flow control button.
3. Turn the fan control dial to the desired posi- tion.
4. Turn the temperature control dial to the de- sired position.
Defrosting or defogging
This mode directs the air to the defrost outlets to
defrost/defog the windows.
1. Press the defrost/defog button
.
2. Turn the fan control dial to the desired posi- tion.
3. Turn the temperature control dial to the de- sired position between the middle and the
hot position.
● To quickly remove ice or fog from the win-
dows, turn the fan control dial to the highest
setting and the temperature control to the
full HOT position. ●
When the
position is selected, the air
conditioner automatically turns on (the indi-
cator light on the
button will come on)
if the outside temperature is more than 36°F
(2°C) . This dehumidifies the air which helps
defog the windshield. The
mode au-
tomatically turns off, allowing outside air to
be drawn into the passenger compartment
to further improve the defogging perfor-
mance. The recirculation mode cannot be
activated in the
position.
Bi-level heating
The bi-level mode directs warmed air to the side
and center vents and to the front and rear floor
outlets.
1. Press the
button to the OFF position.
2. Press the
air flow control button.
3. Turn the fan control dial to the desired posi- tion.
4. Turn the temperature control dial to the de- sired position.
Heating and defogging
This mode heats the interior and defogs the wind-
shield.
1. Press the
air flow control button. 2. Turn the fan control dial to the desired posi-
tion.
3. Turn the temperature control dial to the de- sired position between the middle and the
hot position.
● When the
position is selected, the air
conditioner automatically turns on if the out-
side temperature is more than 36°F (2°C) .
The indicator light on the A/C button will
come on. This dehumidifies the air which
helps defog the windshield. The
mode automatically turns off, allowing out-
side air to be drawn into the passenger
compartment to further improve the defog-
ging performance. The recirculation mode
cannot be activated in the
position.
Operating tips
Clear snow and ice from the wiper blades
and air inlet in front of the windshield. This
improves heater operation.
AIR CONDITIONER OPERATION
Start the engine, turn the fan control dial to the
desired position, and press the
button to
activate the air conditioner. When the air condi-
tioner is on, cooling and dehumidifying functions
are added to the heater operation.
4-26Monitor, climate, audio, phone and voice recognition systems
Page 196 of 428
The air conditioner cooling function oper-
ates only when the engine is running.
Cooling
This mode is used to cool and dehumidify the air.1. Press the
button to the OFF position.
2. Press the
air flow control button.
3. Turn the fan control dial to the desired posi- tion.
4. Push the
button. The indicator light
comes on.
5. Turn the temperature control dial to the de- sired position.
● For quick cooling when the outside tem-
perature is high, push the
button to
the ON position. Be sure to return the
to the OFF position for normal cooling. MAX
A/C may be used for quick cooling.
Dehumidified heating
This mode is used to heat and dehumidify the air.
1. Press the
button to the OFF position.
2. Press the
air flow control button.
3. Turn the fan control dial to the desired posi- tion. 4. Push the
button. The indicator light
comes on.
5. Turn the temperature control dial to the de- sired position.
Dehumidified defogging
This mode is used to defog the windows and
dehumidify the air.
1. Press the
air flow control button.
2. Turn the fan control dial to the desired posi- tion.
● When the
orare selected, the
air conditioner automatically turns on (the
indicator light may or may not illuminate) if
the outside temperature is more than 36°F
(2°C) . This dehumidifies the air which helps
defog the windshield. The
mode au-
tomatically turns off, allowing outside air to
be drawn into the passenger compartment
to further improve the defogging perfor-
mance.
● The air conditioner is always on in
mode, regardless of whether the indicator
light is on or off.
3. Turn the temperature control dial to the de- sired position.
Operating tips
●Keep the windows and moonroof closed
while the air conditioner is in operation.
● After parking in the sun, drive for 2 or 3 min-
utes with the windows open to vent hot air
from the passenger compartment. Then,
close the windows. This allows the air con-
ditioner to cool the interior more quickly.
● The air conditioning system should be
operated for approximately 10 minutes
at least once a month. This helps pre-
vent damage to the system due to lack
of lubrication.
● A visible mist may be seen coming from the
ventilators in hot, humid conditions as the air
is cooled rapidly. This does not indicate a
malfunction.
● If the engine coolant temperature
gauge indicates engine coolant tem-
perature over the normal range, turn
the air conditioner off. See “If your
vehicle overheats” in the “In case of
emergency” section of this manual.
Monitor, climate, audio, phone and voice recognition systems4-27
Page 201 of 428

NOTE:● Odors from inside and outside the vehicle
can build up in the air conditioner unit. Odor
can enter the passenger compartment
through the vents.
● When parking, set the heater and air condi-
tioner controls to turn off air recirculation to
allow fresh air into the passenger compart-
ment. This should help reduce odors inside
the vehicle.
AUTOMATIC OPERATION
Cooling and/or dehumidified heating
(AUTO)
This mode may be used all year round as the
system automatically works to keep a constant
temperature. Air flow distribution and fan speed
are also controlled automatically.
1. Press the AUTO button on. The indicator on the button will illuminate.
2. Turn the temperature control dial to the left or right to set the desired temperature.
● Adjust the temperature display to about
75°F (24°C) for normal operation. ●
The temperature of the passenger compart-
ment will be maintained automatically. Air
flow distribution and fan speed are also con-
trolled automatically.
● A visible mist may be seen coming from the
vents in hot, humid conditions as the air is
cooled rapidly. This does not indicate a mal-
function.
3. You can individually set driver’s and front passenger’s side temperature using each
temperature control dial. When the DUAL
button or passenger’s side temperature dial
is turned, the DUAL indicator will come on.
To turn off the passenger’s side temperature
control, press the DUAL button.Heating (A/C OFF)
The air conditioner does not activate. When you
need to heat only, use this mode.
1. Press the A/C button. The A/C indicator will turn off.
2. Turn the temperature control dial to set the desired temperature.
● The temperature of the passenger compart-
ment will be maintained automatically. Air
flow distribution and fan speed are also con-
trolled automatically. ●
Do not set the temperature lower than the
outside air temperature. Otherwise, the sys-
tem may not work properly.
● Not recommended if windows fog up.
Dehumidified defrosting or defogging
1. Press thefront defroster button on.
(The indicator light on the button will come
on.)
2. Turn the temperature control dial to set the desired temperature.
● To quickly remove ice from the outside of the
windows, use the fan speed control dial to
set the fan speed to maximum.
● As soon as possible after the windshield is
clean, press the AUTO button to return to
the automatic mode.
● When the
front defroster button is
pressed, the air conditioner will automati-
cally be turned on at outside temperatures
above 36°F (2°C) (The indicator light may or
may not illuminate) . The air recirculate mode
automatically turns off, allowing outside air
to be drawn into the passenger compart-
ment to further improve the defogging per-
formance.
4-32Monitor, climate, audio, phone and voice recognition systems
Page 202 of 428
Remote start logic (if so equipped)
Vehicles equipped with automatic climate con-
trols and remote start function may go into auto-
matic heating or cooling mode when remote start
is activated depending on outside and cabin tem-
peratures. During this period, the climate control
display and buttons will be inoperable until igni-
tion switch is turned on.
MANUAL OPERATION
Fan speed control
Press the fan control buttonsto manually
control the fan speed.
Press the AUTO button to return to automatic
control of the fan speed.
Air recirculation
Press theair recirculation button to recir-
culate interior air inside the vehicle. The
indicator light on the button will come on.
The air recirculation cannot be activated when
the air conditioner is in the
front defrosting
mode or the
front defrosting and foot out-
let mode.
Fresh air intake
Press thefresh air intake button to draw
outside air into the passenger compartment.
The
indicator light on the button will come
on.
Air flow control
Pressing the MODE button manually controls air
flow and selects the air outlet:
— Air flows from center and side
vents.
— Air flows from center and sidevents and foot outlets.
— Air flows mainly from foot outlets.
— Air flows from defroster and footoutlets.
To turn system off
Press the OFF button.
Rear window and outside mirror (if so
equipped) defroster switch
For more information about the rear window and
outside mirror (if so equipped) defroster switch,
see “Rear window and outside mirror defroster
switch” in the “Instruments and controls” section
of this manual.
OPERATING TIPS
●When the engine coolant temperature and
outside air temperature are low, the air flow
from the foot outlets may not operate for a
maximum of 150 seconds. However, this is
not a malfunction. After the coolant tempera-
ture warms up, air flow from the foot outlets
will operate normally.
Monitor, climate, audio, phone and voice recognition systems4-33
Page 294 of 428
●When a spare tire is mounted or a wheel
is replaced, tire pressure will not be
indicated, the TPMS will not function
and the low tire pressure warning light
will flash for approximately 1 minute.
The light will remain on after 1 minute.
Contact your NISSAN dealer as soon as
possible for tire replacement and/or
system resetting.
● Replacing tires with those not originally
specified by NISSAN could affect the
proper operation of the TPMS.
● Do not inject any tire liquid or aerosol
tire sealant into the tires, as this may
cause a malfunction of the tire pressure
sensors.
CAUTION
Do not place metalized film or any metal
parts (antenna, etc.) on the windows. This
may cause poor reception of the signals
from the tire pressure sensors, and the
TPMS will not function properly.
Some devices and transmitters may temporarily
interfere with the operation of the TPMS and
cause the low tire pressure warning light to illu-
minate. Some examples are:
– Facilities or electric devices using similar radio
frequencies are near the vehicle.
– If a transmitter set to similar frequencies is being used in or near the vehicle.
– If a computer (or similar equipment) or a DC/AC converter is being used in or near the
vehicle.
FCC Notice:
For USA:
This device complies with Part 15 of the
FCC Rules. Operation is subject to the fol-
lowing two conditions: (1) This device may
not cause harmful interference, and (2) this
device must accept any interference re-
ceived, including interference that may
cause undesired operation.
NOTE:
Changes or modification not expressly ap-
proved by the party responsible for compli-
ance could void the user’s authority to op-
erate the equipment. For Canada:
This device complies with RSS-210 of In-
dustry Canada. Operation is subject to the
following two conditions: (1) this device
may not cause interference, and (2) this
device must accept any interference, in-
clude interference that may cause unde-
sired operation of the device.
TPMS with Easy Fill Tire Alert
When adding air to an under-inflated tire, the
TPMS with Easy Fill Tire Alert provides visual and
audible signals outside the vehicle to help you
inflate the tires to the recommended COLD tire
pressure.
Vehicle set-up:
1. Park the vehicle in a safe and level place.
2. Apply the parking brake and place the shift lever to the P (Park) position.
3. Place the ignition switch to the ON position. Do not start the engine.
Operation: 1. Add air to the tire.
2. After a few seconds, the hazard indicators will start flashing.
Starting and driving5-5
Page 300 of 428
After step 3 is performed, when the ignition
switch is pushed without depressing the
brake pedal, the ignition switch position will
change to ACC.
4. Push the ignition switch while depressing the brake pedal within 10 seconds after the
chime sounds. The engine will start.
NOTE: ● When the ignition switch is pushed to the
ACC or ON position or the engine is started
by the above procedure, the Intelligent Key
battery discharge indicator appears in the
vehicle information display even when the
Intelligent Key is inside the vehicle. This is
not a malfunction. To turn off the Intelligent
Key battery discharge indicator, touch the
ignition switch with the Intelligent Key again.
● If the Intelligent Key battery discharge indi-
cator appears, replace the battery as soon
as possible. See “Battery Replacement” in
the “Maintenance and do-it-yourself” sec-
tion.NISSAN VEHICLE IMMOBILIZER
SYSTEM
The NISSAN Vehicle Immobilizer system will not
allow the engine to start without the use of the
registered key.
If the engine fails to start using a registered key
(for example, when interference is caused by
another registered key, an automated toll road
device or automatic payment device on the key
ring) , restart the engine using the following pro-
cedure:
1. Leave the ignition switch in the ON position for approximately 5 seconds.
2. Place the ignition switch in the OFF or LOCK position, and wait approximately
10 seconds.
3. Repeat steps 1 and 2.
4. Restart the engine while holding the device (which may have caused the interference)
separate from the registered key.
If the no start condition re-occurs, NISSAN rec-
ommends placing the registered key on a sepa-
rate key ring to avoid interference from other
devices. ●
Make sure the area around the vehicle is
clear.
● Check fluid levels such as engine oil, cool-
ant, brake fluid, and windshield-washer fluid
as frequently as possible, or at least when-
ever you refuel.
● Check that all windows and lights are clean.
● Visually inspect tires for their appearance
and condition. Also check tires for proper
inflation.
● Lock all doors.
● Position seat and adjust head restraints.
● Adjust inside and outside mirrors.
● Fasten seat belts and ask all passengers to
do likewise.
● Check the operation of warning lights when
the ignition switch is pushed to the ON
position. See “Warning/indicator lights and
audible reminders” in the “Instruments and
controls” section of this manual.
BEFORE STARTING THE ENGINE
Starting and driving5-11