Page 342 of 460

6-2 For emergencies
6If the vehicle breaks down
N00836300233
If your vehicle breaks down on the road, move to the shoulder
and turn on the hazard warning flashers. If there is no shoulder,
or the shoulder is not safe, drive in the right lane slowly with
the hazard lights flashing until you come to a safe stopping
place. Keep the flashers flashing.If the engine stops/failsIf the engine stops, there will be no power assist to the steering
and brakes, making these difficult to use.
�The brake booster will not work, so the brakes will not
grip well. The brake pedal will be harder to press than
usual.
�Since there is no power steering assist, the steering wheel
will be hard to turn.When the engine fails at the intersectionGet help from your passengers, bystanders, etc. to push the
vehicle and move it to a safe area.
Jump-starting the engine
N00836400768
If the engine cannot be started because the battery is weak or
dead, you can start it with the battery from another vehicle
using jumper cables.NOTE�Do not use jumper cables if they have damage or corro-
sion.
1. Take off any metal jewelry such as watch bands or brace-
lets that might create an accidental electrical contact.
2. Position the vehicles close enough together so that the
jumper cables can reach, but be sure the vehicles aren’t
touching each other.
WA R N I N G
!�To reduce the risk of igniting flammable gas that
may be emitted from the battery, carefully read this
section before jump-starting the vehicle.�Do not try to start your vehicle by pushing or tow-
ing. This can cause an accident resulting in serious
injury or death and can damage the vehicle.
CAUTION
!�Check the other vehicle. It must have a 12-volt bat-
tery. If the other system isn’t 12-volt, both systems
can be damaged.
BK0162600US.book 2 ページ 2013年3月22日 金曜日 午後2時41分
Page 343 of 460

For emergencies
6-3
6
3. You could be injured if the vehicles move. Set the parking
brake firmly on each vehicle. Put an automatic transaxle
or CVT in “P” (PARK) or a manual transaxle in “N”
(Neutral).
4. Turn the ignition switch to the “OFF” position or put the
operation mode in OFF.NOTE�Turn off all lights, heater, and other electrical loads. This
will avoid sparks and help save both batteries.
5. Make sure your battery electrolyte is at the proper level.
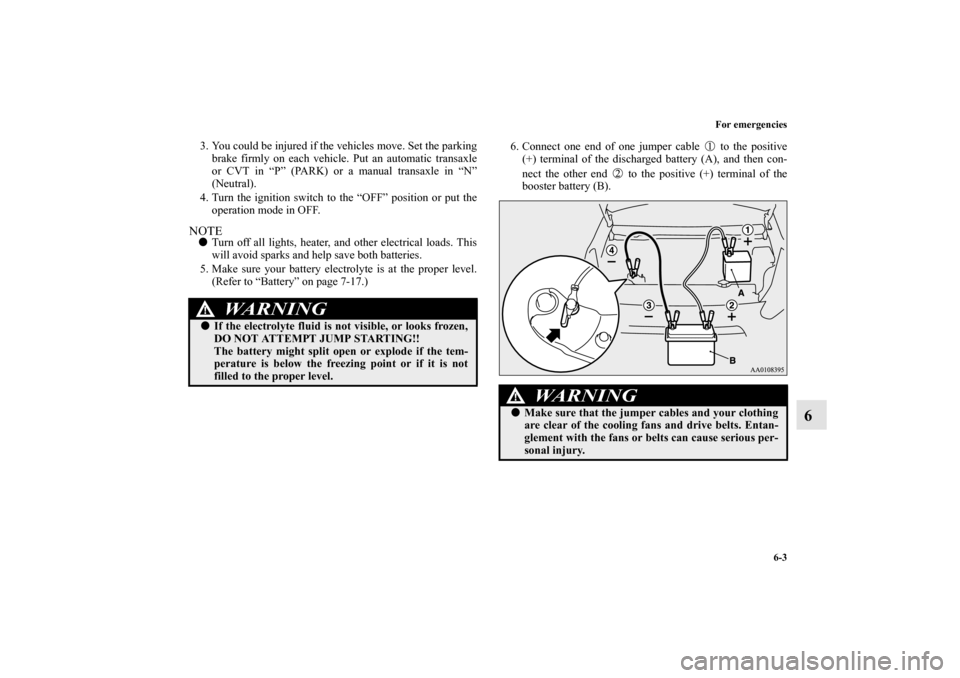
(Refer to “Battery” on page 7-17.)6. Connect one end of one jumper cable to the positive
(+) terminal of the discharged battery (A), and then con-
nect the other end to the positive (+) terminal of the
booster battery (B).
WA R N I N G
!�If the electrolyte fluid is not visible, or looks frozen,
DO NOT ATTEMPT JUMP STARTING!!
The battery might split open or explode if the tem-
perature is below the freezing point or if it is not
filled to the proper level.
WA R N I N G
!�Make sure that the jumper cables and your clothing
are clear of the cooling fans and drive belts. Entan-
glement with the fans or belts can cause serious per-
sonal injury.
BK0162600US.book 3 ページ 2013年3月22日 金曜日 午後2時41分
Page 413 of 460

Vehicle care and maintenance
7-39
7
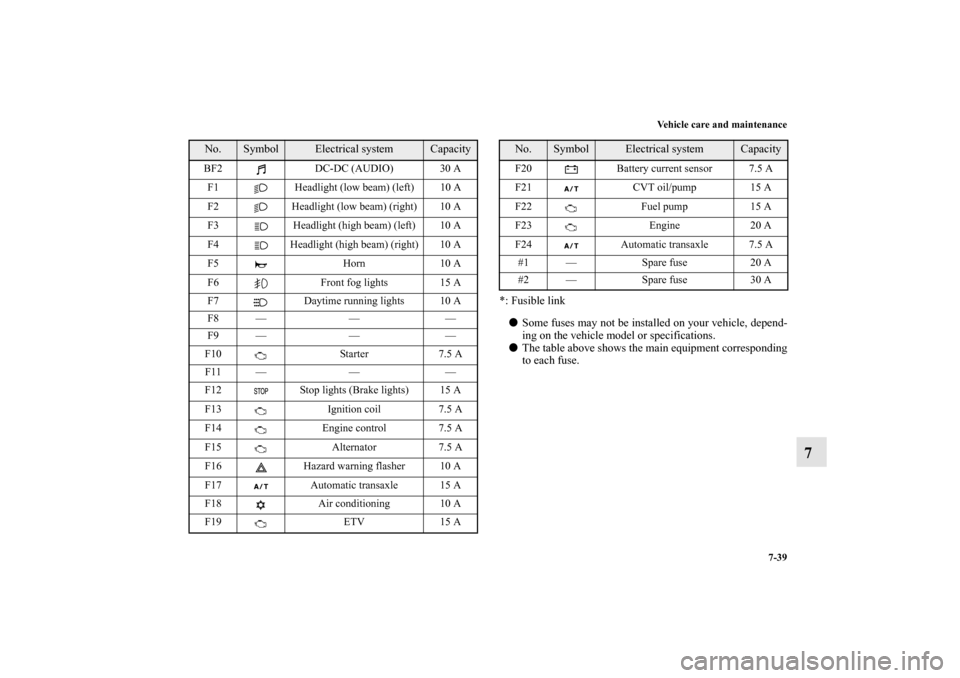
*: Fusible link
�Some fuses may not be installed on your vehicle, depend-
ing on the vehicle model or specifications.
�The table above shows the main equipment corresponding
to each fuse.
BF2 DC-DC (AUDIO) 30 A
F1 Headlight (low beam) (left) 10 A
F2 Headlight (low beam) (right) 10 A
F3 Headlight (high beam) (left) 10 A
F4 Headlight (high beam) (right) 10 A
F5 Horn 10 A
F6 Front fog lights 15 A
F7 Daytime running lights 10 A
F8 — — —
F9 — — —
F10 Starter 7.5 A
F11 — — —
F12 Stop lights (Brake lights) 15 A
F13 Ignition coil 7.5 A
F14 Engine control 7.5 A
F15 Alternator 7.5 A
F16 Hazard warning flasher 10 A
F17 Automatic transaxle 15 A
F18 Air conditioning 10 A
F19 ETV 15 ANo.
Symbol
Electrical system
Capacity
F20 Battery current sensor 7.5 A
F21 CVT oil/pump 15 A
F22 Fuel pump 15 A
F23 Engine 20 A
F24 Automatic transaxle 7.5 A
#1 — Spare fuse 20 A
#2 — Spare fuse 30 ANo.
Symbol
Electrical system
Capacity
BK0162600US.book 39 ページ 2013年3月22日 金曜日 午後2時41分
Page 417 of 460

Vehicle care and maintenance
7-43
7 Replacement of light bulbs
N00942900349
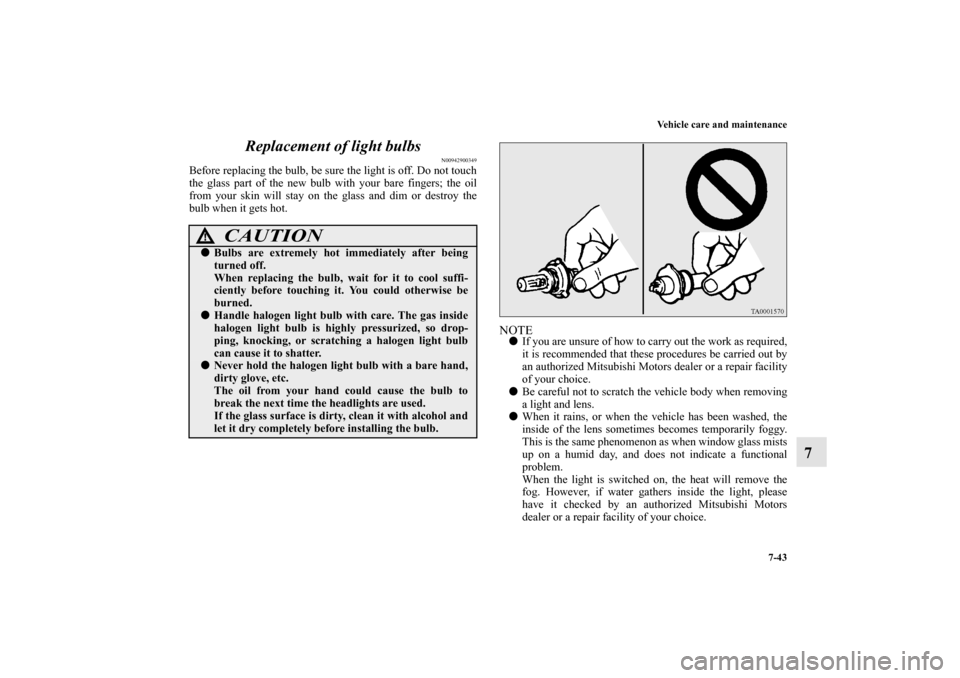
Before replacing the bulb, be sure the light is off. Do not touch
the glass part of the new bulb with your bare fingers; the oil
from your skin will stay on the glass and dim or destroy the
bulb when it gets hot.
NOTE�If you are unsure of how to carry out the work as required,
it is recommended that these procedures be carried out by
an authorized Mitsubishi Motors dealer or a repair facility
of your choice.
�Be careful not to scratch the vehicle body when removing
a light and lens.
�When it rains, or when the vehicle has been washed, the
inside of the lens sometimes becomes temporarily foggy.
This is the same phenomenon as when window glass mists
up on a humid day, and does not indicate a functional
problem.
When the light is switched on, the heat will remove the
fog. However, if water gathers inside the light, please
have it checked by an authorized Mitsubishi Motors
dealer or a repair facility of your choice.
CAUTION
!�Bulbs are extremely hot immediately after being
turned off.
When replacing the bulb, wait for it to cool suffi-
ciently before touching it. You could otherwise be
burned.�Handle halogen light bulb with care. The gas inside
halogen light bulb is highly pressurized, so drop-
ping, knocking, or scratching a halogen light bulb
can cause it to shatter.�Never hold the halogen light bulb with a bare hand,
dirty glove, etc.
The oil from your hand could cause the bulb to
break the next time the headlights are used.
If the glass surface is dirty, clean it with alcohol and
let it dry completely before installing the bulb.
BK0162600US.book 43 ページ 2013年3月22日 金曜日 午後2時41分
Page 420 of 460
7-46 Vehicle care and maintenance
7
Headlights/Daytime running lights
(if so equipped)
N00901800121
1. Pull out the connector (A), and then remove the sealing
cover (B).2. Unhook the spring (C), which secures the bulb, and then
remove the bulb (D).
3. To install the bulb, perform the removal steps in reverse.
Headlight aim adjustment
N00943200352
The alignment of the headlights should be checked by an
authorized Mitsubishi Motors dealer or a repair facility of your
choice.
*- Front of the vehicle
BK0162600US.book 46 ページ 2013年3月22日 金曜日 午後2時41分
Page 421 of 460
Vehicle care and maintenance
7-47
7
Front side-marker lights
N00917300554
1. Turn the socket (A) counterclockwise to remove it.2. Pull the bulb out of the socket.
3. To install the bulb, perform the removal steps in reverse.*- Front of the vehicle
BK0162600US.book 47 ページ 2013年3月22日 金曜日 午後2時41分
Page 422 of 460
7-48 Vehicle care and maintenance
7
Front turn signal lights
N00943400370
1. Turn the socket (A) counterclockwise to remove it.2. Remove the bulb from the socket by turning it counter-
clockwise while pressing in.
3. To install the bulb, perform the removal steps in reverse.*- Front of the vehicle
BK0162600US.book 48 ページ 2013年3月22日 金曜日 午後2時41分
Page 423 of 460
Vehicle care and maintenance
7-49
7
Parking lights
N00917300567
1. Turn the socket (A) counterclockwise to remove it.2. Pull the bulb out of the socket.
3. To install the bulb, perform the removal steps in reverse.*- Front of the vehicle
BK0162600US.book 49 ページ 2013年3月22日 金曜日 午後2時41分