2014 MITSUBISHI MIRAGE ECO mode
[x] Cancel search: ECO modePage 6 of 135

6
Disclaimers
Mitsubishi Motors will in no way be held
responsible for losses resulting from fire,
earthquake, tsunami, flood, or other natural
disasters; from actions of third parties; from
other accidents; or from inappropriate or
abnormal usage conditions utilized by the
customer, be said conditions deliberate or
unintentional.
There will be no indemnification for
alteration or loss of any information stored
upon this product (address book etc.) by
the customer or a third party resulting from
improper use of this product, the influence
of static electricity or electric noise, or at
the time of malfunction or repair or similar
circumstances. We recommend that you
create backups of important information as
a precautionary measure.
Some personal information (addresses
in address book, telephone numbers
etc.) input into this product may remain in
memory even if this product is removed. The
customer is responsible for proper handling
and management (including deleting) of
personal information to protect privacy when
handing this product over to anyone else or
disposing of it. Mitsubishi Motors will in no
way be held responsible.
Mitsubishi Motors will in no way be held
responsible for any collateral losses (loss
of business profits, alteration or loss of
recorded data) resulting from the usage or
inability to use this product. Please be aware that the map displayed
is from when the data was prepared, so
it may differ from current conditions. Also,
Mitsubishi Motors will in no way be held
responsible for any losses resulting from
map data inadequacies.
This product contains data on traffic
regulations, but due to changes in traffic
rules, this data may differ from the actual
traffic rules. Always obey the actual traffic
regulations. Also, Mitsubishi Motors will in
no way be held responsible for any losses
resulting from traffic accidents or traffic
rule violations due to traffic regulation data
inadequacies.
Returns, refunds, exchange, or conversion
for reasons of map data inadequacy or the
like are not possible. There may be times
when the map data does not match the
specific objective of the user. The contents
of the map data are subject to change
without notice. The map data may contain
wrong or missing characters, incorrect
locations etc.
The rule guidance and audio guidance,
for example when to turn, may sometimes
differ from the actual traffic signs or traffic
regulations. Always obey the actual traffic
signs and actual traffic regulations.
For the purpose of product improvement,
specifications and external appearance
may be subject to change without advance
notice. Accordingly, while the contents
of the User Manual may differ, please be
aware that returns, refunds, exchange, or
conversion are not possible. This User Manual explains details for
multiple vehicle models together. Depending
on the vehicle model, there may be
functions that may be described but not
available, or requirements for separately
purchased-products. Thank you for your
understanding.
Images and illustrations used in the
User Manual are either those used in
development, or used for explanations.
Please be aware that these may differ from
the actual images and illustrations used in
the product.
Please be aware that Mitsubishi Motors,
including after-sales service departments,
will in no way be held responsible for any
losses or detriment resulting from alteration
or loss of any information stored in this
product, including customer registration
information.
Before Use
205-0010-00_QY-7375M-A_EN.indb 6205-0010-00_QY-7375M-A_EN.indb 63/12/2013 9:57:13 AM3/12/2013 9:57:13 AM
Page 59 of 135

59
4. OFF-ROAD
NAVIGATION
When first started, MMES calculates routes
using the road network of the high quality
vector maps provided with the product. You
can switch the application to off-road mode
in Navigation settings in one of the following
ways:
From the Main menu, tap ,
, and then
.
From the Map screen, tap ,
and then
.
Most of the procedures described for on-road
navigation also apply to off-road navigation.
However, there are some that are not
available in this navigation mode (for example
you cannot open the itinerary as you have no
maneuvers just route points and straight lines
between them).
Selecting the destination
of the route
Selecting the start point or a destination
(waypoint or final destination) is the same as
described at on-road navigation. The only
difference is that route points are linked to
form a route with straight lines regardless of
the road network and traffic regulations.
Navigating in off-road
mode
The real difference between the on-road and
off-road modes is the navigation itself. When
you are on the Map screen with an off-road
route:
your position and heading is not aligned
with the nearest road and
there is no turn by turn navigation just a
recommended direction.
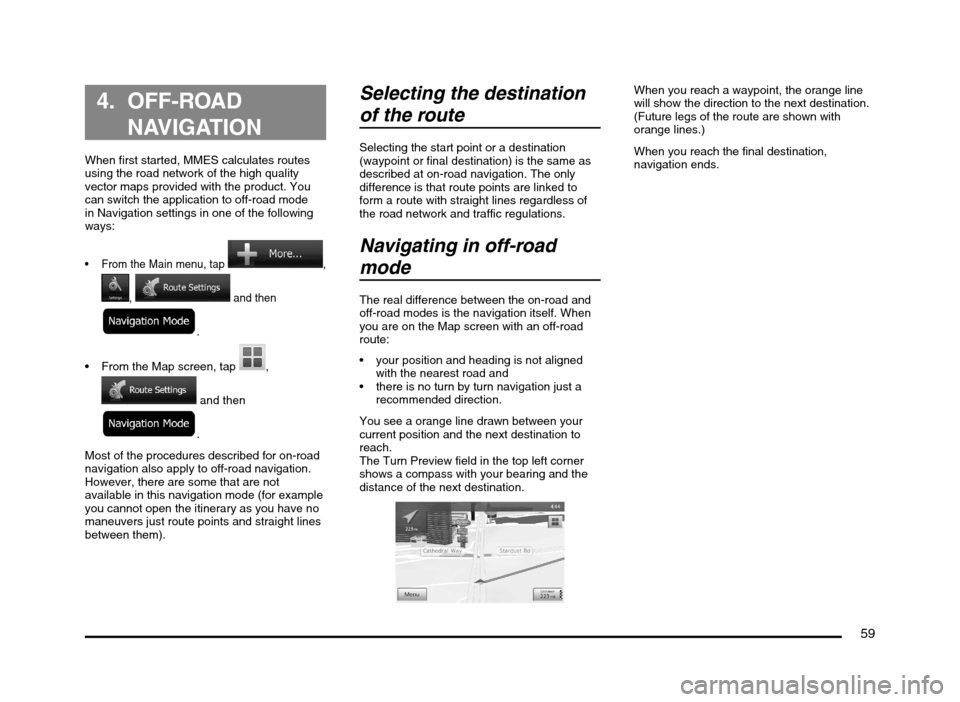
You see a orange line drawn between your
current position and the next destination to
reach.
The Turn Preview field in the top left corner
shows a compass with your bearing and the
distance of the next destination.
When you reach a waypoint, the orange line
will show the direction to the next destination.
(Future legs of the route are shown with
orange lines.)
When you reach the final destination,
navigation ends.
205-0010-00_QY-7375M-A_EN.indb 59205-0010-00_QY-7375M-A_EN.indb 593/12/2013 9:57:23 AM3/12/2013 9:57:23 AM
Page 63 of 135

63
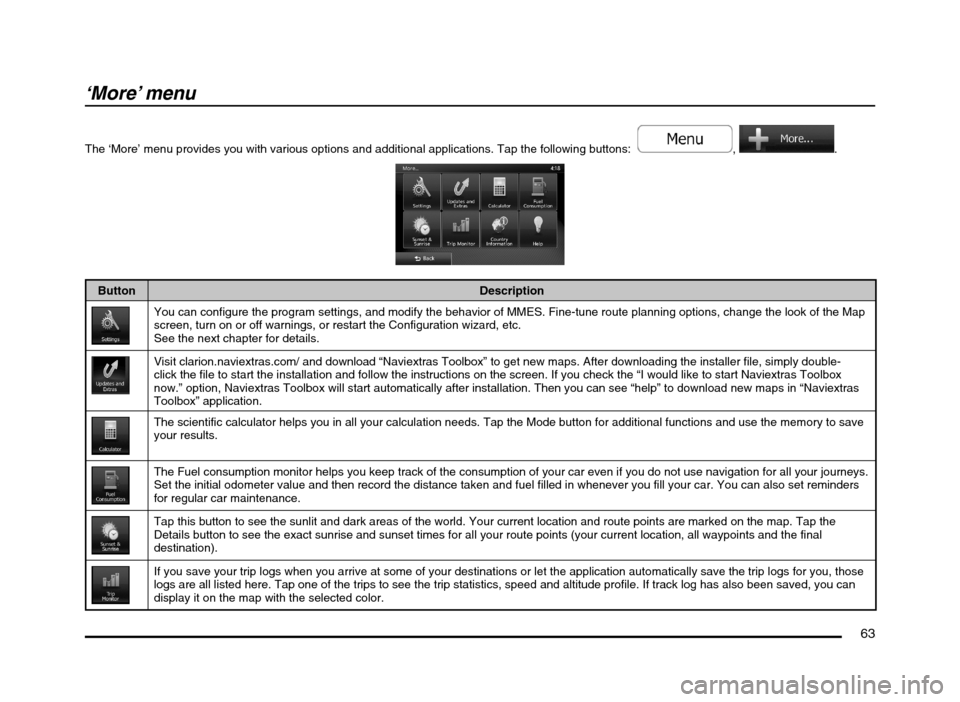
‘More’ menu
The ‘More’ menu provides you with various options and additional applications. Tap the following buttons: , .
Button Description
You can configure the program settings, and modify the behavior of MMES. Fine-tune route planning options, change the look of the Map
screen, turn on or off warnings, or restart the Configuration wizard, etc.
See the next chapter for details.
Visit clarion.naviextras.com/ and download “Naviextras Toolbox” to get new maps. After downloading the installer file, simply double-
click the file to start the installation and follow the instructions on the screen. If you check the “I would like to start Naviextras Toolbox
now.” option, Naviextras Toolbox will start automatically after installation. Then you can see “help” to download new maps in “Naviextras
Toolbox” application.
The scientific calculator helps you in all your calculation needs. Tap the Mode button for additional functions and use the memory to save
your results.
The Fuel consumption monitor helps you keep track of the consumption of your car even if you do not use navigation for all your journeys.
Set the initial odometer value and then record the distance taken and fuel filled in whenever you fill your car. You can also set reminders
for regular car maintenance.
Tap this button to see the sunlit and dark areas of the world. Your current location and route points are marked on the map. Tap the
Details button to see the exact sunrise and sunset times for all your route points (your current location, all waypoints and the final
destination).
If you save your trip logs when you arrive at some of your destinations or let the application automatically save the trip logs for you, those
logs are all listed here. Tap one of the trips to see the trip statistics, speed and altitude profile. If track log has also been saved, you can
display it on the map with the selected color.
205-0010-00_QY-7375M-A_EN.indb 63205-0010-00_QY-7375M-A_EN.indb 633/12/2013 9:57:24 AM3/12/2013 9:57:24 AM
Page 91 of 135

91
10. CONTROLS
CAUTION
When not updating the map data, do not
remove the map SD memory card. If you
remove the map SD memory card, the
unit will not start.
When removing the SD memory card
to update the map data, make sure the
vehicle is set to ACC-OFF.
Do not edit any data on the map SD
memory card or connect the map SD
memory card to a personal computer,
etc. This may cause errors.
lOperation panel
12 3 4
56
789
lWith the operation panel open
!
@ 0
Functions of Buttons
Note:
Be sure to read this section while referring to
the front diagram.
If your car has a rheostat feature, you can
adjust the button illumination level.
1 [AV] button
Press this button to display/hide the
Source screen to switch the source
mode.
2 [{], [}] (Volume) buttons
Use these buttons to increase/decrease
the volume.
3 [], [] (TUNE/TRACK) buttons
In Tuner mode, press these buttons
to seek up/down by 1 step. Press and
hold these buttons to seek a station
automatically.
In DVD, Audio CD, MP3/WMA/AAC,
SD memory card, USB memory, iPod
®,
and Bluetooth Audio modes, use these
buttons to select a track to be played.
In DVD, Audio CD, MP3/WMA/AAC,
SD memory card, USB memory, iPod,
and Bluetooth Audio modes, pressing
and holding a button during playback
performs the fast-forward/fast-backward
operation.
4 [MAP] button
Press this button to display the Map
screen of the current location in any
mode.
When the destination is set, keep
pressing this button for more than
about 1.5 seconds to check the current
guidance message.
5 [POWER] button
Press this button to turn on/off the audio
features of this unit.
Press and hold this button to turn off the
display.
6 Microphone
The built-in microphone is for a Bluetooth
telephone.
Note:
Do not put a pointed object into the hole
of the microphone. This may damage the
microphone.
7 [OPEN/TILT] button
Use this button to open/close the
operation panel.
8 [DEST] button
Press this button to display the
Destination Menu screen in any mode.
Keep pressing this button for more than
about 1.5 seconds to display the Go
Home screen in any mode.
9 [MENU] button
Press this button to display the Main
Menu screen in any mode.
0 Disc slot Insert a DVD Video, CD, or disc with MP3/
WMA/AAC files into the unit to play it.
! SD memory card slot
Insert an SD memory card with MP3/
WMA/AAC files into the unit to play them.
@ Map SD memory card slot
This card slot is used for an SD memory
card with map data.
205-0010-00_QY-7375M-A_EN.indb 91205-0010-00_QY-7375M-A_EN.indb 913/12/2013 9:57:26 AM3/12/2013 9:57:26 AM
Page 101 of 135

101
Media and Device
Operations
q
Inserting/Ejecting a Disc
Notes on handling discs
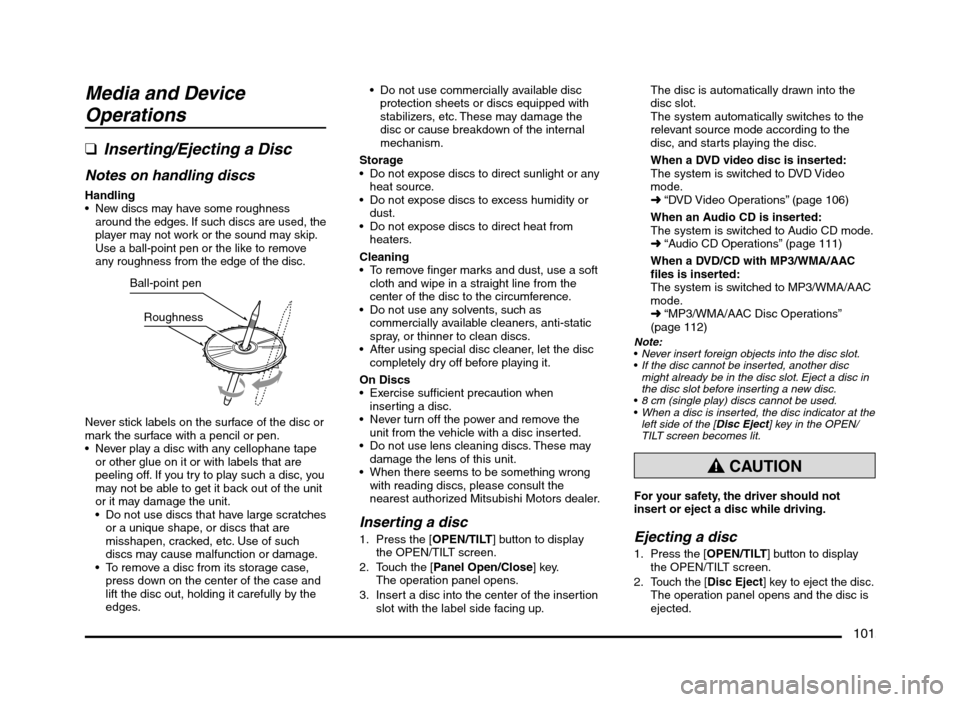
Handling New discs may have some roughness
around the edges. If such discs are used, the
player may not work or the sound may skip.
Use a ball-point pen or the like to remove
any roughness from the edge of the disc.
Ball-point pen
Roughness
Never stick labels on the surface of the disc or
mark the surface with a pencil or pen.
Never play a disc with any cellophane tape
or other glue on it or with labels that are
peeling off. If you try to play such a disc, you
may not be able to get it back out of the unit
or it may damage the unit.
Do not use discs that have large scratches
or a unique shape, or discs that are
misshapen, cracked, etc. Use of such
discs may cause malfunction or damage.
To remove a disc from its storage case,
press down on the center of the case and
lift the disc out, holding it carefully by the
edges. Do not use commercially available disc
protection sheets or discs equipped with
stabilizers, etc. These may damage the
disc or cause breakdown of the internal
mechanism.
Storage
Do not expose discs to direct sunlight or any
heat source.
Do not expose discs to excess humidity or
dust.
Do not expose discs to direct heat from
heaters.
Cleaning
To remove finger marks and dust, use a soft
cloth and wipe in a straight line from the
center of the disc to the circumference.
Do not use any solvents, such as
commercially available cleaners, anti-static
spray, or thinner to clean discs.
After using special disc cleaner, let the disc
completely dry off before playing it.
On Discs
Exercise sufficient precaution when
inserting a disc.
Never turn off the power and remove the
unit from the vehicle with a disc inserted.
Do not use lens cleaning discs. These may
damage the lens of this unit.
When there seems to be something wrong
with reading discs, please consult the
nearest authorized Mitsubishi Motors dealer.
Inserting a disc
1. Press the [OPEN/TILT] button to display
the OPEN/TILT screen.
2. Touch the [Panel Open/Close] key.
The operation panel opens.
3. Insert a disc into the center of the insertion
slot with the label side facing up.The disc is automatically drawn into the
disc slot.
The system automatically switches to the
relevant source mode according to the
disc, and starts playing the disc.
When a DVD video disc is inserted:
The system is switched to DVD Video
mode.
É “DVD Video Operations” (page 106)
When an Audio CD is inserted:
The system is switched to Audio CD mode.
É “Audio CD Operations” (page 111)
When a DVD/CD with MP3/WMA/AAC
files is inserted:
The system is switched to MP3/WMA/AAC
mode.
É “MP3/WMA/AAC Disc Operations”
(page 112)
Note:
Never insert foreign objects into the disc slot.
If the disc cannot be inserted, another disc
might already be in the disc slot. Eject a disc in
the disc slot before inserting a new disc.
8 cm (single play) discs cannot be used.
When a disc is inserted, the disc indicator at the
left side of the [Disc Eject] key in the OPEN/
TILT screen becomes lit.
CAUTION
For your safety, the driver should not
insert or eject a disc while driving.
Ejecting a disc
1. Press the [OPEN/TILT] button to display
the OPEN/TILT screen.
2. Touch the [Disc Eject] key to eject the disc.The operation panel opens and the disc is
ejected.
205-0010-00_QY-7375M-A_EN.indb 101205-0010-00_QY-7375M-A_EN.indb 1013/12/2013 9:57:27 AM3/12/2013 9:57:27 AM
Page 102 of 135
![MITSUBISHI MIRAGE 2014 6.G MMCS Manual 102
If a disc is left in the ejected position for
20 seconds, the disc is automatically
reloaded (Auto reload).
3. Remove the disc carefully.
4. Touch the [Panel Open/Close] key to close
the ope MITSUBISHI MIRAGE 2014 6.G MMCS Manual 102
If a disc is left in the ejected position for
20 seconds, the disc is automatically
reloaded (Auto reload).
3. Remove the disc carefully.
4. Touch the [Panel Open/Close] key to close
the ope](/manual-img/19/7509/w960_7509-101.png)
102
If a disc is left in the ejected position for
20 seconds, the disc is automatically
reloaded (Auto reload).
3. Remove the disc carefully.
4. Touch the [Panel Open/Close] key to close
the operation panel.
Note:
You can eject a disc by pressing and holding
the [OPEN/TILT] button.
If you force a disc into the insertion slot before
auto reloading, this can damage the disc.
q
Inserting/Removing an SD
Memory Card
In this system, SD memory cards are used for
playing MP3/WMA/AAC files.
É “SD Memory Card/USB Memory
Operations” (page 115)
Note:
This device supports SD memory cards, SDHC
memory cards (32GB or less), miniSD memory
cards*, and microSD memory cards*.
* A special adapter is required. If you insert this
memory card into the unit without an adapter,
you may be unable to remove it, and the unit
may become damaged.
Only use SD memory cards that conform to the
SD memory card standard.
Media that is not compatible with SD memory
cards is not supported.
SDXC memory cards are not supported.
Do not leave a miniSD adapter or microSD
adapter inside the unit.
Inserting an SD memory card
CAUTION
For your safety, the driver should not
insert or remove an SD memory card.
Do not turn off your vehicle or remove an
SD memory card while accessing a file
from the SD memory card.
1. Press the [OPEN/TILT] button to display
the OPEN/TILT screen.
2. Touch the [Panel Open/Close] key.
The operation panel opens.
3. Insert an SD memory card into the SD
memory card slot with the label side facing
up and the connectors facing forward. You
will hear a “click” when the SD memory
card is fully inserted.
It may take a long time to recognise the
inserted card.
Note:
If SD memory card mode is already selected,
the system automatically starts playing the files
on the card.
Never insert foreign objects into the SD memory
card slot.
If the SD memory card cannot be inserted,
another SD memory card might already be in
the SD memory card slot. Eject the SD memory
card from the SD memory card slot before
inserting a new SD memory card.
Removing an SD memory card
CAUTION
For your safety, the driver should not
insert or remove an SD memory card while
driving.1. Press the [OPEN/TILT] button to display
the OPEN/TILT screen.
2. Touch the [Panel Open/Close] key.
The operation panel opens.
3. Lightly press the SD memory card inward
with your finger until it stops, and then pull
back your finger. The SD memory card
comes out.
4. Remove the SD memory card carefully.
5. Touch the [Panel Open/Close] key to close
the operation panel.
q
Connecting/Disconnecting a
USB Memory
A USB memory can be used for playing MP3/
WMA/AAC files with this system.
É “SD Memory Card/USB Memory
Operations” (page 115)
To connect your USB memory to this unit, use
a USB cable (if so equipped).
For details, consult your Mitsubishi Motors dealer.Note:
This device supports USB 2.0/1.1.
Connecting a USB memory
CAUTION
For your safety, the driver should not
connect or disconnect a USB memory.
Do not turn off your vehicle or
disconnect a USB memory while
accessing a file from the USB memory.
1. Turn on the power of your USB memory, if
it has a power supply.
2. Confirm the orientation of the connectors,
and connect the USB memory to the USB
connector of this unit.
205-0010-00_QY-7375M-A_EN.indb 102205-0010-00_QY-7375M-A_EN.indb 1023/12/2013 9:57:27 AM3/12/2013 9:57:27 AM
Page 103 of 135

103
It may take a long time to recognise the
connected device.
Note:
If USB memory mode is already selected, the
system switches to the relevant source media
mode, and playback starts.
Never insert unrelated objects into the USB
connector.
Always insert the USB memory fully into the
connector. Incomplete connections may cause
the device not to be recognised.
Disconnecting a USB memory
CAUTION
For your safety, the driver should not
connect or disconnect a USB memory.
Do not turn off your vehicle or disconnect
a USB memory while accessing a file from
the USB memory. Before disconnecting
the USB memory, change to a source
mode other than USB memory mode,
press the [POWER] button, or press the
[AV] button and touch the [Audio OFF] key.
1. Confirm that data is not being transferred
to or from the USB memory.
For how to confirm this, refer to the
operation manual of your USB memory.
2. Remove the USB memory from the USB
connector.
Note:
When turning on the ACC power with no USB
memory connected, “No USB memory.” may
be displayed on the screen if USB memory
mode is selected.
qConnecting/Disconnecting
an iPod
An iPod can be used for playing audio data
with this system.
É “iPod Operations” (page 117)
To connect your iPod to this unit, use a USB
cable (if so equipped).
For details, consult your Mitsubishi Motors
dealer.
Connecting an iPod
CAUTION
For your safety, the driver should not
connect or disconnect an iPod.
Do not turn off your vehicle or disconnect
an iPod while accessing a file from the iPod.
1. Turn on the power of your iPod.
2. Confirm the orientation of the connectors,
and connect the iPod to the USB cable.
It may take a long time to recognise the
iPod.
Note:
If iPod mode is already selected, the system
switches to the relevant source media mode,
and playback starts.
Never insert unrelated objects into the iPod
USB connector.
Always insert the cable connector fully into the
iPod. Incomplete connections may cause the
iPod not to be recognised.
Disconnecting an iPod
CAUTION
For your safety, the driver should not
connect or disconnect an iPod.
Do not turn off your vehicle or
disconnect an iPod while accessing a
file from the iPod. Before disconnecting
the iPod, change to a source mode other
than iPod mode, press the [POWER]
button, or press the [AV] button and
touch the [Audio OFF] key.
1. Confirm that data is not being transferred
to or from the iPod.
For how to confirm this, refer to the
operation manual of your iPod.
2. Remove the iPod from the iPod USB
connector.
Note:
When turning on the ACC power with no
iPod connected, “No USB memory.” may
be displayed on the screen if iPod mode is
selected.
Steering Wheel Audio
Remote Control Operations
You can use the Steering Wheel Audio
Remote Control (if so equipped) to perform
various audio operations.
These operations can be used only when your
vehicle is equipped with a Steering Wheel
Audio Remote Control.
Note:
While driving, be sure that audio control
operations do not interfere with your driving.
205-0010-00_QY-7375M-A_EN.indb 103205-0010-00_QY-7375M-A_EN.indb 1033/12/2013 9:57:27 AM3/12/2013 9:57:27 AM
Page 105 of 135

105
C: This position is approximately 1 m from the
rear of the vehicle.
D: This position is approximately 50 cm from
the rear of the vehicle.
E: This position is approximately aligned with
the position directly below the vehicle’s rear
bumper.
F: These positions are approximately 20 cm
from the sides of the vehicle.
qAdjusting the video of the
Rear View Camera
Note:
Adjustments can only be made when the gear
lever is set to the reverse position.
1. Touch the screen while video from the
Rear View Camera is being displayed.
2. Touch the [Display Adj.] key.
Display settings are the same as those for
a DVD/CD.
3. Touch the key for the item you want to
adjust.
To adjust the brightness, touch the
[Brightness] key.
To adjust the lightness, touch the [Tint]
key.
To adjust the color, touch the [Color] key.
To adjust the black level, touch the
[Black Level] key.
4. To increase the setting, touch the [+] key.
To decrease the setting, touch the [–] key.
12. SOURCE
OPERATIONS
Radio Operations
This unit supports FM and AM radio reception.
This unit also has a built-in “Radio Broadcast
Data System” (RBDS) decoder system that
supports broadcast stations transmitting
Radio Broadcast Data System data.
Radio Broadcast Data System functions are
only available for the FM band.
Note:
When you store a station without broadcasting
Radio Broadcast Data System data to the
preset memory, store the station after receiving
it for more than 10 seconds. If you store such a
station within 10 seconds, it will be stored as an
Radio Broadcast Data System station, and the
Radio Broadcast Data System tracking function
will activate when you tune in.
q
Selecting Tuner mode
1. Press the [AV] button to display the Source
screen.
2. Touch the [FM/AM] key to select Tuner
mode.
The Tuner mode screen is displayed.
You can also select Tuner mode by
using the Steering Wheel Audio Remote
Control (if so equipped).
É “Steering Wheel Audio Remote
Control Operations” (page 103)
12
4
3
1 Information pane
2 Preset keys
3 Current frequency
4 Operation keys
When station names and PTY (Program
Type) of the currently tuned station are
received, they are displayed on the
information pane.
“Stereo” appears when a stereo broadcast
is detected.
“Scan” appears when scanning stations.
q
Radio operations
Listening to the radio
1. Touch the [FM/AM] key to select the radio
band.
Each time you touch this key, the radio
reception band changes in the following order:
É FM2 É AM É FM1…
The current radio reception band is
indicated at the top of the display.
2. Touch the desired Preset key on the Preset
key pane to tune in the preset station.
205-0010-00_QY-7375M-A_EN.indb 105205-0010-00_QY-7375M-A_EN.indb 1053/12/2013 9:57:27 AM3/12/2013 9:57:27 AM