2014 MINI Paceman display
[x] Cancel search: displayPage 23 of 282

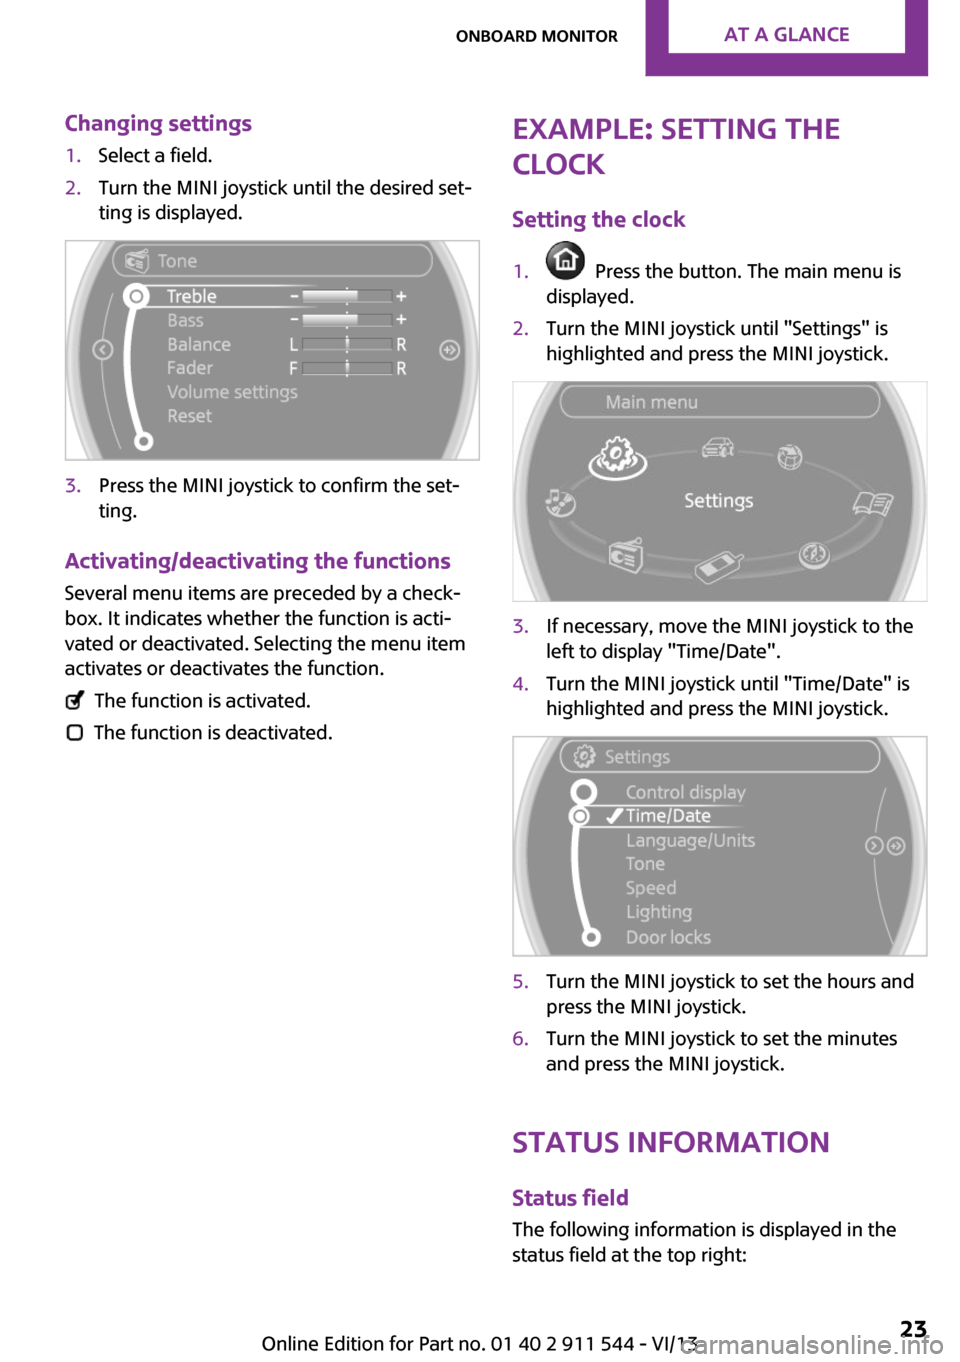
Changing settings1.Select a field.2.Turn the MINI joystick until the desired set‐
ting is displayed.3.Press the MINI joystick to confirm the set‐
ting.
Activating/deactivating the functions
Several menu items are preceded by a check‐box. It indicates whether the function is acti‐
vated or deactivated. Selecting the menu item
activates or deactivates the function.
The function is activated.
The function is deactivated.
Example: setting the
clock
Setting the clock1. Press the button. The main menu is
displayed.2.Turn the MINI joystick until "Settings" is
highlighted and press the MINI joystick.3.If necessary, move the MINI joystick to the
left to display "Time/Date".4.Turn the MINI joystick until "Time/Date" is
highlighted and press the MINI joystick.5.Turn the MINI joystick to set the hours and
press the MINI joystick.6.Turn the MINI joystick to set the minutes
and press the MINI joystick.
Status information
Status fieldThe following information is displayed in the
status field at the top right:
Seite 23Onboard monitorAt a glance23
Online Edition for Part no. 01 40 2 911 544 - VI/13
Page 25 of 282

SymbolFunction Enter the letters. Enter the numbers.
Switching between upper and lower
case letters
Depending on the menu, you can switch be‐tween entering uppercase and lowercase let‐
ters.
SymbolFunction Move the MINI joystick forward:
switch from upper to lower case
letters. Move the MINI joystick forward:
switch from lower to upper case
letters.
Entry comparison
Entry of names and addresses: the selection is
narrowed down every time a letter is entered
and letters may be added automatically.
The entries are continuously compared to the
data stored in the vehicle.
▷Only those letters are offered during the
entry for which data is available.▷Destination search: town/city names can be
entered using the spelling of language
available on the Control Display.Seite 25Onboard monitorAt a glance25
Online Edition for Part no. 01 40 2 911 544 - VI/13
Page 26 of 282

Voice activation systemVehicle equipment
This chapter describes all series equipment as
well as country-specific and special equipment
offered for this model series.Therefore, it also
describes equipment that may not be found in
your vehicle, for instance due to the selected
special equipment or the country version. This
also applies to safety-related functions and sys‐
tems.
The concept▷Most functions that are displayed on the
Control Display can be operated with the
voice activation system using spoken com‐
mands. The system prompts you to make
your entries.▷Functions that can only be used when the
vehicle is stationary cannot be operated us‐
ing the voice activation system.▷The system uses a special microphone in
the headliner on the driver's side.▷›...‹ Verbal instructions in the Owner's
Manual to use with the voice activation sys‐
tem.
Requirements
Via the Control Display, set a language that is
also supported by the voice activation system
so that the spoken commands can be identi‐
fied.
Set the language, refer to page 73.
Using voice activation
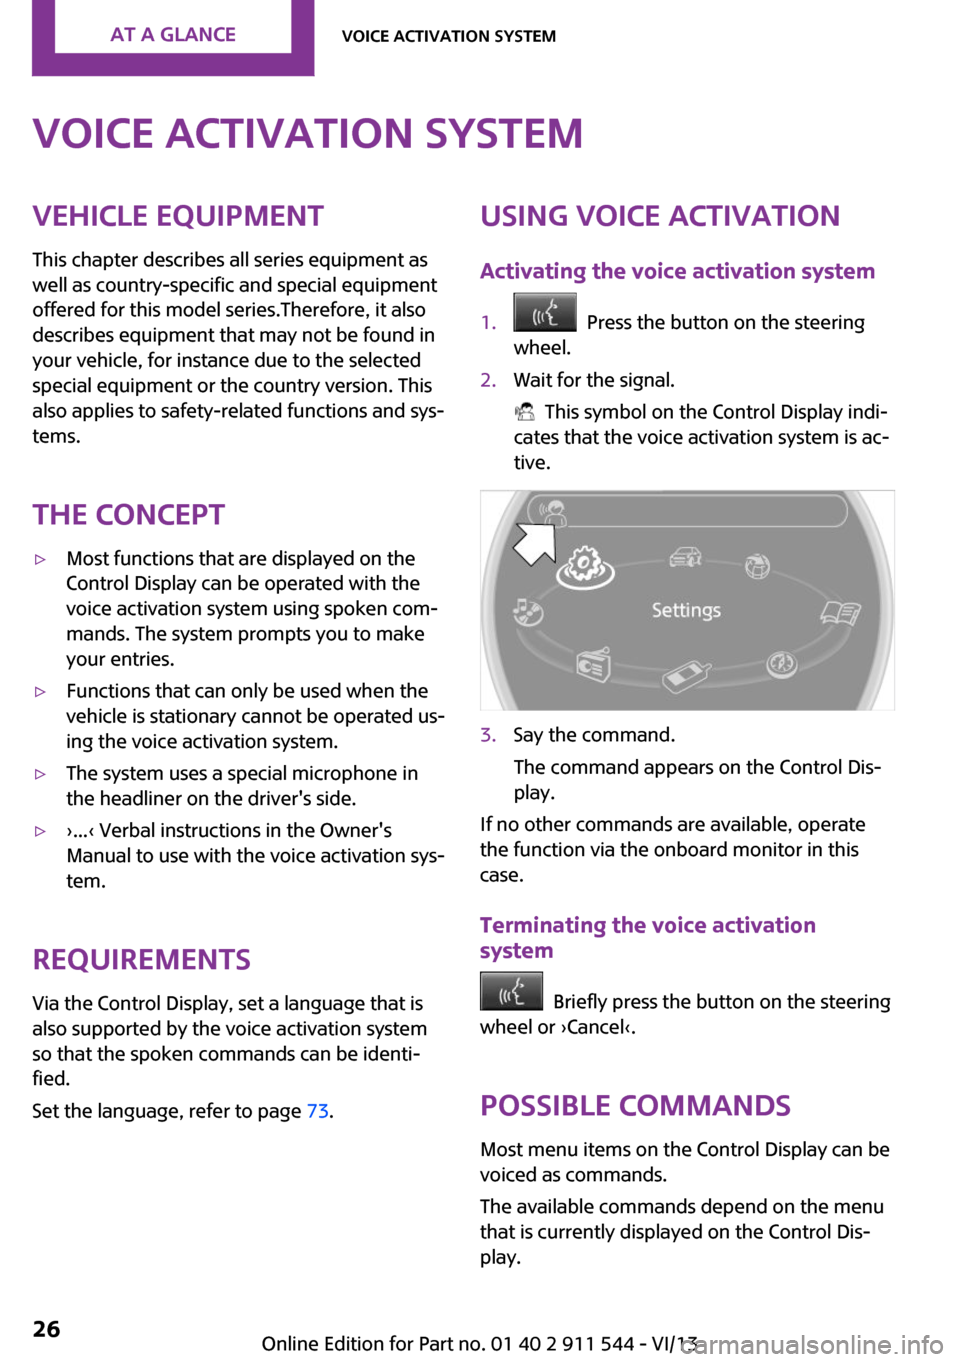
Activating the voice activation system1. Press the button on the steering
wheel.2.Wait for the signal.
This symbol on the Control Display indi‐
cates that the voice activation system is ac‐
tive.
3.Say the command.
The command appears on the Control Dis‐
play.
If no other commands are available, operate
the function via the onboard monitor in this
case.
Terminating the voice activation
system
Briefly press the button on the steering
wheel or ›Cancel‹.
Possible commands
Most menu items on the Control Display can be
voiced as commands.
The available commands depend on the menu
that is currently displayed on the Control Dis‐
play.
Seite 26At a glanceVoice activation system26
Online Edition for Part no. 01 40 2 911 544 - VI/13
Page 27 of 282

The functions of the main menu have short
commands.
Some list items, such as the phone book en‐
tries, can also be selected via the voice activa‐
tion system. Say the list items exactly as they
are displayed on the list.
Having possible commands read aloud
You can have the system read possible com‐
mands aloud: ›Voice commands‹.
For example, if the "CD" menu is displayed, the
commands for the operating the CD player are
read out loud.
Executing functions using short
commands
Functions on the main menu can be performeddirectly by means of short commands, usually
irrespective of which menu item is currently se‐
lected, for instance ›Vehicle status‹.
List of short commands of the voice activation
system, refer to page 264.
Help dialog for the voice activation
system
Calling up help dialog: ›Help‹
Additional commands for the help dialog:▷›Help with examples‹: information about the current operating options and the most
important commands for them are an‐
nounced.▷›Help with voice activation‹: information
about the principle of operation for the
voice activation system is announced.Example: playing back a
CD
Via the main menu
The commands of the menu items are spoken
out loud, in the same way as they are selected
via the MINI joystick.1.Switch on the Entertainment sound output
if necessary.2. Press the button on the steering
wheel.3.›C D and multimedia‹
The medium last played is played back.4.›C D‹5.›C D drive‹
The CD is played back.6. Press the button on the steering
wheel again to select a specific track.7.›Track ...‹ e.g., CD track 4.
Via short commands
Playback of the CD can also be started using a
short command.
1.Switch on the Entertainment sound output
if necessary.2. Press the button on the steering
wheel.3.›C D drive Track ...‹ e.g., CD track 4.
Setting the voice dialog
You can set whether the system should use the
standard dialog or a shorter version.
In the shorter variant of the voice dialog, the
announcements from the system are issued in
an abbreviated form.
Seite 27Voice activation systemAt a glance27
Online Edition for Part no. 01 40 2 911 544 - VI/13
Page 28 of 282

On the Control Display:1."Settings"2."Language/Units"3."Speech mode:"4.Select the setting.
Adjusting the volumeTurn the volume knob while giving an instruc‐
tion until the desired volume is set.
▷The volume remains constant even if the
volume of other audio sources is changed.▷The volume is stored for the remote control
currently in use.
Notes on Emergency Re‐
quests
Do not use the voice activation system to ini‐
tiate an Emergency Request. In stressful situa‐
tions, the voice and vocal pitch can change.
This can unnecessarily delay the establishment
of a telephone connection.
Environmental condi‐
tions
▷Say the commands, numbers, and letters
smoothly and with normal volume, empha‐
sis, and speed.▷Always say commands in the language of
the voice activation system.▷Avoid making other noise in the vehicle
while speaking.Seite 28At a glanceVoice activation system28
Online Edition for Part no. 01 40 2 911 544 - VI/13
Page 33 of 282

stored with it are called up and imple‐
mented.▷Your personal settings will be recognized
and called up again even if the vehicle has
been used in the meantime by someone
else with another remote control.▷The individual settings are stored for no
more than three remote controls.
Personal Profile settings
The following functions and settings can be
stored in a profile.
More information on the settings can be found
under:
▷Response of the central locking system
when the car is being unlocked, refer to
page 34.▷Automatic locking of the vehicle, refer to
page 37.▷Triple turn signal activation, refer to
page 61.▷Settings for the displays on the onboard
monitor, in the speedometer, and in the
tachometer:▷12h/24h clock format, refer to
page 72.▷Date format, refer to page 73.▷Brightness of the Control Display, refer
to page 74.▷Language on the Control Display, refer
to page 73.▷Units of measure for fuel consumption,
distance covered/remaining distances,
and temperature, refer to page 72.▷Light settings:▷Headlamp courtesy delay feature, refer
to page 79.▷Daytime running lights, refer to
page 79.▷Automatic climate control, refer to
page 101: AUTO program, activating/deac‐
tivating the cooling function, setting thetemperature, air volume, and air distribu‐
tion.▷Entertainment:▷Tone settings, refer to page 156.▷Volume, refer to page 156.
Central locking system
The concept
The central locking system becomes active
when the driver's door is closed.
The system simultaneously engages and re‐
leases the locks on the following:
▷Doors.▷Tailgate.▷Fuel filler flap.
Operating from the outside
▷Via the remote control.▷Via the door lock.▷In cars with Comfort Access, via the door
handles on the driver's and front passenger
sides.
The following takes place simultaneously when
locking/unlocking the vehicle via the remote
control:
▷Depending on the vehicle equipment, the
anti-theft protection is switched on and off
as well. The anti-theft protection makes it
impossible to unlock the doors using the
lock buttons or door handles.▷The welcome lamps, interior lamps, and
ambient lighting are switched on and off.▷The alarm system is armed or disarmed, re‐
fer to page 41.
Operating from the inside
Via the switch/button for the central locking
system, refer to page 36.
Seite 33Opening and closingControls33
Online Edition for Part no. 01 40 2 911 544 - VI/13
Page 40 of 282

When the door and tailgate are closed again
and the remote control is detected inside the
vehicle, the windows and the sunroof can be
operated again.
Insert the remote control into the ignition lock
to be able to operate the windows and the sun‐
roof while the engine is switched off and the
doors are open.
Switching on the radio ready state Press the Start/Stop button to switch on the
radio ready state, refer to page 58.
Do not depress the brake or the clutch; other‐
wise, the engine will start.
Starting the engine The engine can be started or the ignition can
be switched on, refer to page 58, when a re‐
mote control is inside the vehicle. It is not nec‐
essary to insert a remote control into the igni‐
tion lock.
Switching off the engine in cars with
automatic transmission
The engine can only be switched off with the
selector lever in position P, refer to page 65.
To switch off the engine with the selector lever
in position N, the remote control must be in‐
serted in the ignition lock.
Before driving a vehicle with automatic
transmission into a car wash1.Insert the remote control into the ignition
switch.2.Depress the brake pedal.3.Move the selector lever to position N.4.Switch the engine off.
The vehicle can roll.
Malfunction The Comfort Access functions can be disturbed
by local radio waves, such as by a mobile
phone in the immediate vicinity of the remote
control or when a mobile phone is being
charged in the vehicle.
If this occurs, open or close the vehicle using
the buttons on the remote control or use the
integrated key in the door lock.
To start the engine afterward, insert the remote
control into the ignition switch.
Warning lamps The warning lamp in the instrument
cluster lights up when you attempt to
start the engine: the engine cannot be
started.
The remote control is not in the vehicle or has a
malfunction. Take the remote control with you
inside the vehicle or have it checked. If neces‐
sary, insert another remote control into the ig‐
nition switch.
The warning lamp in the instrument
cluster lights up while the engine is run‐
ning: the remote control is no longer in‐
side the vehicle.
After switching off the engine, the engine can
only be started again within approx. 10 sec‐
onds if no door has been opened.
The indicator lamp lights up and a mes‐
sage appears on the Control Display: re‐
place the remote control battery.Seite 40ControlsOpening and closing40
Online Edition for Part no. 01 40 2 911 544 - VI/13
Page 50 of 282

Safety belt reminder for driver's seat
and front passenger seat
The indicator lamps light up and a sig‐
nal sounds. In addition, a message ap‐
pears on the Control Display. Check
whether the safety belt has been fas‐
tened correctly.
Damage to safety belts
In the case of strain caused by accidents or
damage:
Have the safety belts, including the safety belt
tensioners, replaced and have the belt anchors
checked.
Checking and replacing safety belts
Have the work performed only by your
service center; otherwise, it cannot be ensured
that this safety feature will function properly. ◀
Head restraints Correctly set head restraint
A correctly adjusted head restraint reduces the
risk of spinal injury in the event of an accident.
Adjusting the head restraint
Correctly adjust the head restraints of all
occupied seats; otherwise, there is an increased
risk of injury in an accident. ◀
Height Adjust the head restraint so that its center is
approx. at ear level.Height adjustment
To raise: pull.
To lower: press the button, arrow 1, and push
the head restraint down.
Removing
Only remove the head restraint if no one will be
sitting in the seat in question.
Before transporting passengers
Reinstall the head restraint before trans‐
porting anyone in the seat; otherwise, the pro‐
tective function of the head restraint is unavail‐
able. ◀
Front
1.Pull upward as far as possible.2.Fold the backrest back slightly.3.Press button 1 and pull out the head re‐
straint all the way to the stop.4.MINI Countryman: press the additional but‐
ton 2 using a suitable tool.5.Pull out the head restraint.6.Fold back the backrest.Seite 50ControlsAdjusting50
Online Edition for Part no. 01 40 2 911 544 - VI/13