2014 MERCEDES-BENZ SLS AMG GT ROADSTER trunk
[x] Cancel search: trunkPage 146 of 290

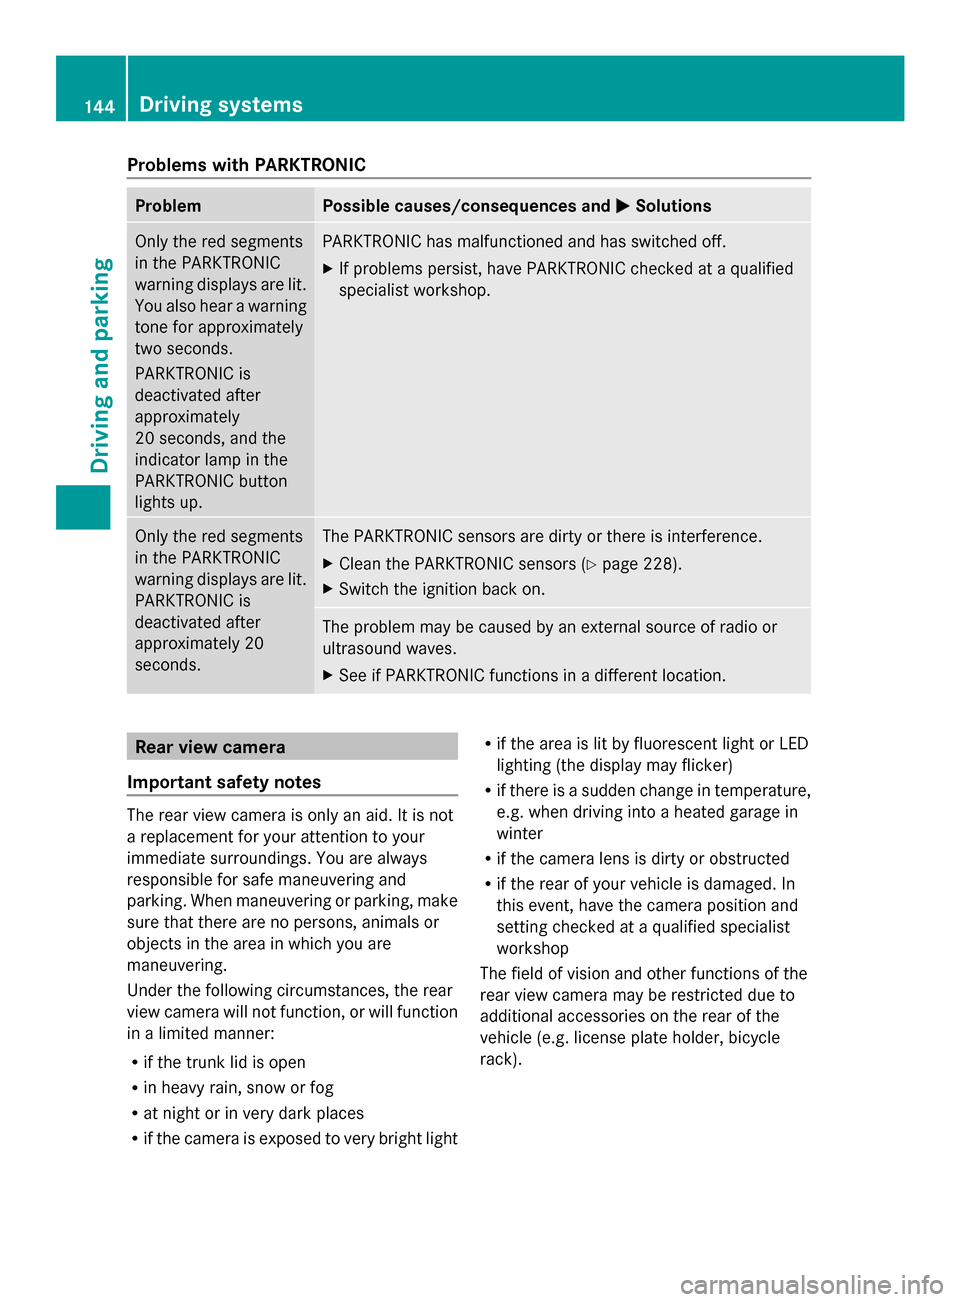
Problems with PARKTRONIC
Problem Possible causes/consequences and
0050
0050Solutions Only the red segments
in the PARKTRONIC
warning displays are lit.
You also hear a warning
tone for approximately
two seconds.
PARKTRONIC is
deactivated after
approximately
20 seconds, and the
indicator lamp in the
PARKTRONIC button
lights up. PARKTRONIC has malfunctioned and has switched off.
X
If problems persist, have PARKTRONIC checked at a qualified
specialist workshop. Only the red segments
in the PARKTRONIC
warning displays are lit.
PARKTRONIC is
deactivated after
approximately 20
seconds. The PARKTRONIC sensors are dirty or there is interference.
X
Clean the PARKTRONIC sensors (Y page 228).
X Switch the ignition back on. The problem may be caused by an external source of radio or
ultrasound waves.
X
See if PARKTRONIC functions in a different location. Rear view camera
Important safety notes The rear view camera is only an aid. It is not
a replacement for your attention to your
immediate surroundings. You are always
responsible for safe maneuvering and
parking. When maneuvering or parking, make
sure that there are no persons, animals or
objects in the area in which you are
maneuvering.
Under the following circumstances, the rear
view camera will not function, or will function
in a limited manner:
R if the trunk lid is open
R in heavy rain, snow or fog
R at night or in very dark places
R if the camera is exposed to very bright light R
if the area is lit by fluorescent light or LED
lighting (the display may flicker)
R if there is a sudden change in temperature,
e.g. when driving into a heated garage in
winter
R if the camera lens is dirty or obstructed
R if the rear of your vehicle is damaged. In
this event, have the camera position and
setting checked at a qualified specialist
workshop
The field of vision and other functions of the
rear view camera may be restricted due to
additional accessories on the rear of the
vehicle (e.g. license plate holder, bicycle
rack). 144
Driving systemsDriving and parking
Page 186 of 290

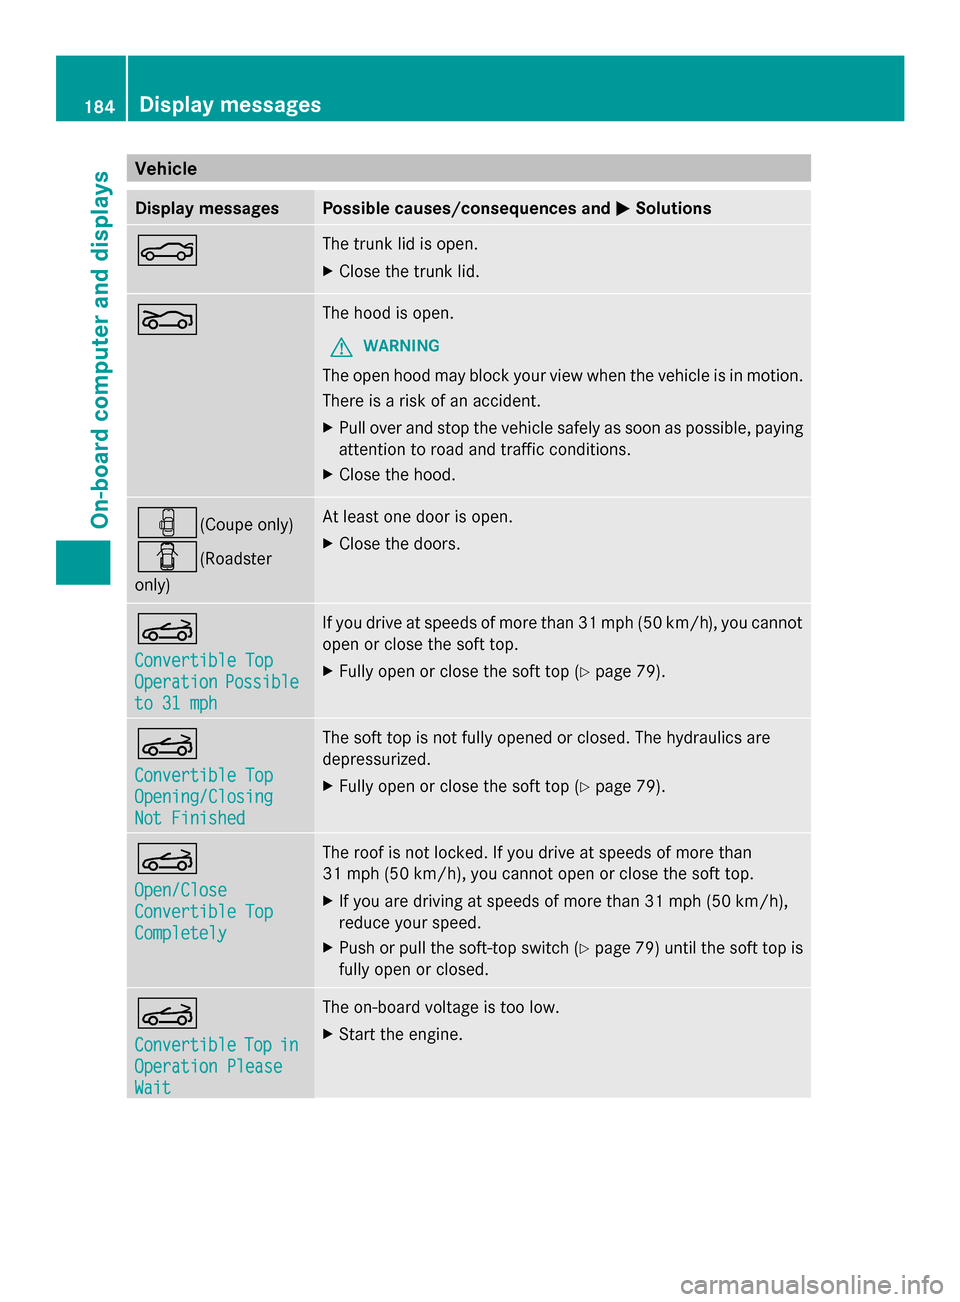
Vehicle
Display messages Possible causes/consequences and
0050
0050Solutions 0084 The trunk lid is open.
X
Close the trunk lid. 005A The hood is open.
G WARNING
The open hood may block your view when the vehicle is in motion.
There is a risk of an accident.
X Pull over and stop the vehicle safely as soon as possible, paying
attention to road and traffic conditions.
X Close the hood. 00B6(Coupe only)
0051(Roadster
only) At least one door is open.
X
Close the doors. 0059
Convertible Top Convertible Top
Operation Operation
Possible
Possible
to 31 mph
to 31 mph If you drive at speeds of more than 31 mph (50 km/h), you cannot
open or close the soft top.
X
Fully open or close the soft top (Y page 79).0059
Convertible Top Convertible Top
Opening/Closing Opening/Closing
Not Finished Not Finished The soft top is not fully opened or closed. The hydraulics are
depressurized.
X Fully open or close the soft top (Y page 79).0059
Open/Close Open/Close
Convertible Top Convertible Top
Completely Completely The roof is not locked. If you drive at speeds of more than
31 mph (50 km/h), you cannot open or close the soft top.
X
If you are driving at speeds of more than 31 mph (50 km/h),
reduce your speed.
X Push or pull the soft-top switch (Y page 79) until the soft top is
fully open or closed. 0059
Convertible Convertible
Top
Topin
in
Operation Please Operation Please
Wait Wait The on-board voltage is too low.
X Start the engine. 184
Display messagesOn-board computer and displays
Page 202 of 290

Useful information
i This Operator's Manual describes all
models and all standard and optional
equipment of your vehicle available at the
time of publication of the Operator's
Manual. Country-specific differences are
possible. Please note that your vehicle may
not be equipped with all features
described. This also applies to safety-
related systems and functions.
i Please read the information on qualified
specialist workshops (Y page 22).Stowage areas
Stowage space
Important safety notes G
WARNING
If you do not correctly store objects in the
vehicle interior, they can slip or be flung
around, thus striking vehicle occupants.
There is a risk of injury, especially when
braking or abruptly changing directions.
R Always store objects so that they cannot be
flung around in these or in similar
situations.
R Always make sure that objects do not
protrude from stowage compartments,
parcel nets or stowage nets.
R Close lockable stowage compartments
while driving.
R Stow and secure objects that are heavy,
hard, pointy, sharp-edged, fragile or too
large in the trunk. Glove box X
To open: pull handle 0043and open glove box
flap 0044.
X To close: fold glove box flap 0044upwards
until it engages.
The glove box can be locked and unlocked
using the mechanical key, e.g. when leaving
your vehicle at a workshop. X
To lock: insert the mechanical key into the
lock and turn it 90° clockwise to position
0048.
X To unlock: insert the mechanical key into
the lock and turn it 90° counter-clockwise
to position 0047.
i Roadster: the glove box can be locked
and unlocked centrally using the SmartKey
(Y page 62).
i Depending on the vehicle's equipment,
you will find an AUX IN jack or a Media
Interface installed in the glove box. A Media
Interface is a universal interface for
portable audio equipment, e.g. for an 200
Stowage areasStowage and features
Page 203 of 290

iPod
®
or USB device (see the separate
COMAND operating instructions).
i There is a 12 V power socket located in
the glove box.
Stowage compartment in the center
console X
To open: press down at the middle of the
marking on lid 0043.
X To close: fold down cover 0043.
i Depending on the equipment installed,
your vehicle is equipped with an ashtray or
a stowage compartment.
Stowage compartment under the
armrest X
To open: press button 0043on the left or right
and slide the armrest in the direction of the
arrow.
The armrest engages in two different
detents. i
Roadster: the stowage compartment can
be locked and unlocked centrally using the
SmartKey (Y page 62).
Stowage compartment in the rear
center console X
Press button 0043.
The stowage compartment opens.
i In the stowage compartment, you will find
the ignition lock (Y page 119)and the trunk
lid emergency release (Y page 74).
Stowage space on the rear wall
between the seats 0043
Ruffled pocket Stowage nets
There is a parcel net located in the front-
passenger footwell. Stowage areas
201Stowage an d features Z
Page 212 of 290

enforcement agency is informed of the
location of the vehicle.
i If the anti-theft alarm system is active for
longer than 30 seconds, mbrace
automatically informs the Mercedes-Benz
Customer Assistance Center. Rear spoiler
The rear spoiler improves the handling of the
vehicle. It adapts the vehicle's aerodynamics
to the operating conditions, dependent on the
speed of the vehicle. Example: Coupe
i
If the vehicle is equipped with AMG
adaptive sport suspension system, the
button is in the switch strip above the air
conditioning control panel.
Only use button 0043to extend and retract the
rear spoiler manually for cleaning.
Button 0043is not used to operate the rear
spoiler.
If you drive at speeds above 75 mph
(120 km/h), the rear spoiler extends
automatically. Button 0043flashes until the rear
spoiler has extended and then lights up in red.
If you drive at speeds above 50 mph
(80 km/h), the rear spoiler remains
extended. Button 0043remains lit in red.
If you drive at speeds below 50 mph
(80 km/h), the rear spoiler retracts
automatically. Button 0043flashes until the rear
spoiler has retracted and then goes out. Extending and retracting the rear
spoiler manually You can extend and retract the rear spoiler
manually for cleaning.
G
WARNING
Body parts could become trapped if you
manually retract the rear spoiler. There is a
risk of injury.
Make sure that nobody is within the range of
movement of the rear spoiler. Release the
switch immediately if somebody becomes
trapped. The rear spoiler then extends again.
When leaving the vehicle, always take the
SmartKey with you and lock the vehicle. Never
leave children unsupervised in the vehicle.
! Do not enter an automatic car wash with
the rear spoiler extended. Otherwise, the
rear spoiler may be damaged.
Only extend the rear spoiler in order to
clean it by hand. Retract it again when you
have finished cleaning it.
X Close the trunk lid.
X Select key position 2with the Start/Stop
button (Y page 119).
X To extend: press button 0043.
The rear spoiler is extended.
Button 0043flashes until the rear spoiler has
extended and then lights up in red.
X To retract: press and hold button 0043until
the rear spoiler is completely retracted.
Button 0043flashes until the rear spoiler has
retracted and then goes out.
Rear Spoiler retracts manually Rear Spoiler retracts manually
appears in the display.
i If you release button 0043while retracting
the rear spoiler, it extends again
automatically. 210
FeaturesStowage and features
Page 213 of 290

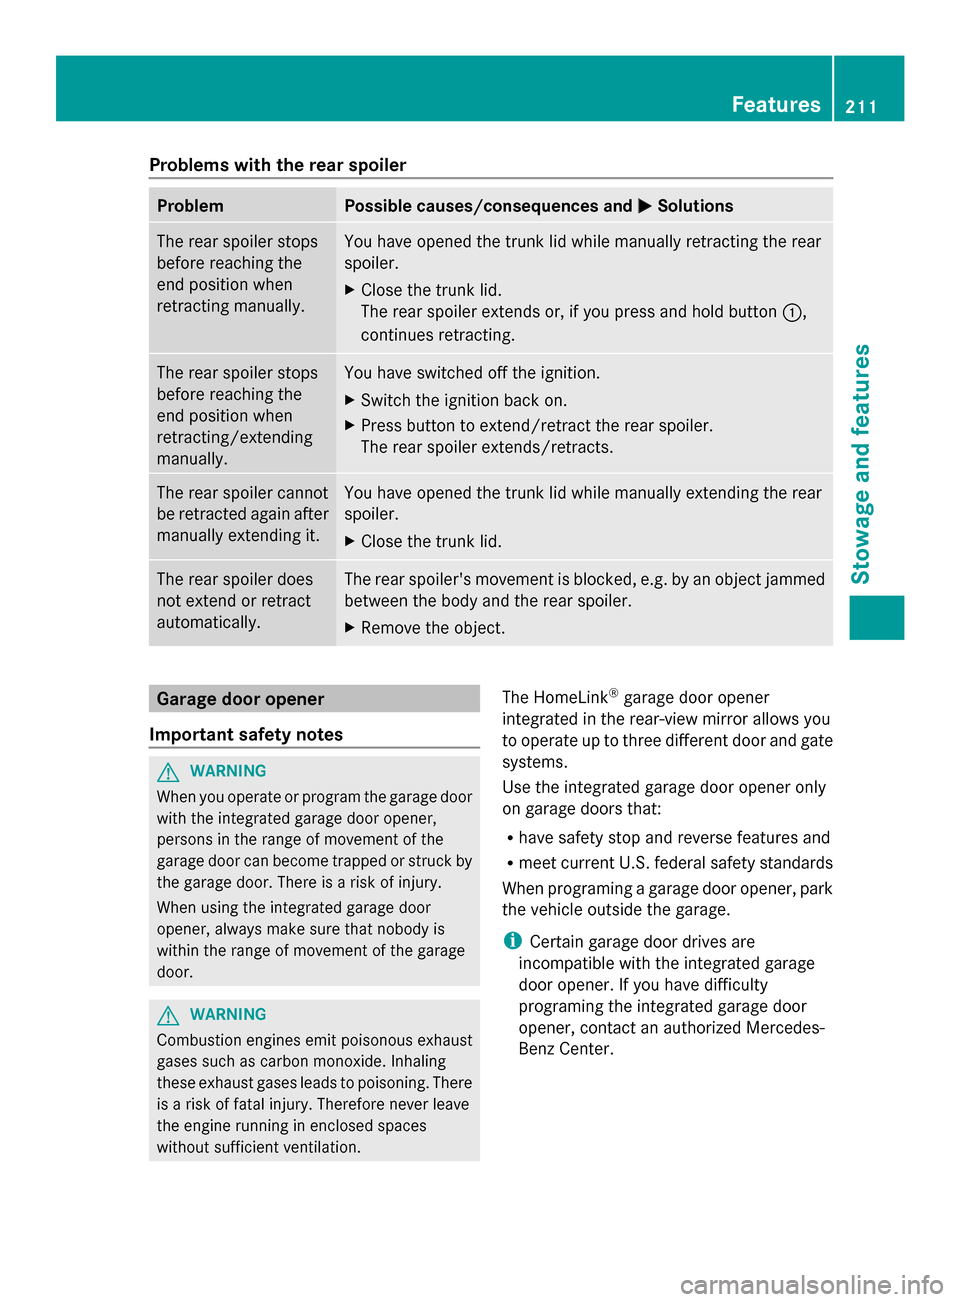
Problems with the rear spoiler
Problem Possible causes/consequences and
0050
0050Solutions The rear spoiler stops
before reaching the
end position when
retracting manually. You have opened the trunk lid while manually retracting the rear
spoiler.
X
Close the trunk lid.
The rear spoiler extends or, if you press and hold button 0043,
continues retracting. The rear spoiler stops
before reaching the
end position when
retracting/extending
manually. You have switched off the ignition.
X
Switch the ignition back on.
X Press button to extend/retract the rear spoiler.
The rear spoiler extends/retracts. The rear spoiler cannot
be retracted again after
manually extending it. You have opened the trunk lid while manually extending the rear
spoiler.
X
Close the trunk lid. The rear spoiler does
not extend or retract
automatically. The rear spoiler's movement is blocked, e.g. by an object jammed
between the body and the rear spoiler.
X
Remove the object. Garage door opener
Important safety notes G
WARNING
When you operate or program the garage door
with the integrated garage door opener,
persons in the range of movement of the
garage door can become trapped or struck by
the garage door. There is a risk of injury.
When using the integrated garage door
opener, always make sure that nobody is
within the range of movement of the garage
door. G
WARNING
Combustion engines emit poisonous exhaust
gases such as carbon monoxide. Inhaling
these exhaust gases leads to poisoning. There
is a risk of fatal injury. Therefore never leave
the engine running in enclosed spaces
without sufficient ventilation. The HomeLink
®
garage door opener
integrated in the rear-view mirror allows you
to operate up to three different door and gate
systems.
Use the integrated garage door opener only
on garage doors that:
R have safety stop and reverse features and
R meet current U.S. federal safety standards
When programing a garage door opener, park
the vehicle outside the garage.
i Certain garage door drives are
incompatible with the integrated garage
door opener. If you have difficulty
programing the integrated garage door
opener, contact an authorized Mercedes-
Benz Center. Features
211Stowage and features Z
Page 216 of 290

out). Press button
0084on remote control
0083 again before transmission ends.
R Align the antenna cable of the garage door
opener unit. This can improve signal
reception/transmission.
Opening/closing the garage door Once programed, the integrated garage door
opener 0083will assume the function of the
garage door system's remote control. Please
also read the operating instructions for the
garage door system.
X Select key position 2with the Start/Stop
button.
X Press button 0044,0087or0085 which you have
programed to operate the garage door.
Garage door system with a fixed code:
indicator lamp 0043lights up green.
Garage door system with a rolling code:
indicator lamp 0043flashes green.
i The transmitter will transmit a signal as
long as the button is pressed. The
transmission is halted after a maximum of
ten seconds and indicator lamp 0043lights
up yellow. Press button 0044,0087or0085 again
if necessary.
Clearing the memory X
Select key position 2with the Start/Stop
button.
X Press buttons 0044and 0085.
The indicator lamp lights up yellow.
X Press and hold buttons 0044and 0085until the
indicator lamp turns green.
i Make sure that you clear the memory of
the integrated garage door opener before
selling the vehicle. Charge maintenance socket
The battery may drain if the vehicle is left
stationary for long periods. In this case,
Mercedes-Benz recommends attaching the trickle charger to the charge maintenance
socket.
The charge maintenance socket is designed
solely for connecting a trickle charger. A
trickle charger can be obtained from an
authorized Mercedes-Benz Center, for
example.
X
Switch the ignition off.
X Open the trunk lid.
X Connect the cable provided in the trunk to
the trickle charger.
X Connect the trickle charger to charge
maintenance socket 0043. Consult the
manufacturer's operating instructions on
how to do so.
i A trickle charger connected to charge
maintenance socket 0043only maintains the
current charge level of the vehicle's
electrical system battery. If the vehicle's
electrical system battery is discharged, it
needs to be charged with a battery charger.
You will find further information on
charging the battery on (Y page 236). Floormat on the driver's side
G
WARNING
Objects in the driver's footwell can restrict the
pedal travel or obstruct a depressed pedal.
The operating and road safety of the vehicle
is jeopardized. There is a risk of an accident.
Make sure that all objects in the vehicle are
stowed correctly, and that they cannot enter
the driver's footwell. Install the floormats 214
FeaturesStowage and features
Page 234 of 290

Useful information
i This Operator's Manual describes all
models and all standard and optional
equipment of your vehicle available at the
time of publication of the Operator's
Manual. Country-specific differences are
possible. Please note that your vehicle may
not be equipped with all features
described. This also applies to safety-
related systems and functions.
i Please read the information on qualified
specialist workshops (Y page 22).Where will I find...?
First-aid kit
The first-aid kit is located in the left-hand
stowage compartment in the trunk.
X Open the trunk lid. X
Turn fastener 0044in the direction of the
arrow.
X Open stowage compartment 0043.
X Open the Velcro fastener and remove the
first aid kit.
i Check the expiration date on the first-aid
kit at least once a year. Replace the
contents if necessary, and replace missing
contents. Vehicle tool kit
Wheel-change tool kit and jack 5 The wheel-change tool kit and the jack are
located in the left-hand stowage space in the
trunk.
Left-hand stowage space in trunk floor
0043
Lug wrench
0044 Towing eye
X Pull the loop on the floor covering and fold
the floor covering forward.
X Take out the jack and lug wrench 0043
underneath it.
TIREFIT kit, wheel chock, alignment bolt
and gloves The TIREFIT kit, wheel chock, alignment bolt
and gloves are located in the left-hand
stowage compartment in the trunk.
Left-hand stowage compartment in the trunk
5 Not included in the scope of delivery in all countries. 232
Where will I find...?Breakdown assistance