2014 MERCEDES-BENZ SLS AMG GT COUPE check engine light
[x] Cancel search: check engine lightPage 101 of 290

only the turn signal lamp on the
corresponding side of the vehicle will flash.
X To switch off the hazard warning
lamps: press button 0043.
The hazard warning lamps switch off
automatically if the vehicle exceeds a speed
of 6 mph(10 km/h) again after a full brake
application.
i The hazard warning lamps still operate if
the ignition is switched off. Headlamp cleaning system
The headlamps are cleaned automatically if
the "Wipe with washer fluid" function is
operated five times (Y page 101) while the
lights are on and the engine is running. When
you switch off the ignition, the automatic
headlamp cleaning system is reset and
counting is resumed from 0. Headlamps fogged up on the inside
The headlamps may fog up on the inside if
there is high atmospheric humidity.
X Drive with the headlamps switched on.
The level of moisture diminishes,
depending on the length of the journey and
the weather conditions (humidity and
temperature).
If the level of moisture does not diminish:
X Have the headlamps checked at a qualified
specialist workshop. Interior lighting
Overview of interior lighting
Overhead control panel
0043
0033 Switches the automatic interior
lighting control on/off
0044 003D Switches the right-hand reading
lamp on/off
0087 004A Switches the interior lighting on/off
0085 003D Switches the left-hand reading lamp
on/off Interior lighting control
General notes In order to prevent the vehicle's battery from
discharging, the interior lighting functions are
automatically deactivated after some time
unless the SmartKey is in position
2in the
ignition lock.
Automatic interior lighting control X
To activate/deactivate: press the0033
button.
When the automatic interior lighting
control is activated, the button is flush with
the overhead control panel.
The interior lighting automatically switches
on if you:
R unlock the vehicle
R open a door
R remove the SmartKey from the ignition lock Interior lighting
99Lights and windshield wipers Z
Page 102 of 290
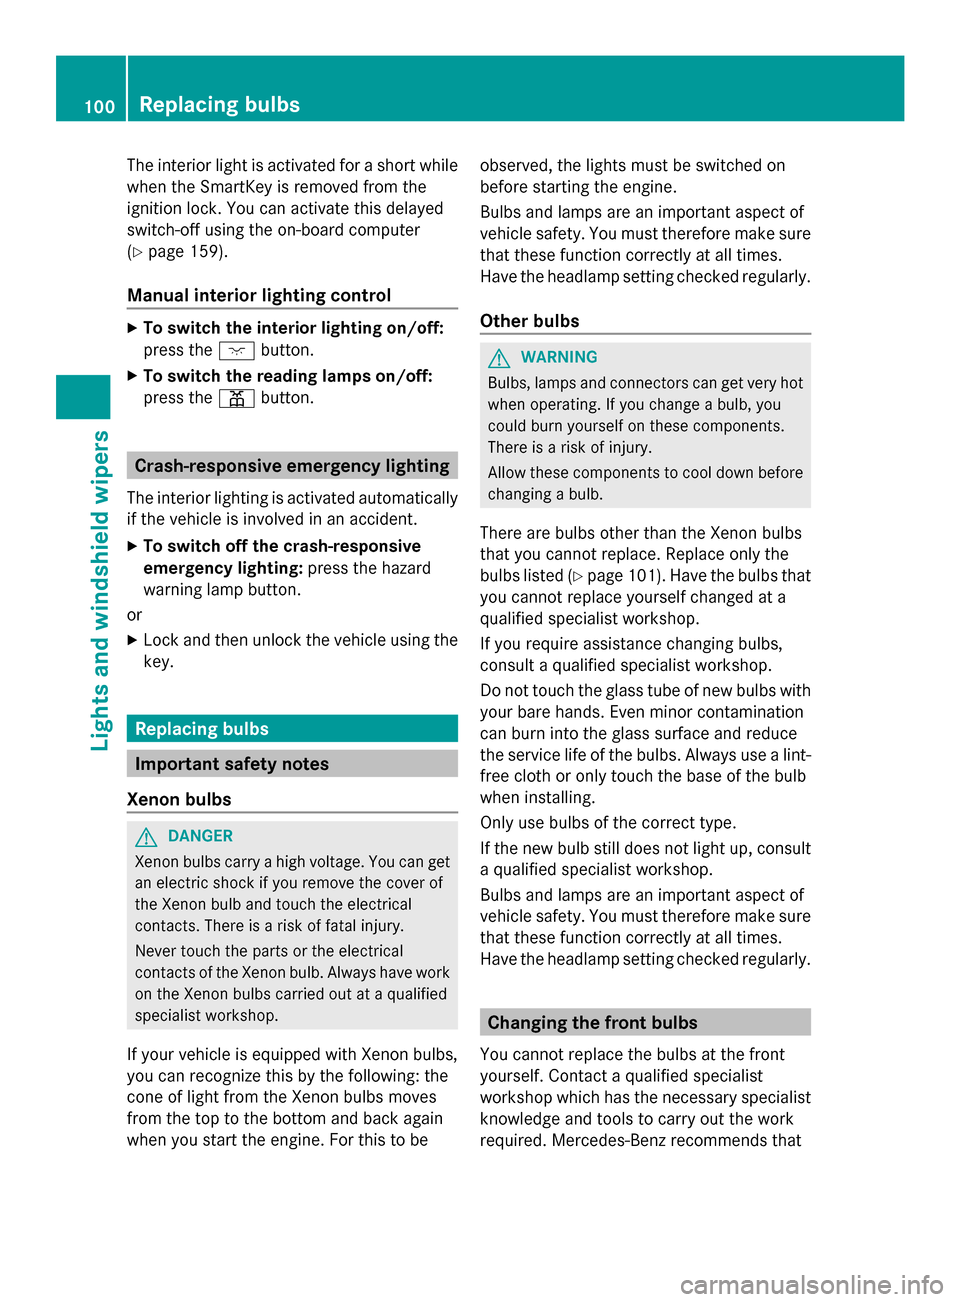
The interior light is activated for a short while
when the SmartKey is removed from the
ignition lock. You can activate this delayed
switch-off using the on-board computer
(Y page 159).
Manual interior lighting control X
To switch the interior lighting on/off:
press the 004Abutton.
X To switch the reading lamps on/off:
press the 003Dbutton. Crash-responsive emergency lighting
The interior lighting is activated automatically
if the vehicle is involved in an accident.
X To switch off the crash-responsive
emergency lighting: press the hazard
warning lamp button.
or
X Lock and then unlock the vehicle using the
key. Replacing bulbs
Important safety notes
Xenon bulbs G
DANGER
Xenon bulbs carry a high voltage. You can get
an electric shock if you remove the cover of
the Xenon bulb and touch the electrical
contacts. There is a risk of fatal injury.
Never touch the parts or the electrical
contacts of the Xenon bulb. Always have work
on the Xenon bulbs carried out at a qualified
specialist workshop.
If your vehicle is equipped with Xenon bulbs,
you can recognize this by the following: the
cone of light from the Xenon bulbs moves
from the top to the bottom and back again
when you start the engine. For this to be observed, the lights must be switched on
before starting the engine.
Bulbs and lamps are an important aspect of
vehicle safety. You must therefore make sure
that these function correctly at all times.
Have the headlamp setting checked regularly.
Other bulbs
G
WARNING
Bulbs, lamps and connectors can get very hot
when operating. If you change a bulb, you
could burn yourself on these components.
There is a risk of injury.
Allow these components to cool down before
changing a bulb.
There are bulbs other than the Xenon bulbs
that you cannot replace. Replace only the
bulbs listed (Y page 101). Have the bulbs that
you cannot replace yourself changed at a
qualified specialist workshop.
If you require assistance changing bulbs,
consult a qualified specialist workshop.
Do not touch the glass tube of new bulbs with
your bare hands. Even minor contamination
can burn into the glass surface and reduce
the service life of the bulbs. Always use a lint-
free cloth or only touch the base of the bulb
when installing.
Only use bulbs of the correct type.
If the new bulb still does not light up, consult
a qualified specialist workshop.
Bulbs and lamps are an important aspect of
vehicle safety. You must therefore make sure
that these function correctly at all times.
Have the headlamp setting checked regularly. Changing the front bulbs
You cannot replace the bulbs at the front
yourself. Contact a qualified specialist
workshop which has the necessary specialist
knowledge and tools to carry out the work
required. Mercedes-Benz recommends that 100
Replacing bulbsLights and windshield wipers
Page 105 of 290

Problems with the windshield wipers
Problem Possible causes/consequences and
0050
0050Solutions The windshield wipers
are jammed. Leaves or snow, for example, may be obstructing the windshield
wiper movement. The wiper motor has been deactivated.
X
Switch off the engine using the Start/Stop button and open the
driver's door.
X Remove the cause of the obstruction.
X Switch the windshield wipers back on. The windshield wipers
fail completely. The windshield wiper drive is malfunctioning.
X
Select another wiper speed on the combination switch.
X Have the windshield wipers checked at a qualified specialist
workshop. The windshield washer
fluid from the spray
nozzles no longer hits
the center of the
windshield. The spray nozzles are misaligned.
X
Have the spray nozzles adjusted at a qualified specialist
workshop. The wiper arms are on
the windshield. The wiper arms have been moved by an external force.
X
Select key position 2(ignition) with the Start/Stop button.
The wiper arms move back down automatically. Windshield wipers
103Lights and windshield wipers Z
Page 138 of 290
Wet roads
If you have driven for a long time in heavy rain
without braking, there may be a delayed
reaction from the brakes when braking for the
first time. This may also occur after the
vehicle has been washed or driven through
deep water.
You have to depress the brake pedal more
firmly. Maintain a greater distance from the
vehicle in front.
After driving on a wet road or having the
vehicle washed, brake firmly while paying
attention to the traffic conditions. This will
warm up the brake discs, thereby drying them
more quickly and protecting them against
corrosion.
Limited braking performance on salt-
treated roads If you drive on salted roads, a layer of salt
residue may form on the brake discs and
brake pads. This can result in a significantly
longer braking distance.
R Brake occasionally to remove any possible
salt residue. Make sure that you do not
endanger other road users when doing so.
R Carefully depress the brake pedal and the
beginning and end of a journey.
R Maintain a greater distance to the vehicle
ahead.
Servicing the brakes !
If the red brake warning lamp lights up in
the instrument cluster and you hear a
warning tone while the engine is running,
the brake fluid level may be too low.
Observe additional warning messages in
the multifunction display.
The brake fluid level may be too low due to
brake pad wear or leaking brake lines.
Have the brake system checked
immediately. This work should be carried
out at a qualified specialist workshop. !
As the ESP ®
system operates
automatically, the engine and the ignition
must be switched off (the SmartKey must
be in position 0or 1in the ignition lock or
the Start/Stop button must be in position
0 or 1) if:
R the electric parking brake is tested using
a brake dynamometer.
R the vehicle is towed with one axle raised.
Braking triggered automatically by ESP ®
may seriously damage the brake system.
All checks and maintenance work on the
brake system must be carried out at a
qualified specialist workshop. Have this work
carried out at an authorized Mercedes-Benz
Center.
Have the brake pads replaced and the brake
fluid renewed at a qualified specialist
workshop, e.g. an authorized Mercedes-Benz
Center.
If the brake system has only been subject to
moderate loads, you should test the
functionality of your brakes at regular
intervals. To do so, press firmly on the brake
pedal when driving at a high speed. This
improves the grip of the brake pads.
You can find a description of Brake Assist
(BAS) on ( Ypage 55).
Mercedes-Benz recommends that you only
have brake pads/linings installed on your
vehicle which have been approved for
Mercedes-Benz vehicles or which correspond
to an equivalent quality standard. Brake
pads/linings which have not been approved
for Mercedes-Benz vehicles or which are not
of an equivalent quality could affect your
vehicle's operating safety.
Mercedes-Benz recommends that you only
use brake fluid that has been specially
approved for your vehicle by Mercedes-Benz,
or which corresponds to an equivalent quality
standard. Brake fluid which has not been
approved for Mercedes-Benz vehicles or
which is not of an equivalent quality could
affect your vehicle's operating safety. 136
Driving tipsDriving and parking
Page 197 of 290
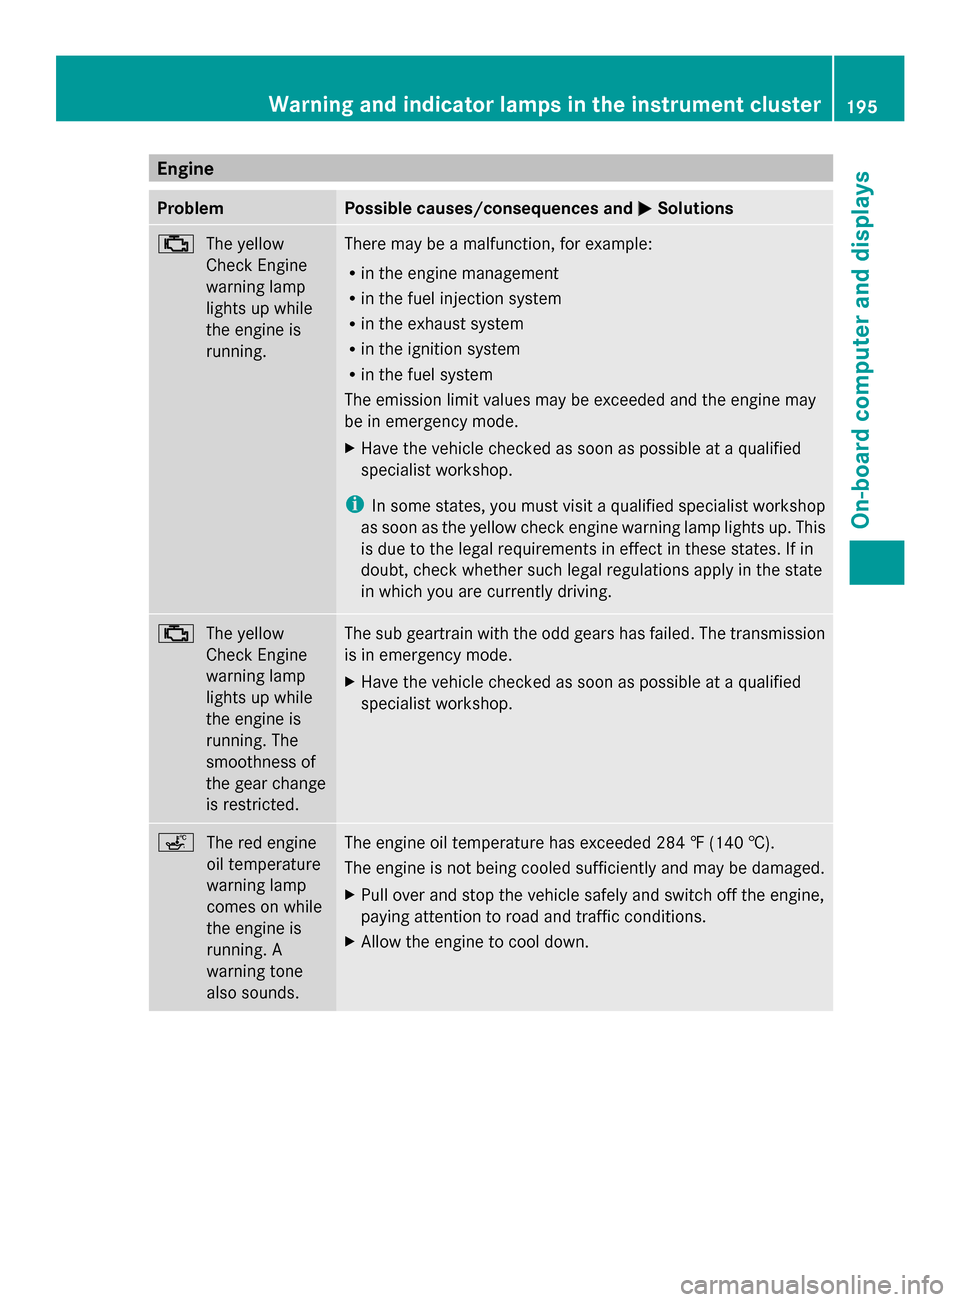
Engine
Problem Possible causes/consequences and
0050
0050Solutions 00B9
The yellow
Check Engine
warning lamp
lights up while
the engine is
running. There may be a malfunction, for example:
R
in the engine management
R in the fuel injection system
R in the exhaust system
R in the ignition system
R in the fuel system
The emission limit values may be exceeded and the engine may
be in emergency mode.
X Have the vehicle checked as soon as possible at a qualified
specialist workshop.
i In some states, you must visit a qualified specialist workshop
as soon as the yellow check engine warning lamp lights up. This
is due to the legal requirements in effect in these states. If in
doubt, check whether such legal regulations apply in the state
in which you are currently driving. 00B9
The yellow
Check Engine
warning lamp
lights up while
the engine is
running. The
smoothness of
the gear change
is restricted. The sub geartrain with the odd gears has failed. The transmission
is in emergency mode.
X
Have the vehicle checked as soon as possible at a qualified
specialist workshop. 00E4
The red engine
oil temperature
warning lamp
comes on while
the engine is
running. A
warning tone
also sounds. The engine oil temperature has exceeded 284 ‡ (140 †).
The engine is not being cooled sufficiently and may be damaged.
X
Pull over and stop the vehicle safely and switch off the engine,
paying attention to road and traffic conditions.
X Allow the engine to cool down. Warning and indicator lamps in the instrument cluster
195On-board computer and displays Z
Page 198 of 290
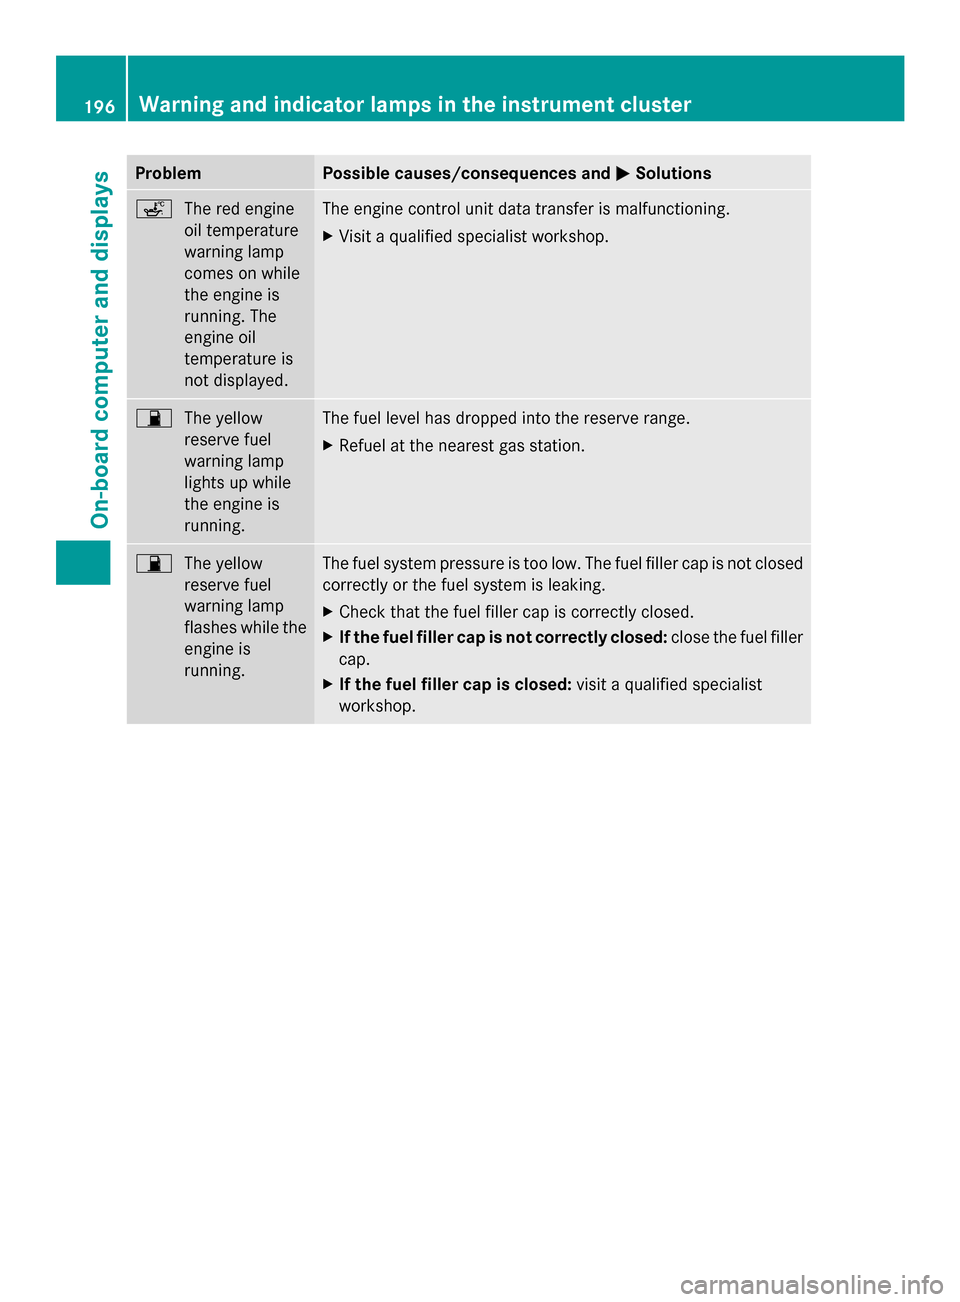
Problem Possible causes/consequences and
0050
0050Solutions 00E4
The red engine
oil temperature
warning lamp
comes on while
the engine is
running. The
engine oil
temperature is
not displayed. The engine control unit data transfer is malfunctioning.
X
Visit a qualified specialist workshop. 00B5
The yellow
reserve fuel
warning lamp
lights up while
the engine is
running. The fuel level has dropped into the reserve range.
X
Refuel at the nearest gas station. 00B5
The yellow
reserve fuel
warning lamp
flashes while the
engine is
running. The fuel system pressure is too low. The fuel filler cap is not closed
correctly or the fuel system is leaking.
X
Check that the fuel filler cap is correctly closed.
X If the fuel filler cap is not correctly closed: close the fuel filler
cap.
X If the fuel filler cap is closed: visit a qualified specialist
workshop. 196
Warning and indicator lamps in the instrument clusterOn-board computer and displays
Page 221 of 290

X
Pull release lever 0043on the hood.
The hood is released.
! Make sure that the windshield wipers are
not folded away from the windshield. You
could otherwise damage the windshield
wipers or the hood. X
Reach into the gap, pull hood catch
handle 0044up and lift the hood.
Closing the hood X
Lower the hood and let it fall from a height
of approximately 8 inches (20 cm).
X Check that the hood has engaged properly.
If the hood can be raised slightly, it is not
properly engaged. Open it again and close
it with a little more force. Engine oil
General notes Depending on the driving style, the vehicle
consumes up to 0.9 US qt (0.8 l) of oil over a
distance of 600 miles (1000 km). The oil
consumption may be higher than this when
the vehicle is new or if you frequently drive at
high engine speeds.
Depending on the engine, the oil dipstick may
be in a different location. When checking the oil level:
R
park the vehicle on a level surface.
R the engine should be switched off for
approximately five minutes if the engine is
at normal operating temperature.
R if the engine is not at normal operating
temperature, e.g. if the engine was only
started briefly, wait about 30 minutes
before carrying out the measurement.
Checking the oil level using the oil
dipstick G
WARNING
Certain components in the engine
compartment, such as the engine, radiator
and parts of the exhaust system, can become
very hot. Working in the engine compartment
poses a risk of injury.
Where possible, let the engine cool down and
touch only the components described in the
following. X
Unscrew and remove oil filler cap 0043with
the integrated dipstick.
X Wipe the oil dipstick.
X Screw on oil filler cap 0043again to the stop.
X Unscrew oil filler cap 0043again and read the
dipstick.
If the level is between MIN mark 0087and
MAX mark 0044, the oil level is correct.
X If the oil level has dropped to MIN mark
0087 or below, add 1.1 US qt (1.0 liter) engine
oil. Engine compartment
219Maintenance and care Z
Page 226 of 290
Start the engine using the SmartKey.. Move
the transmission to Nwith the E-SELECT
lever. Use the SmartKey to switch the
engine off again and then turn the
SmartKey to position 2. Make sure that you
then leave the SmartKey in position 2. You
may otherwise damage the vehicle, the
transmission or the car wash.
Check the transmission position in the
instrument cluster.
! Use the E-SELECT lever to shift the
transmission to Nbefore switching the
engine off. If you open the driver's or front-
passenger door, the transmission remains
in this position for up to 30 minutes if the
SmartKey is in the ignition, even if the
engine is switched off. If you do not shift
the transmission to Nusing the E-SELECT
lever beforehand, it shifts automatically to
parking position Pand locks the wheels if
the driver's or front-passenger door is
opened and the engine is switched off. This
may damage the vehicle, the transmission
or the car wash.
Observe the information on maneuvering
(Y page 131).
! Before driving into an automatic car wash,
make sure that it is suitable for the
dimensions of the vehicle. In particular,
make sure that:
R there is enough ground clearance
between the vehicle underbody and the
guide rails of the automatic car wash.
R the clearance width of the automatic car
wash is sufficient, particularly the width
of the guide rails.
R you enter the automatic car wash
straight and in the center of the guide
rails in order to avoid damaging the tires
or wheel rims.
Fold in the exterior mirrors before the
vehicle is washed. The exterior mirrors
could otherwise be damaged. !
Make sure that:
R the side windows and the roof are
completely closed
R the climate control blower is switched off
R the windshield wiper switch is at position
0
The vehicle could otherwise be damaged.
! In portal car washes, the windshield
wipers may be moved up the windshield by
the cleaning brushes when the ignition is
switched off.
Set the Start/Stop button to key position
2 to reset the windshield wipers to their
original position.
! Preferably use automatic car washes with
adjustable high-pressure pre-cleaning. This
corresponds with the specification for the
Cabriolet program. In car washes that use
high water pressures, there is a risk that a
small amount of water may leak into the
vehicle.
! Cabriolet: do not treat the vehicle with
hot wax under any circumstances.
After using an automatic car wash, wipe off
wax and drying agents from the windshield
and the wiper blades. This will prevent smears
and reduce wiping noises caused by residue
on the windshield.
Washing by hand In some countries, washing by hand is only
allowed at specially equipped washing bays.
Observe the legal requirements in each
country.
X
Do not use hot water and do not wash the
vehicle in direct sunlight.
X Use a soft sponge to clean.
X Use a mild cleaning agent, such as a car
shampoo approved by Mercedes-Benz.
X Thoroughly hose down the vehicle with a
gentle jet of water.
X Do not point the water jet directly towards
the air inlet. 224
CareMaintenance and care