2014 MERCEDES-BENZ SLK ROADSTER seats
[x] Cancel search: seatsPage 6 of 357
Index
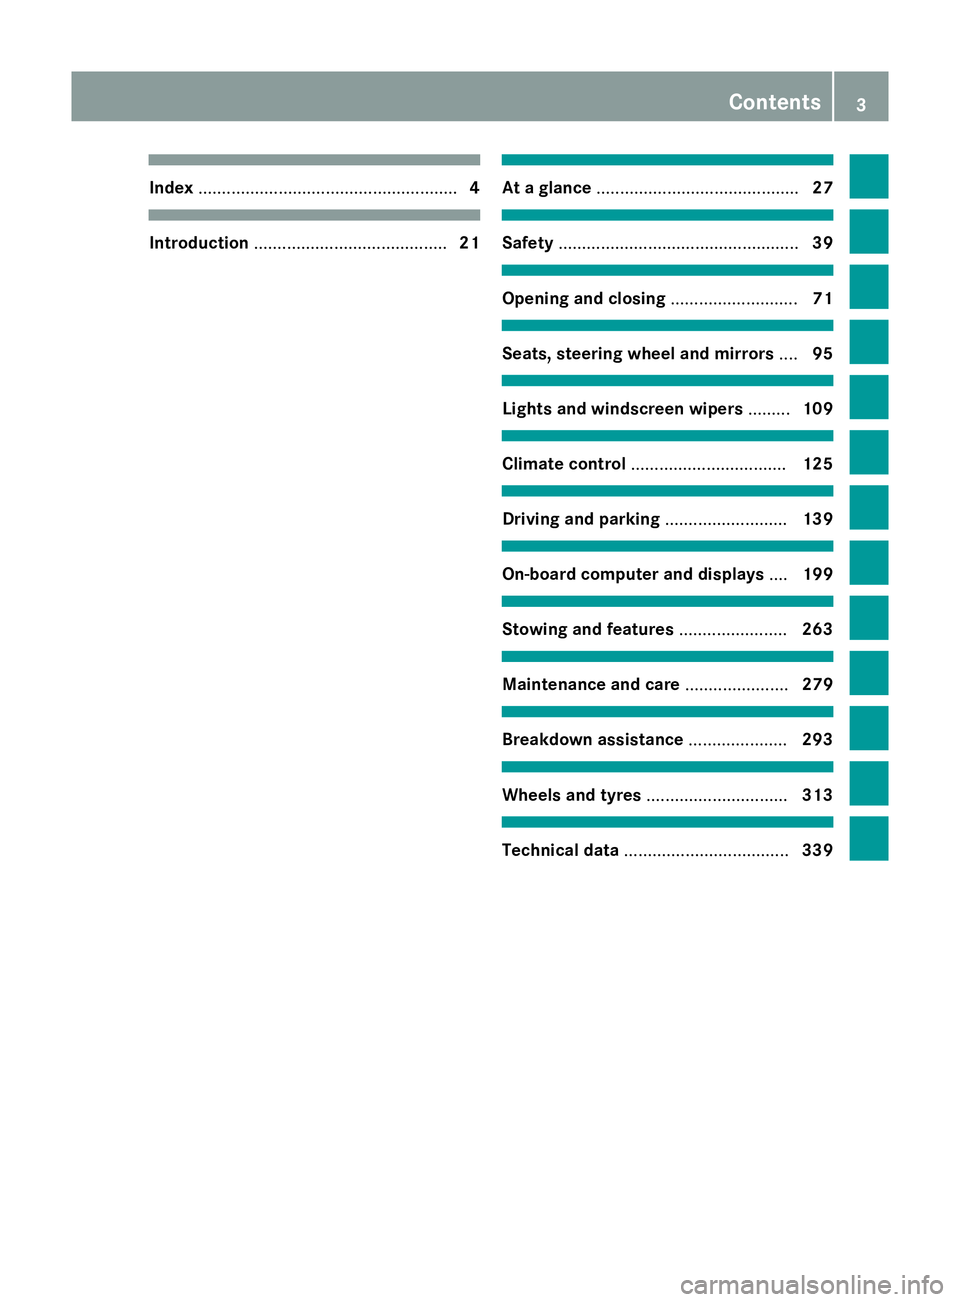
....................................................... 4Introduction
......................................... 21 At a glance
........................................... 27 Safety
................................................... 39 Opening and closing
...........................71 Seats, steering wheel and mirrors
....95 Lights and windscreen wipers
.........109 Climate control
................................. 125 Driving and parking
..........................139 On-board computer and displays
....199 Stowing and features
.......................263 Maintenance and care
......................279 Breakdown assistance
.....................293 Wheels and tyres
.............................. 313 Technical data
................................... 339 Contents
3
Page 19 of 357
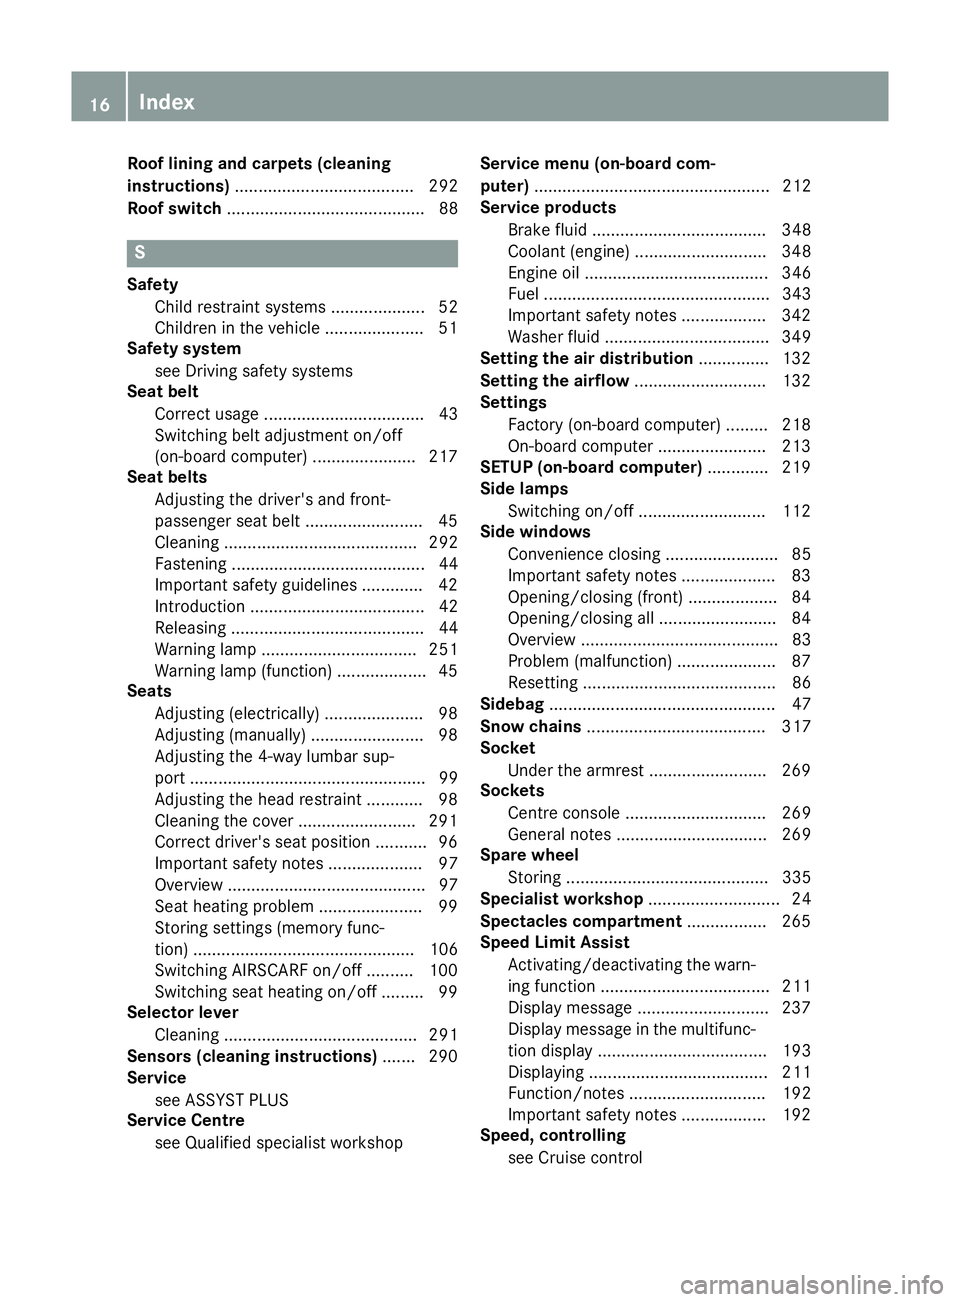
Roof lining and carpets (cleaning
instructions)
...................................... 292
Roof switch .......................................... 88 S
Safety Child restraint systems .................... 52
Children in the vehicle ..................... 51
Safety system
see Driving safety systems
Seat belt
Correct usage .................................. 43
Switching belt adjustment on/off
(on-board computer) ...................... 217
Seat belts
Adjusting the driver's and front-
passenger seat belt ......................... 45
Cleaning ......................................... 292
Fastening ......................................... 44
Important safety guidelines ............. 42
Introduction ..................................... 42
Releasing ......................................... 44
Warning lamp ................................. 251
Warning lamp (function) ................... 45
Seats
Adjusting (electrically) ..................... 98
Adjusting (manually) ........................ 98
Adjusting the 4-way lumbar sup-
port .................................................. 99
Adjusting the head restraint ............ 98
Cleaning the cover ......................... 291
Correct driver's seat position ........... 96
Important safety notes .................... 97
Overview .......................................... 97
Seat heating problem ...................... 99
Storing settings (memory func-
tion) ............................................... 106
Switching AIRSCARF on/off .......... 100
Switching seat heating on/off ......... 99
Selector lever
Cleaning ......................................... 291
Sensors (cleaning instructions) ....... 290
Service
see ASSYST PLUS
Service Centre
see Qualified specialist workshop Service menu (on-board com-
puter)
.................................................. 212
Service products
Brake fluid ..................................... 348
Coolant (engine) ............................ 348
Engine oil ....................................... 346
Fuel ................................................ 343
Important safety notes .................. 342
Washer fluid ................................... 349
Setting the air distribution ............... 132
Setting the airflow ............................ 132
Settings
Factory (on-board computer) ......... 218
On-board compute r....................... 213
SETUP (on-board computer) ............. 219
Side lamps
Switching on/of f........................... 112
Side windows
Convenience closing ........................ 85
Important safety notes .................... 83
Opening/closing (front) ................... 84
Opening/closing all ......................... 84
Overview .......................................... 83
Problem (malfunction) ..................... 87
Resetting ......................................... 86
Sidebag ................................................ 47
Snow chains ...................................... 317
Socket
Under the armrest ......................... 269
Sockets
Centre console .............................. 269
General notes ................................ 269
Spare wheel
Storing ........................................... 335
Specialist workshop ............................ 24
Spectacles compartment ................. 265
Speed Limit Assist
Activating/deactivating the warn-ing function .................................... 211
Display message ............................ 237
Display message in the multifunc-tion display .................................... 193
Displaying ...................................... 211
Function/note s............................. 192
Important safety notes .................. 192
Speed, controlling
see Cruise control 16
Index
Page 24 of 357
Protection of the environment
General notes
H
Environmental note
Daimler's declared policy is one of compre-
hensive environmental protection.
Our objectives are to use the natural resour-
ces which form the basis of our existence on
this planet sparingly and in a manner which
takes the requirements of both nature and
humanity into consideration.
You too can help to protect the environment
by operating your vehicle in an environmen-
tally-responsible manner.
Fuel consumption and the rate of engine,
transmission, brake and tyre wear depend on
the following factors:
R operating conditions of your vehicle
R your personal driving style
You can influence both factors. Therefore,
please bear the following in mind:
Operating conditions:
R avoid short trips, as these increase fuel
consumption.
R observe the correct tyre pressure.
R do not carry any unnecessary weight in the
vehicle.
R remove the roof rack once you no longer
need it.
R a regularly serviced vehicle will contribute
to environmental protection. You should
therefore adhere to the service intervals.
R all maintenance work should be carried out
at a qualified specialist workshop.
Personal driving style:
R do not depress the accelerator pedal when
starting the engine.
R do not warm up the engine when the vehicle
is stationary.
R drive carefully and maintain a safe distance
from the vehicle in front.
R avoid frequent, sudden acceleration and
braking. R
change gear in good time and use each gear
only up to Ôof its maximum engine speed.
R switch off the engine in stationary traffic.
R monitor the vehicle's fuel consumption. Returning an end-of-life vehicle
EU countries only:
Mercedes-Benz will take back your old vehicle to dispose of it in an environmentally-respon-sible manner in accordance with the Euro-
pean Union (EU) End of Life Vehicles Direc-
tive.
There is a network of return points and dis-
assembly plants available. You can return
your vehicle to these plants free of charge.
This makes a valuable contribution to the
recycling process and the conservation of
resources.
For further information on recycling old vehi- cles, recovery and the terms of the policy,
visit the Mercedes-Benz homepage. Genuine Mercedes-Benz parts
H
Environmental note
Daimler AG also supplies reconditioned
assemblies and parts which are of the same
quality as new parts. For these, the same war-
ranty applies as for new parts.
! Airbags and seat belt tensioners, as well
as control units and sensors for these
restraint systems, may be installed in the
following areas of your vehicle:
R doors
R door pillars
R door sills
R seats
R dashboard
R instrument cluster
R centre console Introduction
21 Z
Page 40 of 357
Door control panel
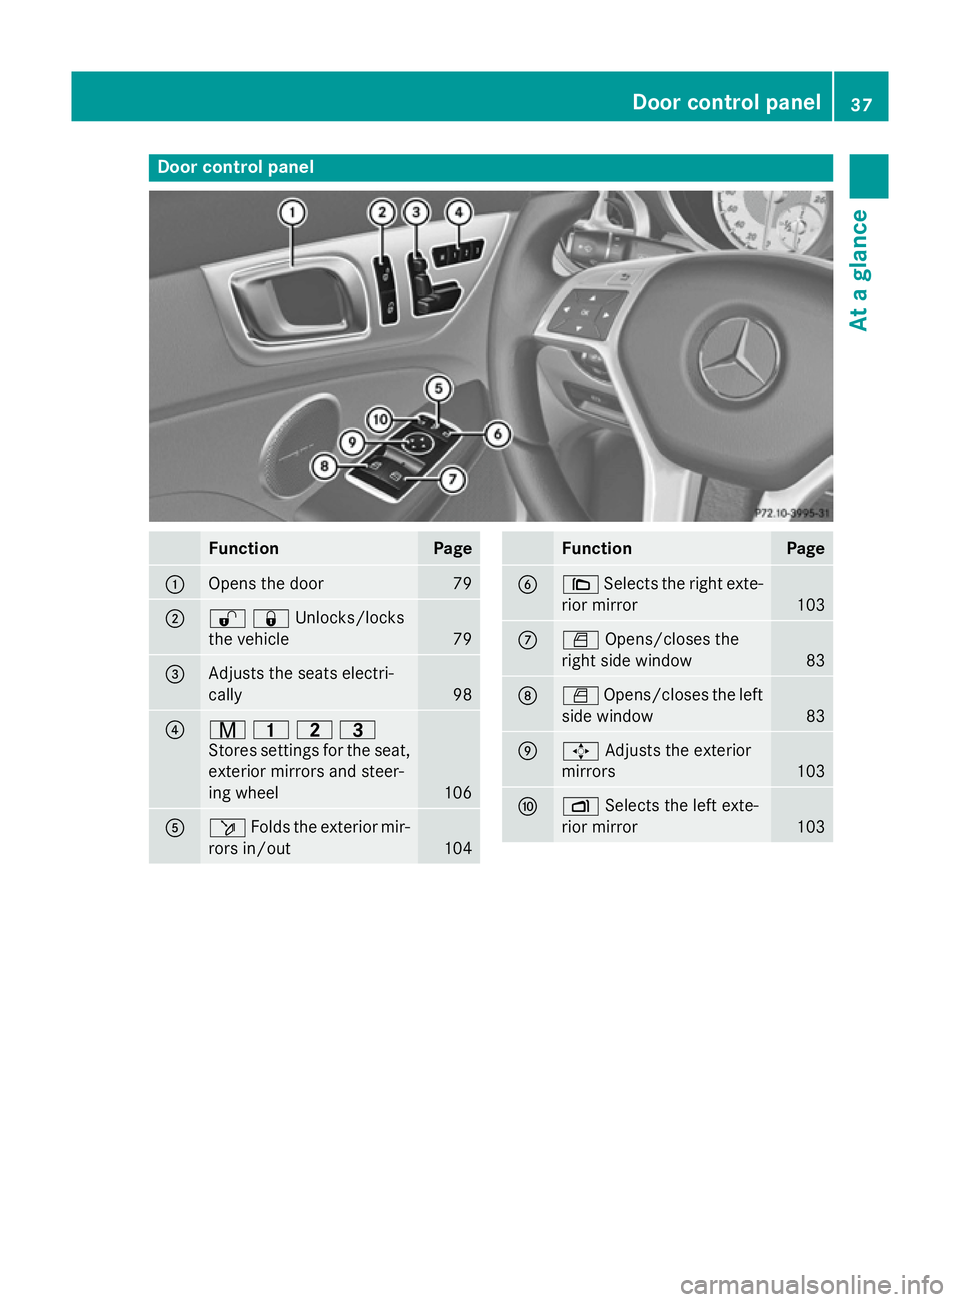
Function Page
:
Opens the door 79
;
%&Unlocks/locks
the vehicle
79
=
Adjusts the seats electri-
cally
98
?
r
45=
Stores settings for the seat, exterior mirrors and steer-
ing wheel 106
A
ö
Folds the exterior mir-
rors in/out 104 Function Page
B
\
Selects the right exte-
rior mirror 103
C
W
Opens/closes the
right side window 83
D
W
Opens/closes the left
side window 83
E
7
Adjusts the exterior
mirrors 103
F
Z
Selects the left exte-
rior mirror 103Door control panel
37At a glance
Page 48 of 357
Seat belt adjustment
The seat-belt adjustment is an integral part of
the PRE-SAFE ®
convenience function. This
function adjusts the driver's and front-
passenger seat belt to the upper body of the
occupants.
The belt strap is tightened slightly when:
R the seat belt tongue is engaged in the belt
buckle and
R the ignition is switched on
The seat-belt adjustment will apply a certain
tightening force if any slack is detected
between the vehicle occupant and the seat
belt. Do not hold on to the seat belt tightly
while it is adjusting.
You can switch the seat-belt adjustment on
and off in the on-board computer
(Y page 217).
Belt warning for the driver and front
passenger The
7 seat belt warning lamp in the instru-
ment cluster is a reminder that all vehicle
occupants must wear their seat belts. It may
light up continuously or flash. In addition, a
warning tone may sound.
The 7 seat belt warning lamp goes out and
the warning tone ceases when the driver and
the front passenger have fastened their seat
belts.
i For more information on the
7seat
belt warning lamp, see "Warning and indi-
cator lamps in the instrument cluster, seat
belt" (Y page 251). Airbags
Introduction The installation location of an airbag is iden-
tified by the AIRBAG symbol.
An airbag supplements a correctly worn seat
belt. It is not a replacement for the seat belt. The airbag offers additional protection in
applicable accident situations.
Not all airbags are deployed in an accident.
The different airbag systems work independ-
ently of each other (Y
page 47).
However, no system available today can com- pletely eliminate injuries and fatalities.
It is also not possible to completely rule out a risk of injury caused by an airbag due to the
speed at which the airbag must be deployed.
Important safety notes G
WARNING
If you deviate from the correct seat position,
the airbag cannot perform its intended pro-
tective function and can even cause addi-
tional injuries when deployed. There is an
increased risk of serious or even fatal injuries. In order to avoid such risks, always ensure
that all vehicle occupants:
R fasten their seatbelts correctly, including
pregnant women
R are seated correctly and maintain the fur-
thest possible distance from the airbags
R observe the following notes
Always ensure that there are no objects loca-
ted between the airbag and the vehicle occu-
pant.
R Adjust the seats properly before beginning
your journey. Always make sure that the
seat is in an almost upright position. The
centre of the head restraint must support
the head at about eye level.
R Move the driver's and front-passenger
seats as far back as possible. The driver's
seat position must allow the vehicle to be
driven safely.
R Only hold the steering wheel on the out-
side. This allows the airbag to be fully
deployed.
R Always lean against the backrest while driv-
ing. Do not lean forwards or lean against
the door or side window. You may other- Occupant safety
45Safety Z
Page 50 of 357
When deployed, the front airbags offer addi-
tional head and thorax protection on the front
seats.
The permanently lit PASSENGER AIR BAG OFF indicator lamp shows you that the co-driver's
front airbag is disabled (Y page 41).
Sidebags G
WARNING
Unsuitable seat covers may obstruct or even
prevent deployment of the airbags integrated into the seats. The airbags may then fail to
protect the vehicle occupants as intended.
Operation of the automatic child seat recog-
nition may also be impaired. There is an
increased risk of injury, possibly even fatal.
Use only seat covers which have been specif-
ically approved for the respective seat by
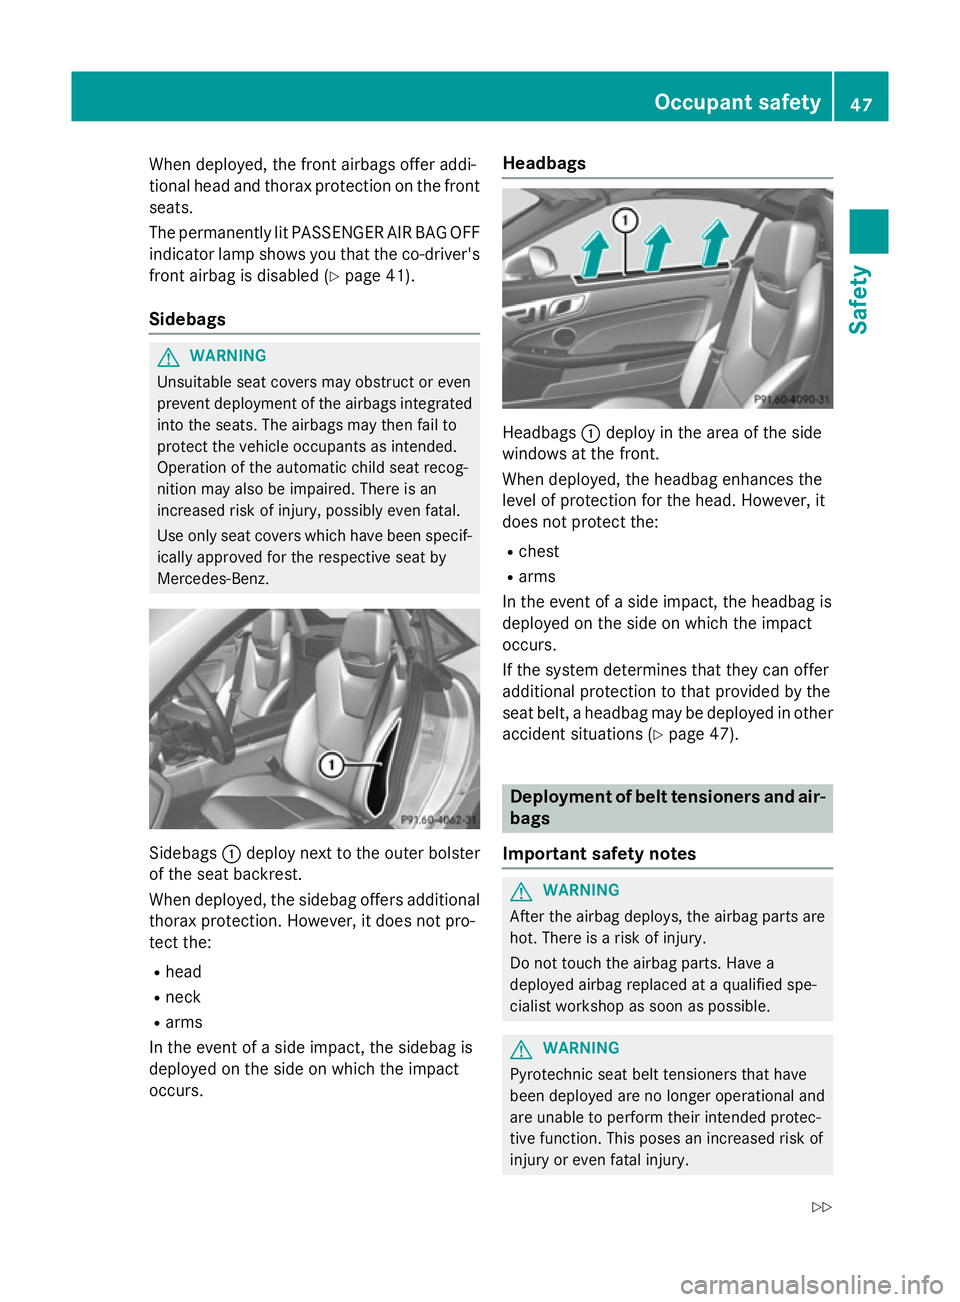
Mercedes-Benz. Sidebags
:deploy next to the outer bolster
of the seat backrest.
When deployed, the sidebag offers additional thorax protection. However, it does not pro-
tect the:
R head
R neck
R arms
In the event of a side impact, the sidebag is
deployed on the side on which the impact
occurs. Headbags
Headbags
:deploy in the area of the side
windows at the front.
When deployed, the headbag enhances the
level of protection for the head. However, it
does not protect the:
R chest
R arms
In the event of a side impact, the headbag is
deployed on the side on which the impact
occurs.
If the system determines that they can offer
additional protection to that provided by the
seat belt, a headbag may be deployed in other
accident situations (Y page 47). Deployment of belt tensioners and air-
bags
Important safety notes G
WARNING
After the airbag deploys, the airbag parts are
hot. There is a risk of injury.
Do not touch the airbag parts. Have a
deployed airbag replaced at a qualified spe-
cialist workshop as soon as possible. G
WARNING
Pyrotechnic seat belt tensioners that have
been deployed are no longer operational and
are unable to perform their intended protec-
tive function. This poses an increased risk of
injury or even fatal injury. Occupant safety
47Safety
Z
Page 52 of 357
gitudinal body members are hit, and sufficient
deceleration occurs as a result.
If the restraint system control unit detects a
side impact or an overturn situation, the rel-
evant restraint system components are acti-
vated independently of one another depend-
ing on the apparent type of accident. If addi-
tional protection for the vehicle occupants is determined in this situation, the belt tension-
ers are also triggered.
R Sidebag on the side on which the impact
occurs, independently of the belt tensioner
and of the use of the seat belt
Vehicles with automatic child seat recog-
nition on the front-passenger seat: the
sidebag on the front-passenger side
deploys under the following conditions:
- an occupant is detected on the front-
passenger seat or
- the belt tongue has engaged in the belt
buckle of the front-passenger seat.
R Headbag on the side on which the impact
occurs, independently of the use of the seat
belt and independently of whether the
front-passenger seat is occupied
R Headbags on the driver's and front-
passenger sides in certain overturn situa-
tions if the system determines that they
can offer additional protection to that pro-
vided by the seat belt
i Not all airbags are deployed in an acci-
dent. The various airbag systems work
independently of one another.
How the airbag system works is deter-
mined by the severity of the accident detec- ted, especially the vehicle deceleration or
acceleration, and the apparent type of acci- dent:
R frontal collision
R side impact
R overturn NECK-PRO head restraints
Important safety notes G
WARNING
The function of the head restraint may be
impaired if you:
R attach objects such as coat hangers to the
head restraints, for example
R use unsuitable head restraint covers
If you do so, the head restraints cannot fulfil
their intended protective function in the event of an accident. In addition, objects attached
to the head restraints could endanger other
vehicle occupants. This poses an increased
risk of injury.
Do not attach any objects to the head
restraints and only use suitable head restraint
covers.
Consult a Mercedes-Benz Service Centre
regarding the availability of suitable seat or
head restraint covers.
Operation NECK-PRO head restraints reduce the likeli-
hood of head and chest injuries. The NECK-
PRO head restraints on the driver's and front-
passenger seats are moved forwards and
upwards in the event of a rear-end collision of
a certain severity. This provides better head
support.
If the NECK-PRO head restraints have been
triggered in an accident, you must reset the
NECK-PRO head restraints on the driver’s and
front-passenger seat (Y page 50). Other-
wise, the additional protection will not be
available in the event of another rear-end col-
lision. You can recognise when NECK-PRO
head restraints have been triggered by the
fact that they have moved forwards and can
no longer be adjusted.
Mercedes-Benz recommends that you have
the NECK-PRO head restraints checked for
functionality at a qualified specialist work-
shop after a rear-end collision. Occupant safety
49Safety Z
Page 53 of 357
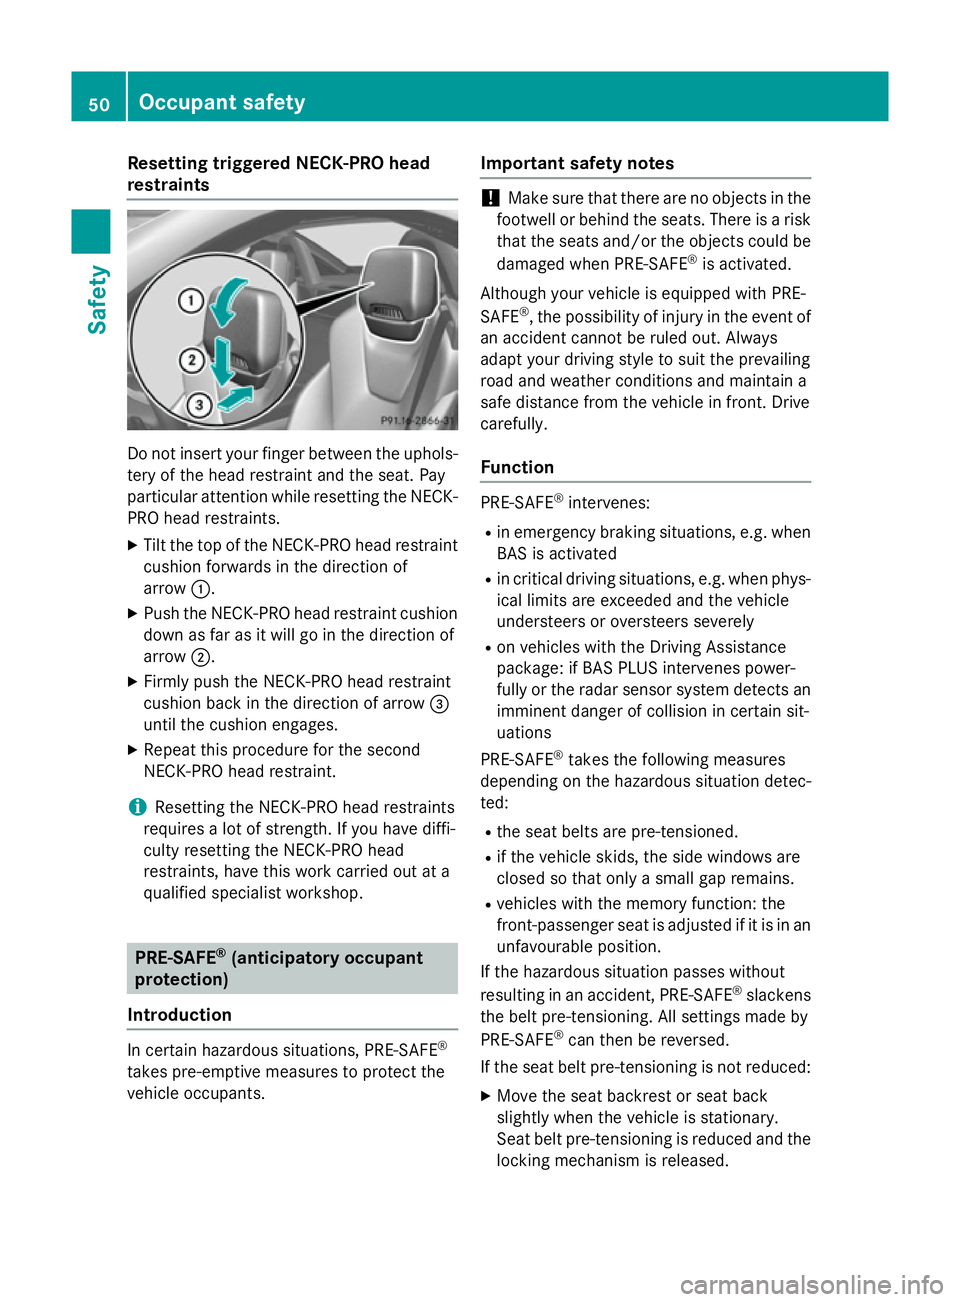
Resetting triggered NECK-PRO head
restraints Do not insert your finger between the uphols-
tery of the head restraint and the seat. Pay
particular attention while resetting the NECK-PRO head restraints.
X Tilt the top of the NECK-PRO head restraint
cushion forwards in the direction of
arrow :.
X Push the NECK-PRO head restraint cushion
down as far as it will go in the direction of
arrow ;.
X Firmly push the NECK-PRO head restraint
cushion back in the direction of arrow =
until the cushion engages.
X Repeat this procedure for the second
NECK-PRO head restraint.
i Resetting the NECK-PRO head restraints
requires a lot of strength. If you have diffi-
culty resetting the NECK-PRO head
restraints, have this work carried out at a
qualified specialist workshop. PRE-SAFE
®
(anticipatory occupant
protection)
Introduction In certain hazardous situations, PRE-SAFE
®
takes pre-emptive measures to protect the
vehicle occupants. Important safety notes !
Make sure that there are no objects in the
footwell or behind the seats. There is a risk that the seats and/or the objects could be
damaged when PRE-SAFE ®
is activated.
Although your vehicle is equipped with PRE-
SAFE ®
, the possibility of injury in the event of
an accident cannot be ruled out. Always
adapt your driving style to suit the prevailing
road and weather conditions and maintain a
safe distance from the vehicle in front. Drive
carefully.
Function PRE-SAFE
®
intervenes:
R in emergency braking situations, e.g. when
BAS is activated
R in critical driving situations, e.g. when phys-
ical limits are exceeded and the vehicle
understeers or oversteers severely
R on vehicles with the Driving Assistance
package: if BAS PLUS intervenes power-
fully or the radar sensor system detects an imminent danger of collision in certain sit-
uations
PRE-SAFE ®
takes the following measures
depending on the hazardous situation detec-
ted:
R the seat belts are pre-tensioned.
R if the vehicle skids, the side windows are
closed so that only a small gap remains.
R vehicles with the memory function: the
front-passenger seat is adjusted if it is in an
unfavourable position.
If the hazardous situation passes without
resulting in an accident, PRE-SAFE ®
slackens
the belt pre-tensioning. All settings made by
PRE-SAFE ®
can then be reversed.
If the seat belt pre-tensioning is not reduced:
X Move the seat backrest or seat back
slightly when the vehicle is stationary.
Seat belt pre-tensioning is reduced and the
locking mechanism is released. 50
Occupant safetySafety