2014 MERCEDES-BENZ SLK-CLASS ROADSTER wheel size
[x] Cancel search: wheel sizePage 311 of 356
Use M+S tires of the same make and tread on
all wheels to maintain safe handling
characteristics.
Always observe the maximum permissible
speed specified for the M+S tires you have
mounted.
When you have mounted M+S tires:
X Check the tire pressures (Y page 313).
X Vehicles for USA: restart the tire pressure
monitor (Y page 314).
X Vehicles for Canada: restart the tire
pressure loss warning system
(Y page 314).
For more information on driving with the
emergency spare wheel, see (Y page 337).Snow chains
G
WARNING
If snow chains are installed to the front
wheels, they may drag against the vehicle
body or chassis components. This could
cause damage to the vehicle or the tires.
There is a risk of an accident.
To avoid hazardous situations:
R never install snow chains to the front
wheels
R always install snow chains in pairs to the
rear wheels.
! You must drive at raised vehicle level
(level 1) if snow chains have been mounted.
The vehicle may otherwise be damaged.
! On some tire sizes there is not enough
space for snow chains. To avoid damage to
the vehicle or tires, observe the "Wheel and
tire combinations" section under "Tires and
wheels".
! Vehicles with steel wheels: if you wish
to mount snow chains on steel wheels,
make sure that you remove the respective
wheels' hubcaps first. The hubcaps may
otherwise be damaged. For safety reasons, Mercedes-Benz
recommends that you only use snow chains
that have been specially approved for your
vehicle by Mercedes-Benz, or are of a
corresponding standard of quality.
If you intend to mount snow chains, please
bear the following points in mind:
R
Snow chains may not be mounted on all
wheel/tire combinations. Permissible
wheel-tire combinations (Y page 333).
R Only use snow chains when driving on
roads completely covered by snow.
Remove the snow chains as soon as
possible when you come to a road that is
not snow-covered.
R Local regulations may restrict the use of
snow chains. Observe the appropriate
regulations if you wish to install snow
chains.
R Do not exceed the maximum permissible
speed of 30 mph (50 km/h).
i You may wish to deactivate ESP ®
when
pulling away with snow chains installed
(Y page 62). You can thereby allow the
wheels to spin in a controlled manner,
achieving an increased driving force
(cutting action).
For more information on driving with the
emergency spare wheel, see (Y page 337). Winter operation
309Wheels and tires Z
Page 313 of 356
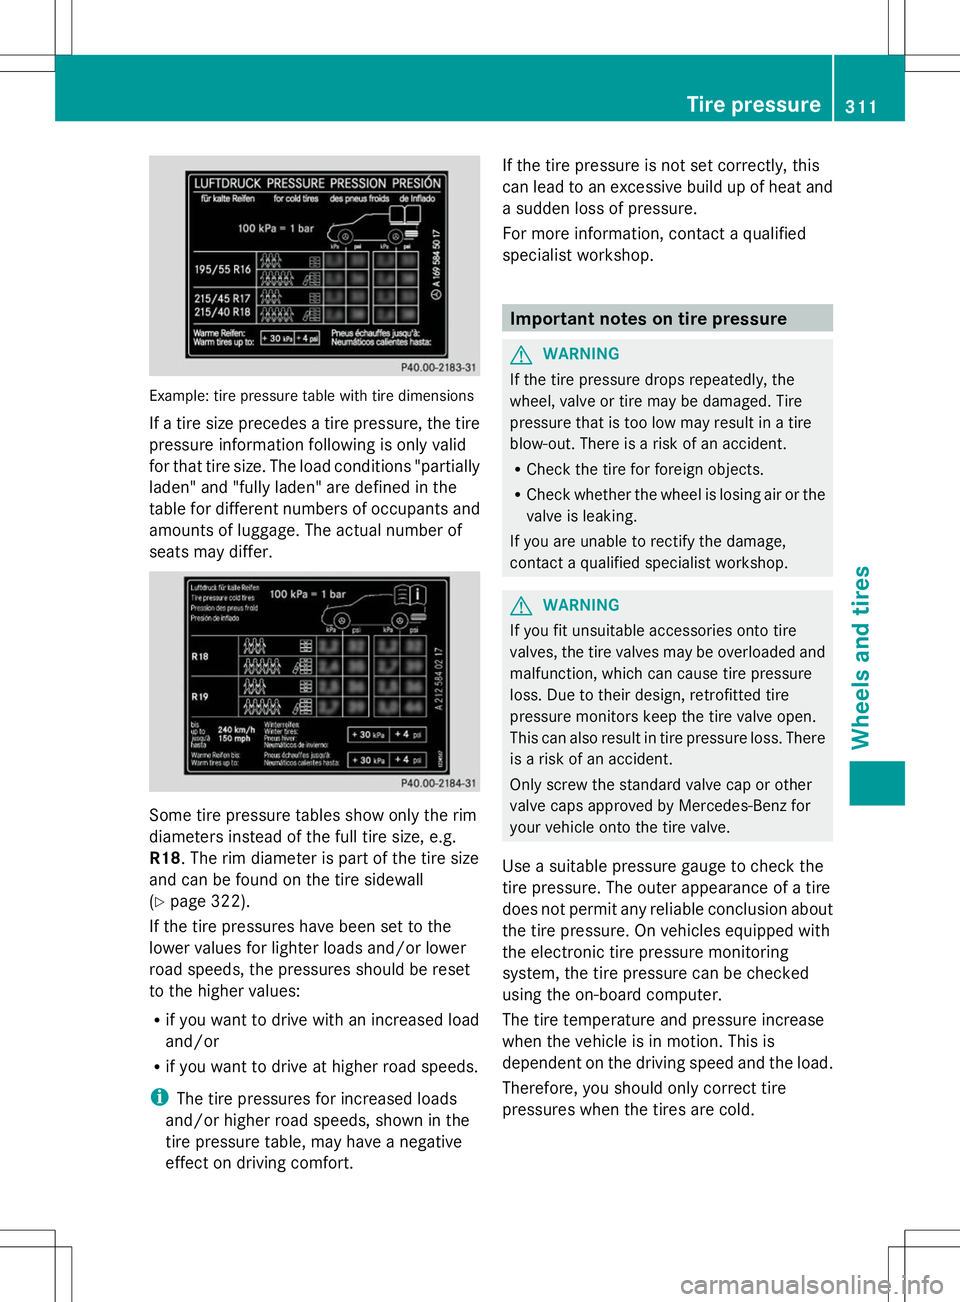
Example: tire pressure table with tire dimensions
If a tire size precedes a tire pressure, the tire
pressure information following is only valid
for that tire size. The load conditions "partially
laden" and "fully laden" are defined in the
table for different numbers of occupants and
amounts of luggage. The actual number of
seats may differ. Some tire pressure tables show only the rim
diameters instead of the full tire size, e.g.
R18 . The rim diameter is part of the tire size
and can be found on the tire sidewall
(Y page 322).
If the tire pressures have been set to the
lower values for lighter loads and/or lower
road speeds, the pressures should be reset
to the higher values:
R if you want to drive with an increased load
and/or
R if you want to drive at higher road speeds.
i The tire pressures for increased loads
and/or higher road speeds, shown in the
tire pressure table, may have a negative
effect on driving comfort. If the tire pressure is not set correctly, this
can lead to an excessive build up of heat and
a sudden loss of pressure.
For more information, contact a qualified
specialist workshop.
Important notes on tire pressure
G
WARNING
If the tire pressure drops repeatedly, the
wheel, valve or tire may be damaged. Tire
pressure that is too low may result in a tire
blow-out. There is a risk of an accident.
R Check the tire for foreign objects.
R Check whether the wheel is losing air or the
valve is leaking.
If you are unable to rectify the damage,
contact a qualified specialist workshop. G
WARNING
If you fit unsuitable accessories onto tire
valves, the tire valves may be overloaded and
malfunction, which can cause tire pressure
loss. Due to their design, retrofitted tire
pressure monitors keep the tire valve open.
This can also result in tire pressure loss. There
is a risk of an accident.
Only screw the standard valve cap or other
valve caps approved by Mercedes-Benz for
your vehicle onto the tire valve.
Use a suitable pressure gauge to check the
tire pressure. The outer appearance of a tire
does not permit any reliable conclusion about
the tire pressure. On vehicles equipped with
the electronic tire pressure monitoring
system, the tire pressure can be checked
using the on-board computer.
The tire temperature and pressure increase
when the vehicle is in motion. This is
dependent on the driving speed and the load.
Therefore, you should only correct tire
pressures when the tires are cold. Tire pressure
311Wheels and tires Z
Page 317 of 356
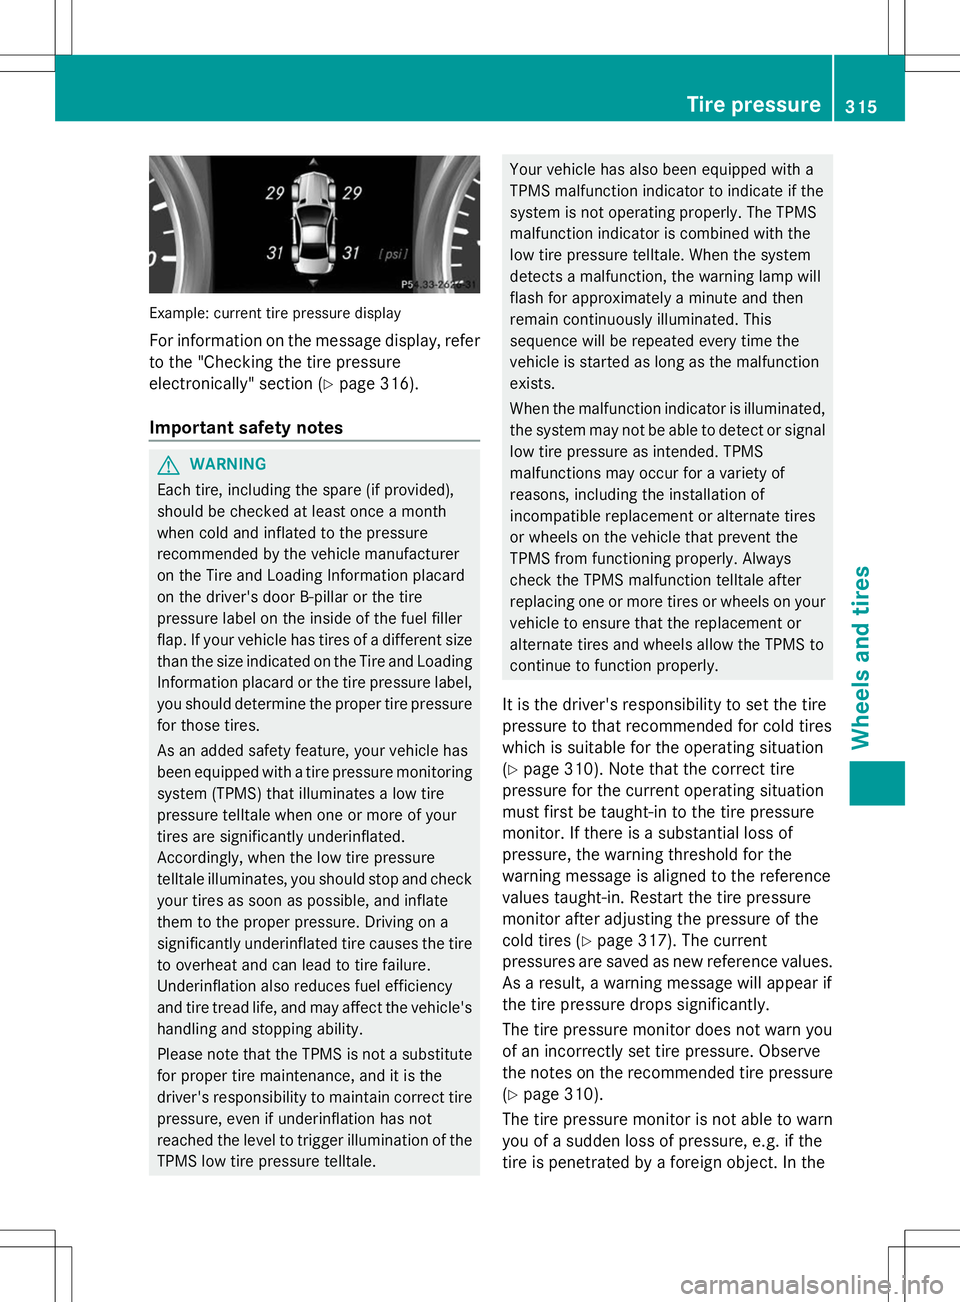
Example: current tire pressure display
For information on the message display, refer
to the "Checking the tire pressure
electronically" section (Y page 316).
Important safety notes G
WARNING
Each tire, including the spare (if provided),
should be checked at least once a month
when cold and inflated to the pressure
recommended by the vehicle manufacturer
on the Tire and Loading Information placard
on the driver's door B-pillar or the tire
pressure label on the inside of the fuel filler
flap. If your vehicle has tires of a different size
than the size indicated on the Tire and Loading
Information placard or the tire pressure label,
you should determine the proper tire pressure
for those tires.
As an added safety feature, your vehicle has
been equipped with a tire pressure monitoring
system (TPMS) that illuminates a low tire
pressure telltale when one or more of your
tires are significantly underinflated.
Accordingly, when the low tire pressure
telltale illuminates, you should stop and check
your tires as soon as possible, and inflate
them to the proper pressure. Driving on a
significantly underinflated tire causes the tire
to overheat and can lead to tire failure.
Underinflation also reduces fuel efficiency
and tire tread life, and may affect the vehicle's
handling and stopping ability.
Please note that the TPMS is not a substitute
for proper tire maintenance, and it is the
driver's responsibility to maintain correct tire
pressure, even if underinflation has not
reached the level to trigger illumination of the
TPMS low tire pressure telltale. Your vehicle has also been equipped with a
TPMS malfunction indicator to indicate if the
system is not operating properly. The TPMS
malfunction indicator is combined with the
low tire pressure telltale. When the system
detects a malfunction, the warning lamp will
flash for approximately a minute and then
remain continuously illuminated. This
sequence will be repeated every time the
vehicle is started as long as the malfunction
exists.
When the malfunction indicator is illuminated,
the system may not be able to detect or signal
low tire pressure as intended. TPMS
malfunctions may occur for a variety of
reasons, including the installation of
incompatible replacement or alternate tires
or wheels on the vehicle that prevent the
TPMS from functioning properly. Always
check the TPMS malfunction telltale after
replacing one or more tires or wheels on your
vehicle to ensure that the replacement or
alternate tires and wheels allow the TPMS to
continue to function properly.
It is the driver's responsibility to set the tire
pressure to that recommended for cold tires
which is suitable for the operating situation
(Y page 310). Note that the correct tire
pressure for the current operating situation
must first be taught-in to the tire pressure
monitor. If there is a substantial loss of
pressure, the warning threshold for the
warning message is aligned to the reference
values taught-in. Restart the tire pressure
monitor after adjusting the pressure of the
cold tires (Y page 317). The current
pressures are saved as new reference values.
As a result, a warning message will appear if
the tire pressure drops significantly.
The tire pressure monitor does not warn you
of an incorrectly set tire pressure. Observe
the notes on the recommended tire pressure
(Y page 310).
The tire pressure monitor is not able to warn
you of a sudden loss of pressure, e.g. if the
tire is penetrated by a foreign object. In the Tire pressure
315Wheels and tires Z
Page 320 of 356
your vehicle. Never overload the tires by
exceeding the maximum load.
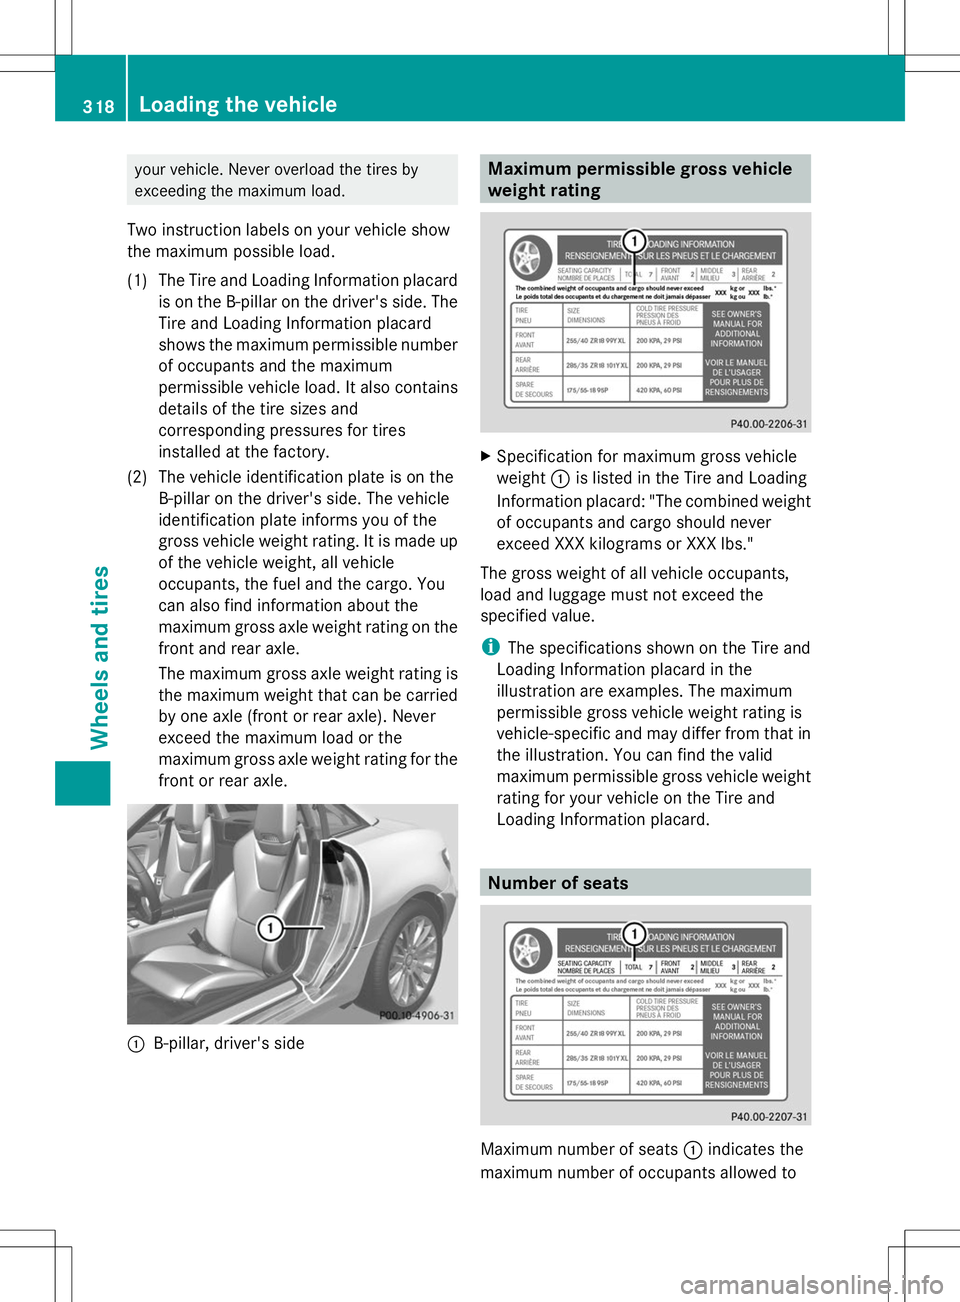
Two instruction labels on your vehicle show
the maximum possible load.
(1) The Tire and Loading Information placard is on the B-pillar on the driver's side. The
Tire and Loading Information placard
shows the maximum permissible number
of occupants and the maximum
permissible vehicle load. It also contains
details of the tire sizes and
corresponding pressures for tires
installed at the factory.
(2) The vehicle identification plate is on the B-pillar on the driver's side. The vehicle
identification plate informs you of the
gross vehicle weight rating. It is made up
of the vehicle weight, all vehicle
occupants, the fuel and the cargo. You
can also find information about the
maximum gross axle weight rating on the
front and rear axle.
The maximum gross axle weight rating is
the maximum weight that can be carried
by one axle (front or rear axle). Never
exceed the maximum load or the
maximum gross axle weight rating for the
front or rear axle. :
B-pillar, driver's side Maximum permissible gross vehicle
weight rating
X
Specification for maximum gross vehicle
weight :is listed in the Tire and Loading
Information placard: "The combined weight
of occupants and cargo should never
exceed XXX kilograms or XXX lbs."
The gross weight of all vehicle occupants,
load and luggage must not exceed the
specified value.
i The specifications shown on the Tire and
Loading Information placard in the
illustration are examples. The maximum
permissible gross vehicle weight rating is
vehicle-specific and may differ from that in
the illustration. You can find the valid
maximum permissible gross vehicle weight
rating for your vehicle on the Tire and
Loading Information placard. Number of seats
Maximum number of seats
:indicates the
maximum number of occupants allowed to 318
Loading the vehicleWheels and ti
res
Page 321 of 356
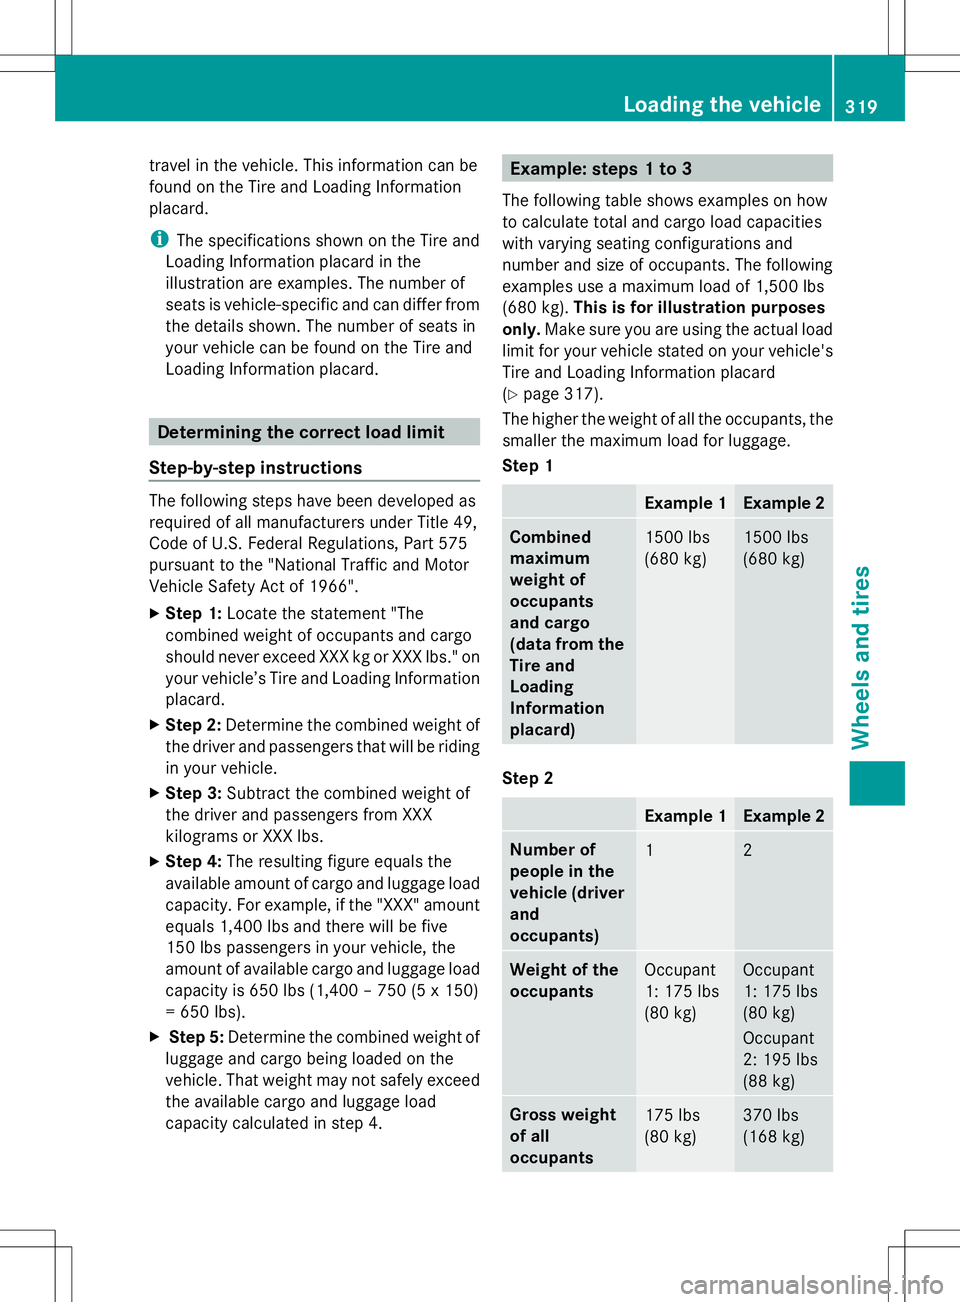
travel in the vehicle. This information can be
found on the Tire and Loading Information
placard.
i The specifications shown on the Tire and
Loading Information placard in the
illustration are examples. The number of
seats is vehicle-specific and can differ from
the details shown. The number of seats in
your vehicle can be found on the Tire and
Loading Information placard. Determining the correct load limit
Step-by-step instructions The following steps have been developed as
required of all manufacturers under Title 49,
Code of U.S. Federal Regulations, Part 575
pursuant to the "National Traffic and Motor
Vehicle Safety Act of 1966".
X Step 1: Locate the statement "The
combined weight of occupants and cargo
should never exceed XXX kg or XXX lbs." on
your vehicle’s Tire and Loading Information
placard.
X Step 2: Determine the combined weight of
the driver and passengers that will be riding
in your vehicle.
X Step 3: Subtract the combined weight of
the driver and passengers from XXX
kilograms or XXX lbs.
X Step 4: The resulting figure equals the
available amount of cargo and luggage load
capacity. For example, if the "XXX" amount
equals 1,400 lbs and there will be five
150 lbs passengers in your vehicle, the
amount of available cargo and luggage load
capacity is 650 lbs (1,400 – 750 (5 x 150)
= 650 lbs).
X Step 5: Determine the combined weight of
luggage and cargo being loaded on the
vehicle. That weight may not safely exceed
the available cargo and luggage load
capacity calculated in step 4. Example: steps 1 to 3
The following table shows examples on how
to calculate total and cargo load capacities
with varying seating configurations and
number and size of occupants. The following
examples use a maximum load of 1,500 lbs
(680 kg). This is for illustration purposes
only. Make sure you are using the actual load
limit for your vehicle stated on your vehicle's
Tire and Loading Information placard
(Y page 317).
The higher the weight of all the occupants, the
smaller the maximum load for luggage.
Step 1 Example 1 Example 2
Combined
maximum
weight of
occupants
and cargo
(data from the
Tire and
Loading
Information
placard)
1500 lbs
(680 kg) 1500 lbs
(680 kg)
Step 2
Example 1 Example 2
Number of
people in the
vehicle (driver
and
occupants)
1 2
Weight of the
occupants
Occupant
1: 175 lbs
(80 kg) Occupant
1: 175 lbs
(80 kg)
Occupant
2: 195 lbs
(88 kg)
Gross weight
of all
occupants
175 lbs
(80 kg) 370 lbs
(168 kg)Loading the vehicle
319Wheels and tires Z
Page 324 of 356
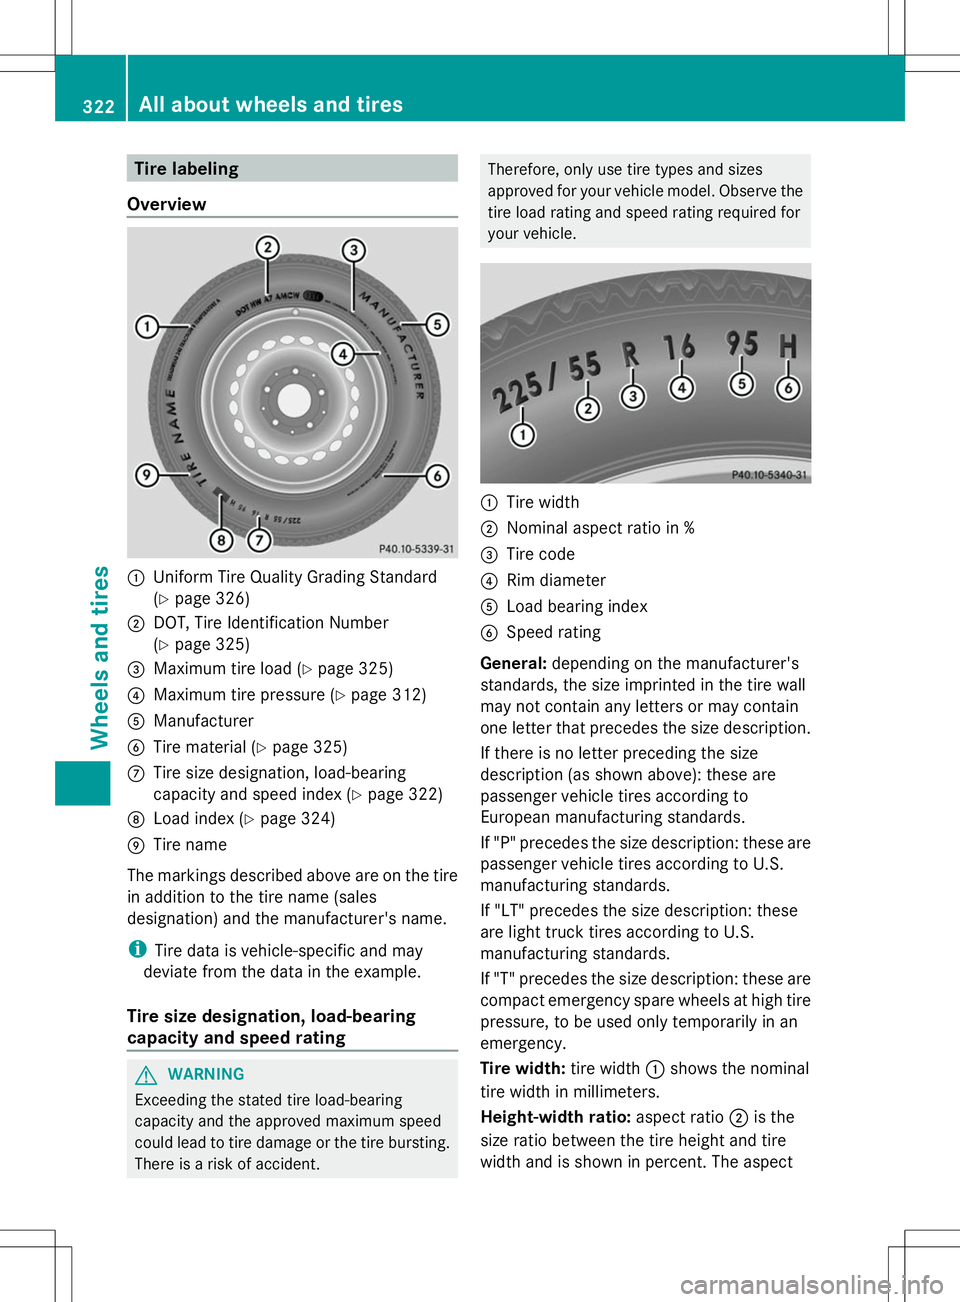
Tire labeling
Overview :
Uniform Tire Quality Grading Standard
(Y page 326)
; DOT, Tire Identification Number
(Ypage 325)
= Maximum tire load (Y page 325)
? Maximum tire pressure (Y page 312)
A Manufacturer
B Tire material (Y page 325)
C Tire size designation, load-bearing
capacity and speed index (Y page 322)
D Load index (Y page 324)
E Tire name
The markings described above are on the tire
in addition to the tire name (sales
designation) and the manufacturer's name.
i Tire data is vehicle-specific and may
deviate from the data in the example.
Tire size designation, load-bearing
capacity and speed rating G
WARNING
Exceeding the stated tire load-bearing
capacity and the approved maximum speed
could lead to tire damage or the tire bursting.
There is a risk of accident. Therefore, only use tire types and sizes
approved for your vehicle model. Observe the
tire load rating and speed rating required for
your vehicle.
:
Tire width
; Nominal aspect ratio in %
= Tire code
? Rim diameter
A Load bearing index
B Speed rating
General: depending on the manufacturer's
standards, the size imprinted in the tire wall
may not contain any letters or may contain
one letter that precedes the size description.
If there is no letter preceding the size
description (as shown above): these are
passenger vehicle tires according to
European manufacturing standards.
If "P" precedes the size description: these are
passenger vehicle tires according to U.S.
manufacturing standards.
If "LT" precedes the size description: these
are light truck tires according to U.S.
manufacturing standards.
If "T" precedes the size description: these are
compact emergency spare wheels at high tire
pressure, to be used only temporarily in an
emergency.
Tire width: tire width:shows the nominal
tire width in millimeters.
Height-width ratio: aspect ratio;is the
size ratio between the tire height and tire
width and is shown in percent. The aspect 322
All about
wheels and tiresWheels and tires
Page 325 of 356
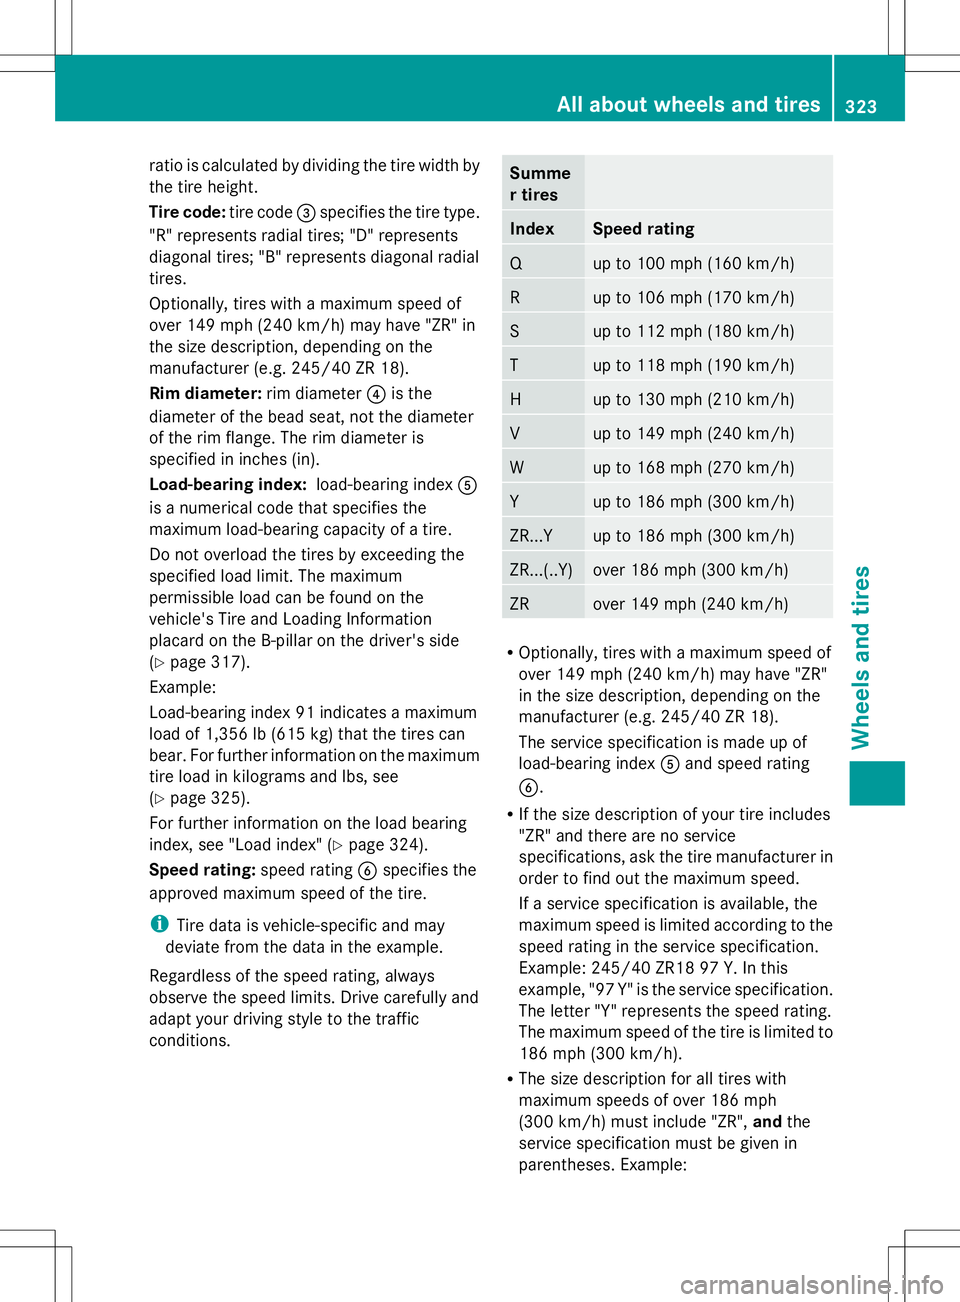
ratio is calculated by dividing the tire width by
the tire height.
Tire code: tire code=specifies the tire type.
"R" represents radial tires; "D" represents
diagonal tires; "B" represents diagonal radial
tires.
Optionally, tires with a maximum speed of
over 149 mph (240 km/h) may have "ZR" in
the size description, depending on the
manufacturer (e.g. 245/40 ZR 18).
Rim diameter: rim diameter?is the
diameter of the bead seat, not the diameter
of the rim flange. The rim diameter is
specified in inches (in).
Load-bearing index: load-bearing indexA
is a numerical code that specifies the
maximum load-bearing capacity of a tire.
Do not overload the tires by exceeding the
specified load limit. The maximum
permissible load can be found on the
vehicle's Tire and Loading Information
placard on the B-pillar on the driver's side
(Y page 317).
Example:
Load-bearing index 91 indicates a maximum
load of 1,356 lb (615 kg) that the tires can
bear. For further information on the maximum
tire load in kilograms and lbs, see
(Y page 325).
For further information on the load bearing
index, see "Load index" (Y page 324).
Speed rating: speed ratingBspecifies the
approved maximum speed of the tire.
i Tire data is vehicle-specific and may
deviate from the data in the example.
Regardless of the speed rating, always
observe the speed limits. Drive carefully and
adapt your driving style to the traffic
conditions. Summe
r tires
Index Speed rating
Q up to 100 mph (160 km/h)
R up to 106 mph (170 km/h)
S up to 112 mph (180 km/h)
T up to 118 mph (190 km/h)
H up to 130 mph (210 km/h)
V up to 149 mph (240 km/h)
W up to 168 mph (270 km/h)
Y up to 186 mph (300 km/h)
ZR...Y up to 186 mph (300 km/h)
ZR...(..Y) over 186 mph (300 km/h)
ZR over 149 mph (240 km/h)
R
Optionally, tires with a maximum speed of
over 149 mph (240 km/h) may have "ZR"
in the size description, depending on the
manufacturer (e.g. 245/40 ZR 18).
The service specification is made up of
load-bearing index Aand speed rating
B.
R If the size description of your tire includes
"ZR" and there are no service
specifications, ask the tire manufacturer in
order to find out the maximum speed.
If a service specification is available, the
maximum speed is limited according to the
speed rating in the service specification.
Example: 245/40 ZR18 97 Y.In this
example, "97 Y" is the service specification.
The letter "Y" represents the speed rating.
The maximum speed of the tire is limited to
186 mph (300 km/h).
R The size description for all tires with
maximum speeds of over 186 mph
(300 km/h) must include "ZR", andthe
service specification must be given in
parentheses. Example: All about wheels and tires
323Wheels and tires Z
Page 327 of 356
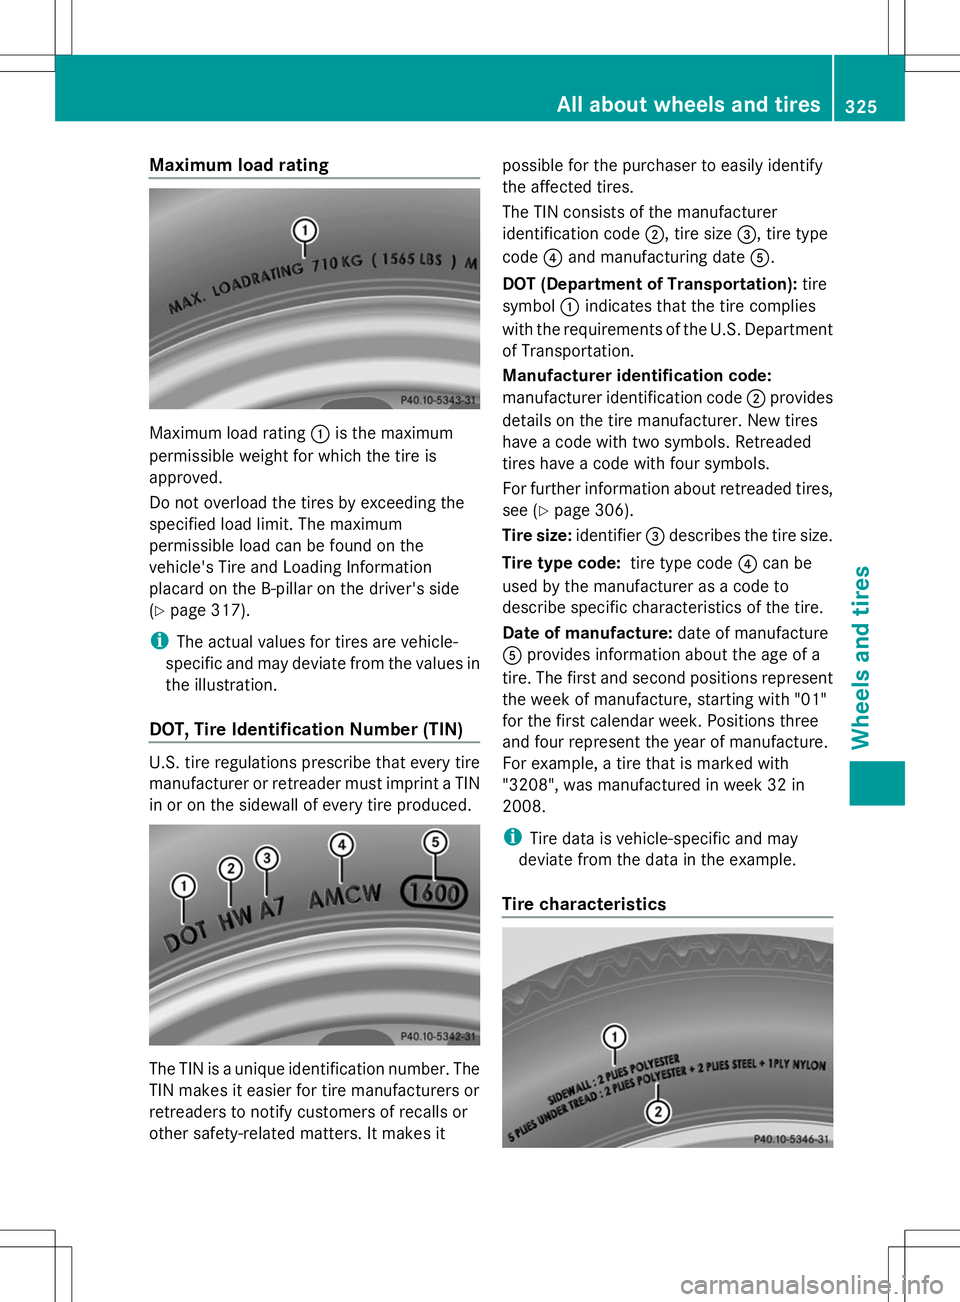
Maximum load rating
Maximum load rating
:is the maximum
permissible weight for which the tire is
approved.
Do not overload the tires by exceeding the
specified load limit. The maximum
permissible load can be found on the
vehicle's Tire and Loading Information
placard on the B-pillar on the driver's side
(Y page 317).
i The actual values for tires are vehicle-
specific and may deviate from the values in
the illustration.
DOT, Tire Identification Number (TIN) U.S. tire regulations prescribe that every tire
manufacturer or retreader must imprint a TIN
in or on the sidewall of every tire produced. The TIN is a unique identification number. The
TIN makes it easier for tire manufacturers or
retreaders to notify customers of recalls or
other safety-related matters. It makes it possible for the purchaser to easily identify
the affected tires.
The TIN consists of the manufacturer
identification code
;, tire size=, tire type
code ?and manufacturing date A.
DOT (Department of Transportation): tire
symbol :indicates that the tire complies
with the requirements of the U.S. Department
of Transportation.
Manufacturer identification code:
manufacturer identification code ;provides
details on the tire manufacturer. New tires
have a code with two symbols. Retreaded
tires have a code with four symbols.
For further information about retreaded tires,
see (Y page 306).
Tire size: identifier=describes the tire size.
Tire type code: tire type code?can be
used by the manufacturer as a code to
describe specific characteristics of the tire.
Date of manufacture: date of manufacture
A provides information about the age of a
tire. The first and second positions represent
the week of manufacture, starting with "01"
for the first calendar week. Positions three
and four represent the year of manufacture.
For example, a tire that is marked with
"3208", was manufactured in week 32 in
2008.
i Tire data is vehicle-specific and may
deviate from the data in the example.
Tire characteristics All about wheels and tires
325Wheels and tires Z