2014 MERCEDES-BENZ SL-CLASS ROADSTER maintenance
[x] Cancel search: maintenancePage 224 of 284
should drive for a few minutes after
cleaning. Braking heats the brake discs and
the brake pads/linings, thus drying them.
The vehicle can then be parked.
Regular care of your vehicle is a condition for
retaining the quality in the long term.
Use care products and cleaning agents
recommended and approved by Mercedes-
Benz. Exterior care
Automatic car wash G
WARNING
Braking efficiency is reduced after washing
the vehicle. There is a risk of an accident.
After the vehicle has been washed, brake
carefully while paying attention to the traffic
conditions until full braking power is restored.
! If DISTRONIC PLUS or the HOLD function
is activated, the vehicle brakes
automatically in certain situations. To
prevent damage to the vehicle, deactivate
DISTRONIC PLUS and the HOLD function in
the following or other similar situations:
R when towing the vehicle
R in the car wash
! It is preferable to use car washes with
adjustable high-pressure pre-cleaning that
corresponds to the specification for the
Cabriolet program. In car washes that use
high water pressures, there is a risk that a
small amount of water may leak into the
vehicle.
! Vehicles with HANDS-FREE ACCESS: if a
SmartKey with KEYLESS-GO is within the
detection range of the KEYLESS-GO
antenna, the following situations could lead
to the unintentional opening of the trunk
lid:
R using a car wash
R using a power washer Make sure that the SmartKey is at least
6.5 ft (2 m) away from the vehicle.
! Never clean your vehicle in a Touchless
Automatic Car Wash as these use special
cleaning agents. These cleaning agents can
damage the paintwork or plastic parts.
! Make sure that the automatic
transmission is in position Nwhen washing
your vehicle in a tow-through car wash. The
vehicle could be damaged if the
transmission is in another position.
! Make sure that:
R the side windows and the roof are
completely closed
R the climate control blower is switched off
R the windshield wiper switch is at position
0
The vehicle could otherwise be damaged.
You can wash the vehicle in an automatic car
wash from the very start.
If the vehicle is very dirty, pre-wash it before
cleaning it in an automatic car wash.
After using an automatic car wash, wipe off
wax from the windshield and the wiper
blades. This will prevent smears and reduce
wiping noises caused by residue on the
windshield.
Information in the Digital Operator's
Manual In the Digital Operator's Manual you will find
information on the following topics:
R
Washing by hand
R Power washers
R Cleaning the wheels
R Cleaning the paintwork
R Matte finish care
R Cleaning the windows
R Cleaning wiper blades
R Cleaning the exterior lighting
R Cleaning the mirror turn signals
R Cleaning the sensors 222
CareMaintenance and care
Page 225 of 284

R
Cleaning the rear view camera
R Cleaning the exhaust pipes Interior care
In the Digital Operator's Manual you will find
information on the following topics:
R Cleaning the display
R Cleaning Night View Assist Plus
R Cleaning the plastic trim
R Cleaning the steering wheel and gear or
selector lever
R Cleaning genuine wood and trim strips
R Cleaning the seat covers
R Cleaning the seat belts
R Cleaning the headliner and carpets Care
223Maintenance and care Z
Page 234 of 284
battery carried out at a qualified specialist
workshop.
For more information on ABS (Y page 67) and
ESP (Y page 69). G
WARNING
Electrostatic build-up can lead to the creation
of sparks, which could ignite the highly
explosive gases of a battery. There is a risk of
an explosion.
Before handling the battery, touch the vehicle
body to remove any existing electrostatic
build-up.
The highly flammable gas mixture forms when
charging the battery as well as when jump-
starting.
Always make sure that neither you nor the
battery is electrostatically charged. A build-
up of electrostatic charge can be caused, for
example:
R by wearing clothing made from synthetic
fibers
R due to friction between clothing and seats
R if you push or pull the battery across the
carpet or other synthetic materials
R if you wipe the battery with a cloth G
WARNING
During the charging process, a battery
produces hydrogen gas. If a short circuit
occurs or sparks are created, the hydrogen
gas can ignite. There is a risk of an explosion.
R Make sure that the positive terminal of a
connected battery does not come into
contact with vehicle parts.
R Never place metal objects or tools on a
battery.
R It is important that you observe the
described order of the battery terminals
when connecting and disconnecting a
battery.
R When jump-starting, make sure that the
battery poles with identical polarity are
connected. R
It is particularly important to observe the
described order when connecting and
disconnecting the jumper cables.
R Never connect or disconnect the battery
terminals while the engine is running. G
WARNING
Battery acid is caustic. There is a risk of injury.
Avoid contact with the skin, eyes or clothing.
Do not inhale any battery gases. Do not lean
over the battery. Keep children away from
batteries. Wash battery acid immediately with
water and seek medical attention. H
Environmental note Batteries contain dangerous
substances. It is against the
law to dispose of them with
the household rubbish. They
must be collected separately
and recycled to protect the
environment. Dispose of batteries in an
environmentally friendly
manner. Take discharged
batteries to a qualified
specialist workshop or a
special collection point for
used batteries.
! Have the battery checked regularly at a
qualified specialist workshop.
Observe the service intervals in the
Maintenance Booklet or contact a qualified
specialist workshop for more information.
! You should have all work involving the
battery carried out at a qualified specialist
workshop. In the exceptional case that it is
necessary for you to disconnect the battery
yourself, make sure that:
R you switch off the engine and remove the
SmartKey. On vehicles with KEYLESS-
GO, ensure that the ignition is switched
off. Check that all the indicator lamps in
the instrument cluster are off. Otherwise, 232
Battery (vehicle)Breakdown assistance
Page 252 of 284
Tire pressure monitor
General notes If a tire pressure monitor is installed, the
vehicle's wheels have sensors that monitor
the tire pressures in all four tires. The tire
pressure monitor warns you if the pressure
drops in one or more of the tires. The tire
pressure monitor only functions if the correct
sensors are installed on all wheels.
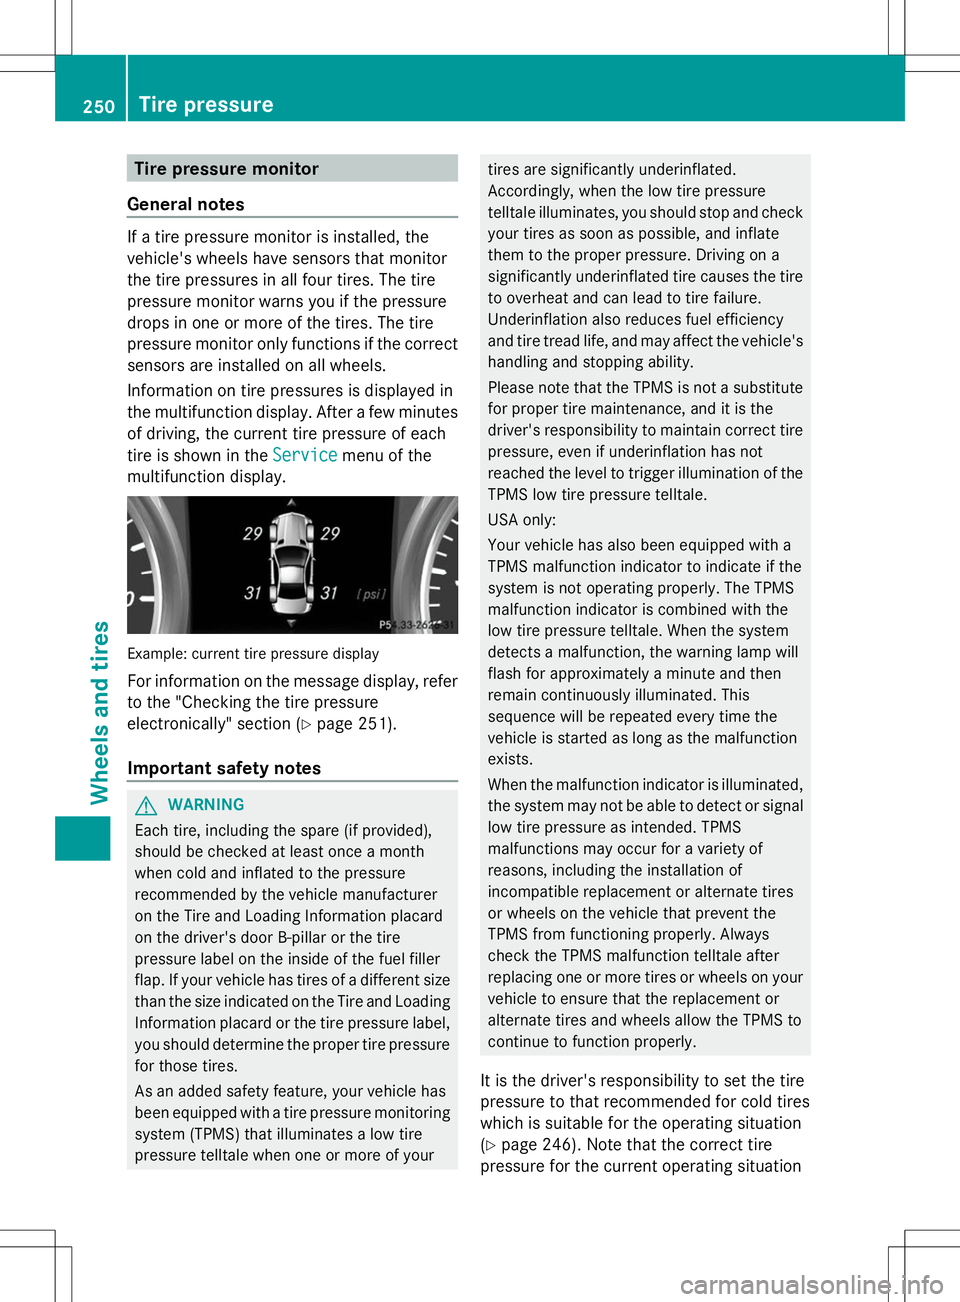
Information on tire pressures is displayed in
the multifunction display. After a few minutes
of driving, the current tire pressure of each
tire is shown in the Service
Service menu of the
multifunction display. Example: current tire pressure display
For information on the message display, refer
to the "Checking the tire pressure
electronically" section (Y page 251).
Important safety notes G
WARNING
Each tire, including the spare (if provided),
should be checked at least once a month
when cold and inflated to the pressure
recommended by the vehicle manufacturer
on the Tire and Loading Information placard
on the driver's door B-pillar or the tire
pressure label on the inside of the fuel filler
flap. If your vehicle has tires of a different size
than the size indicated on the Tire and Loading
Information placard or the tire pressure label,
you should determine the proper tire pressure
for those tires.
As an added safety feature, your vehicle has
been equipped with a tire pressure monitoring
system (TPMS) that illuminates a low tire
pressure telltale when one or more of your tires are significantly underinflated.
Accordingly, when the low tire pressure
telltale illuminates, you should stop and check
your tires as soon as possible, and inflate
them to the proper pressure. Driving on a
significantly underinflated tire causes the tire
to overheat and can lead to tire failure.
Underinflation also reduces fuel efficiency
and tire tread life, and may affect the vehicle's
handling and stopping ability.
Please note that the TPMS is not a substitute
for proper tire maintenance, and it is the
driver's responsibility to maintain correct tire
pressure, even if underinflation has not
reached the level to trigger illumination of the
TPMS low tire pressure telltale.
USA only:
Your vehicle has also been equipped with a
TPMS malfunction indicator to indicate if the
system is not operating properly. The TPMS
malfunction indicator is combined with the
low tire pressure telltale. When the system
detects a malfunction, the warning lamp will
flash for approximately a minute and then
remain continuously illuminated. This
sequence will be repeated every time the
vehicle is started as long as the malfunction
exists.
When the malfunction indicator is illuminated,
the system may not be able to detect or signal
low tire pressure as intended. TPMS
malfunctions may occur for a variety of
reasons, including the installation of
incompatible replacement or alternate tires
or wheels on the vehicle that prevent the
TPMS from functioning properly. Always
check the TPMS malfunction telltale after
replacing one or more tires or wheels on your
vehicle to ensure that the replacement or
alternate tires and wheels allow the TPMS to
continue to function properly.
It is the driver's responsibility to set the tire
pressure to that recommended for cold tires
which is suitable for the operating situation
(Y page 246). Note that the correct tire
pressure for the current operating situation 250
Tire pressureWheels and tires
Page 267 of 284
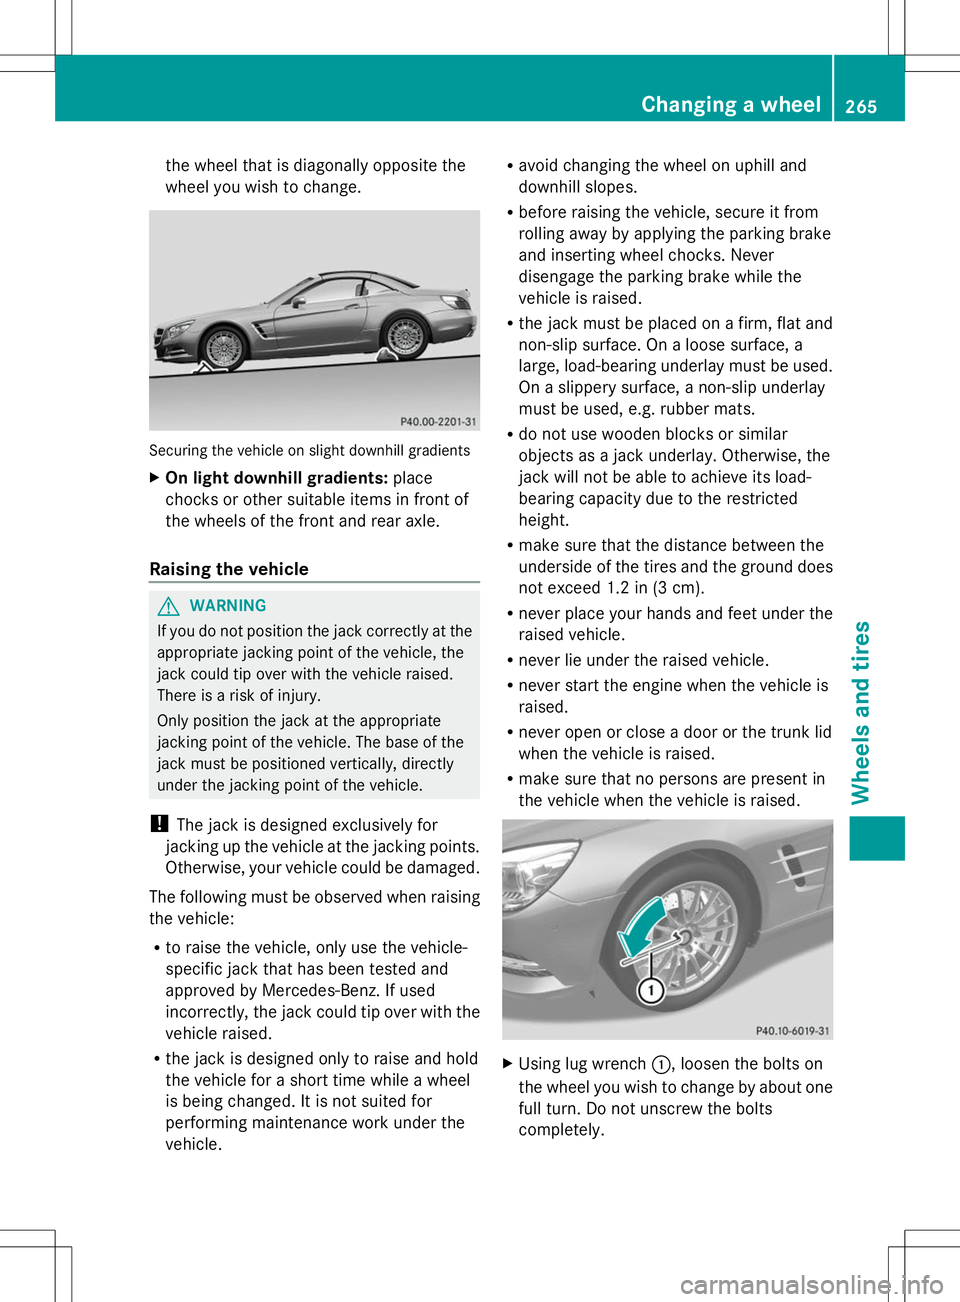
the wheel that is diagonally opposite the
wheel you wish to change.
Securing the vehicle on slight downhill gradients
X On light downhill gradients: place
chocks or other suitable items in front of
the wheels of the front and rear axle.
Raising the vehicle G
WARNING
If you do not position the jack correctly at the
appropriate jacking point of the vehicle, the
jack could tip over with the vehicle raised.
There is a risk of injury.
Only position the jack at the appropriate
jacking point of the vehicle. The base of the
jack must be positioned vertically, directly
under the jacking point of the vehicle.
! The jack is designed exclusively for
jacking up the vehicle at the jacking points.
Otherwise, your vehicle could be damaged.
The following must be observed when raising
the vehicle:
R to raise the vehicle, only use the vehicle-
specific jack that has been tested and
approved by Mercedes-Benz. If used
incorrectly, the jack could tip over with the
vehicle raised.
R the jack is designed only to raise and hold
the vehicle for a short time while a wheel
is being changed. It is not suited for
performing maintenance work under the
vehicle. R
avoid changing the wheel on uphill and
downhill slopes.
R before raising the vehicle, secure it from
rolling away by applying the parking brake
and inserting wheel chocks. Never
disengage the parking brake while the
vehicle is raised.
R the jack must be placed on a firm, flat and
non-slip surface. On a loose surface, a
large, load-bearing underlay must be used.
On a slippery surface, a non-slip underlay
must be used, e.g. rubber mats.
R do not use wooden blocks or similar
objects as a jack underlay. Otherwise, the
jack will not be able to achieve its load-
bearing capacity due to the restricted
height.
R make sure that the distance between the
underside of the tires and the ground does
not exceed 1.2 in (3 cm).
R never place your hands and feet under the
raised vehicle.
R never lie under the raised vehicle.
R never start the engine when the vehicle is
raised.
R never open or close a door or the trunk lid
when the vehicle is raised.
R make sure that no persons are present in
the vehicle when the vehicle is raised. X
Using lug wrench :, loosen the bolts on
the wheel you wish to change by about one
full turn. Do not unscrew the bolts
completely. Changing a
wheel
265Wheels an d tires Z
Page 271 of 284

The recommended pressures for various
operating conditions can be found:
R
on the Tire and Loading Information placard
with the recommended tire pressures on
the B-pillar on the driver's side
R in the tire pressure table on the inside of
the fuel filler flap
Observe the notes on recommended tire
pressures under various operating conditions
(Y page 246).
Check tire pressures regularly, and only when
the tires are cold. Comply with the
maintenance recommendations of the tire
manufacturer in the vehicle document wallet.
Notes on the vehicle equipment – always
equip the vehicle with:
R tires of the same size on a given axle (left/
right)
R the same type of tires at a given time
(summer tires, winter tires, MOExtended
tires)
Exception: it is permissible to install a
different type or make in the event of a flat
tire. Observe the "MOExtended tires (tires
with run-flat characteristics" section
(Y page 227).
Vehicles equipped with MOExtended tires are
not equipped with a TIREFIT kit at the factory.
It is therefore recommended that you
additionally equip your vehicle with a TIREFIT
kit if you mount tires that do not feature run-
flat properties, e.g. winter tires. A TIREFIT kit
may be obtained from a qualified specialist
workshop.
i Not all wheel and tire combinations are
available at the factory for all countries.
i The following pages contain information
on approved wheel rims and tire sizes for
equipping your vehicle with winter tires.
Winter tires are not available at the factory
as standard equipment or optional extras.
If you want to equip your vehicle with
approved winter tires, it may be necessary
to obtain wheel rims in the corresponding
size. The size of the approved winter tires may differ from the standard tires. This is
dependent on the model and the
equipment installed at the factory.
The tires and wheel rims, as well as further
information, can be obtained at a qualified
specialist workshop. Wheel and tire combinations
269Wheels and tires Z
Page 278 of 284
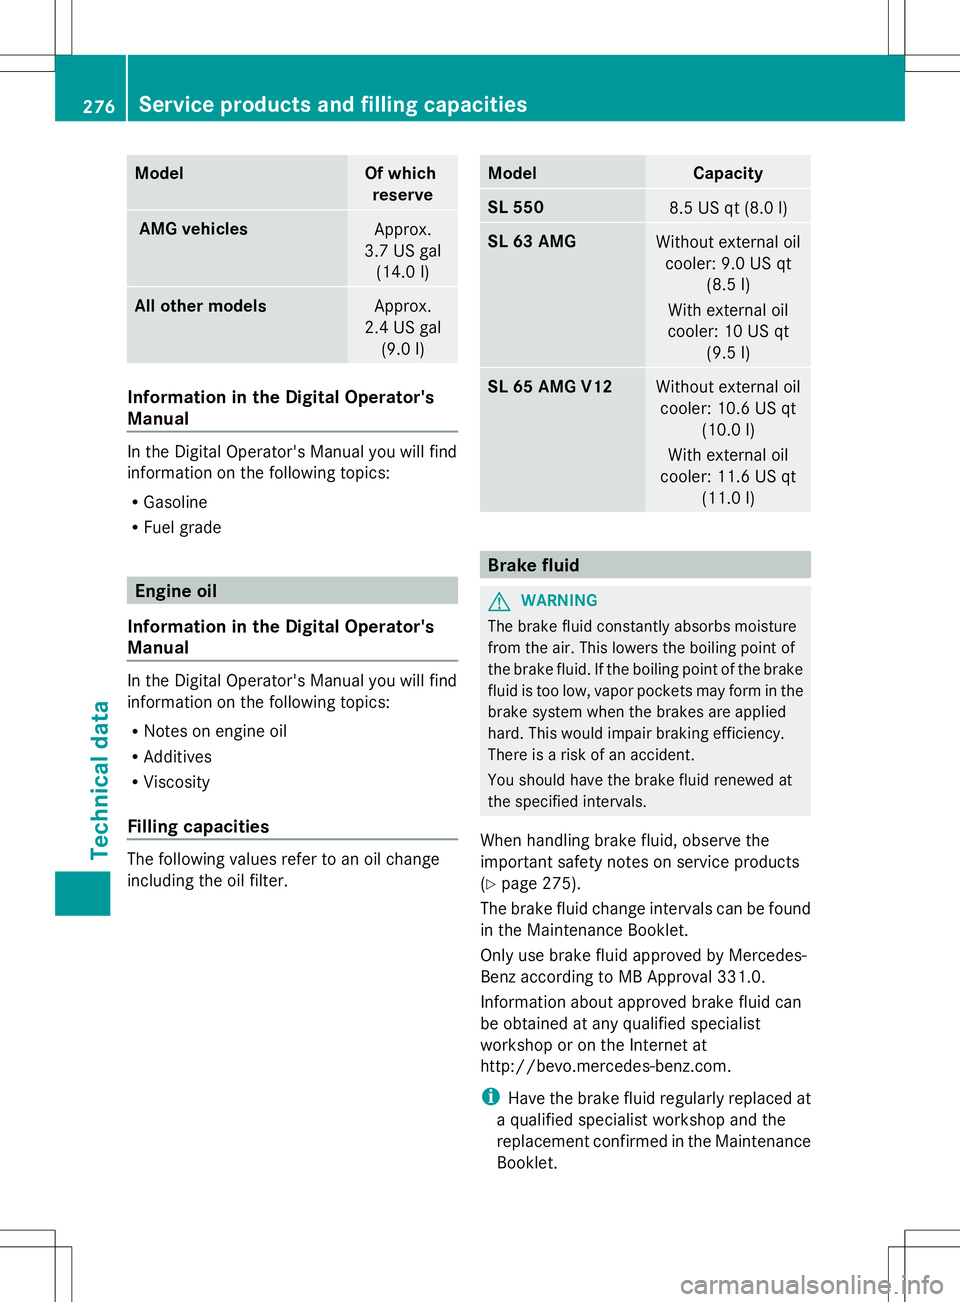
Model Of which
reserve AMG vehicles
Approx.
3.7 US gal (14.0 l) All other models
Approx.
2.4 US gal (9.0 l) Information in the Digital Operator's
Manual
In the Digital Operator's Manual you will find
information on the following topics:
R
Gasoline
R Fuel grade Engine oil
Information in the Digital Operator's
Manual In the Digital Operator's Manual you will find
information on the following topics:
R
Notes on engine oil
R Additives
R Viscosity
Filling capacities The following values refer to an oil change
including the oil filter. Model Capacity
SL 550
8.5 US qt (8.0 l)
SL 63 AMG
Without external oil
cooler: 9.0 US qt (8.5 l)
With external oil
cooler: 10 US qt (9.5 l) SL 65 AMG V12
Without external oil
cooler: 10.6 US qt (10.0 l)
With external oil
cooler: 11.6 US qt (11.0 l) Brake fluid
G
WARNING
The brake fluid constantly absorbs moisture
from the air. This lowers the boiling point of
the brake fluid. If the boiling point of the brake
fluid is too low, vapor pockets may form in the
brake system when the brakes are applied
hard. This would impair braking efficiency.
There is a risk of an accident.
You should have the brake fluid renewed at
the specified intervals.
When handling brake fluid, observe the
important safety notes on service products
(Y page 275).
The brake fluid change intervals can be found
in the Maintenance Booklet.
Only use brake fluid approved by Mercedes-
Benz according to MB Approval 331.0.
Information about approved brake fluid can
be obtained at any qualified specialist
workshop or on the Internet at
http://bevo.mercedes-benz.com.
i Have the brake fluid regularly replaced at
a qualified specialist workshop and the
replacement confirmed in the Maintenance
Booklet. 276
Service products and filling capacitiesTechnical data
Page 279 of 284

Coolant
Important safety notes G
WARNING
If antifreeze comes into contact with hot
components in the engine compartment, it
may ignite. There is a risk of fire and injury.
Let the engine cool down before you add
antifreeze. Make sure that antifreeze is not
spilled next to the filler neck. Thoroughly
clean the antifreeze from components before
starting the engine.
! Only add coolant that has been premixed
with the desired antifreeze protection. You
could otherwise damage the engine.
Further information on coolants can be
found in the Mercedes-Benz Specifications
for Service Products, MB Specifications for
Service Products 310.1, e.g. on the
Internet at
http://bevo.mercedes-benz.co m.Or
contact a qualified specialist workshop.
! Always use a suitable coolant mixture,
even in countries where high temperatures
prevail.
Otherwise, the engine cooling system is not
sufficiently protected from corrosion and
overheating.
i Have the coolant regularly replaced at a
qualified specialist workshop and the
replacement confirmed in the Maintenance
Booklet.
Comply with the important safety precautions
for service products when handling coolant
(Y page 275).
The coolant is a mixture of water and
antifreeze/corrosion inhibitor. It performs
the following tasks:
R corrosion protection
R antifreeze protection
R raising the boiling point
If the coolant has antifreeze protection down
to -35 ‡ (-37 †), the boiling point of the coolant during operation is approximately
266 ‡ (130 †).
The antifreeze/corrosion inhibitor
concentration in the engine cooling system
should:
R be at least 50%. This will protect the engine
cooling system against freezing down to
approximately -35 ‡ (-37 †).
R not exceed 55% (antifreeze protection
down to -49 ‡ [-45 †]). Otherwise, heat
will not be dissipated as effectively.
If the vehicle has lost coolant, add equal
amounts of water and antifreeze/corrosion
inhibitor.
Mercedes-Benz recommends an antifreeze/
corrosion inhibitor concentrate in
accordance with MB Specifications for
Service Products 310.1.
i When the vehicle is first delivered, it is
filled with a coolant mixture that ensures
adequate antifreeze and corrosion
protection.
i The coolant is checked with every
maintenance interval at a qualified
specialist workshop.
Filling capacities Model Capacity
SL 550
Approx. 13.7 US qt
(13.0 l) SL 63 AMG
Approx. 11.6 US qt
(11.0 l) SL 65 AMG V12
Approx. 13.5 US qt
(12.8 l) i
Use antifreeze/corrosion inhibitor
according to MB approval 325.0 or 326.0. Service products and filling capacities
277Technical data Z