2014 MERCEDES-BENZ S-Class seat control
[x] Cancel search: seat controlPage 206 of 434

R
the transmission must be in position D.
R the driver's door must be closed when you
shift from Pto Dor your seat belt must be
fastened.
R the front-passenger door and rear doors
must be closed.
Activating X
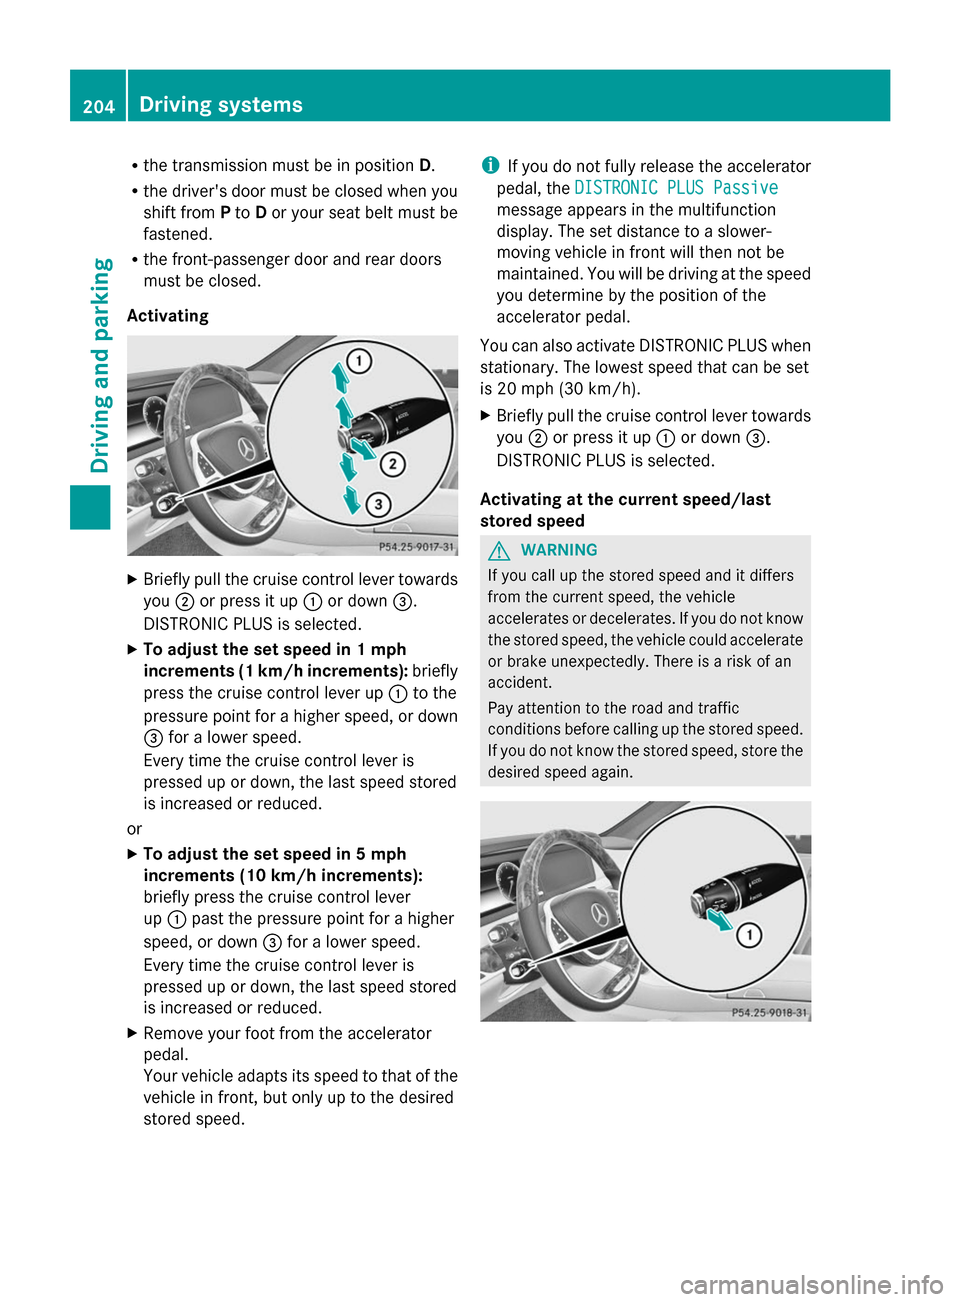
Briefly pull the cruise control lever towards
you 0044or press it up 0043or down 0087.
DISTRONIC PLUS is selected.
X To adjust the set speed in 1 mph
increments (1 km/h increments): briefly
press the cruise control lever up 0043to the
pressure point for a higher speed, or down
0087 for a lower speed.
Every time the cruise control lever is
pressed up or down, the last speed stored
is increased or reduced.
or
X To adjust the set speed in 5 mph
increments (10 km/h increments):
briefly press the cruise control lever
up 0043 past the pressure point for a higher
speed, or down 0087for a lower speed.
Every time the cruise control lever is
pressed up or down, the last speed stored
is increased or reduced.
X Remove your foot from the accelerator
pedal.
Your vehicle adapts its speed to that of the
vehicle in front, but only up to the desired
stored speed. i
If you do not fully release the accelerator
pedal, the DISTRONIC PLUS Passive
DISTRONIC PLUS Passive
message appears in the multifunction
display. The set distance to a slower-
moving vehicle in front will then not be
maintained. You will be driving at the speed
you determine by the position of the
accelerator pedal.
You can also activate DISTRONIC PLUS when
stationary. The lowest speed that can be set
is 20 mph (30 km/h).
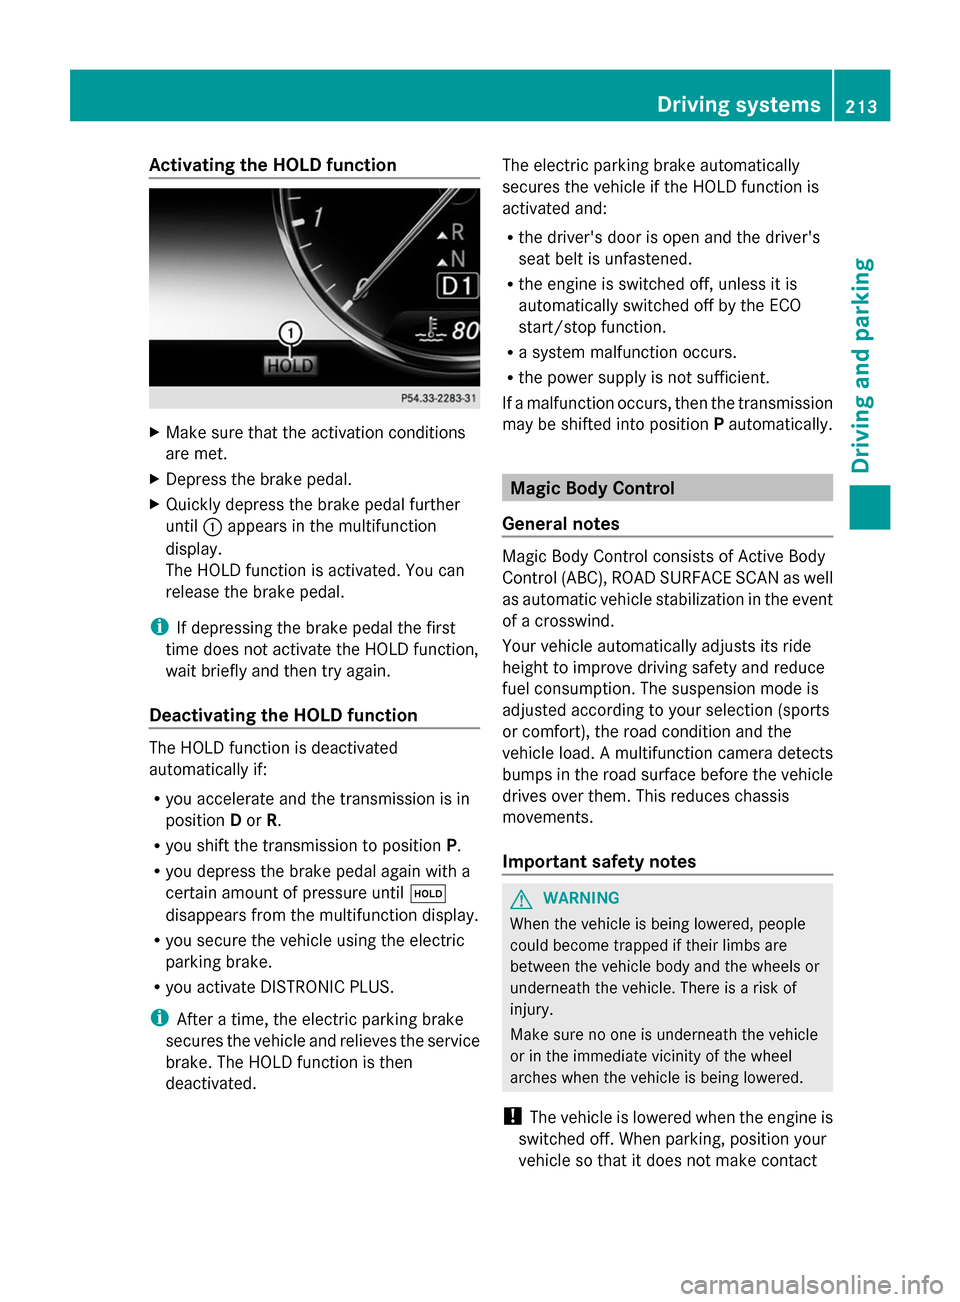
X Briefly pull the cruise control lever towards
you 0044or press it up 0043or down 0087.
DISTRONIC PLUS is selected.
Activating at the current speed/last
stored speed G
WARNING
If you call up the stored speed and it differs
from the current speed, the vehicle
accelerates or decelerates. If you do not know
the stored speed, the vehicle could accelerate
or brake unexpectedly. There is a risk of an
accident.
Pay attention to the road and traffic
conditions before calling up the stored speed.
If you do not know the stored speed, store the
desired speed again. 204
Driving systemsDriving an
d parking
Page 208 of 434

R
the electrical system in the engine
compartment, the battery or the fuses have
been tampered with.
R the battery is disconnected.
R the accelerator pedal has been depressed,
e.g. by a vehicle occupant.
There is a risk of an accident.
If you wish to exit the vehicle, always turn off
DISTRONIC PLUS and secure the vehicle
against rolling away.
For further information on deactivating
DISTRONIC PLUS (Y page 208).
If DISTRONIC PLUS detects that the vehicle
in front is stopping, it brakes your vehicle until
it is stationary.
Once your vehicle is stationary, it remains
stationary and you do not need to depress the
brake.
After a time, the electric parking brake
secures the vehicle and relieves the service
brake.
Depending on the specified minimum
distance, your vehicle will come to a standstill
at a sufficient distance behind the vehicle in
front. The specified minimum distance is set
using the control on the cruise control lever.
The electric parking brake automatically
secures the vehicle if DISTRONIC PLUS is
activated and:
R the seat belt is unfastened and the driver's
door is open.
R the engine is switched off, unless it is
automatically switched off by the ECO
start/stop function.
R a system malfunction occurs.
R the power supply is not sufficient.
If a malfunction occurs, then the transmission
may be shifted into position Pautomatically. Setting a speed
X
Press the cruise control lever up 0043for a
higher speed or down 0044for a lower speed.
X To adjust the set speed in 1 mph
increments (1 km/h increments): briefly
press the cruise control lever up 0043or
down 0044to the pressure point.
Every time the cruise control lever is
pressed up 0043or down 0044the last speed
stored is increased or reduced.
X To adjust the set speed in 5 mph
increments (10 km/h increments):
briefly press the cruise control lever
up 0043 or down 0044to the pressure point.
Every time the cruise control lever is
pressed up 0043or down 0044, the last speed
stored is increased or reduced.
i If you accelerate to overtake, DISTRONIC
PLUS adjusts the vehicle's speed to the last
speed stored after you have finished
overtaking.
Setting the specified minimum distance You can set the specified minimum distance
for DISTRONIC PLUS by varying the time span
between one and two seconds. With this
function, you can set the minimum distance
that DISTRONIC PLUS keeps to the vehicle in
front, dependent on vehicle speed. You can
see this distance in the multifunction display
(Y
page 207).
i Make sure that you maintain the
minimum distance to the vehicle in front as 206
Driving systemsDriving an
d parking
Page 215 of 434

Activating the HOLD function
X
Make sure that the activation conditions
are met.
X Depress the brake pedal.
X Quickly depress the brake pedal further
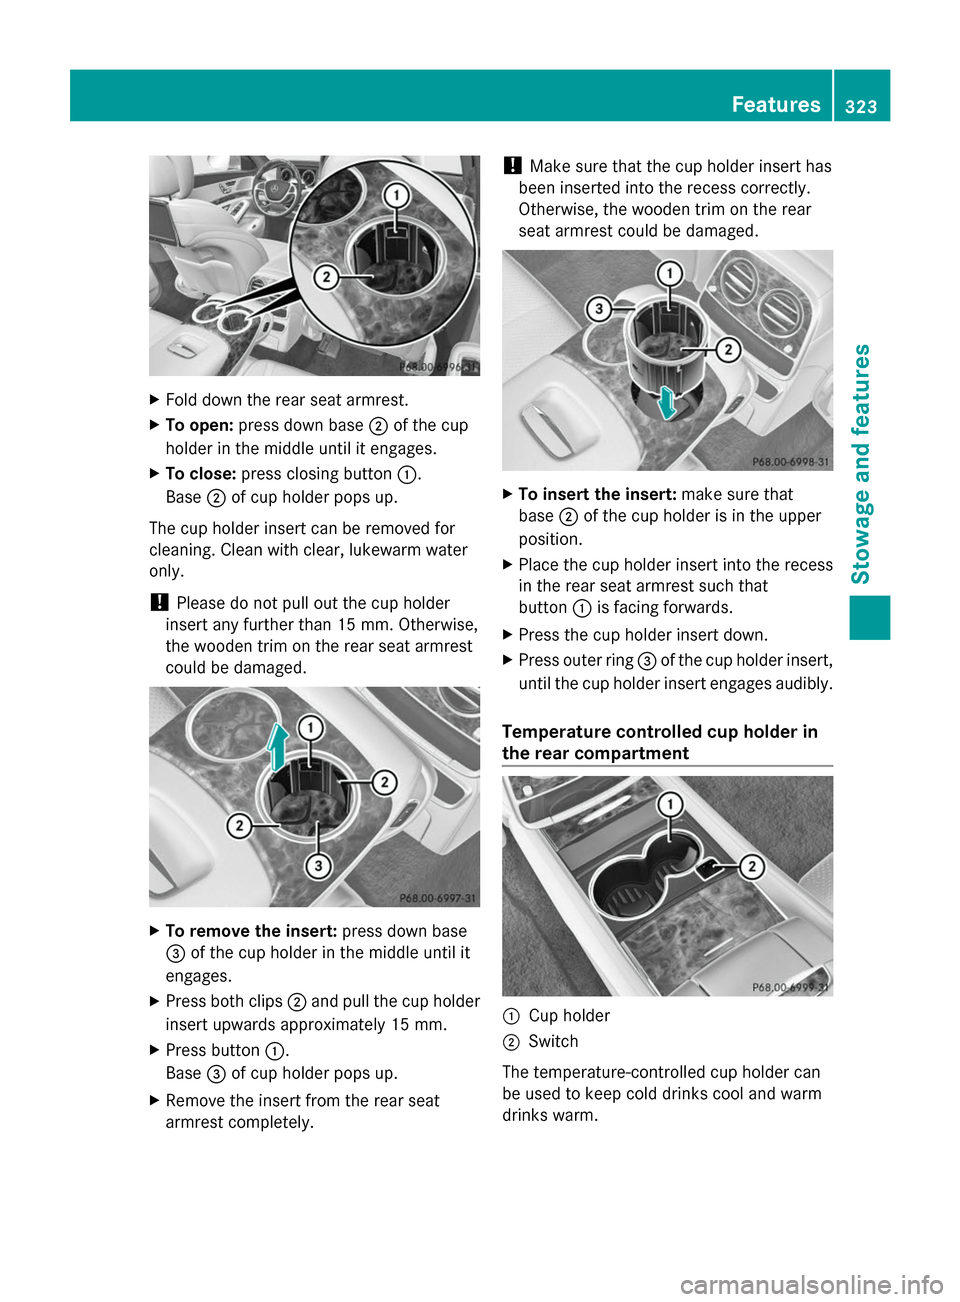
until 0043appears in the multifunction
display.
The HOLD function is activated. You can
release the brake pedal.
i If depressing the brake pedal the first
time does not activate the HOLD function,
wait briefly and then try again.
Deactivating the HOLD function The HOLD function is deactivated
automatically if:
R
you accelerate and the transmission is in
position Dor R.
R you shift the transmission to position P.
R you depress the brake pedal again with a
certain amount of pressure until 00D9
disappears from the multifunction display.
R you secure the vehicle using the electric
parking brake.
R you activate DISTRONIC PLUS.
i After a time, the electric parking brake
secures the vehicle and relieves the service
brake. The HOLD function is then
deactivated. The electric parking brake automatically
secures the vehicle if the HOLD function is
activated and:
R
the driver's door is open and the driver's
seat belt is unfastened.
R the engine is switched off, unless it is
automatically switched off by the ECO
start/stop function.
R a system malfunction occurs.
R the power supply is not sufficient.
If a malfunction occurs, then the transmission
may be shifted into position Pautomatically. Magic Body Control
General notes Magic Body Control consists of Active Body
Control (ABC), ROAD SURFACE SCAN as well
as automatic vehicle stabilization in the event
of a crosswind.
Your vehicle automatically adjusts its ride
height to improve driving safety and reduce
fuel consumption. The suspension mode is
adjusted according to your selection (sports
or comfort), the road condition and the
vehicle load. A multifunction camera detects
bumps in the road surface before the vehicle
drives over them. This reduces chassis
movements.
Important safety notes
G
WARNING
When the vehicle is being lowered, people
could become trapped if their limbs are
between the vehicle body and the wheels or
underneath the vehicle. There is a risk of
injury.
Make sure no one is underneath the vehicle
or in the immediate vicinity of the wheel
arches when the vehicle is being lowered.
! The vehicle is lowered when the engine is
switched off. When parking, position your
vehicle so that it does not make contact Driving systems
213Driving and parking Z
Page 325 of 434

X
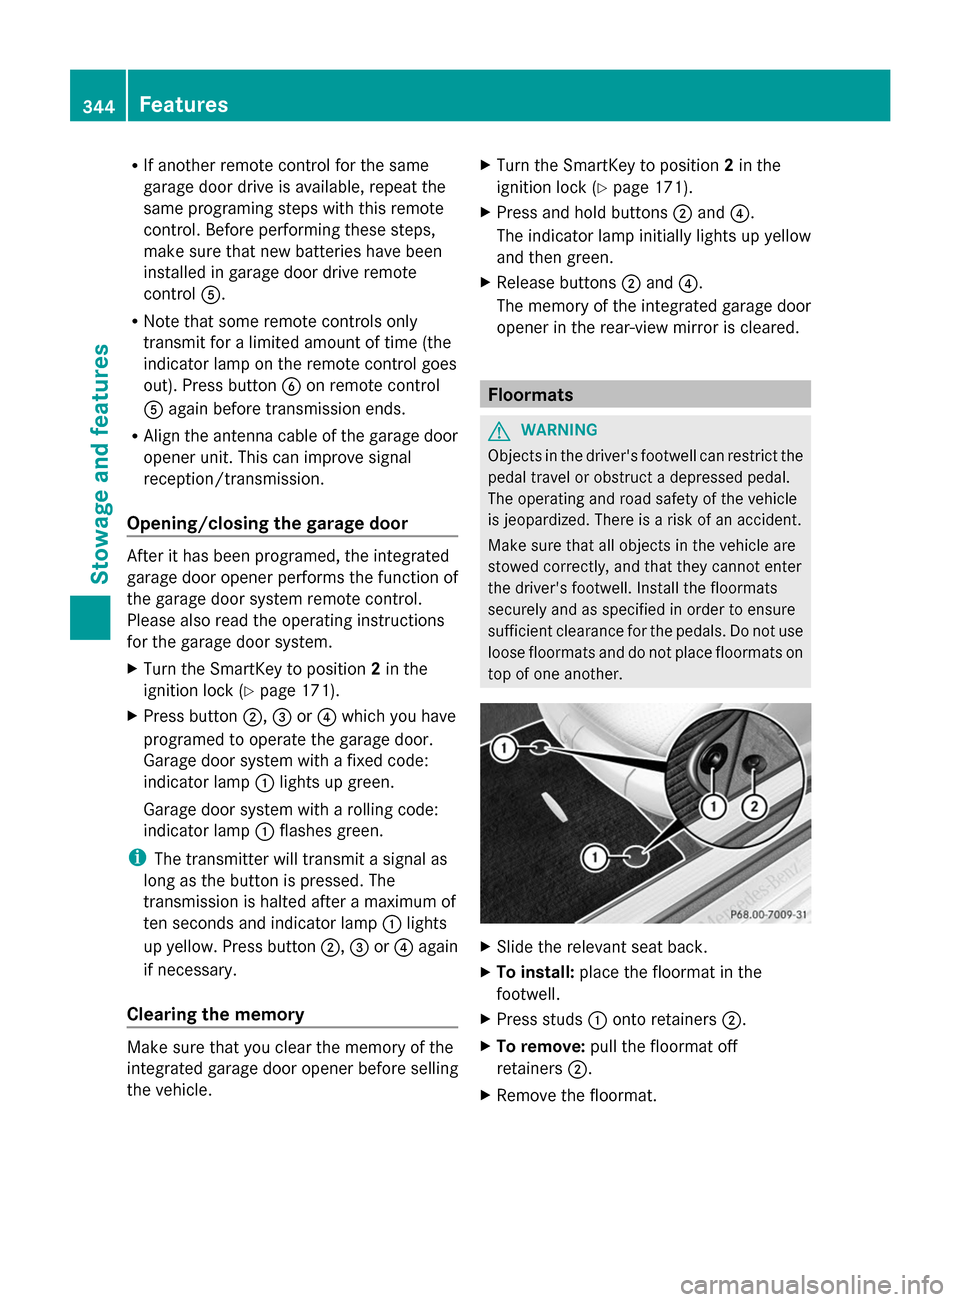
Fold down the rear seat armrest.
X To open: press down base 0044of the cup
holder in the middle until it engages.
X To close: press closing button 0043.
Base 0044of cup holder pops up.
The cup holder insert can be removed for
cleaning. Clean with clear, lukewarm water
only.
! Please do not pull out the cup holder
insert any further than 15 mm. Otherwise,
the wooden trim on the rear seat armrest
could be damaged. X
To remove the insert: press down base
0087 of the cup holder in the middle until it
engages.
X Press both clips 0044and pull the cup holder
insert upwards approximately 15 mm.
X Press button 0043.
Base 0087of cup holder pops up.
X Remove the insert from the rear seat
armrest completely. !
Make sure that the cup holder insert has
been inserted into the recess correctly.
Otherwise, the wooden trim on the rear
seat armrest could be damaged. X
To insert the insert: make sure that
base 0044of the cup holder is in the upper
position.
X Place the cup holder insert into the recess
in the rear seat armrest such that
button 0043is facing forwards.
X Press the cup holder insert down.
X Press outer ring 0087of the cup holder insert,
until the cup holder insert engages audibly.
Temperature controlled cup holder in
the rear compartment 0043
Cup holder
0044 Switch
The temperature-controlled cup holder can
be used to keep cold drinks cool and warm
drinks warm. Features
323Stowage and features Z
Page 346 of 434

R
If another remote control for the same
garage door drive is available, repeat the
same programing steps with this remote
control. Before performing these steps,
make sure that new batteries have been
installed in garage door drive remote
control 0083.
R Note that some remote controls only
transmit for a limited amount of time (the
indicator lamp on the remote control goes
out). Press button 0084on remote control
0083 again before transmission ends.
R Align the antenna cable of the garage door
opener unit. This can improve signal
reception/transmission.
Opening/closing the garage door After it has been programed, the integrated
garage door opener performs the function of
the garage door system remote control.
Please also read the operating instructions
for the garage door system.
X Turn the SmartKey to position 2in the
ignition lock (Y page 171).
X Press button 0044,0087or0085 which you have
programed to operate the garage door.
Garage door system with a fixed code:
indicator lamp 0043lights up green.
Garage door system with a rolling code:
indicator lamp 0043flashes green.
i The transmitter will transmit a signal as
long as the button is pressed. The
transmission is halted after a maximum of
ten seconds and indicator lamp 0043lights
up yellow. Press button 0044,0087or0085 again
if necessary.
Clearing the memory Make sure that you clear the memory of the
integrated garage door opener before selling
the vehicle. X
Turn the SmartKey to position 2in the
ignition lock (Y page 171).
X Press and hold buttons 0044and 0085.
The indicator lamp initially lights up yellow
and then green.
X Release buttons 0044and 0085.
The memory of the integrated garage door
opener in the rear-view mirror is cleared. Floormats
G
WARNING
Objects in the driver's footwell can restrict the
pedal travel or obstruct a depressed pedal.
The operating and road safety of the vehicle
is jeopardized. There is a risk of an accident.
Make sure that all objects in the vehicle are
stowed correctly, and that they cannot enter
the driver's footwell. Install the floormats
securely and as specified in order to ensure
sufficient clearance for the pedals. Do not use
loose floormats and do not place floormats on
top of one another. X
Slide the relevant seat back.
X To install: place the floormat in the
footwell.
X Press studs 0043onto retainers 0044.
X To remove: pull the floormat off
retainers 0044.
X Remove the floormat. 344
FeaturesStowage and features