2014 MERCEDES-BENZ S-CLASS COUPE emergency towing
[x] Cancel search: emergency towingPage 9 of 413
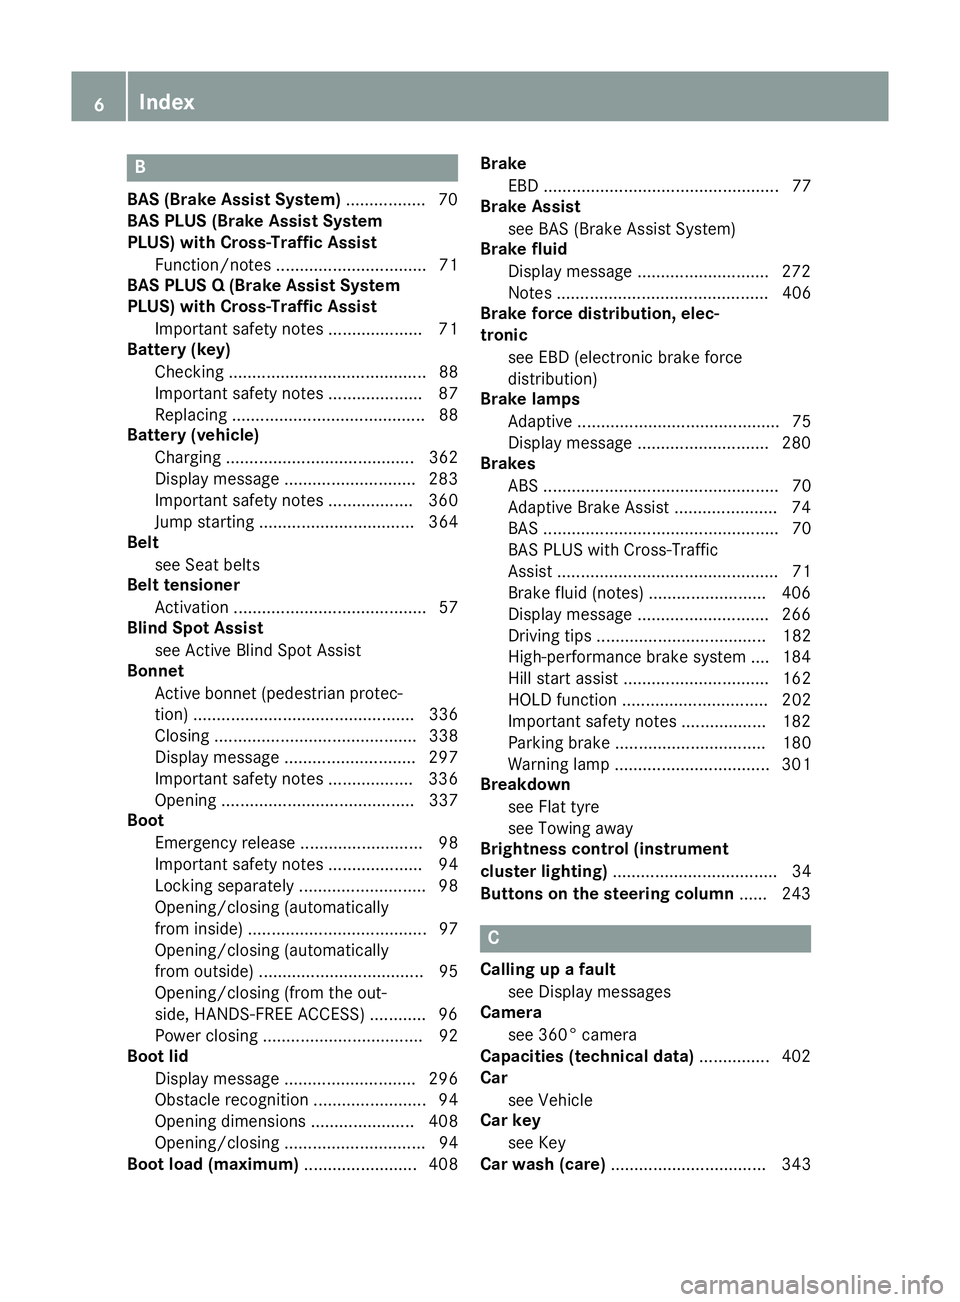
B
BAS (Brake Assist System) ................. 70
BAS PLUS (Brake Assist System
PLUS) with Cross-Traffic Assist
Function/note s................................ 71
BAS PLUS Q (Brake Assist System
PLUS) with Cross-Traffic Assist
Important safety notes .................... 71
Battery (key)
Checking .......................................... 88
Important safety notes .................... 87
Replacing ......................................... 88
Battery (vehicle)
Charging ........................................ 362
Display message ............................ 283
Important safety notes .................. 360
Jump starting ................................. 364
Belt
see Seat belts
Belt tensioner
Activation ......................................... 57
Blind Spot Assist
see Active Blind Spot Assist
Bonnet
Active bonnet (pedestrian protec-tion) ............................................... 336
Closing ........................................... 338
Display message ............................ 297
Important safety notes .................. 336
Opening ......................................... 337
Boot
Emergency release .......................... 98
Important safety notes .................... 94
Locking separately ........................... 98
Opening/closing (automatically
from inside) ...................................... 97
Opening/closing (automatically
from outside) ................................... 95
Opening/closing (from the out-
side, HANDS-FREE ACCESS) ............ 96
Power closing .................................. 92
Boot lid
Display message ............................ 296
Obstacle recognition ........................ 94
Opening dimensions ...................... 408
Opening/closing .............................. 94
Boot load (maximum) ........................ 408Brake
EBD .................................................. 77
Brake Assist
see BAS (Brake Assist System)
Brake fluid
Display message ............................ 272
Notes ............................................. 406
Brake force distribution, elec-
tronic
see EBD (electronic brake force
distribution)
Brake lamps
Adaptive ........................................... 75
Display message ............................ 280
Brakes
ABS .................................................. 70
Adaptive Brake Assist ...................... 74
BAS .................................................. 70
BAS PLUS with Cross-Traffic
Assist ............................................... 71
Brake fluid (notes) ......................... 406
Display message ............................ 266
Driving tips .................................... 182
High-performance brake system .... 184
Hill start assist ............................... 162
HOLD function ............................... 202
Important safety notes .................. 182
Parking brake ................................ 180
Warning lamp ................................. 301
Breakdown
see Flat tyre
see Towing away
Brightness control (instrument
cluster lighting) ................................... 34
Buttons on the steering column ...... 243 C
Calling up a fault see Display messages
Camera
see 360° camera
Capacities (technical data) ............... 402
Car
see Vehicle
Car key
see Key
Car wash (care) ................................. 3436
Index
Page 22 of 413

Stowage net ................................... 317
Stowage well beneath the boot
floor .................................................... 319
Summer tyres
In winter ........................................ 378
Sun visor ............................................ 321
Suspension tuning
Active Body Control ABC ............... 205
AIRMATIC ...................................... 208
SETUP (on-board computer) .......... 264
Switching the auxiliary heating/
ventilation
On/off ........................................... 149 T
Tail lamps Display message ............................ 280
see Lights
Technical data
Capacities ...................................... 402
Information .................................... 400
Tyres/wheels ................................. 391
Vehicle data ................................... 408
Telephone
Accepting a call (multifunction
steering wheel) .............................. 255
Display message ............................ 298
Introduction ................................... 254
Menu (on-board computer) ............ 254
Number from the phone book ........ 255
Redialling ....................................... 255
Rejecting/ending a call ................. 255
Telephone compartment ................ 316
Temperature
Coolant .......................................... 242
Engine oil (on-board computer) ...... 263
Outside temperature ...................... 243
Setting (climate control )................ 142
TEMPOMAT
Function/note s............................. 186
TIREFIT kit .......................................... 357
Top Tether ............................................ 62
Total distance recorder .................... 247
Tow-away protection
Activating ......................................... 81
Deactivating ..................................... 81
Function ........................................... 81 Tow-starting
Emergency engine starting ............ 370
Important safety notes .................. 367
Towing
Important safety notes .................. 367
Notes for 4MATIC vehicles ............ 370
With the rear axle raised ................ 369
Towing away
Fitting the towing ey e.................... 369
Removing the towing eye ............... 369
With both axles on the ground ....... 369
Towing eye ......................................... 355
Traffic Sign Assist
Activating ....................................... 228
Activating/deactivating the warn-ing function .................................... 258
Display message ............................ 289
Function/note s............................. 227
Important safety notes .................. 228
Instrument cluster display ............. 228
Transmission
see Automatic transmission
Transporting the vehicle .................. 370
Trim pieces (cleaning instruc-
tions) .................................................. 350
Trip computer (on-board com-
puter) .................................................. 248
Trip meter
Calling up ....................................... 247
Resetting (on-board computer) ...... 249
Turn signals
Switching on/of f........................... 126
TV
Operating (on-board computer) ..... 254
Two-way radio
Frequencies ................................... 400
Installation ..................................... 400
Transmission output (maximum) .... 400
Windscreen (infrared reflective) ..... 334
Type identification plate
see Vehicle identification plate
Tyre pressure
Calling up (on-board computer) ..... 381
Display message ............................ 293
Important safety notes .................. 381
Not reached (TIREFIT) .................... 359
Reached (TIREFIT) .......................... 359
Recommended ............................... 380 Index
19
Page 23 of 413
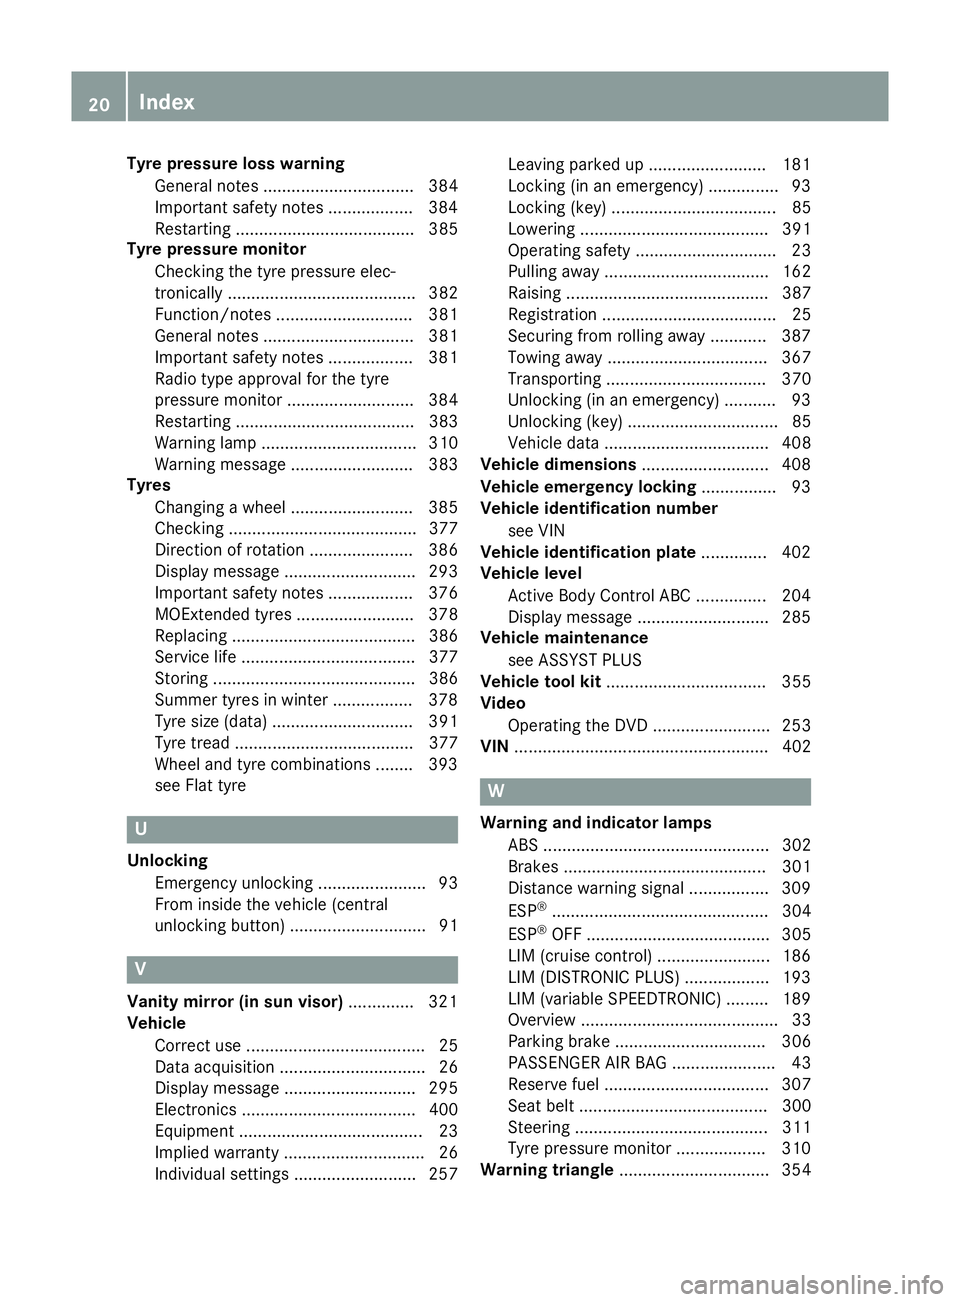
Tyre pressure loss warning
General notes ................................ 384
Important safety notes .................. 384
Restarting ...................................... 385
Tyre pressure monitor
Checking the tyre pressure elec-
tronically ........................................ 382
Function/note s............................. 381
General notes ................................ 381
Important safety notes .................. 381
Radio type approval for the tyre
pressure monitor ........................... 384
Restarting ...................................... 383
Warning lamp ................................. 310
Warning message .......................... 383
Tyres
Changing a whee l.......................... 385
Checking ........................................ 377
Direction of rotation ...................... 386
Display message ............................ 293
Important safety notes .................. 376
MOExtended tyre s......................... 378
Replacing ....................................... 386
Service life ..................................... 377
Storing ........................................... 386
Summer tyres in winter ................. 378
Tyre size (data ).............................. 391
Tyre tread ...................................... 377
Wheel and tyre combinations ........ 393
see Flat tyre U
Unlocking Emergency unlocking ....................... 93
From inside the vehicle (central
unlocking button) ............................. 91 V
Vanity mirror (in sun visor) .............. 321
Vehicle
Correct use ...................................... 25
Data acquisition ............................... 26
Display message ............................ 295
Electronics ..................................... 400
Equipment ....................................... 23
Implied warranty .............................. 26
Individual settings .......................... 257 Leaving parked up ......................... 181
Locking (in an emergency) ............... 93
Locking (key) ................................... 85
Lowering ........................................ 391
Operating safety .............................. 23
Pulling away ................................... 162
Raising ........................................... 387
Registration ..................................... 25
Securing from rolling away ............ 387
Towing away .................................. 367
Transporting .................................. 370
Unlocking (in an emergency) ........... 93
Unlocking (key) ................................ 85
Vehicle data ................................... 408
Vehicle dimensions ........................... 408
Vehicle emergency locking ................ 93
Vehicle identification number
see VIN
Vehicle identification plate .............. 402
Vehicle level
Active Body Control ABC ............... 204
Display message ............................ 285
Vehicle maintenance
see ASSYST PLUS
Vehicle tool kit .................................. 355
Video
Operating the DVD ......................... 253
VIN ...................................................... 402 W
Warning and indicator lamps ABS ................................................ 302
Brakes ........................................... 301
Distance warning signal ................. 309
ESP ®
.............................................. 304
ESP ®
OFF ....................................... 305
LIM (cruise control )........................ 186
LIM (DISTRONIC PLUS) .................. 193
LIM (variable SPEEDTRONIC) ......... 189
Overview .......................................... 33
Parking brake ................................ 306
PASSENGER AIR BAG ...................... 43
Reserve fuel ................................... 307
Seat belt ........................................ 300
Steering ......................................... 311
Tyre pressure monitor ................... 310
Warning triangle ................................ 35420
Index
Page 318 of 413
R
Close lockable stowage compartments
while driving.
R Stow and secure objects that are heavy,
hard, pointy, sharp-edged, fragile or too
large in the boot.
Observe the loading guidelines (Y page 314).
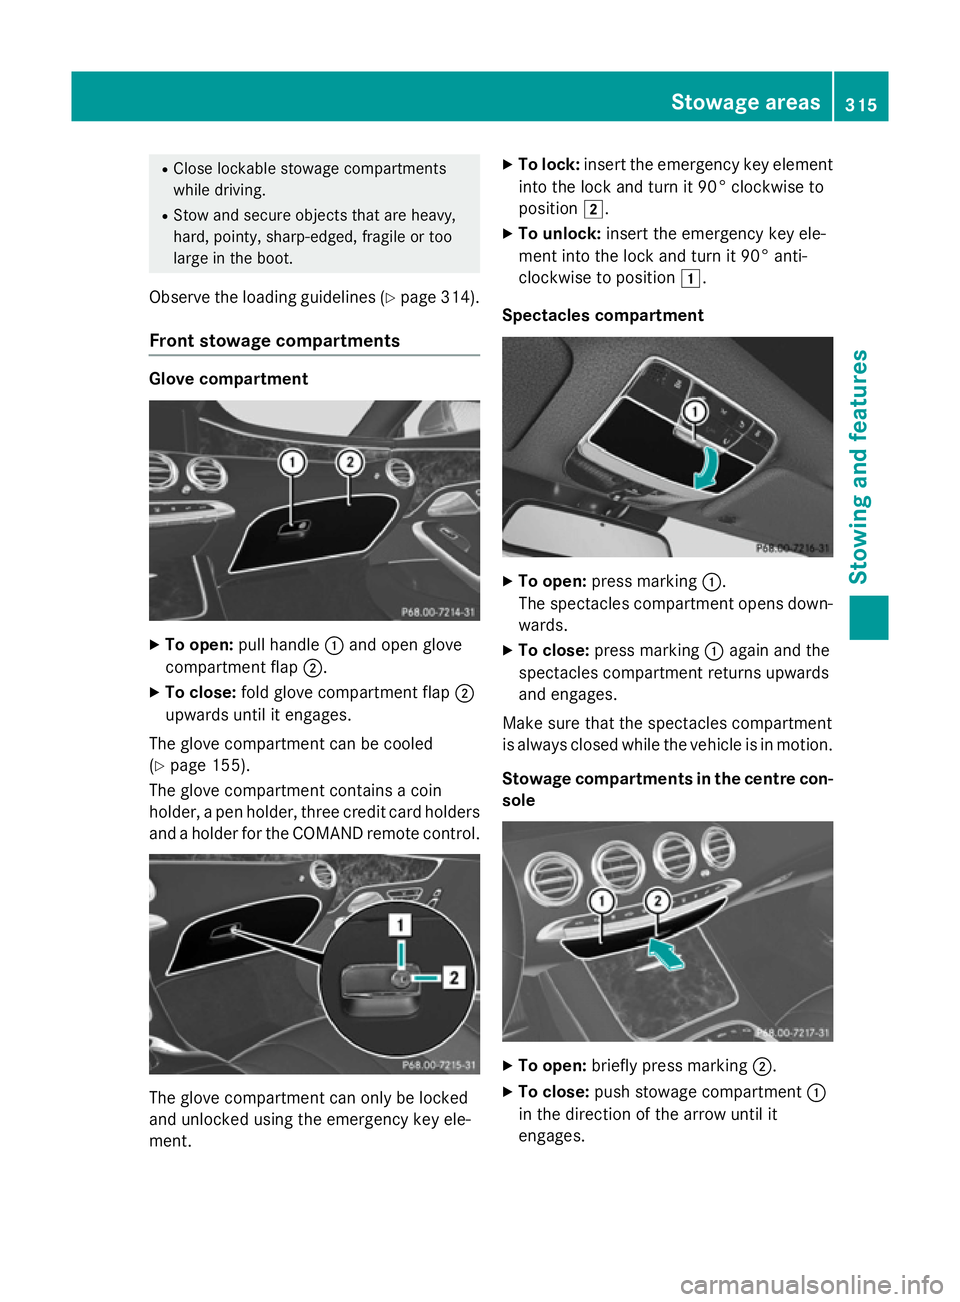
Front stowage compartments Glove compartment
X
To open: pull handle :and open glove
compartment flap ;.
X To close: fold glove compartment flap ;
upwards until it engages.
The glove compartment can be cooled
(Y page 155).
The glove compartment contains a coin
holder, a pen holder, three credit card holders
and a holder for the COMAND remote control. The glove compartment can only be locked
and unlocked using the emergency key ele-
ment. X
To lock: insert the emergency key element
into the lock and turn it 90° clockwise to
position 2.
X To unlock: insert the emergency key ele-
ment into the lock and turn it 90° anti-
clockwise to position 1.
Spectacles compartment X
To open: press marking :.
The spectacles compartment opens down- wards.
X To close: press marking :again and the
spectacles compartment returns upwards
and engages.
Make sure that the spectacles compartment
is always closed while the vehicle is in motion.
Stowage compartments in the centre con-
sole X
To open: briefly press marking ;.
X To close: push stowage compartment :
in the direction of the arrow until it
engages. Stowage areas
315Stowing and features Z
Page 326 of 413
lighter when road and traffic conditions per-
mit.
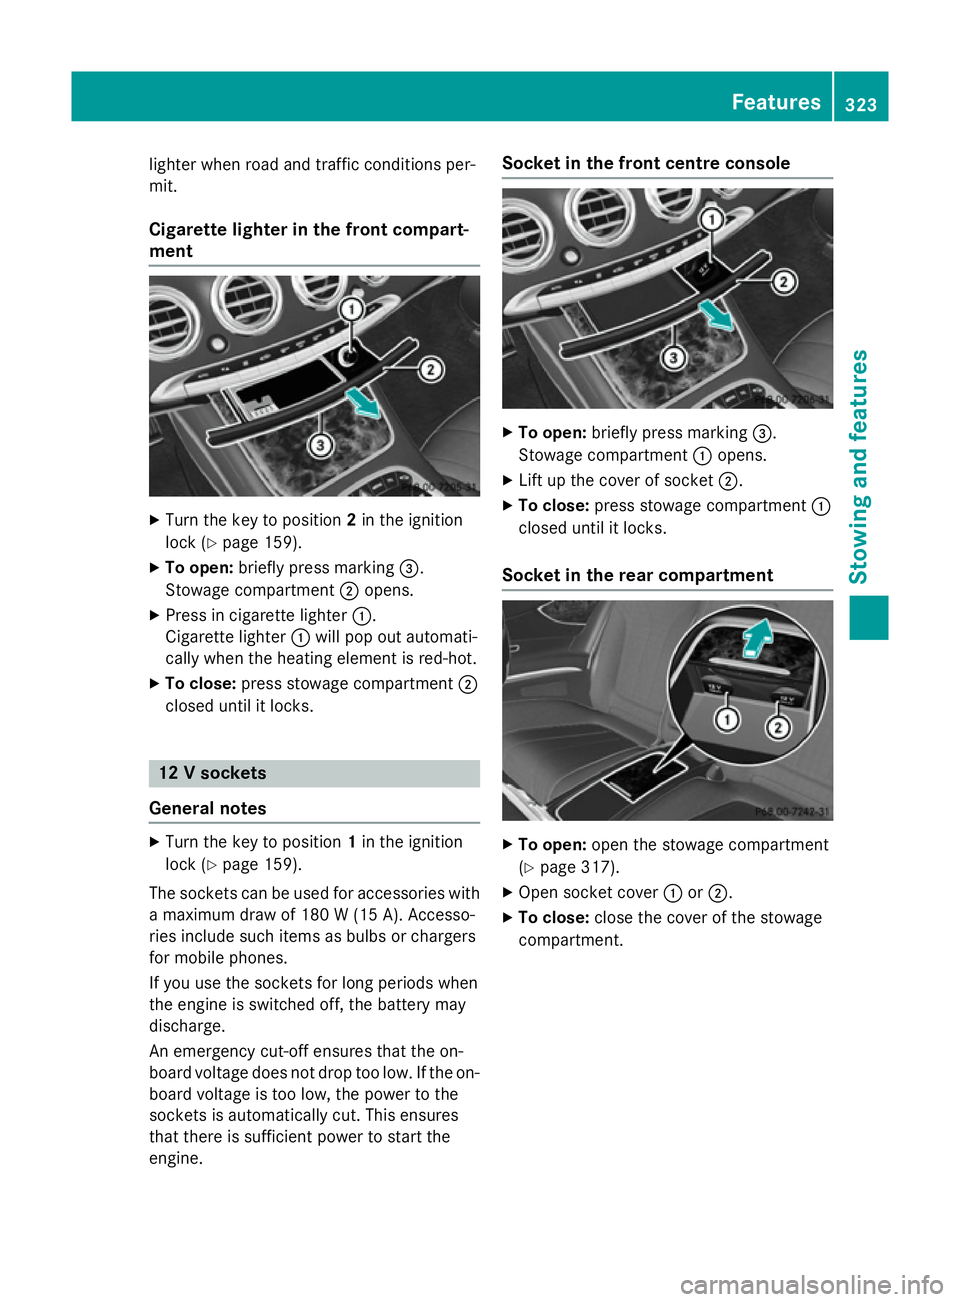
Cigarette lighter in the front compart-
ment X
Turn the key to position 2in the ignition
lock (Y page 159).
X To open: briefly press marking =.
Stowage compartment ;opens.
X Press in cigarette lighter :.
Cigarette lighter :will pop out automati-
cally when the heating element is red-hot.
X To close: press stowage compartment ;
closed until it locks. 12 V sockets
General notes X
Turn the key to position 1in the ignition
lock (Y page 159).
The sockets can be used for accessories with a maximum draw of 180 W (15A). Accesso-
ries include such items as bulbs or chargers
for mobile phones.
If you use the sockets for long periods when
the engine is switched off, the battery may
discharge.
An emergency cut-off ensures that the on-
board voltage does not drop too low. If the on-
board voltage is too low, the power to the
sockets is automatically cut. This ensures
that there is sufficient power to start the
engine. Socket in the front cent
re console X
To open: briefly press marking =.
Stowage compartment :opens.
X Lift up the cover of socket ;.
X To close: press stowage compartment :
closed until it locks.
Socket in the rear compartment X
To open: open the stowage compartment
(Y page 317).
X Open socket cover :or;.
X To close: close the cover of the stowage
compartment. Features
323Stowing an d features Z
Page 328 of 413
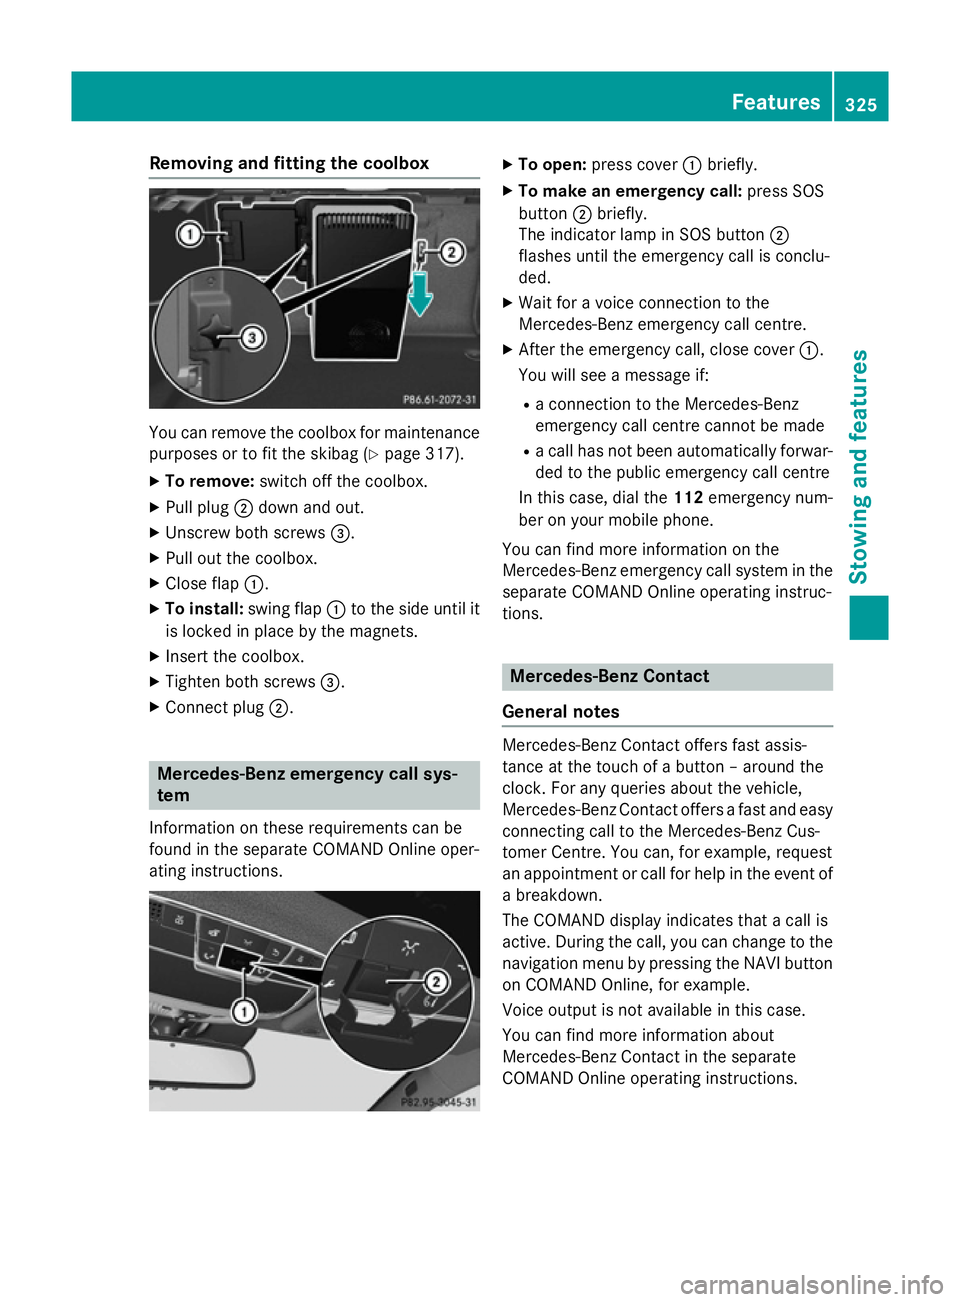
Removing and fitting the coolbox
You can remove the coolbox for maintenance
purposes or to fit the skibag (Y page 317).
X To remove: switch off the coolbox.
X Pull plug ;down and out.
X Unscrew both screws =.
X Pull out the coolbox.
X Close flap :.
X To install: swing flap:to the side until it
is locked in place by the magnets.
X Insert the coolbox.
X Tighten both screws =.
X Connect plug ;. Mercedes-Benz emergency call sys-
tem
Information on these requirements can be
found in the separate COMAND Online oper-
ating instructions. X
To open: press cover :briefly.
X To make an emergency call: press SOS
button ;briefly.
The indicator lamp in SOS button ;
flashes until the emergency call is conclu-
ded.
X Wait for a voice connection to the
Mercedes-Benz emergency call centre.
X After the emergency call, close cover :.
You will see a message if:
R a connection to the Mercedes-Benz
emergency call centre cannot be made
R a call has not been automatically forwar-
ded to the public emergency call centre
In this case, dial the 112emergency num-
ber on your mobile phone.
You can find more information on the
Mercedes-Benz emergency call system in the separate COMAND Online operating instruc-
tions. Mercedes-Benz Contact
General notes Mercedes-Benz Contact offers fast assis-
tance at the touch of a button – around the
clock. For any queries about the vehicle,
Mercedes-Benz Contact offers a fast and easy
connecting call to the Mercedes-Benz Cus-
tomer Centre. You can, for example, request
an appointment or call for help in the event of a breakdown.
The COMAND display indicates that a call is
active. During the call, you can change to the
navigation menu by pressing the NAVI button
on COMAND Online, for example.
Voice output is not available in this case.
You can find more information about
Mercedes-Benz Contact in the separate
COMAND Online operating instructions. Features
325Stowing and features Z
Page 373 of 413
X
Shift the automatic transmission to posi-
tion N.
X Release the brake pedal.
X Release the electric parking brake.
X Leave the key in position 2in the ignition
lock.
X Switch on the hazard warning lamps
(Y page 126).
i In order to signal a change of direction
when towing the vehicle with the hazard
warning lamps switched on, use the com-
bination switch as usual. In this case, only
the turn signals for the desired direction
flash. When you reset the combination
switch, the hazard warning lamps start
flashing again. Transporting the vehicle
! You may only secure the vehicle by the
wheels, not by parts of the vehicle such as
axle or steering components. Otherwise,
the vehicle could be damaged.
The towing eye can be used to pull the vehicle
onto a trailer or transporter for transporta-
tion.
X Turn the key to position 2in the ignition
lock.
X Shift the automatic transmission to posi-
tion N.
As soon as the vehicle is loaded: X Prevent the vehicle from rolling away by
applying the electric parking brake.
X Shift the automatic transmission to posi-
tion P.
X Turn the key to position 0in the ignition
lock and remove it.
X Secure the vehicle. Notes for 4MATIC vehicles
! Vehicles with 4MATIC must not be towed
with the front or rear axle raised; otherwise,
the transmission may be damaged.
Vehicles with 4MATIC may either be towed
away with both axles on the ground or be loa- ded up and transported.
If the vehicle has transmission damage or
damage to the front or rear axle, have it trans-
ported on a transporter or trailer.
In the event of damage to the electrical
system: if the battery is defective, the auto-
matic transmission will be locked in position
P. To shift the automatic transmission to posi-
tion N, you must provide power to the vehi-
cle's electrical system in the same way as
when jump-starting (Y page 364).
Have the vehicle transported on a transporter
or trailer. Tow-starting (emergency engine
starting)
! Do not tow-start vehicles with automatic
transmission. You could otherwise damage the automatic transmission.
i Information on "Jump-starting"
(Y page 364). Electrical fuses
Important safety notes
G
WARNING
If you manipulate, bridge or replace a faulty
fuse with a fuse of a higher amperage, the
electric cables could be overloaded. This may result in a fire. There is a risk of an accident
and injury.
Always replace faulty fuses with specified new fuses of the correct amperage.
Blown fuses must be replaced with fuses of
the same rating, which you can recognise by 370
Electrical fusesBreakdown assistance