2014 MERCEDES-BENZ S-CLASS COUPE reset
[x] Cancel search: resetPage 252 of 413
The
From reset
From reset trip computer is automati-
cally reset if the value exceeds 9999 hours or 99,999 kilometres.
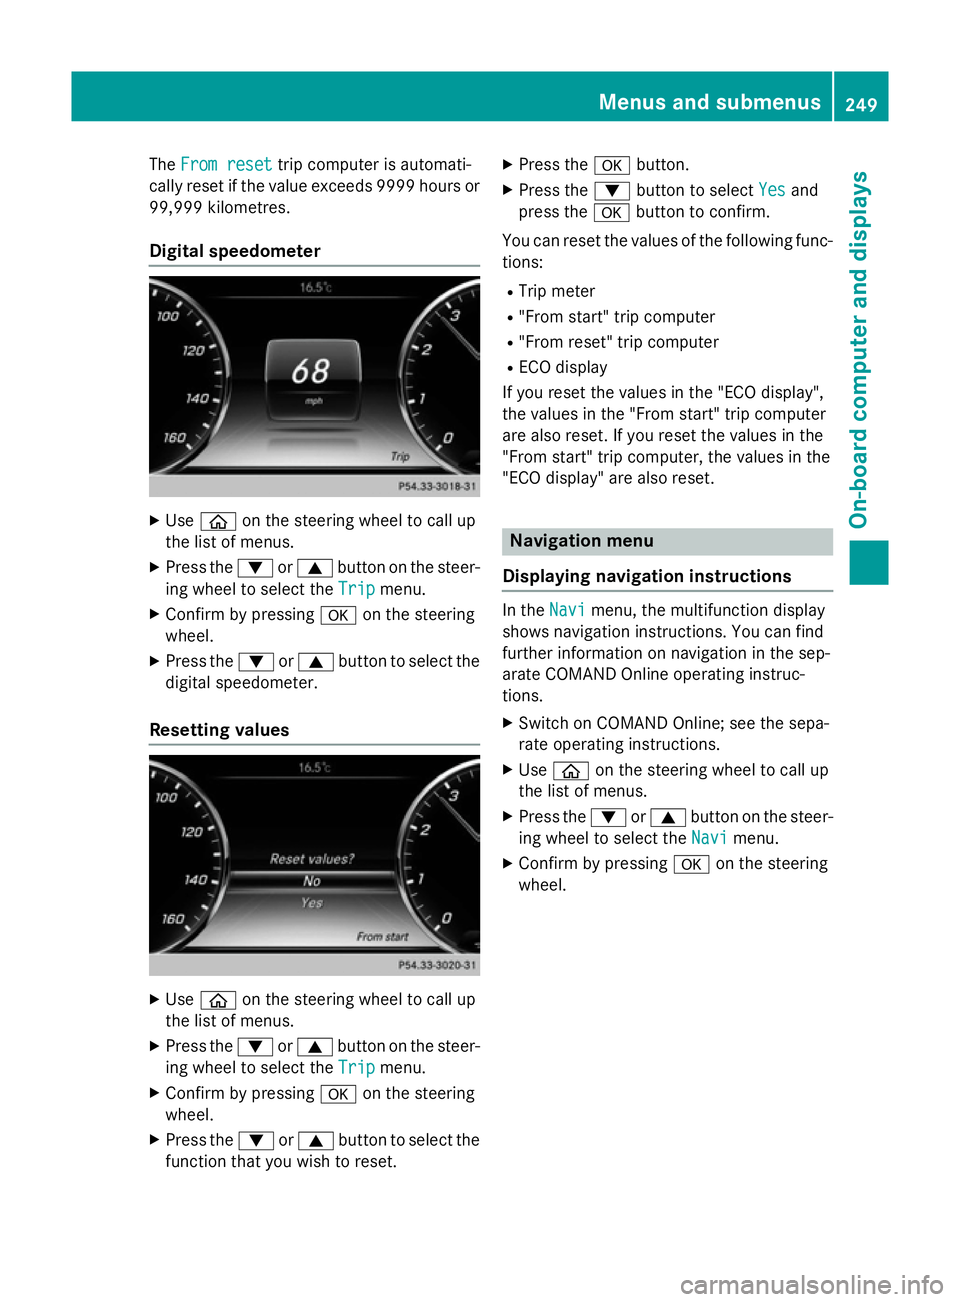
Digital speedometer X
Use ò on the steering wheel to call up
the list of menus.
X Press the :or9 button on the steer-
ing wheel to select the Trip
Trip menu.
X Confirm by pressing aon the steering
wheel.
X Press the :or9 button to select the
digital speedometer.
Resetting values X
Use ò on the steering wheel to call up
the list of menus.
X Press the :or9 button on the steer-
ing wheel to select the Trip
Tripmenu.
X Confirm by pressing aon the steering
wheel.
X Press the :or9 button to select the
function that you wish to reset. X
Press the abutton.
X Press the :button to select Yes Yesand
press the abutton to confirm.
You can reset the values of the following func-
tions:
R Trip meter
R "From start" trip computer
R "From reset" trip computer
R ECO display
If you reset the values in the "ECO display",
the values in the "From start" trip computer
are also reset. If you reset the values in the
"From start" trip computer, the values in the
"ECO display" are also reset. Navigation menu
Displaying navigation instructions In the
Navi Navimenu, the multifunction display
shows navigation instructions. You can find
further information on navigation in the sep-
arate COMAND Online operating instruc-
tions.
X Switch on COMAND Online; see the sepa-
rate operating instructions.
X Use ò on the steering wheel to call up
the list of menus.
X Press the :or9 button on the steer-
ing wheel to select the Navi
Navi menu.
X Confirm by pressing aon the steering
wheel. Menus and submenus
249On-board computer and displays Z
Page 255 of 413
Station
;is displayed with the station fre-
quency or station name. The memory position is only displayed along with station ;if this
has been stored.
X Switch on COMAND Online; see the sepa-
rate operating instructions.
X Use ò on the steering wheel to call up
the list of menus.
X Press the :or9 button on the steer-
ing wheel to select the Radio
Radio menu.
X Confirm by pressing aon the steering
wheel.
Currently selected station ;appears in
the multifunction display.
X To open the station list: press:or
9 briefly.
X To select a station from the station list:
press :or9 briefly.
X To select a station from the station list
using rapid scrolling: press and briefly
hold the :or9 button.
X To select a waveband or station preset:
press abriefly.
X Use : or9 to select the waveband
or station preset.
X Press ato confirm the selection.
i Store the station in COMAND Online; see
the separate operating instructions.
i DAB radio mode (Digital
AudioBroadcast-
ing) is an optimised digital transmission
standard designed for the mobile reception of radio transmissions. Media menu
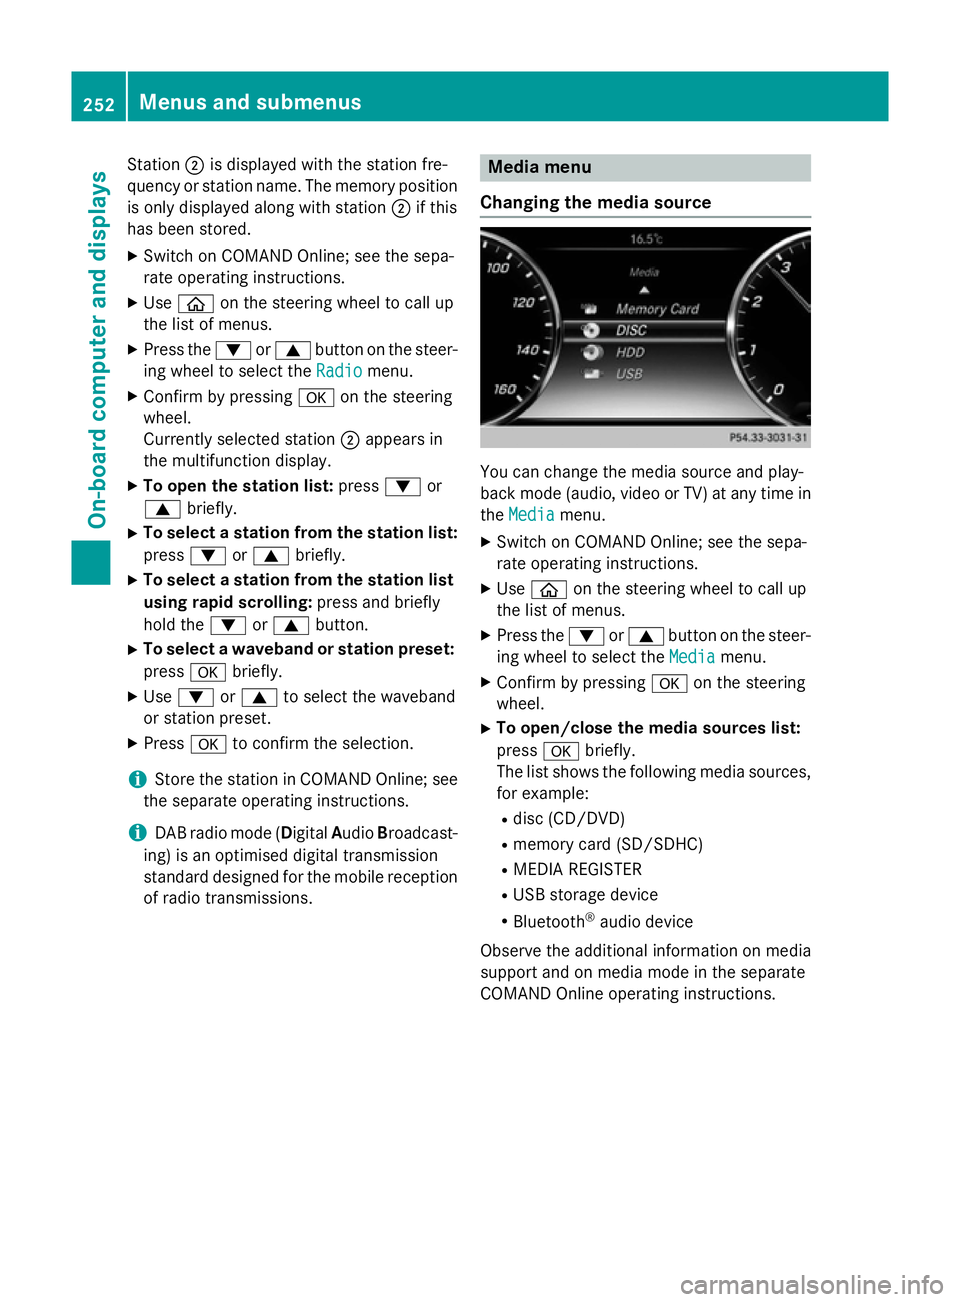
Changing the media source You can change the media source and play-
back mode (audio, video or TV) at any time in
the Media Media menu.
X Switch on COMAND Online; see the sepa-
rate operating instructions.
X Use ò on the steering wheel to call up
the list of menus.
X Press the :or9 button on the steer-
ing wheel to select the Media
Mediamenu.
X Confirm by pressing aon the steering
wheel.
X To open/close the media sources list:
press abriefly.
The list shows the following media sources,
for example:
R disc (CD/DVD)
R memory card (SD/SDHC)
R MEDIA REGISTER
R USB storage device
R Bluetooth ®
audio device
Observe the additional information on media
support and on media mode in the separate
COMAND Online operating instructions. 252
Menus and submenusOn-board computer and displays
Page 263 of 413
X
Press the :or9 buttons to select
Display content Display content.
X Press ato confirm.
Switching the Traffic Sign Assist display
on/off X Press the abutton to save the setting.
When you switch on the Traffic Sign Traffic Sign
Assist
Assist display, recognised traffic signs are
shown on the windscreen when the head-
up display is activated.
Switching the navigation messages dis-
play on/off X Vehicles with Traffic Sign Assist:
press :to select Navigation mes‐ Navigation mes‐
sages
sages.
X Press the abutton to save the setting.
When you switch on the Navigation Navigationmes‐ mes‐
sages
sages display, navigation messages are
shown on the windscreen when the head-
up display is activated.
For more information on navigation, see the
separate operating instructions.
For further information about Traffic Sign
Assist, see (Y page 227).
Setting the position
You can adjust the position of the head-up
display. This allows you to compensate for
differences in the seat position.
X Switch on the Head-up display
(Y page 245).
X Use ò on the steering wheel to call up
the list of menus.
X Press the :or9 button on the steer-
ing wheel to select the Settings Settingsmenu.
X Confirm by pressing aon the steering
wheel.
X Press the :or9 button to select the
Head-up display
Head-up display submenu.
X Press ato confirm.
X Use the :or9 button to select the
Position
Position function.
X Press the abutton to save the setting. X
Press the :or9 button to set the
position from Level
Level+5
+5 (high) to Level
Level-5
-5
(low).
X Press the aor% button to save the
setting.
Using the Memory function, you can save and
call up the position of the head-up display as a single memory preset (Y page 120).
Adjusting the brightness
The brightness of the head-up display is auto-
matically adjusted to the surrounding light
conditions. You can also individually adjust
the brightness of the head-up display.
X Switch on the Head-up display
(Y page 245).
X Use ò on the steering wheel to call up
the list of menus.
X Press the :or9 button on the steer-
ing wheel to select the Settings Settingsmenu.
X Confirm by pressing aon the steering
wheel.
X Use the :or9 button to select the
Head-up display
Head-up display submenu.
X Press ato confirm.
X Press the :or9 button to select the
Brightness
Brightness function.
X Press the abutton to save the setting.
X Press the :or9 button to set the
brightness from Level +5
Level +5(bright) to
Level -5 Level -5 (dark).
X Press the aor% button to save the
setting.
Light submenu Switching the Intelligent Light System
on/off
X Use ò on the steering wheel to call up
the list of menus.
X Press the :or9 button on the steer-
ing wheel to select the Settings Settingsmenu.
X Confirm by pressing aon the steering
wheel. 260
Menus and submenusOn-board computer and displays
Page 266 of 413
X
Press ato confirm.
X Press the :or9 button to select the
Limit speed (winter tyres)
Limit speed (winter tyres) function.
You will see the current setting.
X Press ato confirm.
X Press the :or9 button to adjust
permanent SPEEDTRONIC in increments of
ten (240 km/h 240 km/h to160 km/h
160 km/h). The Off
Offset-
ting switches permanent SPEEDTRONIC
off.
X Press the abutton to store the entry.
For further information on permanent SPEED- TRONIC (Y page 191).
Restoring the factory settings X
Use ò on the steering wheel to call up
the list of menus.
X Press the :or9 button on the steer-
ing wheel to select the Settings Settingsmenu.
X Confirm by pressing aon the steering
wheel.
X Press the :or9 button to select the
Factory settings
Factory settings submenu.
X Press ato confirm.
The Reset all settings? Reset all settings? message
appears.
X Press the :or9 button to select No
No
or Yes
Yes.
X Press the abutton to confirm the selec-
tion.
If you have selected Yes Yes, the multifunction
display shows a confirmation message.
For safety reasons, not all functions are reset: the Limit
Limit speed
speed (winter
(winter tyres)
tyres) function
in permanent SPEEDTRONIC can only be set
in the Vehicle
Vehicle submenu. AMG menu in AMG vehicles
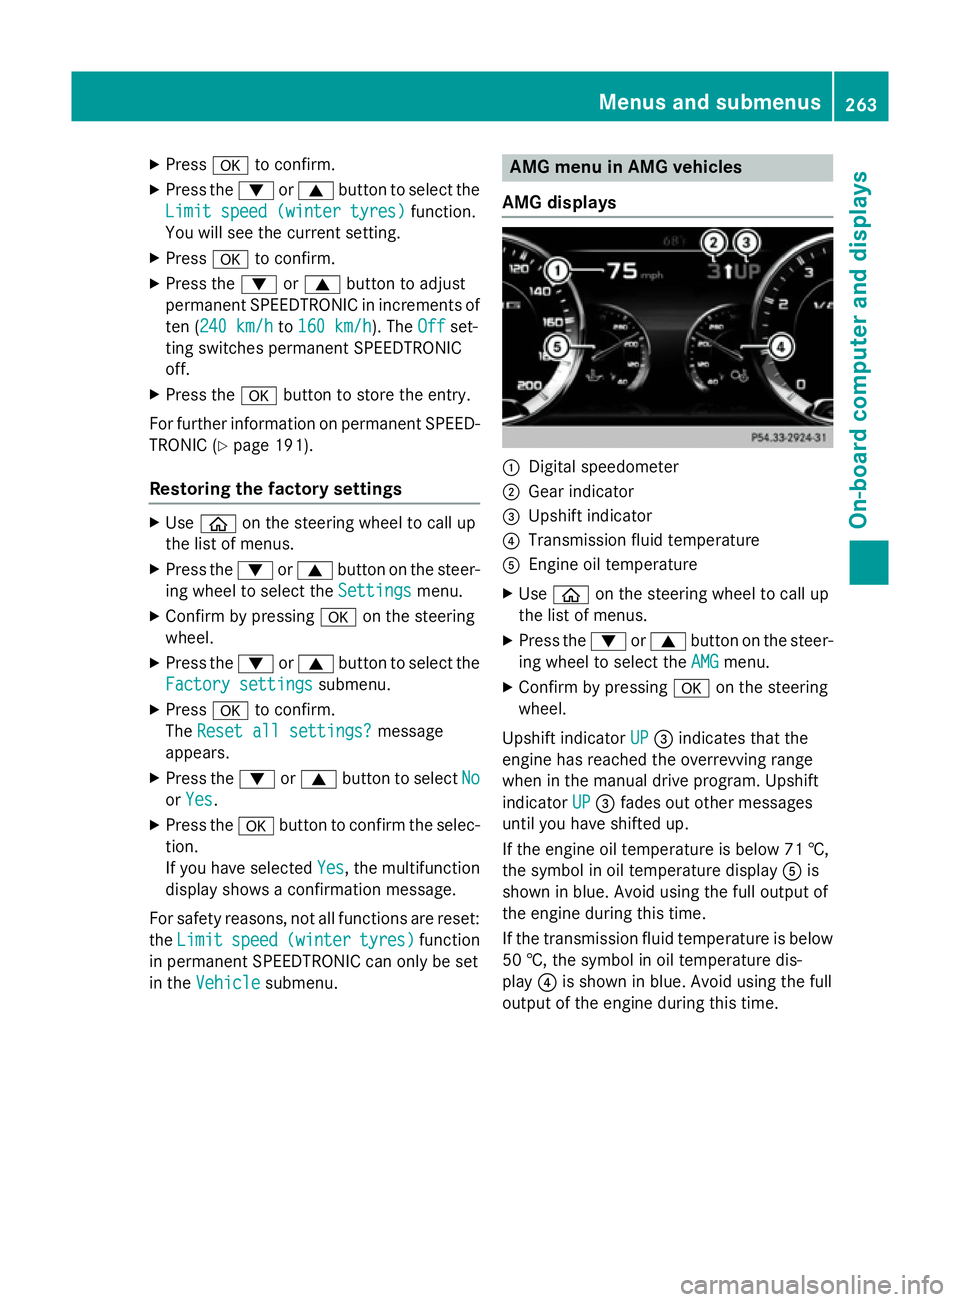
AMG displays :
Digital speedometer
; Gear indicator
= Upshift indicator
? Transmission fluid temperature
A Engine oil temperature
X Use ò on the steering wheel to call up
the list of menus.
X Press the :or9 button on the steer-
ing wheel to select the AMG
AMGmenu.
X Confirm by pressing aon the steering
wheel.
Upshift indicator UP
UP= indicates that the
engine has reached the overrevving range
when in the manual drive program. Upshift
indicator UP UP= fades out other messages
until you have shifted up.
If the engine oil temperature is below 71 †,
the symbol in oil temperature display Ais
shown in blue. Avoid using the full output of
the engine during this time.
If the transmission fluid temperature is below
50 †, the symbol in oil temperature dis-
play ?is shown in blue. Avoid using the full
output of the engine during this time. Menus and submenus
263On-board computer and displays Z
Page 339 of 413
Useful information
i This Owner's Manual describes all mod-
els, series and optional equipment for your
vehicle that were available at the time of
going to press. National variations are pos- sible. Note that your vehicle may not be
equipped with all of the functions descri-
bed. This is also the case for systems and
functions relevant to safety.
i Read the information on qualified special-
ist workshops: (Y page 25). Engine compartment
Bonnet
Important safety notes G
WARNING
An unlocked bonnet may open while driving
and block your view. There is a risk of an acci- dent.
Never unlock the bonnet while driving. G
WARNING
When being opened and closed, the bonnet
may suddenly fall into the closed position.
There is a risk of injury to persons in the range of movement of the bonnet.
Open and close the bonnet only when nobody
is in the range of movement. G
WARNING
If you open the bonnet while the engine is
overheating or while there is a fire in the
engine compartment, you could come into
contact with hot gases or other leaking ser-
vice products. There is a danger of injury.
Allow an overheating engine to cool down
before opening the bonnet. If there is a fire in the engine compartment, leave the bonnet
closed and notify the fire brigade. G
WARNING
There are moving components in the engine
compartment. Certain components may con-
tinue to move or suddenly move again even
after the ignition has been switched off, e.g.
the radiator fan. There is a risk of injury.
If you have to carry out work in the engine
compartment:
R switch off the ignition
R never touch the dangerous areas surround-
ing moving components, e.g. the rotation
area of the fan
R remove jewellery and watches
R keep items of clothing and hair, for exam-
ple, away from moving parts. G
WARNING
The ignition system and the fuel injection sys- tem operate with a high voltage. If you touch
the live components, you could receive an
electric shock. There is a danger of injury.
Never touch components of the ignition sys-
tem or the fuel injection system when the
ignition is switched on.
Active bonnet (pedestrian protection) Operating principle
! A triggered active bonnet must be
repaired at a qualified specialist workshop
after it has been reset. The active bonnet
function will then be available again. The
additional pedestrian protection provided
by the active bonnet will then be restored.
The active bonnet is only available in certain
countries.
The active bonnet can reduce the risk of injury to pedestrians in certain accident situations.
Raising the active bonnet increases the clear- ance to hard components, such as the engine.
If the active bonnet has been triggered, it is
raised at the rear in the area around the hinge
by approximately 85 mm.
For the drive to the workshop, reset the trig-
gered active bonnet yourself. If the active 336
Engine compartmentMaintenance and care
Page 340 of 413
bonnet has been triggered, pedestrian pro-
tection may be limited.
Resetting G
WARNING
Certain components in the engine compart-
ment could be very hot, e.g. the engine, the
radiator and parts of the exhaust system.
There is a risk of injury when accessing the
engine compartment.
As far as possible, allow the engine to cool
down and only touch the components descri- bed in the following. X
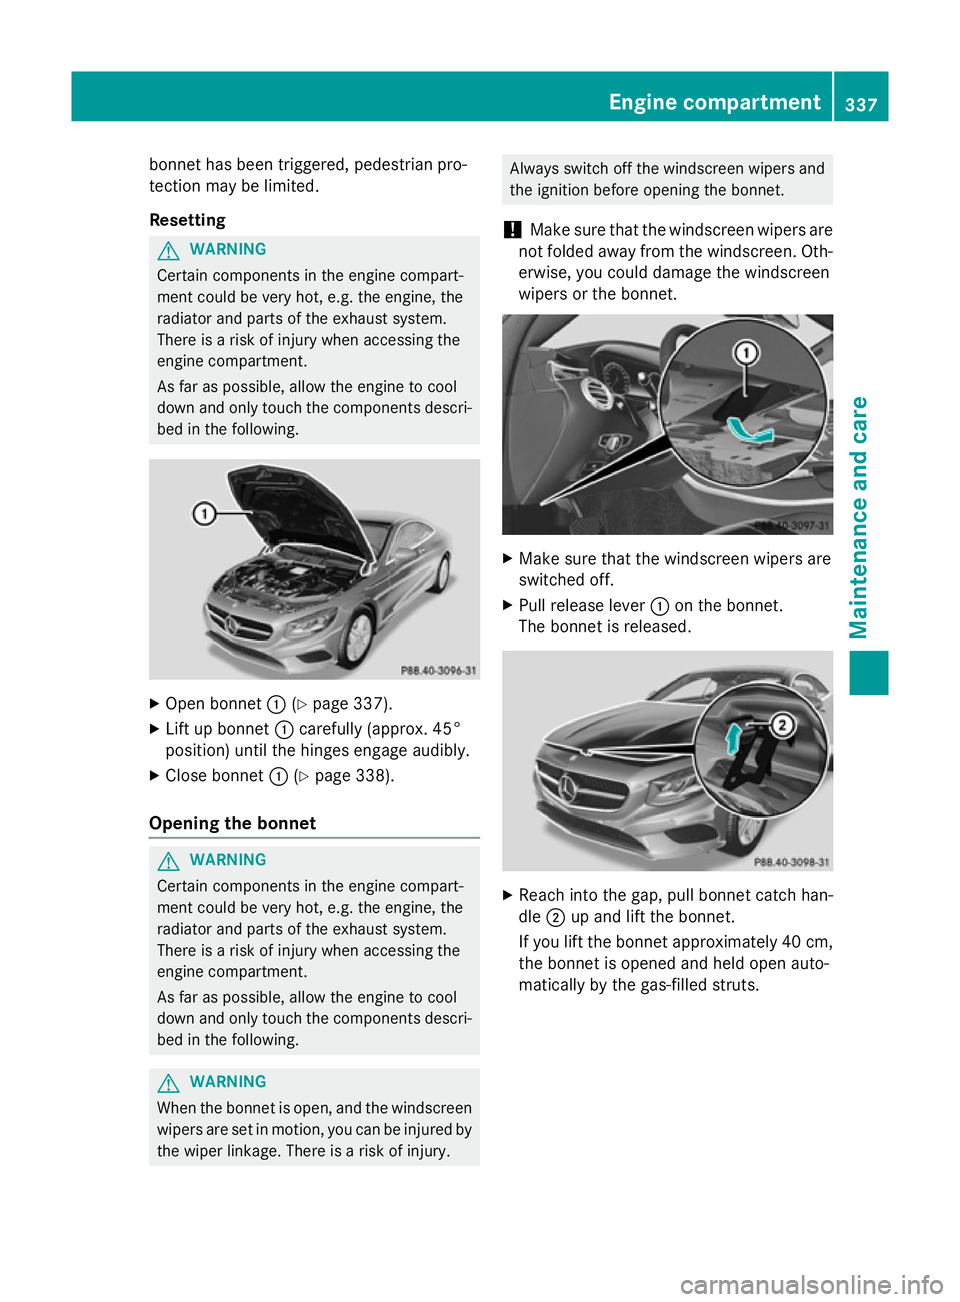
Open bonnet :(Ypage 337).
X Lift up bonnet :carefully (approx. 45°
position) until the hinges engage audibly.
X Close bonnet :(Ypage 338).
Opening the bonnet G
WARNING
Certain components in the engine compart-
ment could be very hot, e.g. the engine, the
radiator and parts of the exhaust system.
There is a risk of injury when accessing the
engine compartment.
As far as possible, allow the engine to cool
down and only touch the components descri- bed in the following. G
WARNING
When the bonnet is open, and the windscreen wipers are set in motion, you can be injured by
the wiper linkage. There is a risk of injury. Always switch off the windscreen wipers and
the ignition before opening the bonnet.
! Make sure that the windscreen wipers are
not folded away from the windscreen. Oth-
erwise, you could damage the windscreen
wipers or the bonnet. X
Make sure that the windscreen wipers are
switched off.
X Pull release lever :on the bonnet.
The bonnet is released. X
Reach into the gap, pull bonnet catch han-
dle ;up and lift the bonnet.
If you lift the bonnet approximately 40 cm, the bonnet is opened and held open auto-
matically by the gas-filled struts. Engine compartment
337Maintenance and care Z
Page 345 of 413
X
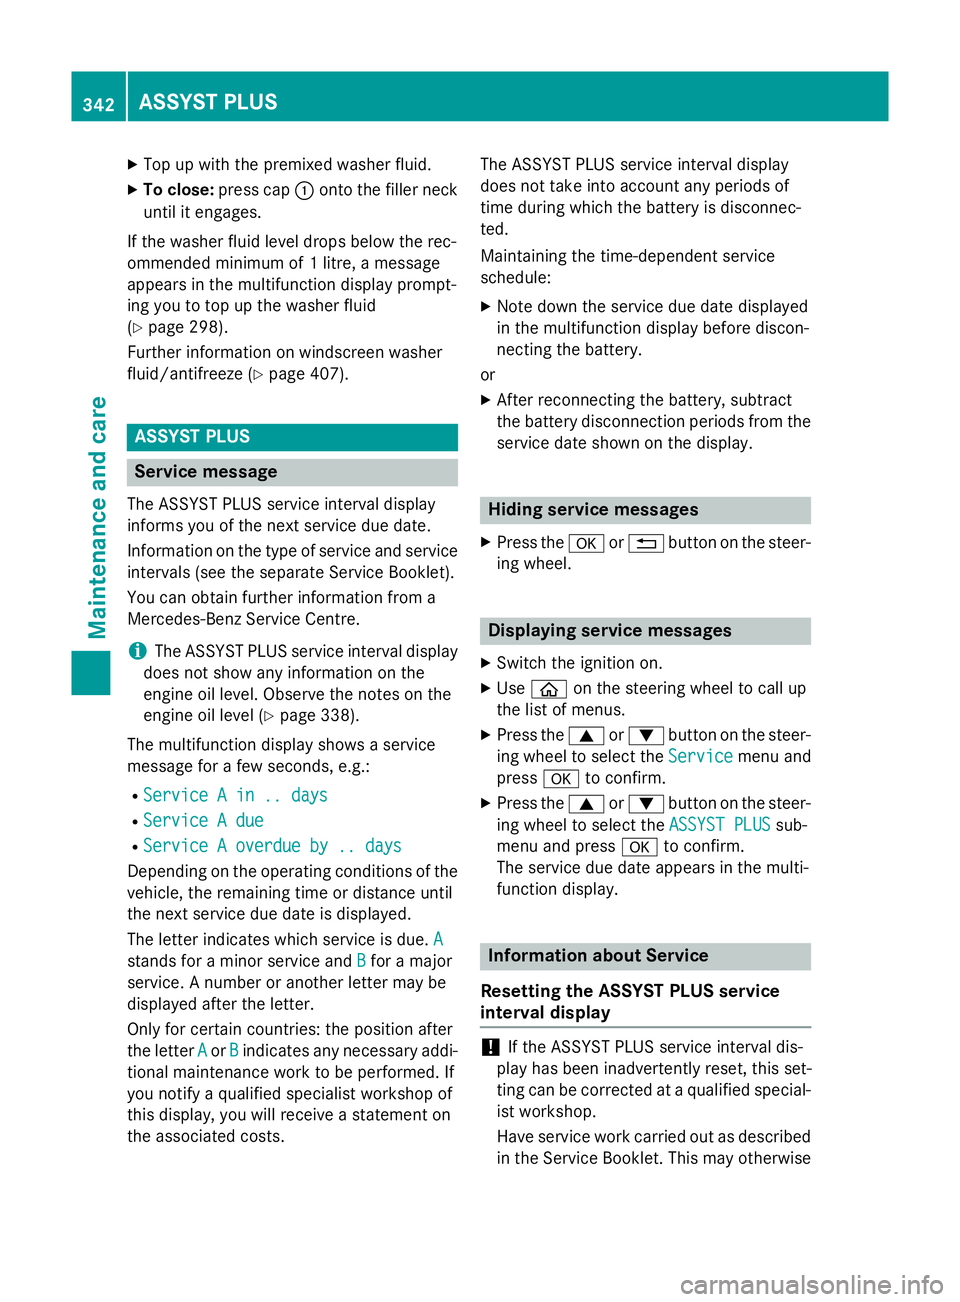
Top up with the premixed washer fluid.
X To close: press cap :onto the filler neck
until it engages.
If the washer fluid level drops below the rec-
ommended minimum of 1 litre, a message
appears in the multifunction display prompt-
ing you to top up the washer fluid
(Y page 298).
Further information on windscreen washer
fluid/antifreeze (Y page 407).ASSYST PLUS
Service message
The ASSYST PLUS service interval display
informs you of the next service due date.
Information on the type of service and service
intervals (see the separate Service Booklet).
You can obtain further information from a
Mercedes-Benz Service Centre.
i The ASSYST PLUS service interval display
does not show any information on the
engine oil level. Observe the notes on the
engine oil level (Y page 338).
The multifunction display shows a service
message for a few seconds, e.g.:
R Service A in .. days
Service A in .. days
R Service A due Service A due
R Service A overdue by .. days
Service A overdue by .. days
Depending on the operating conditions of the vehicle, the remaining time or distance until
the next service due date is displayed.
The letter indicates which service is due. A
A
stands for a minor service and B
B for a major
service. A number or another letter may be
displayed after the letter.
Only for certain countries: the position after
the letter A
A or B Bindicates any necessary addi-
tional maintenance work to be performed. If
you notify a qualified specialist workshop of
this display, you will receive a statement on
the associated costs. The ASSYST PLUS service interval display
does not take into account any periods of
time during which the battery is disconnec-
ted.
Maintaining the time-dependent service
schedule:
X Note down the service due date displayed
in the multifunction display before discon-
necting the battery.
or X After reconnecting the battery, subtract
the battery disconnection periods from the
service date shown on the display. Hiding service messages
X Press the aor% button on the steer-
ing wheel. Displaying service messages
X Switch the ignition on.
X Use ò on the steering wheel to call up
the list of menus.
X Press the 9or: button on the steer-
ing wheel to select the Service Servicemenu and
press ato confirm.
X Press the 9or: button on the steer-
ing wheel to select the ASSYST PLUS
ASSYST PLUSsub-
menu and press ato confirm.
The service due date appears in the multi-
function display. Information about Service
Resetting the ASSYST PLUS service
interval display !
If the ASSYST PLUS service interval dis-
play has been inadvertently reset, this set-
ting can be corrected at a qualified special-
ist workshop.
Have service work carried out as described in the Service Booklet. This may otherwise 342
ASSYST PLUSMaintenance and care
Page 346 of 413
lead to increased wear and damage to the
major assemblies or the vehicle.
A qualified specialist workshop, e.g. a
Mercedes-Benz Service Centre, will reset the ASSYST PLUS service interval display after
the service work has been carried out. You
can also obtain further information on main-
tenance work, for example.
Special service requirements The prescribed service interval is based on
normal operation of the vehicle. Service work
will need to be performed more often if the
vehicle is operated under arduous conditions
or increased loads, for example:
R regular city driving with frequent intermedi-
ate stops
R if the vehicle is primarily used to travel
short distances
R for frequent operation in mountainous ter-
rain or on poor road surfaces
R if the engine is often left idling for long peri-
ods
In these or similar operating conditions, have,
for example, the air filter, engine oil and oil
filter changed more frequently. The tyres
must be checked more frequently if the vehi-
cle is operated under increased loads. Fur-
ther information can be obtained at a quali-
fied specialist workshop, e.g. a Mercedes-
Benz Service Centre.
Driving abroad An extensive Mercedes-Benz Service network
is also available in other countries. You can
obtain further information from any
Mercedes-Benz Service Centre. Care
General notes
H
Environmental note
Dispose of empty packaging and cleaning
cloths in an environmentally responsible man- ner.
! For cleaning your vehicle, do not use any
of the following:
R dry, rough or hard cloths
R abrasive cleaning agents
R solvents
R cleaning agents containing solvents
Do not scrub.
Do not touch the surfaces or protective
films with hard objects, e.g. a ring or ice
scraper. You could otherwise scratch or
damage the surfaces and protective film.
! Do not park up the vehicle for an extended
period straight after cleaning it, particularly after having cleaned the wheels with wheel cleaner. Wheel cleaners could cause
increased corrosion of the brake discs and
brake pads/linings. For this reason, you
should drive for a few minutes after clean-
ing. Braking heats the brake discs and the
brake pads/linings, thus drying them. The
vehicle can then be parked up.
Regular care of your vehicle is a condition for
retaining the quality in the long term.
Use care products and cleaning agents rec-
ommended and approved by Mercedes-Benz. Washing the vehicle and cleaning the
paintwork
Automatic car wash G
WARNING
Braking efficiency is reduced after the vehicle has been washed. There is a risk of an acci-
dent. Care
343Maintenance and care
Z