2014 MERCEDES-BENZ S-CLASS COUPE cooling
[x] Cancel search: coolingPage 146 of 413
b
Directs the airflow through the centre
and side air vents as well as the demis-
ter vents
W Sets the air distribution to automatic
Setting the air distribution using
COMAND Online The air distribution for the left and right sides
of the driver and front passenger area can be adjusted using COMAND Online (see the sep-
arate operating instructions). Setting the airflow
General notes You can select different airflow settings for
the driver's and front-passenger sides.
Setting the airflow X
Turn the key to position 2in the ignition
lock (Y page 159).
X To increase/reduce: press the upper or
lower section of the Krocker switch.
or X Set the airflow using COMAND Online (see
the separate operating instructions). Activating/deactivating the synchro-
nisation function
Climate control can be set centrally using the synchronisation function. The settings for
temperature, air distribution and airflow on
the driver's side are adopted for the front-
passenger side.
X To activate/deactivate: switch the syn-
chronisation function on or off using
COMAND Online (see the separate operat- ing instructions).
The synchronisation function switches off, if
the settings for the front-passenger side are
changed. Demisting the windscreen
You can use this function to defrost the wind-
screen or to demist the inside of the wind-
screen and the front side windows.
Switch off the windscreen demisting function
as soon as the windscreen is clear again.
X Turn the key to position 2in the ignition
lock (Y page 159).
X To activate: press the¬rocker switch
on the front control unit up or down.
The indicator lamp in the ¬rocker
switch lights up.
The climate control system switches to the
following functions:
R high airflow
R high temperature
R air distribution to the windscreen and
front side windows
R air-recirculation mode off
R windscreen heating on
X To deactivate: press the¬rocker
switch up or down.
The indicator lamp in the ¬rocker
switch goes out. The previous settings are
reactivated. Air-recirculation mode
remains deactivated.
or
X Press the Ãrocker switch up or down.
or
X Vehicles with auxiliary heating: call up
the COMAND Online climate control menu
using the !rocker switch.
X Vehicles without auxiliary heating: call
up the COMAND Online climate control
menu using the trocker switch. Demisting the windows
Windows misted up on the inside X
Vehicles with auxiliary heating: activate
the "Cooling with air dehumidification" Operating the climate control system
143Climate control
Page 147 of 413
function via COMAND Online (see the sep-
arate operating instructions).
X Vehicles without auxiliary heating: acti-
vate the "Cooling with air dehumidification" function with the Árocker switch.
or
X Activate the "Cooling with air dehumidifi-
cation" function via COMAND Online (see
the separate operating instructions).
X Switch on automatic mode using the Ã
rocker switch.
X If the windows continue to mist up: activate
the windscreen demisting function using
the ¬ rocker switch. The windscreen
heating is switched on.
i You should only select this setting until
the windscreen is clear again.
Windows misted up on the outside X
Activate the windscreen wipers.
X Switch on automatic mode using the Ã
rocker switch.
i If you clean the windows regularly, they
do not mist up so quickly. Rear window heating
General notes The rear window heating has a high current
draw. You should therefore switch it off as
soon as the window is clear. It otherwise
switches off automatically after several
minutes.
If the battery voltage is too low, the rear win-
dow heating may switch off.
Activating/deactivating X
Turn the key to position 2in the ignition
lock (Y page 159).
X Press the ¤rocker switch up or down.
The indicator lamp in the ¤rocker
switch lights up or goes out. 144
Operating the climate control systemClimate control
Page 148 of 413
Problems with the rear window heating
Problem
Possible causes/consequences and
M
MSolutions The rear window heat-
ing has switched off
prematurely or cannot
be activated. The battery has not been sufficiently charged.
X Switch off any consumers that are not required, e.g. reading
lamps, interior lighting or the seat heating.
When the battery is sufficiently charged, the rear window heat-
ing can be activated again. Activating/deactivating air-recircula-
tion mode
General notes You can also temporarily deactivate the flow
of fresh air manually if unpleasant odours are
entering the vehicle from outside. The air
already inside the vehicle will then be recir-
culated.
If you switch on air-recirculation mode, the
windows can mist up more quickly, in partic-
ular at low temperatures. Only use air-recir-
culation mode briefly to prevent the windows misting up.
Activating/deactivating X
Turn the key to position 2in the ignition
lock (Y page 159).
X To activate: press thegrocker switch
up or down.
The indicator lamp in the rocker switch
g lights up.
Air-recirculation mode is automatically acti-
vated at high levels of pollution or at high out- side temperatures. The indicator lamp in the
g rocker switch is not lit when automatic
air-recirculation mode is activated. Outside
air is added after about 30 minutes.
X To deactivate: press thegrocker
switch up or down.
The indicator lamp in the rocker switch
g goes out. Air-recirculation mode is deactivated auto-
matically:
R after approximately five minutes at outside
temperatures below approximately 5 †
R after approximately five minutes if cooling
with air dehumidification is deactivated
R after approximately 30 minutes at outside
temperatures above approximately 5 † if
the cooling with air dehumidification func-
tion is activated Convenience opening/closing using
the air-recirculation button
G
WARNING
When using convenience closing, you could
become trapped within the sweep of the clos- ing window. There is a risk of injury.
Monitor the entire closing procedure when
using convenience closing. When closing,
make sure that no one has any parts of the
body within the closing area. G
WARNING
During convenience opening parts of the body could be drawn in or become trapped
between the side window and window frame.
There is a risk of injury.
When opening, make sure that nobody is
touching the side window. If someone
becomes trapped, press the Wswitch
immediately to open/close the side window
in the door. The side window stops. To con- Operating the climate control system
145Climate control
Z
Page 158 of 413
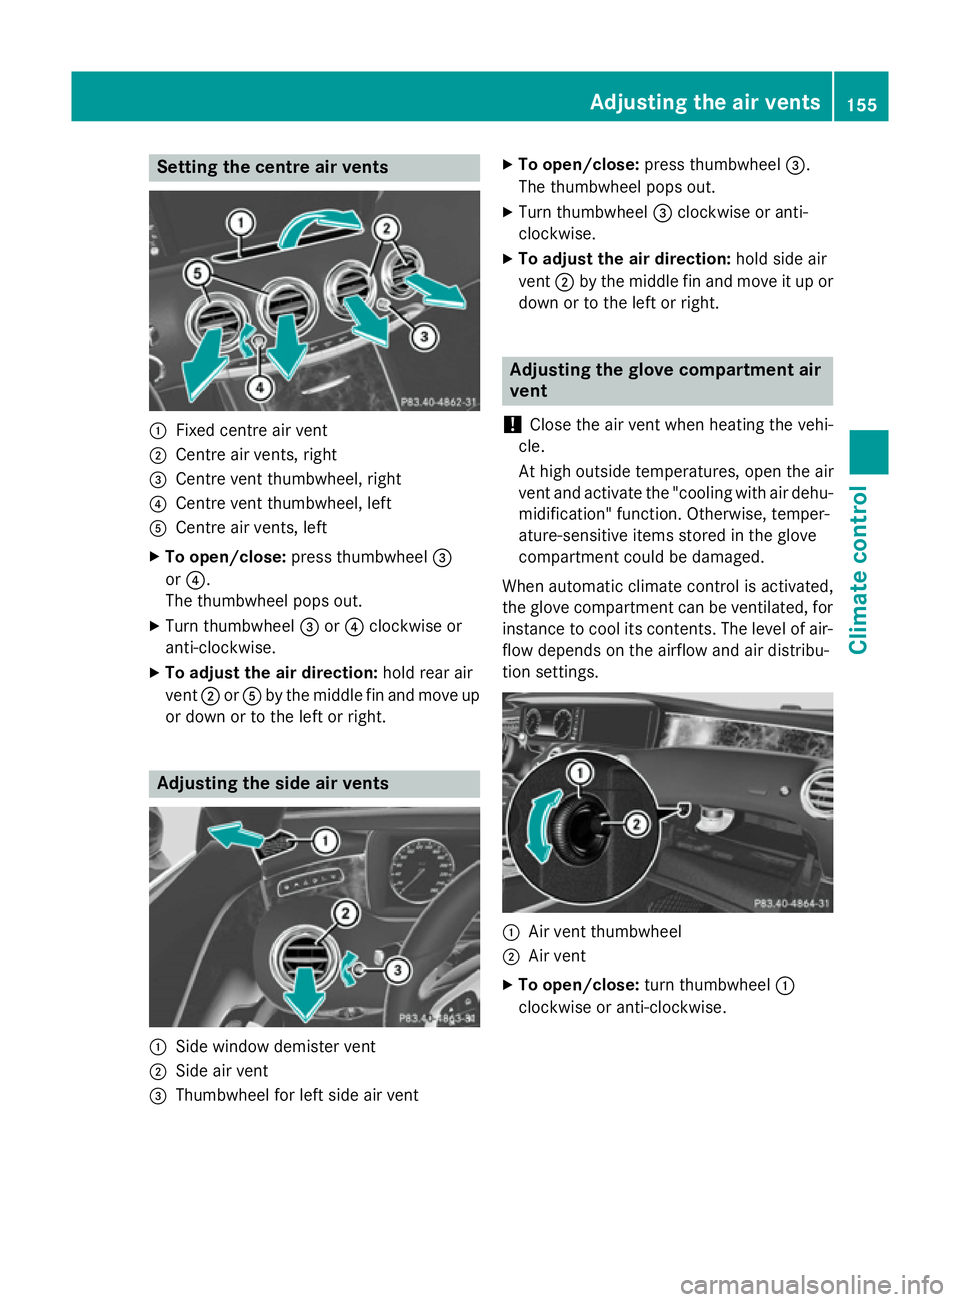
Setting the centre air vents
:
Fixed centre air vent
; Centre air vents, right
= Centre vent thumbwheel, right
? Centre vent thumbwheel, left
A Centre air vents, left
X To open/close: press thumbwheel =
or ?.
The thumbwheel pops out.
X Turn thumbwheel =or? clockwise or
anti-clockwise.
X To adjust the air direction: hold rear air
vent ;orA by the middle fin and move up
or down or to the left or right. Adjusting the side air vents
:
Side window demister vent
; Side air vent
= Thumbwheel for left side air vent X
To open/close: press thumbwheel =.
The thumbwheel pops out.
X Turn thumbwheel =clockwise or anti-
clockwise.
X To adjust the air direction: hold side air
vent ;by the middle fin and move it up or
down or to the left or right. Adjusting the glove compartment air
vent
! Close the air vent when heating the vehi-
cle.
At high outside temperatures, open the air
vent and activate the "cooling with air dehu- midification" function. Otherwise, temper-
ature-sensitive items stored in the glove
compartment could be damaged.
When automatic climate control is activated,
the glove compartment can be ventilated, for
instance to cool its contents. The level of air- flow depends on the airflow and air distribu-
tion settings. :
Air vent thumbwheel
; Air vent
X To open/close: turn thumbwheel :
clockwise or anti-clockwise. Adjusting the air vents
155Climate control Z
Page 285 of 413
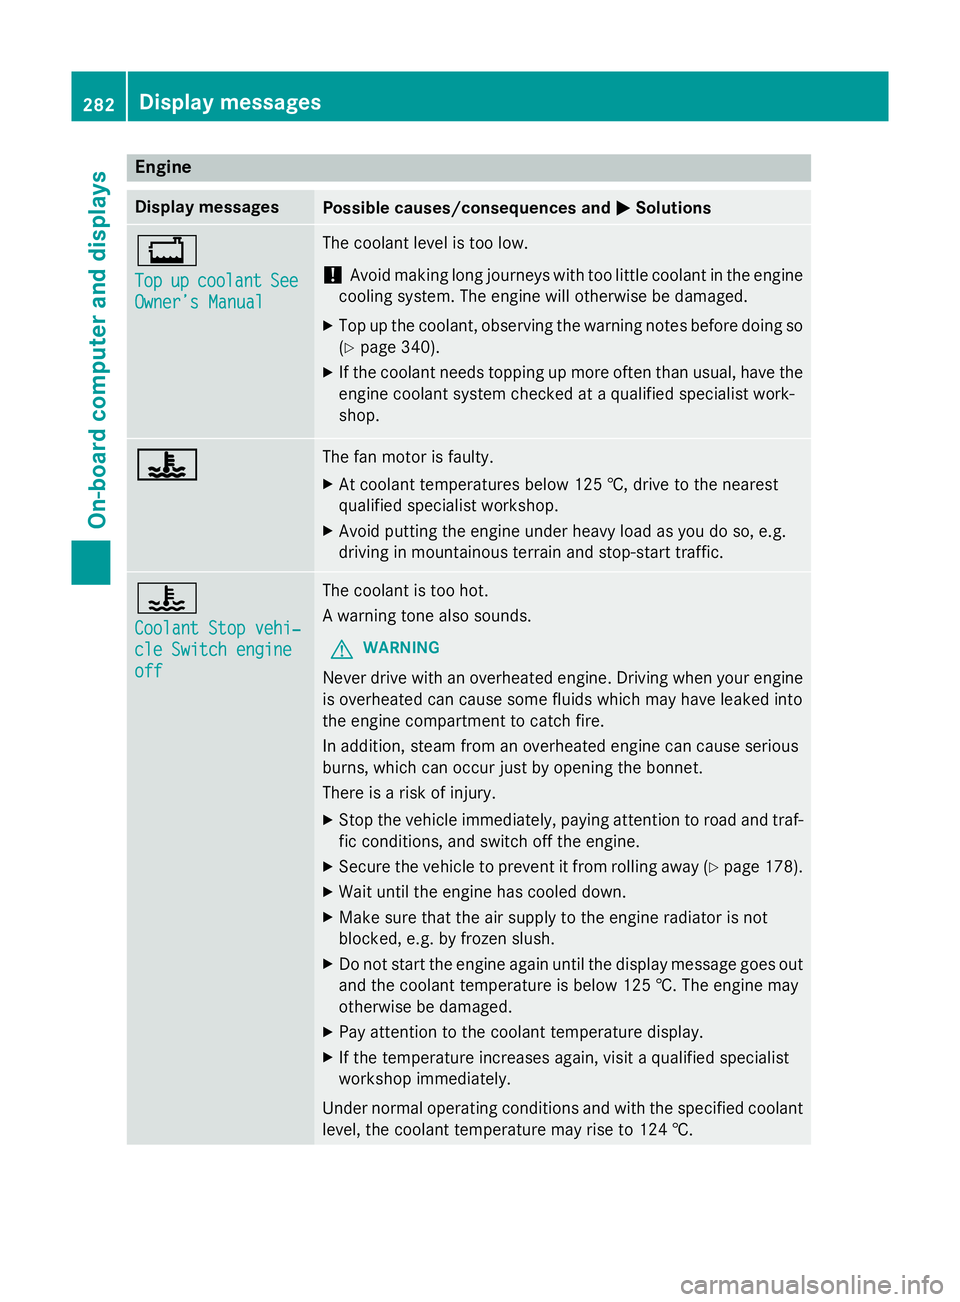
Engine
Display messages
Possible causes/consequences and
M
MSolutions +
Top Top
up
upcoolant
coolant See
See
Owner’s Manual
Owner’s Manual The coolant level is too low.
! Avoid making long journeys with too little coolant in the engine
cooling system. The engine will otherwise be damaged.
X Top up the coolant, observing the warning notes before doing so
(Y page 340).
X If the coolant needs topping up more often than usual, have the
engine coolant system checked at a qualified specialist work-
shop. ? ? The fan motor is faulty.
X At coolant temperatures below 125 †, drive to the nearest
qualified specialist workshop.
X Avoid putting the engine under heavy load as you do so, e.g.
driving in mountainous terrain and stop-start traffic. ?
Coolant Stop vehi‐ Coolant Stop vehi‐
cle Switch engine cle Switch engine
off off The coolant is too hot.
A warning tone also sounds.
G WARNING
Never drive with an overheated engine. Driving when your engine is overheated can cause some fluids which may have leaked into
the engine compartment to catch fire.
In addition, steam from an overheated engine can cause serious
burns, which can occur just by opening the bonnet.
There is a risk of injury.
X Stop the vehicle immediately, paying attention to road and traf-
fic conditions, and switch off the engine.
X Secure the vehicle to prevent it from rolling away (Y page 178).
X Wait until the engine has cooled down.
X Make sure that the air supply to the engine radiator is not
blocked, e.g. by frozen slush.
X Do not start the engine again until the display message goes out
and the coolant temperature is below 125 †. The engine may
otherwise be damaged.
X Pay attention to the coolant temperature display.
X If the temperature increases again, visit a qualified specialist
workshop immediately.
Under normal operating conditions and with the specified coolant level, the coolant temperature may rise to 124 †. 282
Display messagesOn-board computer and displays
Page 311 of 413
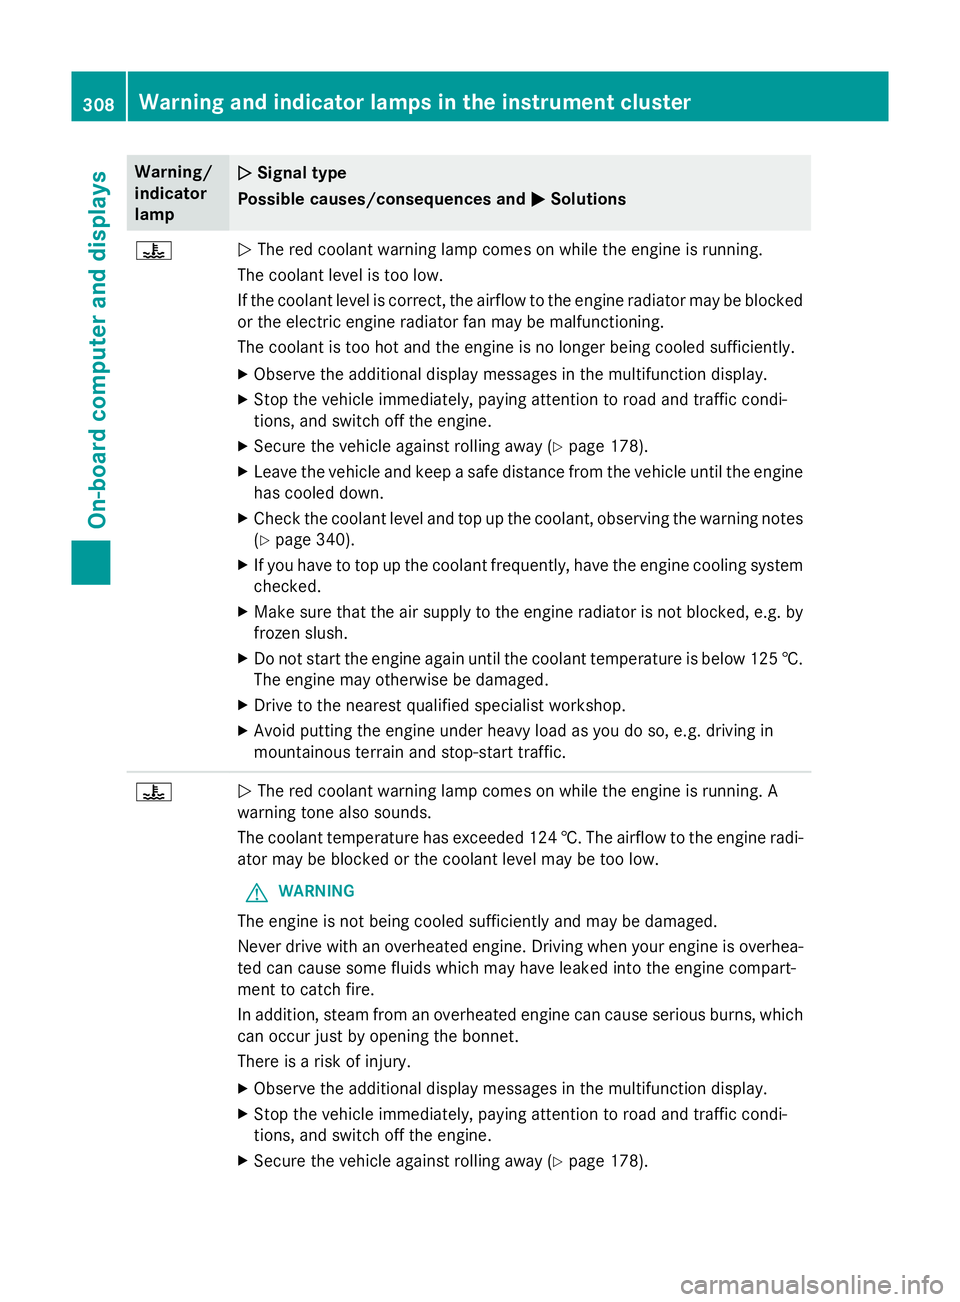
Warning/
indicator
lamp
N N
Signal type
Possible causes/consequences and M
MSolutions ?
N
The red coolant warning lamp comes on while the engine is running.
The coolant level is too low.
If the coolant level is correct, the airflow to the engine radiator may be blocked
or the electric engine radiator fan may be malfunctioning.
The coolant is too hot and the engine is no longer being cooled sufficiently.
X Observe the additional display messages in the multifunction display.
X Stop the vehicle immediately, paying attention to road and traffic condi-
tions, and switch off the engine.
X Secure the vehicle against rolling away (Y page 178).
X Leave the vehicle and keep a safe distance from the vehicle until the engine
has cooled down.
X Check the coolant level and top up the coolant, observing the warning notes
(Y page 340).
X If you have to top up the coolant frequently, have the engine cooling system
checked.
X Make sure that the air supply to the engine radiator is not blocked, e.g. by
frozen slush.
X Do not start the engine again until the coolant temperature is below 125 †.
The engine may otherwise be damaged.
X Drive to the nearest qualified specialist workshop.
X Avoid putting the engine under heavy load as you do so, e.g. driving in
mountainous terrain and stop-start traffic. ?
N
The red coolant warning lamp comes on while the engine is running. A
warning tone also sounds.
The coolant temperature has exceeded 124 †. The airflow to the engine radi- ator may be blocked or the coolant level may be too low.
G WARNING
The engine is not being cooled sufficiently and may be damaged.
Never drive with an overheated engine. Driving when your engine is overhea-
ted can cause some fluids which may have leaked into the engine compart-
ment to catch fire.
In addition, steam from an overheated engine can cause serious burns, which
can occur just by opening the bonnet.
There is a risk of injury.
X Observe the additional display messages in the multifunction display.
X Stop the vehicle immediately, paying attention to road and traffic condi-
tions, and switch off the engine.
X Secure the vehicle against rolling away (Y page 178).308
Warning and indicator lamps in the instrument clusterOn-board computer and displays
Page 312 of 413
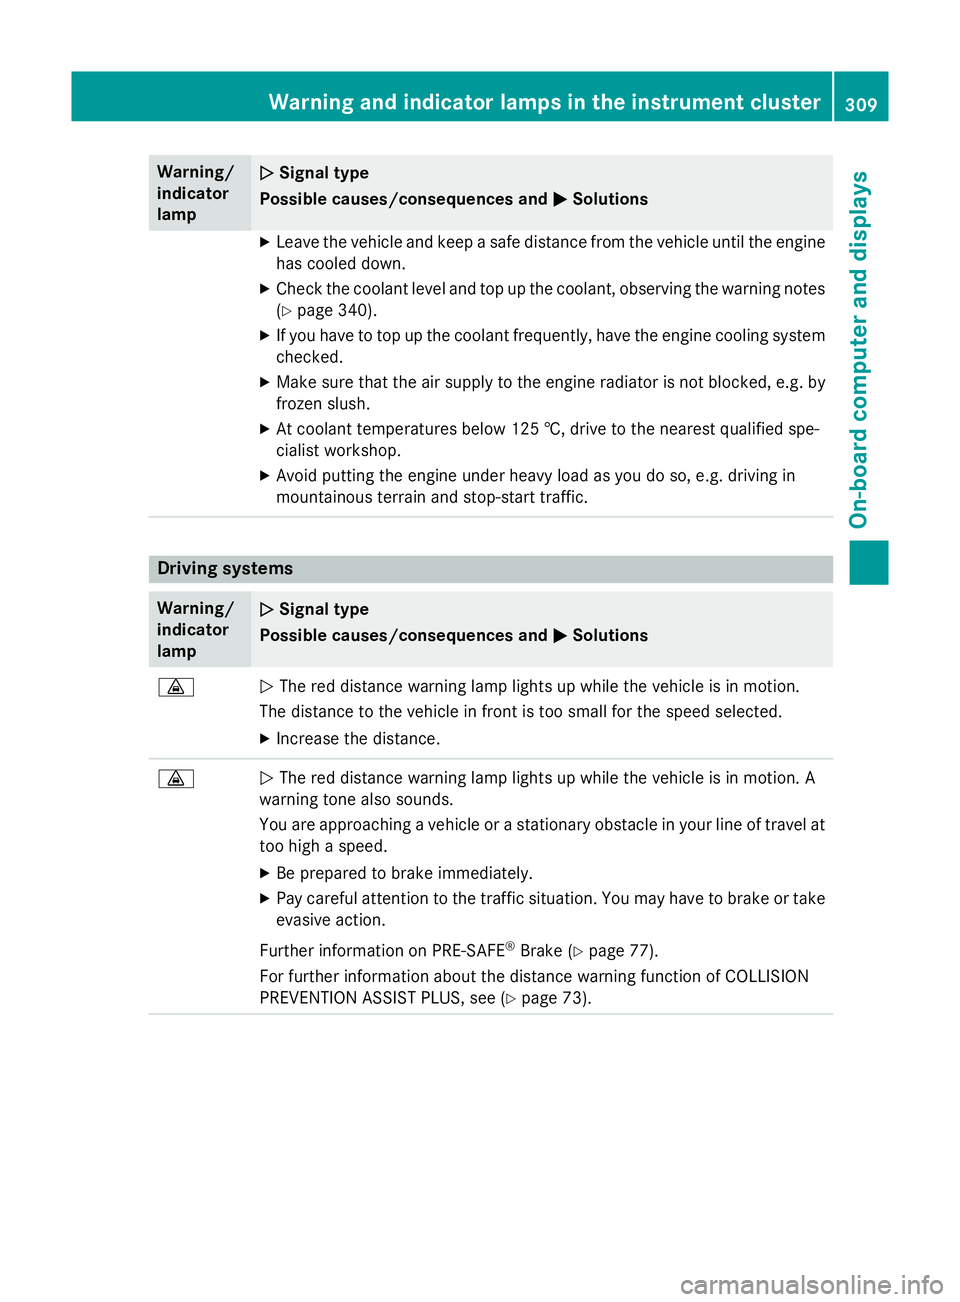
Warning/
indicator
lamp
N N
Signal type
Possible causes/consequences and M
MSolutions X
Leave the vehicle and keep a safe distance from the vehicle until the engine
has cooled down.
X Check the coolant level and top up the coolant, observing the warning notes
(Y page 340).
X If you have to top up the coolant frequently, have the engine cooling system
checked.
X Make sure that the air supply to the engine radiator is not blocked, e.g. by
frozen slush.
X At coolant temperatures below 125 †, drive to the nearest qualified spe-
cialist workshop.
X Avoid putting the engine under heavy load as you do so, e.g. driving in
mountainous terrain and stop-start traffic. Driving systems
Warning/
indicator
lamp
N N
Signal type
Possible causes/consequences and M
MSolutions ·
N
The red distance warning lamp lights up while the vehicle is in motion.
The distance to the vehicle in front is too small for the speed selected.
X Increase the distance. ·
N
The red distance warning lamp lights up while the vehicle is in motion. A
warning tone also sounds.
You are approaching a vehicle or a stationary obstacle in your line of travel at too high a speed.
X Be prepared to brake immediately.
X Pay careful attention to the traffic situation. You may have to brake or take
evasive action.
Further information on PRE ‑SAFE®
Brake (Y page 77).
For further information about the distance warning function of COLLISION
PREVENTION ASSIST PLUS, see (Y page 73). Warning and indicator lamps in the instrument cluster
309On-board computer and displays Z
Page 327 of 413
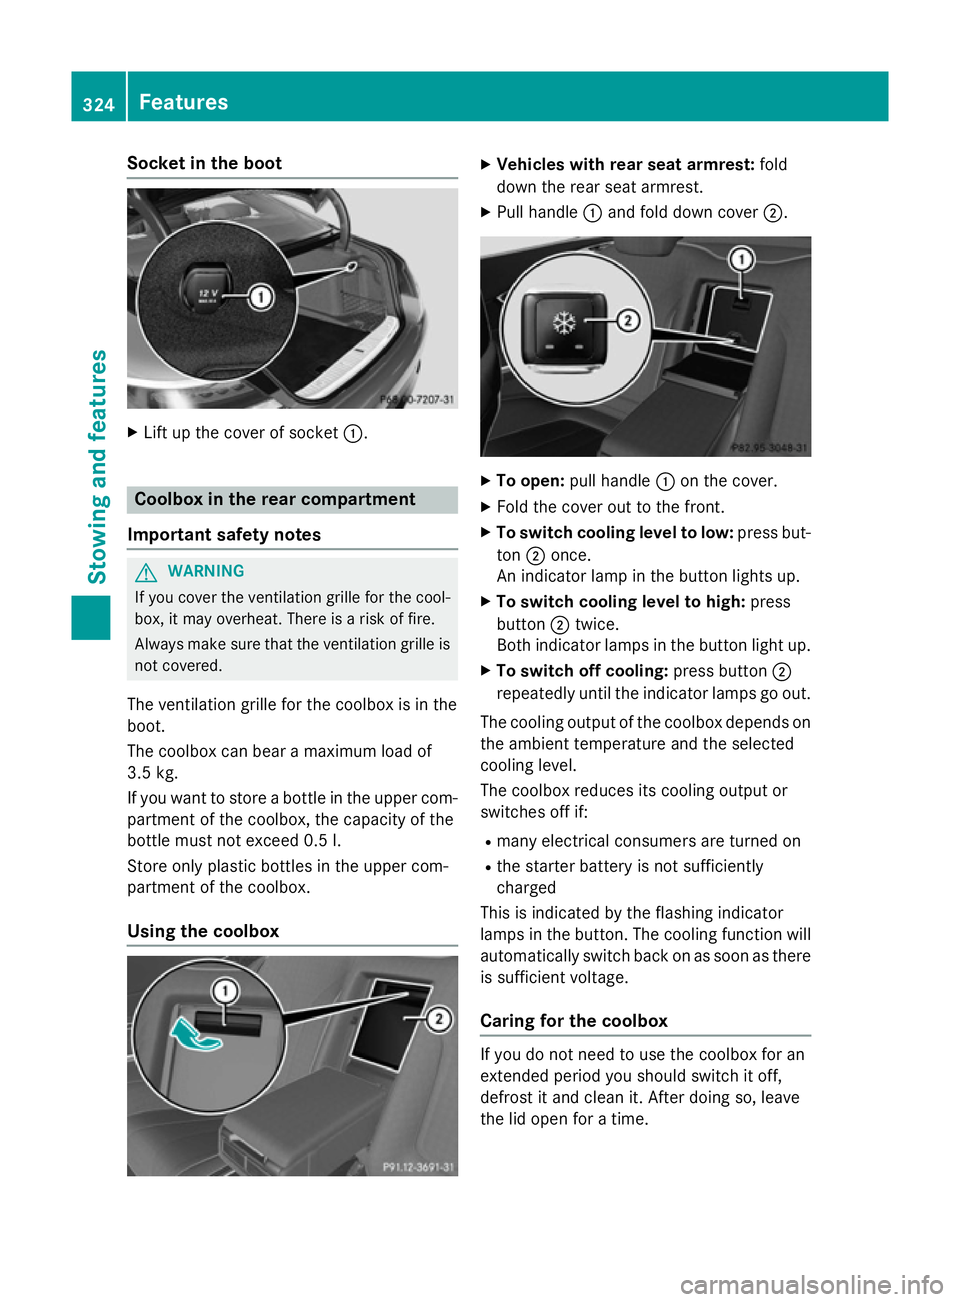
Socket in the boot
X
Lift up the cover of socket :.Coolbox in the rear compartment
Important safety notes G
WARNING
If you cover the ventilation grille for the cool-
box, it may overheat. There is a risk of fire.
Always make sure that the ventilation grille is not covered.
The ventilation grille for the coolbox is in the
boot.
The coolbox can bear a maximum load of
3.5 kg.
If you want to store a bottle in the upper com-
partment of the coolbox, the capacity of the
bottle must not exceed 0.5 l.
Store only plastic bottles in the upper com-
partment of the coolbox.
Using the coolbox X
Vehicles with rear seat armrest: fold
down the rear seat armrest.
X Pull handle :and fold down cover ;. X
To open: pull handle :on the cover.
X Fold the cover out to the front.
X To switch cooling level to low: press but-
ton ;once.
An indicator lamp in the button lights up.
X To switch cooling level to high: press
button ;twice.
Both indicator lamps in the button light up.
X To switch off cooling: press button;
repeatedly until the indicator lamps go out.
The cooling output of the coolbox depends on
the ambient temperature and the selected
cooling level.
The coolbox reduces its cooling output or
switches off if:
R many electrical consumers are turned on
R the starter battery is not sufficiently
charged
This is indicated by the flashing indicator
lamps in the button. The cooling function will automatically switch back on as soon as there
is sufficient voltage.
Caring for the coolbox If you do not need to use the coolbox for an
extended period you should switch it off,
defrost it and clean it. After doing so, leave
the lid open for a time.324
FeaturesStowing and features