2014 MERCEDES-BENZ M-Class lamp
[x] Cancel search: lampPage 250 of 462

X
To increase or decrease in 1 mph
increments (Canada: 1 km/h
increments): briefly press the cruise
control lever up 0002for a highe rset speed
or down 0003for a lower set speed.
The set speed appears in the multifunction
display with the 0001DSR symbol. It is also
displayed in status indicator 0023.
When DSR is activated, you can change the
set speed to a value between 1mph and
11 mph (Canada: between 2 km/h and
18 km/h).
i The DSR set speed is always changed in
1 mph increments (Canada: 1 km/h
increments). This is regardless of whether
you press the cruise control lever to or
beyond the pressure point.
Off-road programs (vehicles with the
ON&OFFROAD package) General notes
The off-road programs assist you in driving
off-road. The engine’s performance
characteristics and the gearshifting
characteristics of the automatic transmission
are adapted for this purpose. ABS, ESP
®
and
4ET Sprograms especially adapted to off-road
driving are activated. An accelerator pedal
curve suitable for the terrain is selected, i.e.
the accelerator pedal must be depressed
further to accelerate.
Do not use the off-road programs on roads
that are snow-covered or icy or if you have
mounted snow chains on yourv ehicle.
For information on driving off-road, see
(Y page 187).
The following program messages are shown
in the multifunction display until the
applicable vehicle level is set. Up to off-road
level 2, you can hide the program messages
using the 0007or the 000Bbutton on the
multifunction steering wheel. Off-road program 1
X
Selector wheel 0002 engaged:
briefly press
selector wheel 0002.
Selector wheel 0002extends.
X To select: turn selector wheel 0002until
indicator lamp 0003comes on.
Off-road indicator 0023appears in the
multifunction display.
Off-road level 1 is set to +1.2 in (+30 mm)
above the highway level.
If you drive at a speed above 70 mph
(110 km/h), off-road program 1 switches to
AUTO program.
Select off-road program 1 for gentle off-road
terrain, e.g. for gravel or sand surfaces or
tracks. The engine's torque is restricted to a
limited degree and the drive wheels can spin.
The spinning wheels produce acutting effect
for better traction.
You can only activate off-road program 1
when driving at speeds below 60 mph
(100 km/h). The Drive Program OFFROAD 1 Max Speed 60 mph (100 km/h ) message
appears in the multifunction display. 248
Driving systemsDriving and pa
rking
Page 251 of 462

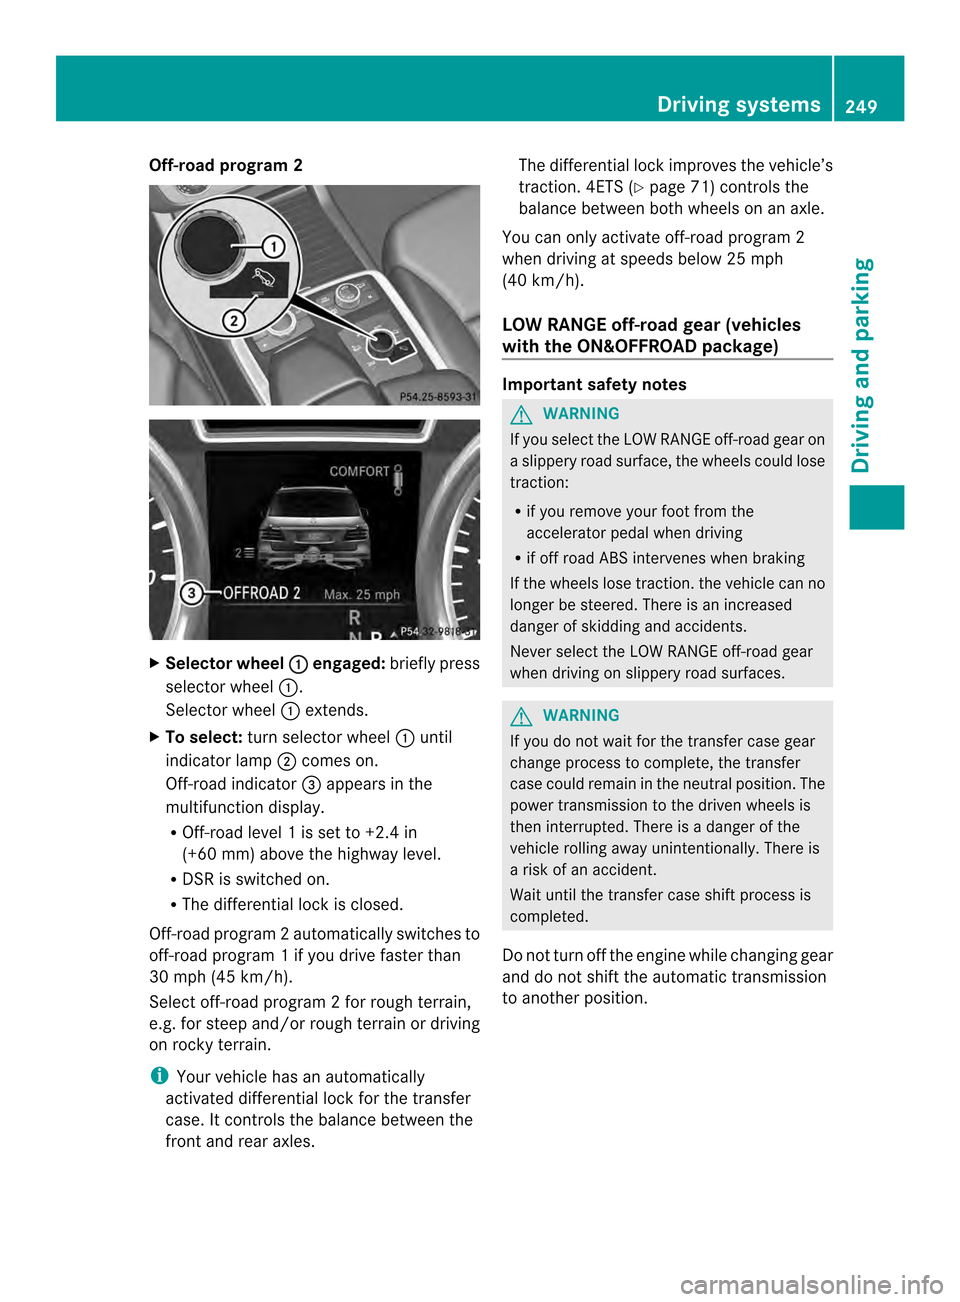
Off-road program 2
X
Selector wheel 0002 engaged:
briefly press
selector wheel 0002.
Selector wheel 0002extends.
X To select: turn selector wheel 0002until
indicator lamp 0003comes on.
Off-road indicator 0023appears in the
multifunction display.
R Off-road level 1 is set to +2.4 in
(+60 mm) above the highway level.
R DSR is switched on.
R The differential lock is closed.
Off-road program 2automatically switches to
off-road program 1 if you drive faster than
30 mph (45 km/h).
Select off-road program 2 for rough terrain,
e.g. for steep and/o rrough terrain or driving
on rocky terrain.
i Your vehicle has an automatically
activated differential lock for the transfer
case. It controls the balance between the
front and rear axles. The differential lock improves the vehicle’s
traction. 4ETS (Y
page 71) controls the
balance between both wheels on an axle.
You can only activate off-road program 2
when driving at speeds below 25 mph
(40 km/h).
LOW RANGE off-road gear (vehicles
with the ON&OFFROAD package) Important safety notes
G
WARNING
If you select the LOW RANGE off-road gear on
a slippery road surface, the wheels could lose
traction:
R if you remove your foot from the
accelerator pedal when driving
R if off road ABS intervenes when braking
If the wheels lose traction. the vehicle can no
longer be steered. There is an increased
danger of skidding and accidents.
Never select the LOW RANGE off-road gear
when driving on slippery road surfaces. G
WARNING
If you do not wait for the transfer case gear
change process to complete, the transfer
case could remain in the neutral position. The
power transmission to the driven wheels is
then interrupted. There is a danger of the
vehicle rolling away unintentionally. There is
a risk of an accident.
Wait until the transfer case shift process is
completed.
Do not turn off the engine while changing gear
and do not shift the automatic transmission
to another position. Driving systems
249Driving and parking Z
Page 252 of 462

General notes
0002
LOW RANGE off-road gear button
0003 LOW RANGE off-road gear indicator lamp HIGH RANGE
Positio
nfor all normal on-
road driving conditions LOW RANGE
Off-road position for
driving off-road and
fording
The transmission ratio
between the engine and
wheels is only
approximately one third of
that in the HIGH RANGE
road position. Drive torque
is thus proportionately
higher.
Do not use LOW RANGE:
R
on slippery road
surfaces, e.g. in the case
of slush
R on snow or ice-covered
roads
R if you have mounted
snow chains to your
vehicle The LOW RANGE off-road gear assists you in
driving off-road and when fording. When LOW
RANGE is engaged, the engine’s performance
characteristics and the gearshifting
characteristics of the automatic transmission
are adapted for this purpose. Further information about "Driving off-road"
(Y
page 187). You will find information about
driving safety systems in conjunction with
LOW RANGE in the "Safety" section
(Y page 66).
From HIGH RANGE to LOW RANGE
! Only change from LOW RANGE to HIGH
RANGE if:
R the engine is running.
R the transmission is in position N
R you are driving at a speed below
40 km/h
X Press LOW RANGE button 0002.
Indicator lamp 0003flashes.
When the gear change is complete,
indicator lamp 0003lights up. LOW RANGE
indicator appears in the multifunction
display and in the status indicator.
While indicator lamp 0003is flashing, you can
cancel the gear change by pressing LOW
RANGE button 0002again.
i You cannot activate LOW RANGE if the
SPORT on-road program is activated. The
LOW RANGE Not in Drive Program SPORT message then appears in the
multifunction display.
From LOW RANGE to HIGH RANGE
! Only change from LOW RANGE to HIGH
RANGE if:
R the engine is running.
R the transmission is in position N
R you are driving at a speed below
70 km/h
X Press LOW RANGE button 0002.
Indicator lamp 0003flashes.
When the gear change is complete,
indicator lamp 0003goes out. In the
multifunction display, the LOW RANGE Off message appears and status indicator
0023
goes out. 250
Driving systemsDriving and parking
Page 253 of 462

While indicato
rlamp 0003is flashing, you can
cancel the gear change by pressing LOW
RANGE button 0002again. Driving systems
251Driving and parking Z
Page 254 of 462

Messages in the multifunction display
If a gearc
hange process has not been successful, the following messages may be displayed
in the multifunction display: Display messages Possible causes/consequences and
0001 Solutions
LOW RANGE Max.
Speed 40 km/h You have been driving faster than 40 km/h. Additionally, the
indicator lamp on the button in the center console blinks.
X
Drive more slowly to carry out the gear change process. LOW RANGE Shift to
Position N Briefly The transmission is in position
Dand you are driving at below
40 km/h.
X Shift the transmission to Nto complete the gear change
process. LOW RANGE Shifting
Canceled Please
Reactivate The gear change process was not carried out.
X
Ensure that all gear change conditions are fulfilled and carry out
the gear change process again. LOW RANGE Stop
Apply Parking Brake Aw
arning tone also sounds. The gear change proces shas no tbeen
completed. LOW RANGE is in the neutral position .There is no
connection between the engine and the drive wheels.
! Do not drive any further. You could otherwise damage the
vehicle's drive train.
X Stop the vehicle. Take into account the road and traffic
conditions when doing this.
X Depress the electric parking brake (Y page 180).
X Carry out the gear change process again.
If the gear change process has been carried out, the LOW RANGE
Stop Apply Parking Brake message disappears.
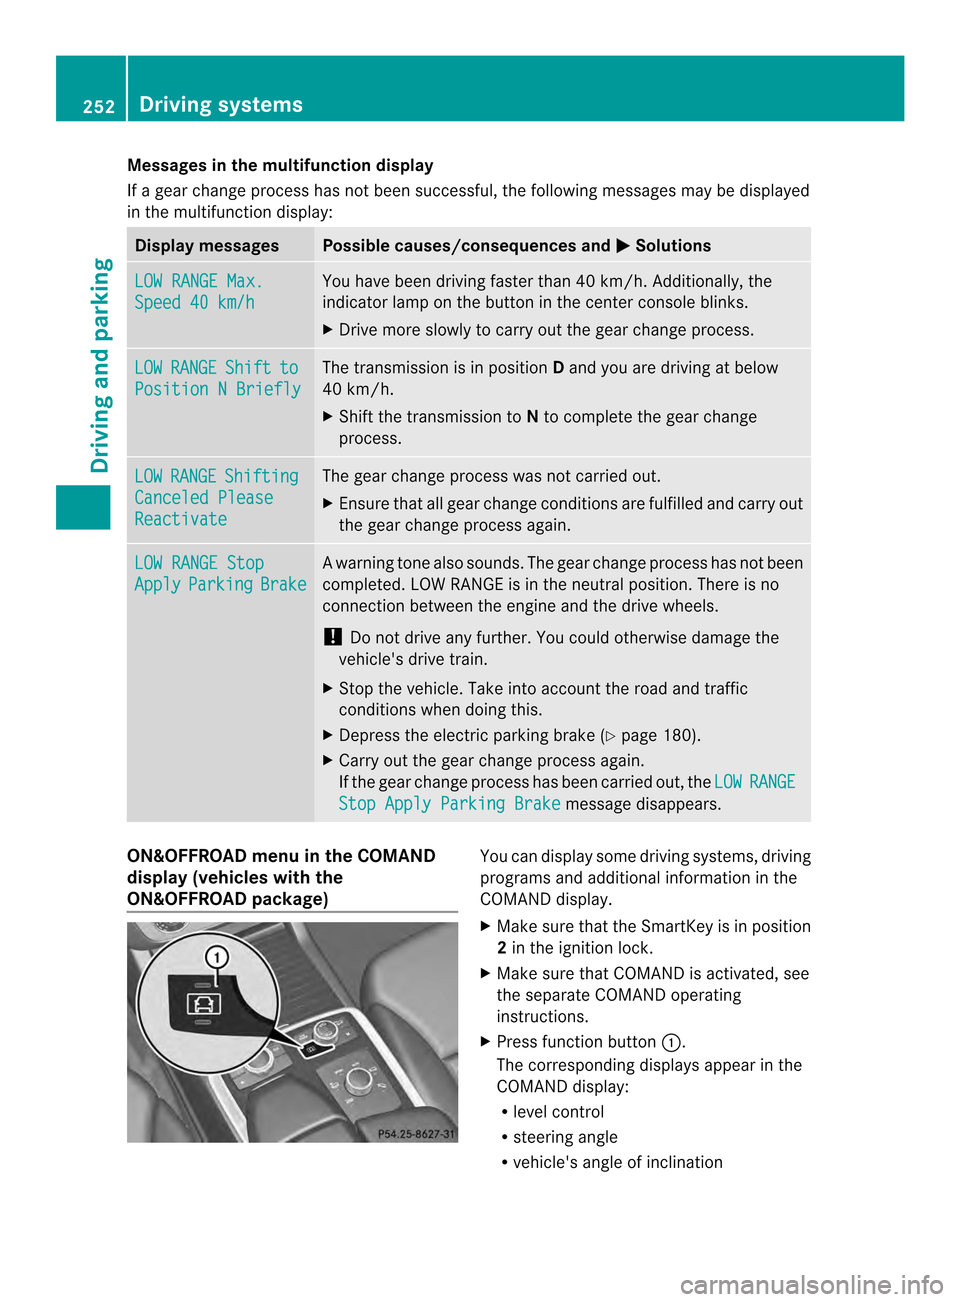
ON&OFFROAD menu in the COMAND
display (vehicles with the
ON&OFFROAD package) You can display some driving systems, driving
programs and additional information in the
COMAND display.
X Make sure that the SmartKey is in position
2in the ignition lock.
X Make sure that COMAND is activated, see
the separate COMAND operating
instructions.
X Press function button 0002.
The corresponding displays appearint he
COMAND display:
R level control
R steering angle
R vehicle's angle of inclination 252
Driving systemsDriving and parking
Page 260 of 462

R
Secure any objects on the traile rto prevent
the cargo from slipping when the vehicle is
in motion.
R If you couple up a trailer, regularly check
that the cargo is securely fastened and
make sure that the trailer lamps and (if
applicable) the trailer brakes are
functioning correctly.
R Bear in mind that the handling will be less
stable when towing a trailer than when
driving without one. Avoid sudden steering
movements.
R The vehicle/trailer combination is heavier,
accelerates more slowly, has a decreased
gradient climbing capability and a longer
braking distance.
It is more susceptible to side winds and
requires more careful steering.
R If possible, avoid abrupt braking. Depress
the brake pedal moderately at first, so that
the trailer can activate its own brakes. Then
increase the pressure on the brake pedal.
R If the automatic transmission repeatedly
shifts between gears on uphill or downhill
gradients, shift to a lower gear using the
left-hand steering wheel paddle shifter.
Al ower gear and lower speed reduce the
risk of engine failure.
R When driving downhill, shift to a lower gear
to utilize the engine's braking effect.
Avoid continuous brake application as this
may overheat the vehicle brakes and, if
installed, the trailer brakes.
R If the coolant temperature increases
dramatically while the air-conditioning
system is switched on, switch off the air-
conditioning system.
Coolant heat can additionally be dissipated
by opening the windows and by setting the
blower fan and the interior temperature to
maximum.
R When overtaking, pay particular attention
to the extended length of your vehicle/
trailer combination. Due to the length of your vehicle/trailer
combination, you will have to travel an
additional distance beyond the vehicle you
are overtaking before returning to the
previous lane. Decoupling
atrailer G
WARNING
If you uncouple a trailer with the overrun
brake engaged, you could trap your hand
between the vehicle and the trailer drawbar.
There is a risk of injury.
Do not uncouple a trailer if the overru nbrake
is engaged. G
WARNING
Vehicles with level control:
The vehicle is lowered as soon as you
disconnect the trailer cable. This could result
in yourl imbs or those of other people that are
betwee nthe vehicle body and tires or
underneath the vehicle being trapped. There
is a risk of injury.
Make sure that nobody is in the immediate
vicinity of the wheel housings or under the
vehicle when you disconnectt he trailer cable.
! Do not disconnect a trailer with an
engaged overrun brake. Otherwise, your
vehicle could be damaged by the
rebounding of the overrun brake.
X Make sure that the automatic transmission
is set to position P.
X Apply the vehicle's electric parking brake.
X Start the engine.
X Close all doors and the tailgate.
X Apply the trailer's parking brake.
X Detach the trailer cable and decouple the
trailer.
X Switch off the engine. 258
Towing
atrailerDriving an d parking
Page 263 of 462

Useful information
............................262
Important safety notes ....................262
Displays and operation ....................263
Menus and submenus ......................266
Display messages ............................. 282
Warning and indicator lamps in the
instrument cluster ............................316 261On-board computer and displays
Page 276 of 462

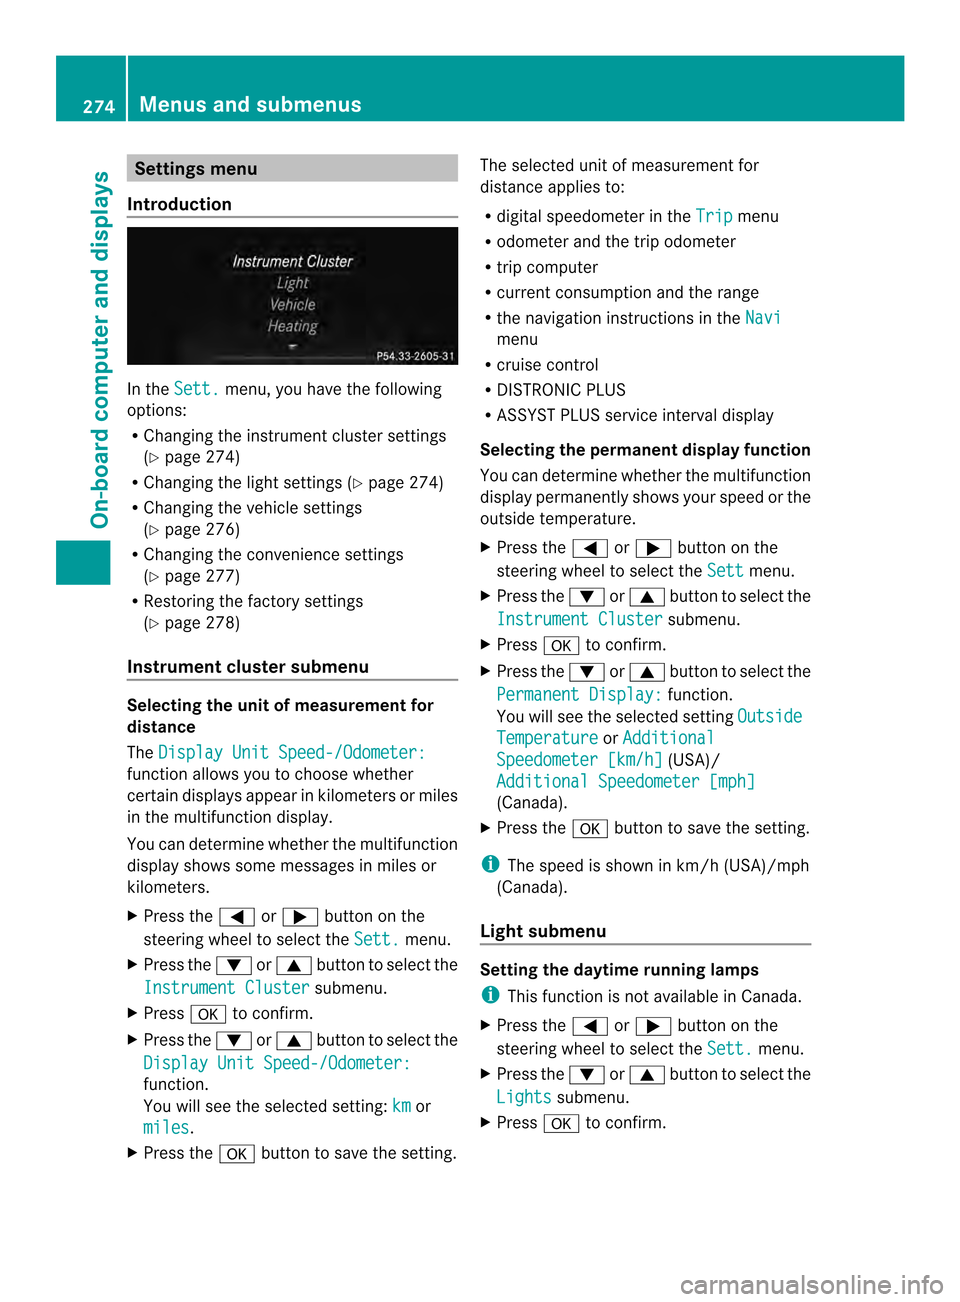
Settings menu
Introduction In the
Sett. menu, you have the following
options:
R Changing the instrumen tcluste rsettings
(Y page 274)
R Changing the light settings (Y page 274)
R Changing the vehicle settings
(Y page 276)
R Changing the convenience settings
(Y page 277)
R Restoring the factory settings
(Y page 278)
Instrument cluster submenu Selecting the unit of measurement for
distance
The
Display Unit Speed-/Odometer: function allows you to choose whether
certain displays appear in kilometers or miles
in the multifunction display.
You can determine whether the multifunction
display shows some messages in miles or
kilometers.
X
Press the 0002or0005 button on the
steering wheel to select the Sett. menu.
X Press the 0004or0003 button to select the
Instrument Cluster submenu.
X Press 000Bto confirm.
X Press the 0004or0003 button to select the
Display Unit Speed-/Odometer: function.
You will see the selected setting:
km or
miles .
X Press the 000Bbutton to save the setting. The selected unit of measuremen
tfor
distance applies to:
R digital speedometer in the Trip menu
R odometer and the trip odometer
R trip computer
R current consumption and the range
R the navigation instructions in the Navi menu
R cruise control
R DISTRONIC PLUS
R ASSYST PLUS service interval display
Selecting the permanent display function
You can determine whether the multifunction
display permanently shows your speed or the
outside temperature.
X Press the 0002or0005 button on the
steering wheel to select the Sett menu.
X Press the 0004or0003 button to select the
Instrument Cluster submenu.
X Press 000Bto confirm.
X Press the 0004or0003 button to select the
Permanent Display: function.
You will see the selected setting Outside Temperature or
Additional Speedometer [km/h] (USA)/
Additional Speedometer [mph] (Canada).
X Press the 000Bbutton to save the setting.
i The speed is shown in km/h( USA)/mph
(Canada).
Light submenu Setting the daytime running lamps
i
This function is not available in Canada.
X Press the 0002or0005 button on the
steering wheel to select the Sett. menu.
X Press the 0004or0003 button to select the
Lights submenu.
X Press 000Bto confirm. 274
Menus and submenusOn-board computer and displays