2014 MERCEDES-BENZ GL-Class buttons
[x] Cancel search: buttonsPage 116 of 462
X
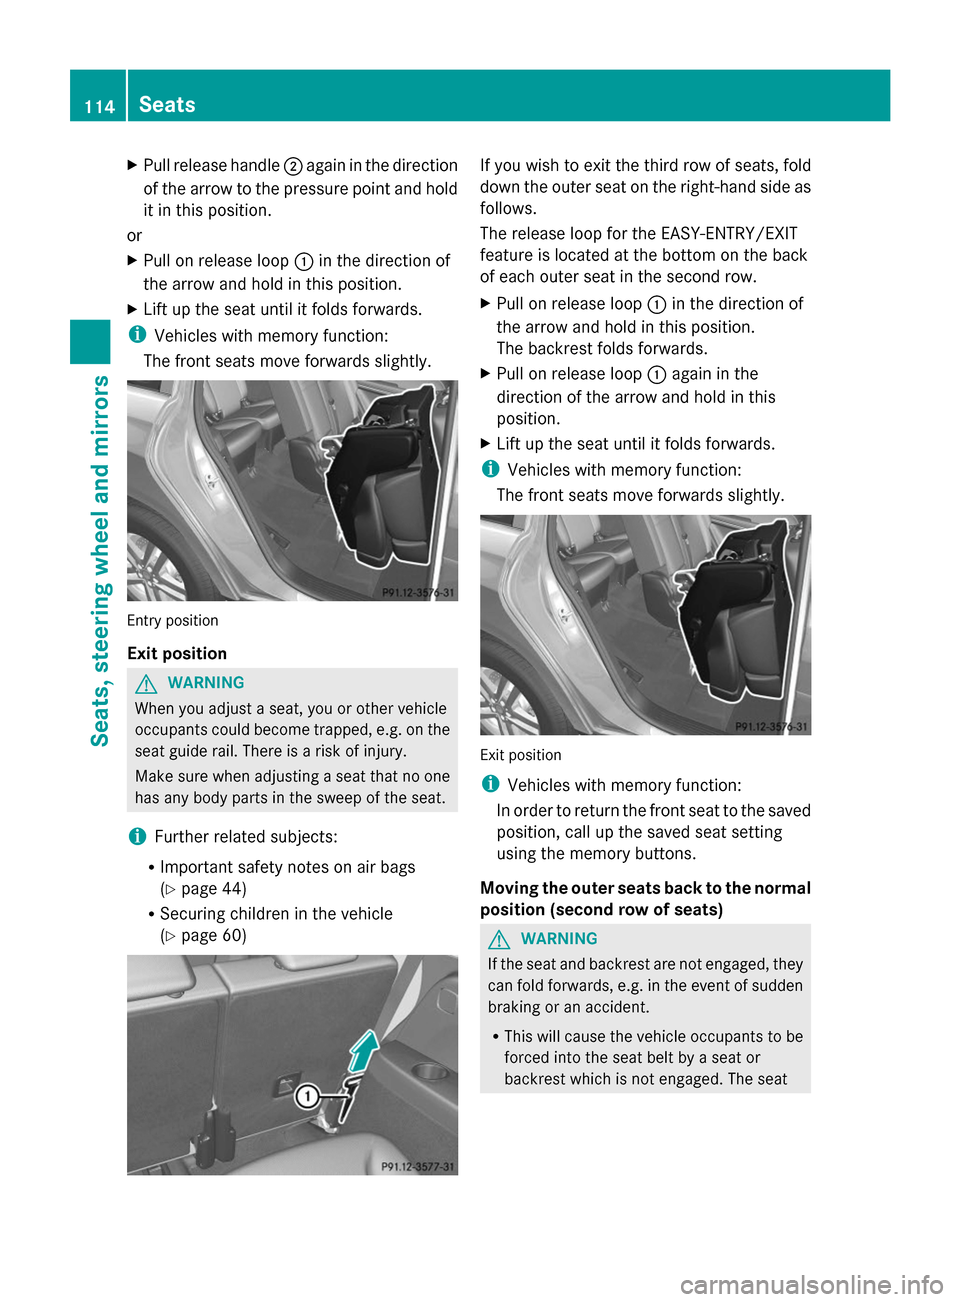
Pull release handle ;again in the direction
of the arrow to the pressure point and hold
it in this position.
or
X Pull on release loop :in the direction of
the arrow and hold in this position.
X Lift up the seat until it folds forwards.
i Vehicles with memory function:
The front seats move forwards slightly. Entry position
Exit position
G
WARNING
When you adjust a seat, you or other vehicle
occupants could become trapped, e.g. on the
seat guide rail. There is a risk of injury.
Make sure when adjusting a seat that no one
has any body parts in the sweep of the seat.
i Further related subjects:
R Important safety notes on air bags
(Y page 44)
R Securing children in the vehicle
(Y page 60) If you wish to exit the third row of seats, fold
down the outer seat on the right-hand side as
follows.
The release loop for the EASY-ENTRY/EXIT
feature is located at the bottom on the back
of each outer seat in the second row.
X
Pull on release loop :in the direction of
the arrow and hold in this position.
The backrest folds forwards.
X Pull on release loop :again in the
direction of the arrow and hold in this
position.
X Lift up the seat until it folds forwards.
i Vehicles with memory function:
The front seats move forwards slightly. Exit position
i
Vehicles with memory function:
In order to return the front seat to the saved
position, call up the saved seat setting
using the memory buttons.
Moving the outer seats back to the normal
position (second row of seats) G
WARNING
If the seat and backrest are not engaged, they
can fold forwards, e.g. in the event of sudden
braking or an accident.
R This will cause the vehicle occupants to be
forced into the seat belt by a seat or
backrest which is not engaged. The seat 114
SeatsSeats, steering wheel and mirrors
Page 120 of 462
Problems with the seat heating
Problem Possible causes/consequences and
M
MSolutions The seat heating has
switched off
prematurely or cannot
be switched on. The on-board voltage is too low because too many electrical
consumers are switched on.
X Switch off electrical consumers that you do not need, such as
the rear window defroster or interior lighting.
Once the battery is sufficiently charged, the seat heating will
switch back on automatically. Switching the seat ventilation on/off
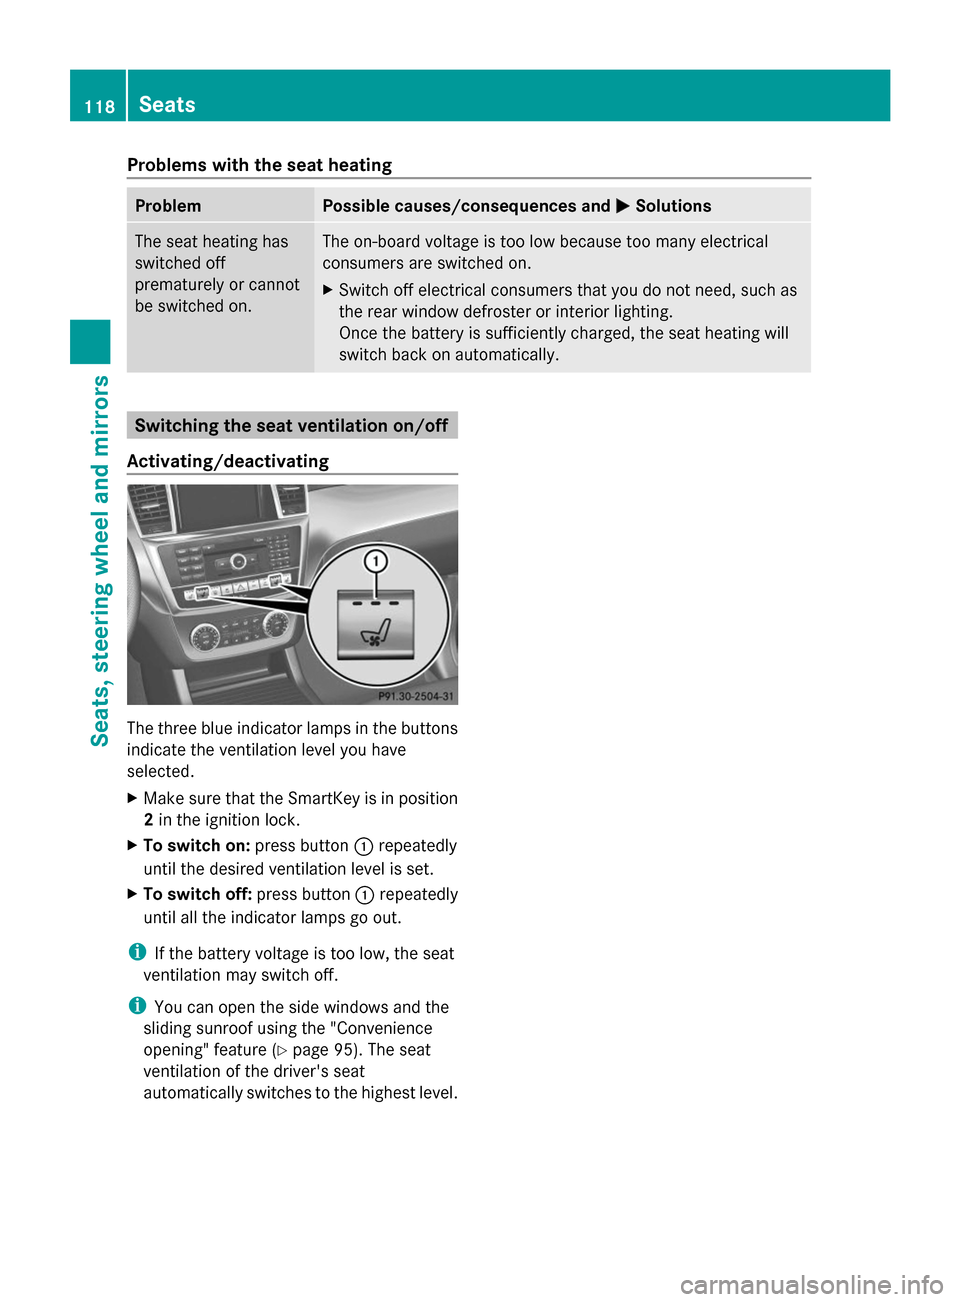
Activating/deactivating The three blue indicator lamps in the buttons
indicate the ventilation level you have
selected.
X Make sure that the SmartKey is in position
2 in the ignition lock.
X To switch on: press button:repeatedly
until the desired ventilation level is set.
X To switch off: press button:repeatedly
until all the indicator lamps go out.
i If the battery voltage is too low, the seat
ventilation may switch off.
i You can open the side windows and the
sliding sunroof using the "Convenience
opening" feature (Y page 95). The seat
ventilation of the driver's seat
automatically switches to the highest level. 118
SeatsSeats, steering wheel and mirrors
Page 123 of 462

Problems with the steering wheel heating
Problem Possible causes/consequences and
M
MSolutions The steering wheel
heating has switched
off prematurely or
cannot be switched on. The on-board voltage is too low because too many electrical
consumers are switched on.
X
Switch off electrical consumers that you do not need, such as
the rear window defroster or interior lighting. EASY-ENTRY/EXIT feature
Important safety notes G
WARNING
When the EASY-ENTRY/EXIT feature adjusts
the steering wheel, you and other vehicle
occupants – particularly children – could
become trapped. There is a risk of injury.
While the EASY-ENTRY/EXIT feature is
making adjustments, make sure that no one
has any body parts in the sweep of the
steering wheel.
Move the steering wheel adjustment lever if
there is a risk of entrapment by the steering
wheel. The adjustment process is stopped.
Press one of the memory function position
buttons. This function is only available on
vehicles with memory function.
Press one of the memory function position
buttons. G
WARNING
If children activate the EASY-ENTRY/EXIT
feature, they can become trapped,
particularly when unattended. There is a risk
of injury.
When leaving the vehicle, always take the
SmartKey with you and lock the vehicle. Never
leave children unsupervised in the vehicle. G
WARNING
If you drive off while the EASY-ENTRY/EXIT
feature is making adjustments, you could lose
control of the vehicle. There is a risk of an
accident. Always wait until the adjustment process is
complete before driving off.
The EASY-ENTRY/EXIT feature makes getting
in and out of your vehicle easier.
You can activate and deactivate the EASY-
ENTRY/EXIT feature in the on-board
computer (Y page 285).
Position of the steering wheel when the
EASY-ENTRY/EXIT feature is active The steering wheel swings upwards when
you:
R
remove the SmartKey from the ignition lock
R open the driver's door with KEYLESS-GO in
position 1
R open the driver's door and the SmartKey is
in position 0or 1in the ignition lock
i The steering wheel only moves upwards if
it has not already reached the upper end
stop.
Position of the steering wheel for
driving The steering wheel is moved to the last
selected position when:
R
the driver's door is closed
R you insert the SmartKey into the ignition
lock
or
R you press the Start/Stop button once on
vehicles with KEYLESS-GO
When you close the driver's door with the
ignition switched on, the steering wheel is Steering wheel
121Seats, steering wheel and mirrors Z
Page 128 of 462
X
Adjust the seat ( Ypage 108).
X On the driver's side, adjust the steering
wheel (Y page 120) and the exterior mirrors
(Y page 122).
X Press the Mmemory button and then press
one of the storage position buttons 1,2or
3 within three seconds.
The settings are stored in the selected
preset position. A tone sounds when the
settings have been completed.
The memory function can still be used if the
SmartKey has been removed. Calling up a stored setting
X Press the button for storage position 1,2
or 3. Keep pressing until the seat, steering
wheel and exterior mirrors are in the stored
position.
i The setting procedure is interrupted as
soon as you release the storage position
buttons. 126
Memory functionSeats, steering
wheel and mirrors
Page 151 of 462

=
To direct the airflow through the rear air vents
? To direct the airflow through the footwell vents Information about using 2-zone
automatic climate control
The following contains notes and
recommendations on optimum use of dual-
zone automatic climate control.
R Activate climate control using the Ãand
¿/Á buttons. The indicator lamps in
the à and¿/Á buttons light up.
R Set the temperature to 72 ‡ (22 †).
R Only use the "Windshield defrosting"
function briefly until the windshield is clear
again.
R Only use air-recirculation mode briefly, e.g.
if there are unpleasant outside odors or
when in a tunnel. The windows could
otherwise fog up, since no fresh air is drawn
into the vehicle in air-recirculation mode.
R Use the ZONE function to adopt the
temperature settings on the driver's side
for the front-passenger side as well. The
indicator lamp above the ábutton goes
out.
R Vehicles with COMAND: if you change the
settings of the climate control system, the
climate status display appears for
approximately three seconds at the bottom
of the screen in the COMAND display. See
also the separate COMAND operating
instructions. You will see the current
settings of the various climate control
functions. Overview of climate control systems
149Climate control
Page 156 of 462
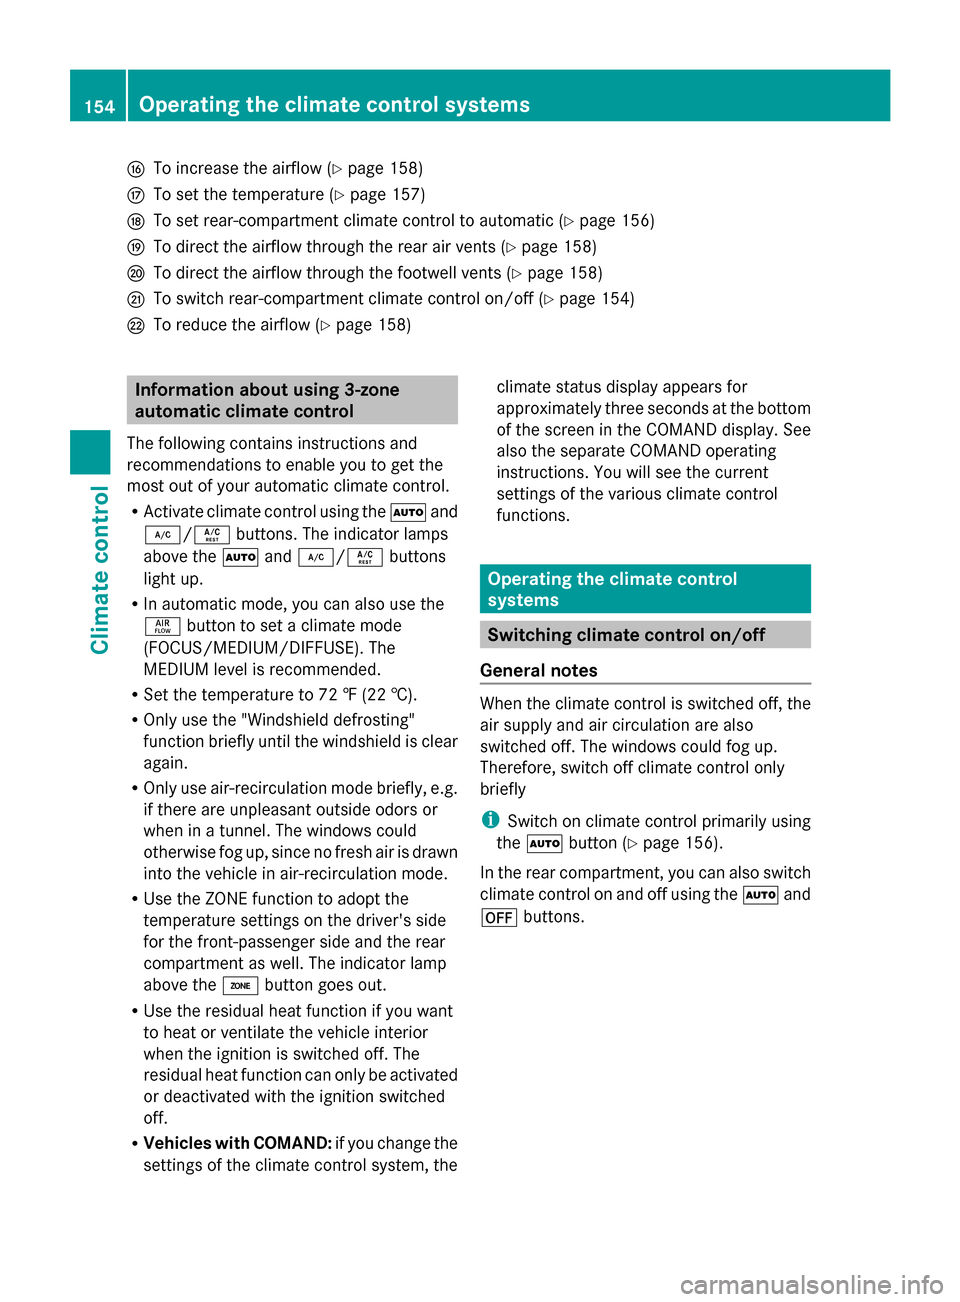
L
To increase the airflow (Y page 158)
M To set the temperature (Y page 157)
N To set rear-compartment climate control to automatic (Y page 156)
O To direct the airflow through the rear air vents (Y page 158)
P To direct the airflow through the footwell vents (Y page 158)
Q To switch rear-compartment climate control on/off (Y page 154)
R To reduce the airflow (Y page 158)Information about using 3-zone
automatic climate control
The following contains instructions and
recommendations to enable you to get the
most out of your automatic climate control.
R Activate climate control using the Ãand
¿/Á buttons. The indicator lamps
above the Ãand¿/Á buttons
light up.
R In automatic mode, you can also use the
ñ button to set a climate mode
(FOCUS/MEDIUM/DIFFUSE). The
MEDIUM level is recommended.
R Set the temperature to 72 ‡ (22 †).
R Only use the "Windshield defrosting"
function briefly until the windshield is clear
again.
R Only use air-recirculation mode briefly, e.g.
if there are unpleasant outside odors or
when in a tunnel. The windows could
otherwise fog up, since no fresh air is drawn
into the vehicle in air-recirculation mode.
R Use the ZONE function to adopt the
temperature settings on the driver's side
for the front-passenger side and the rear
compartment as well. The indicator lamp
above the ábutton goes out.
R Use the residual heat function if you want
to heat or ventilate the vehicle interior
when the ignition is switched off. The
residual heat function can only be activated
or deactivated with the ignition switched
off.
R Vehicles with COMAND: if you change the
settings of the climate control system, the climate status display appears for
approximately three seconds at the bottom
of the screen in the COMAND display. See
also the separate COMAND operating
instructions. You will see the current
settings of the various climate control
functions.
Operating the climate control
systems
Switching climate control on/off
General notes When the climate control is switched off, the
air supply and air circulation are also
switched off. The windows could fog up.
Therefore, switch off climate control only
briefly
i
Switch on climate control primarily using
the à button (Y page 156).
In the rear compartment, you can also switch
climate control on and off using the Ãand
^ buttons. 154
Operating the climate control systemsClimate control
Page 160 of 462
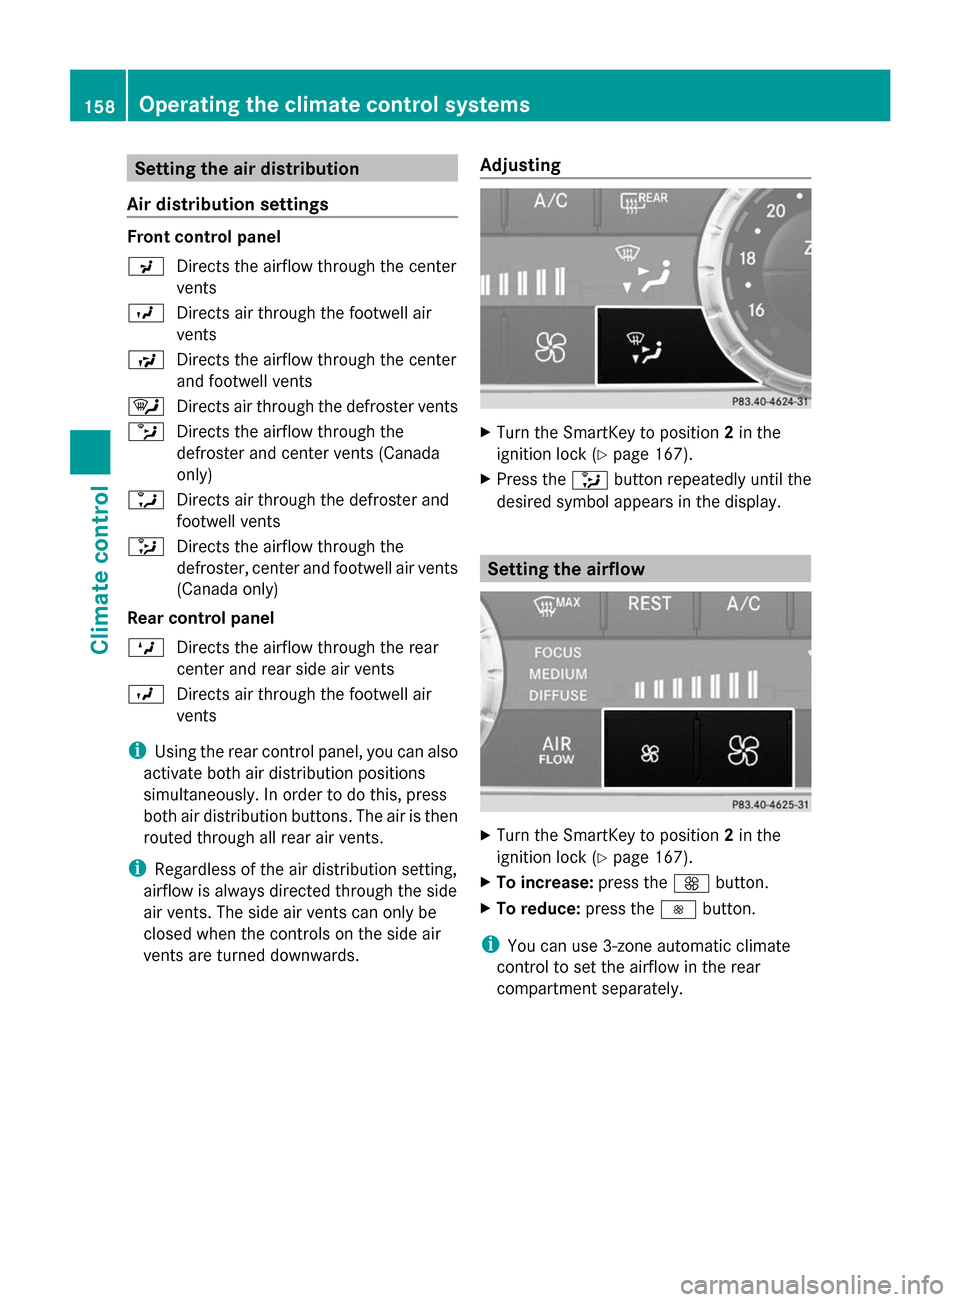
Setting the air distribution
Air distribution settings Front control panel
P
Directs the airflow through the center
vents
O Directs air through the footwell air
vents
S Directs the airflow through the center
and footwell vents
¯ Directs air through the defroster vents
b Directs the airflow through the
defroster and center vents (Canada
only)
a Directs air through the defroster and
footwell vents
_ Directs the airflow through the
defroster, center and footwell air vents
(Canada only)
Rear control panel
M Directs the airflow through the rear
center and rear side air vents
O Directs air through the footwell air
vents
i Using the rear control panel, you can also
activate both air distribution positions
simultaneously. In order to do this, press
both air distribution buttons. The air is then
routed through all rear air vents.
i Regardless of the air distribution setting,
airflow is always directed through the side
air vents. The side air vents can only be
closed when the controls on the side air
vents are turned downwards. Adjusting X
Turn the SmartKey to position 2in the
ignition lock (Y page 167).
X Press the _button repeatedly until the
desired symbol appears in the display. Setting the airflow
X
Turn the SmartKey to position 2in the
ignition lock (Y page 167).
X To increase: press theKbutton.
X To reduce: press theIbutton.
i You can use 3-zone automatic climate
control to set the airflow in the rear
compartment separately. 158
Operating the climate control systemsClimate control
Page 275 of 462

If the coolant temperature is over
248 ‡(120 †), do not continue driving. The
engine will otherwise be damaged.
The coolant temperature gauge is in the
instrument cluster on the right-hand side
(Y page 33).
Under normal operating conditions and with
the specified coolant level, the coolant
temperature may rise to 248 ‡ (120 †). Tachometer
! Do not drive in the overrevving range, as
this could damage the engine.
The red band in the tachometer indicates the
engine's overrevving range.
The fuel supply is interrupted to protect the
engine when the red band is reached. Outside temperature display
You should pay special attention to road
conditions when temperatures are around
freezing point.
The outside temperature display is in the
multifunction display (Y page 274).
Changes in the outside temperature are
displayed after a short delay. Speedometer with segments
The segments in the speedometer indicate
which speed range is available.
R Cruise control activated (Y page 201):
The segments light up from the stored
speed to the maximum speed.
R DISTRONIC PLUS activated (Y page 203):
One or two segments in the set speed
range light up.
R DISTRONIC PLUS detects a vehicle in front:
The segments between the speed of the
vehicle in front and the stored speed light
up. Operating the on-board computer
Overview :
Multifunction display
; Switches on the Voice Control System;
see the separate operating instructions
= Right control panel
? Left control panel
A Back button
X To activate the on-board computer: turn
the SmartKey to position 1in the ignition
lock.
You can control the multifunction display and
the settings in the on-board computer using
the buttons on the multifunction steering
wheel. Displays and operation
273On-board computer and displays Z