2014 MERCEDES-BENZ E-SEDAN tailgate
[x] Cancel search: tailgatePage 345 of 430

X
Make sure the vehicle is stationary and the
ignition is switched off.
X Turn the SmartKey to position 2in the
ignition lock (Y page 159).
Use the SmartKey instead of the Start/
Stop button on vehicles with KEYLESS-GO.
X Depress and hold the brake pedal.
X Shift the automatic transmission to
position N.
X Release the brake pedal.
X Release the parking brake.
X Switch off the ignition and leave the
SmartKey in the ignition lock.
You can wash the vehicle in an automatic car
wash from the very start.
If the vehicle is very dirty, pre-wash it before
cleaning it in an automatic car wash.
After using an automatic car wash, wipe off
wax from the windshield and the wiper
blades. This will prevent smears and reduce
wiping noises caused by residue on the
windshield.
Washing by hand In some countries, washing by hand is only
allowed at specially equipped washing bays.
Observe the legal requirements in all
countries concerned.
X Do not use hot water and do not wash the
vehicle in direct sunlight.
X Use a soft sponge to clean.
X Use a mild cleaning agent, such as a car
shampoo approved by Mercedes-Benz.
X Thoroughly hose down the vehicle with a
gentle jet of water.
X Do not point the water jet directly towards
the air inlet.
X Use plenty of water and rinse out the
sponge frequently.
X Rinse the vehicle with clean water and dry
thoroughly with a chamois.
X Do not let the cleaning agent dry on the
paintwork. When using the vehicle in winter, remove all
traces of road salt deposits carefully and as
soon as possible.
Power washers G
WARNING
The water jet from a circular jet nozzle (dirt
blasters) can cause invisible exterior damage
to the tires or chassis components.
Components damaged in this way may fail
unexpectedly. There is a risk of an accident.
Do not use power washers with circular jet
nozzles to clean the vehicle. Have damaged
tires or chassis components replaced
immediately.
! Always maintain a distance of at least
11.8 in (30 cm) between the vehicle and the
power washer nozzle. Information about
the correct distance is available from the
equipment manufacturer.
Move the power washer nozzle around
when cleaning your vehicle.
Do not aim directly at any of the following:
R tires
R door gaps, roof gaps, joints, etc.
R electrical components
R battery
R connectors
R lights
R seals
R trim
R ventilation slots
Damaged seals or electrical components
can lead to leaks or failures.
! If the SmartKey is within the rear
detection range of KEYLESS-GO, the
following situations, for example, could
lead to the unintentional opening of the
trunk lid/tailgate:
R using a car wash
R using a power washer Care
343Maintenance and care Z
ProCarManuals.com
Page 354 of 430

Useful information
i This Operator's Manual describes all
models and all standard and optional
equipment of your vehicle available at the
time of publication of the Operator's
Manual. Country-specific differences are
possible. Please note that your vehicle may
not be equipped with all features
described. This also applies to safety-
related systems and functions.
i Read the information on qualified
specialist workshops: (Y page 26).Where will I find...?
First-aid kit
Sedan:
the first-aid kit is in the right-hand
stowage compartment in the trunk.
X Open the trunk lid.
X Slide the stowage net down.
X Open the stowage compartment.
X Release tensioning strap :.
X Remove first-aid kit ;. First-aid kit in the stowage net
First-aid kit behind the side trim panel
Wagon: depending on the vehicle's
equipment, the first-aid kit is in the stowage
net or behind the side trim panel.
X Open the tailgate.
X Open the right-hand side trim panel if the
first-aid kit is in the side trim panel.
X Remove first-aid kit :.
i Check the expiration date on the first-aid
kit at least once a year. Replace the
contents if necessary, and replace missing
items. Vehicle tool kit
General notes The vehicle tool kit can be found in the
stowage well under the trunk floor/cargo
compartment floor. Depending on the vehicle
equipment, the vehicle tool kit is on the left-
hand side or the right-hand side in the352
Where will I find...?Breakdown assistance
ProCarManuals.com
Page 355 of 430

stowage well under the trunk floor/cargo
compartment floor.
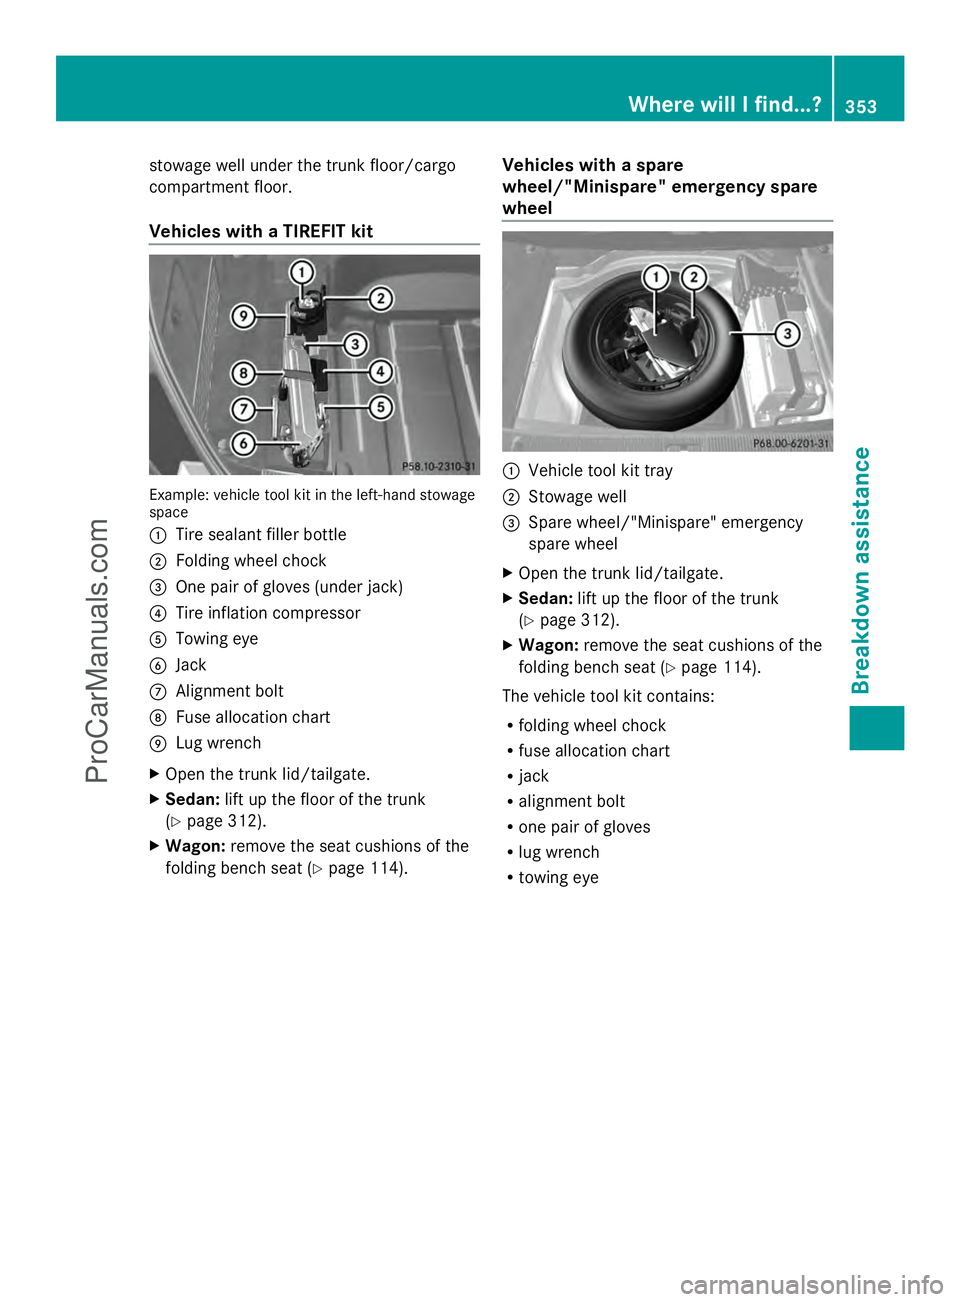
Vehicles with a TIREFIT kit
Example: vehicle tool kit in the left-hand stowage
space
: Tire sealant filler bottle
; Folding wheel chock
= One pair of gloves (under jack)
? Tire inflation compressor
A Towing eye
B Jack
C Alignment bolt
D Fuse allocation chart
E Lug wrench
X Open the trunk lid/tailgate.
X Sedan: lift up the floor of the trunk
(Y page 312).
X Wagon: remove the seat cushions of the
folding bench seat (Y page 114). Vehicles with a spare
wheel/"Minispare" emergency spare
wheel :
Vehicle tool kit tray
; Stowage well
= Spare wheel/"Minispare" emergency
spare wheel
X Open the trunk lid/tailgate.
X Sedan: lift up the floor of the trunk
(Y page 312).
X Wagon: remove the seat cushions of the
folding bench seat (Y page 114).
The vehicle tool kit contains:
R folding wheel chock
R fuse allocation chart
R jack
R alignment bolt
R one pair of gloves
R lug wrench
R towing eye Where will I find...?
353Breakdown assistance
ProCarManuals.com
Page 371 of 430

Fuse box in the cargo compartment
! Make sure that no moisture can enter the
fuse box when the cover is open.
! When closing the cover, make sure that it
is lying correctly on the fuse box. Moisture
seeping in or dirt could otherwise impair
the operation of the fuses.
X Open the tailgate. X
To open: pull handle :on the cover.
X Open the cover downwards.
X Swing trim ;forwards. Fuses
369Breakdown assistance Z
ProCarManuals.com
Page 399 of 430

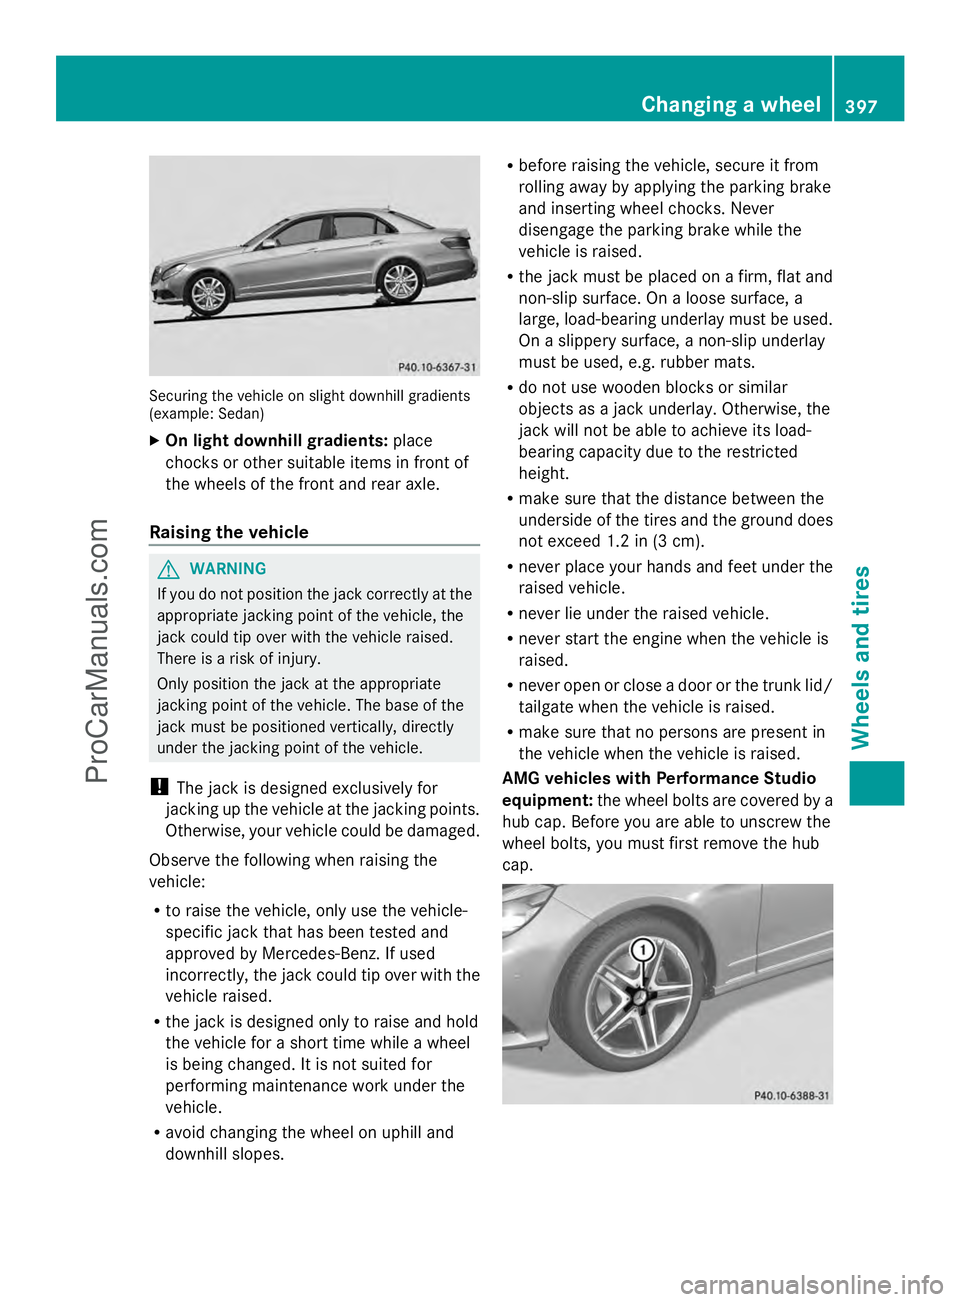
Securing the vehicle on slight downhill gradients
(example: Sedan)
X On light downhill gradients: place
chocks or other suitable items in front of
the wheels of the front and rear axle.
Raising the vehicle G
WARNING
If you do not position the jack correctly at the
appropriate jacking point of the vehicle, the
jack could tip over with the vehicle raised.
There is a risk of injury.
Only position the jack at the appropriate
jacking point of the vehicle. The base of the
jack must be positioned vertically, directly
under the jacking point of the vehicle.
! The jack is designed exclusively for
jacking up the vehicle at the jacking points.
Otherwise, your vehicle could be damaged.
Observe the following when raising the
vehicle:
R to raise the vehicle, only use the vehicle-
specific jack that has been tested and
approved by Mercedes-Benz. If used
incorrectly, the jack could tip over with the
vehicle raised.
R the jack is designed only to raise and hold
the vehicle for a short time while a wheel
is being changed. It is not suited for
performing maintenance work under the
vehicle.
R avoid changing the wheel on uphill and
downhill slopes. R
before raising the vehicle, secure it from
rolling away by applying the parking brake
and inserting wheel chocks. Never
disengage the parking brake while the
vehicle is raised.
R the jack must be placed on a firm, flat and
non-slip surface. On a loose surface, a
large, load-bearing underlay must be used.
On a slippery surface, a non-slip underlay
must be used, e.g. rubber mats.
R do not use wooden blocks or similar
objects as a jack underlay. Otherwise, the
jack will not be able to achieve its load-
bearing capacity due to the restricted
height.
R make sure that the distance between the
underside of the tires and the ground does
not exceed 1.2 in (3 cm).
R never place your hands and feet under the
raised vehicle.
R never lie under the raised vehicle.
R never start the engine when the vehicle is
raised.
R never open or close a door or the trunk lid/
tailgate when the vehicle is raised.
R make sure that no persons are present in
the vehicle when the vehicle is raised.
AMG vehicles with Performance Studio
equipment: the wheel bolts are covered by a
hub cap. Before you are able to unscrew the
wheel bolts, you must first remove the hub
cap. Changing a wheel
397Wheels and tires Z
ProCarManuals.com
Page 418 of 430

Useful information
i This Operator's Manual describes all
models and all standard and optional
equipment of your vehicle available at the
time of publication of the Operator's
Manual. Country-specific differences are
possible. Please note that your vehicle may
not be equipped with all features
described. This also applies to safety-
related systems and functions.
i Read the information on qualified
specialist workshops: (Y page 26).Information regarding technical data
General information
G
WARNING
HYBRID vehicles: It is imperative that you read
the HYBRID Supplemental Operating
Instructions included in your vehicle literature
portfolio. You may otherwise not receive all
necessary safety information and warning for
the operation of your vehicle.
i The data stated here specifically refers to
a vehicle with standard equipment. Consult
an authorized Mercedes-Benz Center for
the data for all vehicle variants and trim
levels. Information in the printed Operator's
Manual
In the printed Operator's Manual you can find
information about:
R Vehicle data
R Trunk lid/tailgate opening dimensions
R Tank capacity
R Coolant (engine)
R Engine oil approval and capacity
R DEF filling capacity
R Refrigerant filling capacity and PAG oil
R Towing a trailer Warranty
Your vehicle is covered under the terms of the
warranties printed in the Service and
Warranty Information booklet.
Your authorized Mercedes-Benz Center will
replace and repair all factory-installed parts
in accordance with the following warranty
terms and conditions:
R New Vehicle Limited Warranty
R Emission Systems Warranty
R Emission Performance Warranty
R California, Connecticut, Maine,
Massachusetts, New York, Pennsylvania,
Rhode Island and Vermont Emission
Control System Warranty
R State warranty enforcement laws (Lemon
Laws)
Replacement parts and accessories are
covered by the Mercedes-Benz Parts and
Accessories warranties. These are available
at any authorized Mercedes-Benz Center.
i If you lose the Service and Warranty
Information booklet, contact an authorized
Mercedes-Benz Center to arrange a
replacement. It will be mailed to you. Identification plates
Vehicle identification plate with
vehicle identification number (VIN)
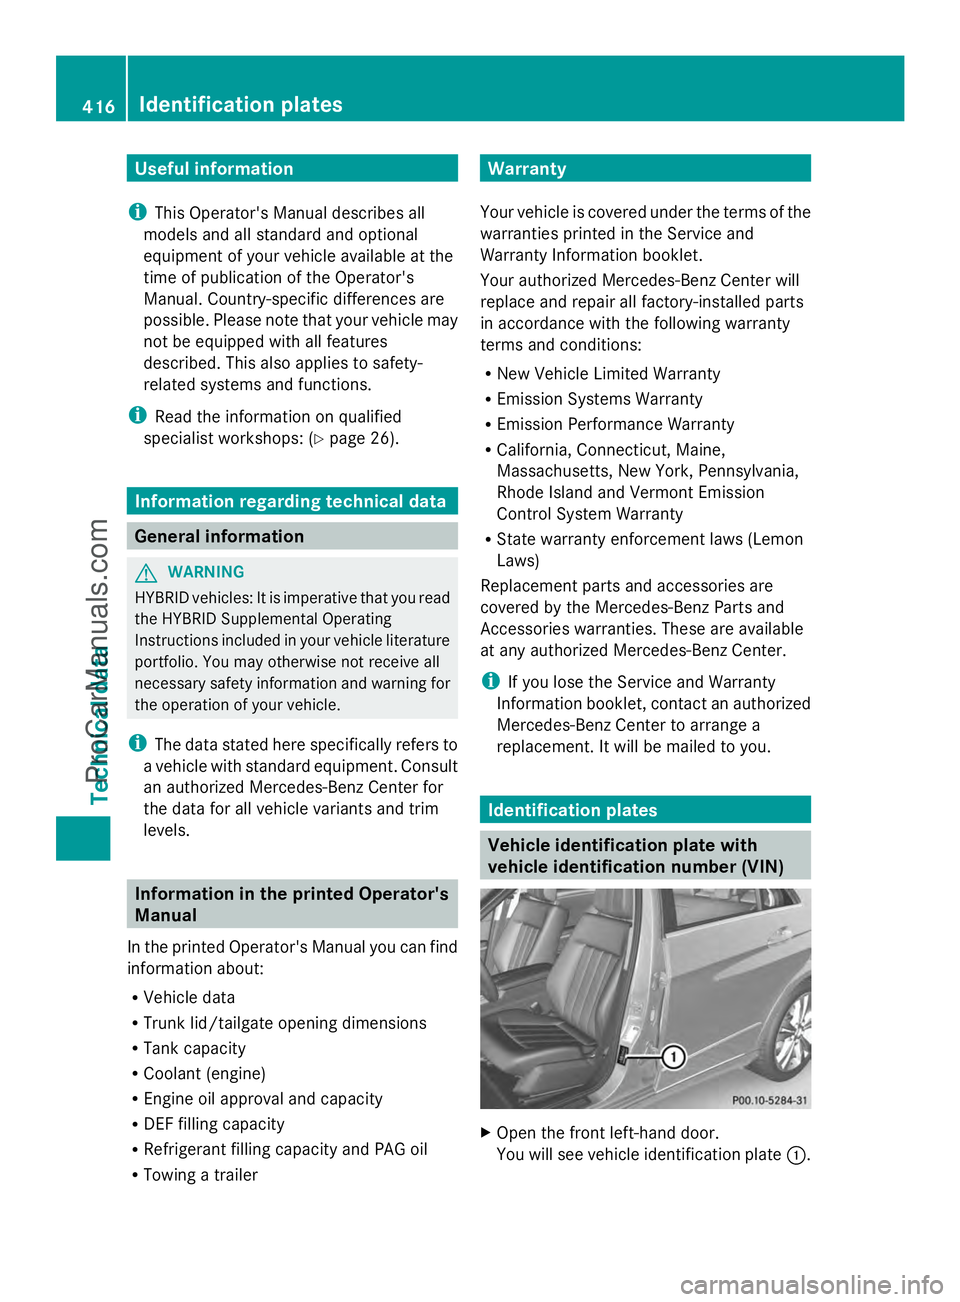
X
Open the front left-hand door.
You will see vehicle identification plate :.416
Identification platesTechnical data
ProCarManuals.com