2014 MERCEDES-BENZ CLS COUPE brake sensor
[x] Cancel search: brake sensorPage 233 of 417
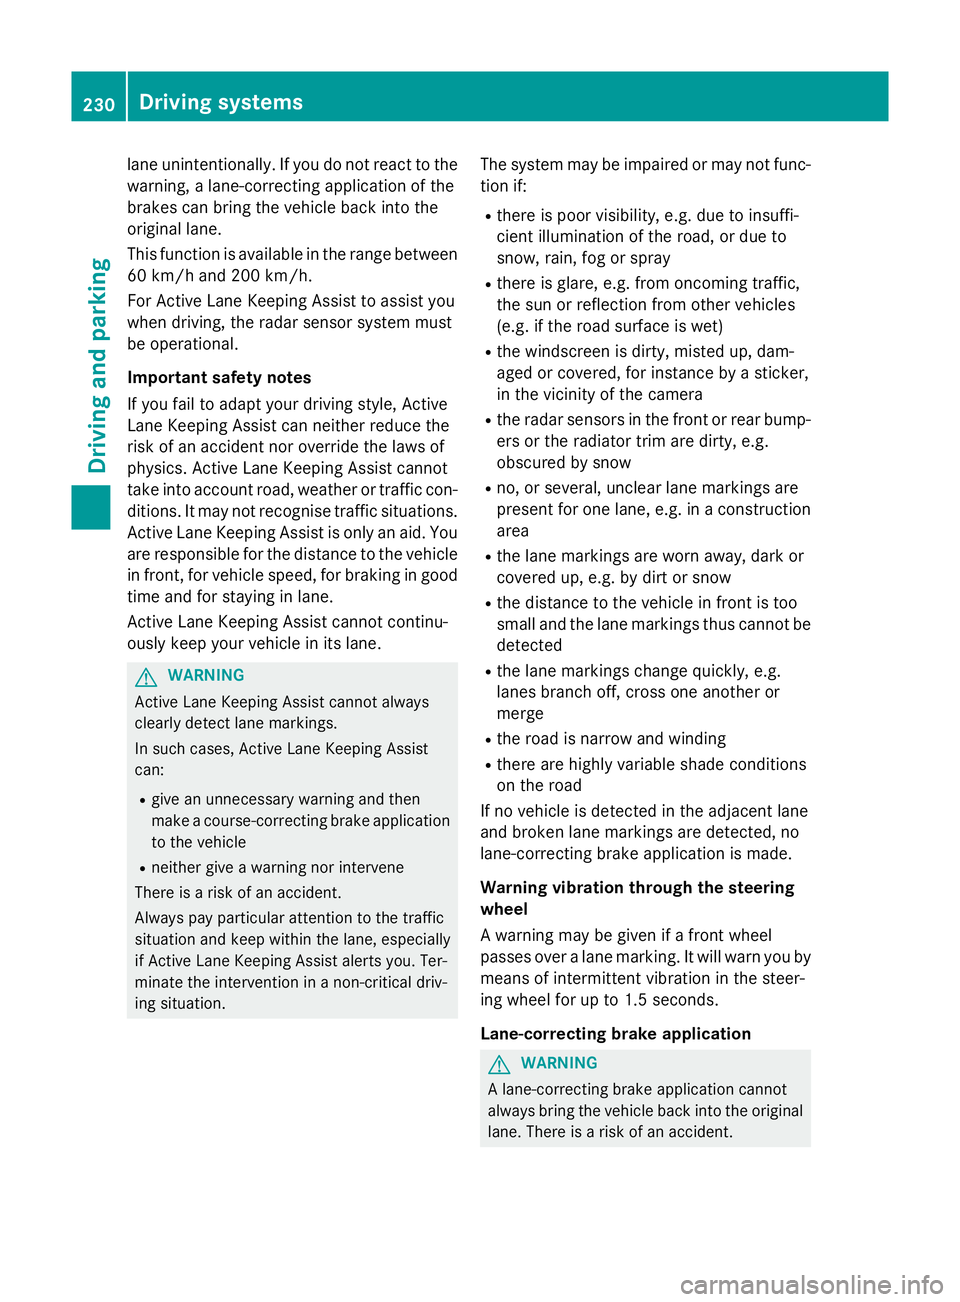
lane unintentionally. If you do not react to the
warning, a lane-correcting application of the
brakes can bring the vehicle back into the
original lane.
This function is available in the range between
60 km/h and 200 km/h.
For Active Lane Keeping Assist to assist you
when driving, the radar sensor system must
be operational.
Important safety notes
If you fail to adapt your driving style, Active
Lane Keeping Assist can neither reduce the
risk of an accident nor override the laws of
physics. Active Lane Keeping Assist cannot
take into account road, weather or traffic con-
ditions. It may not recognise traffic situations. Active Lane Keeping Assist is only an aid. Youare responsible for the distance to the vehicle in front, for vehicle speed, for braking in good
time and for staying in lane.
Active Lane Keeping Assist cannot continu-
ously keep your vehicle in its lane. G
WARNING
Active Lane Keeping Assist cannot always
clearly detect lane markings.
In such cases, Active Lane Keeping Assist
can:
R give an unnecessary warning and then
make a course-correcting brake application
to the vehicle
R neither give a warning nor intervene
There is a risk of an accident.
Always pay particular attention to the traffic
situation and keep within the lane, especially
if Active Lane Keeping Assist alerts you. Ter-
minate the intervention in a non-critical driv-
ing situation. The system may be impaired or may not func-
tion if:
R there is poor visibility, e.g. due to insuffi-
cient illumination of the road, or due to
snow, rain, fog or spray
R there is glare, e.g. from oncoming traffic,
the sun or reflection from other vehicles
(e.g. if the road surface is wet)
R the windscreen is dirty, misted up, dam-
aged or covered, for instance by a sticker,
in the vicinity of the camera
R the radar sensors in the front or rear bump-
ers or the radiator trim are dirty, e.g.
obscured by snow
R no, or several, unclear lane markings are
present for one lane, e.g. in a construction
area
R the lane markings are worn away, dark or
covered up, e.g. by dirt or snow
R the distance to the vehicle in front is too
small and the lane markings thus cannot be
detected
R the lane markings change quickly, e.g.
lanes branch off, cross one another or
merge
R the road is narrow and winding
R there are highly variable shade conditions
on the road
If no vehicle is detected in the adjacent lane
and broken lane markings are detected, no
lane-correcting brake application is made.
Warning vibration through the steering
wheel
A warning may be given if a front wheel
passes over a lane marking. It will warn you by means of intermittent vibration in the steer-
ing wheel for up to 1.5 seconds.
Lane-correcting brake application G
WARNING
A lane-correcting brake application cannot
always bring the vehicle back into the original lane. There is a risk of an accident. 230
Driving systemsDriving and parking
Page 258 of 417
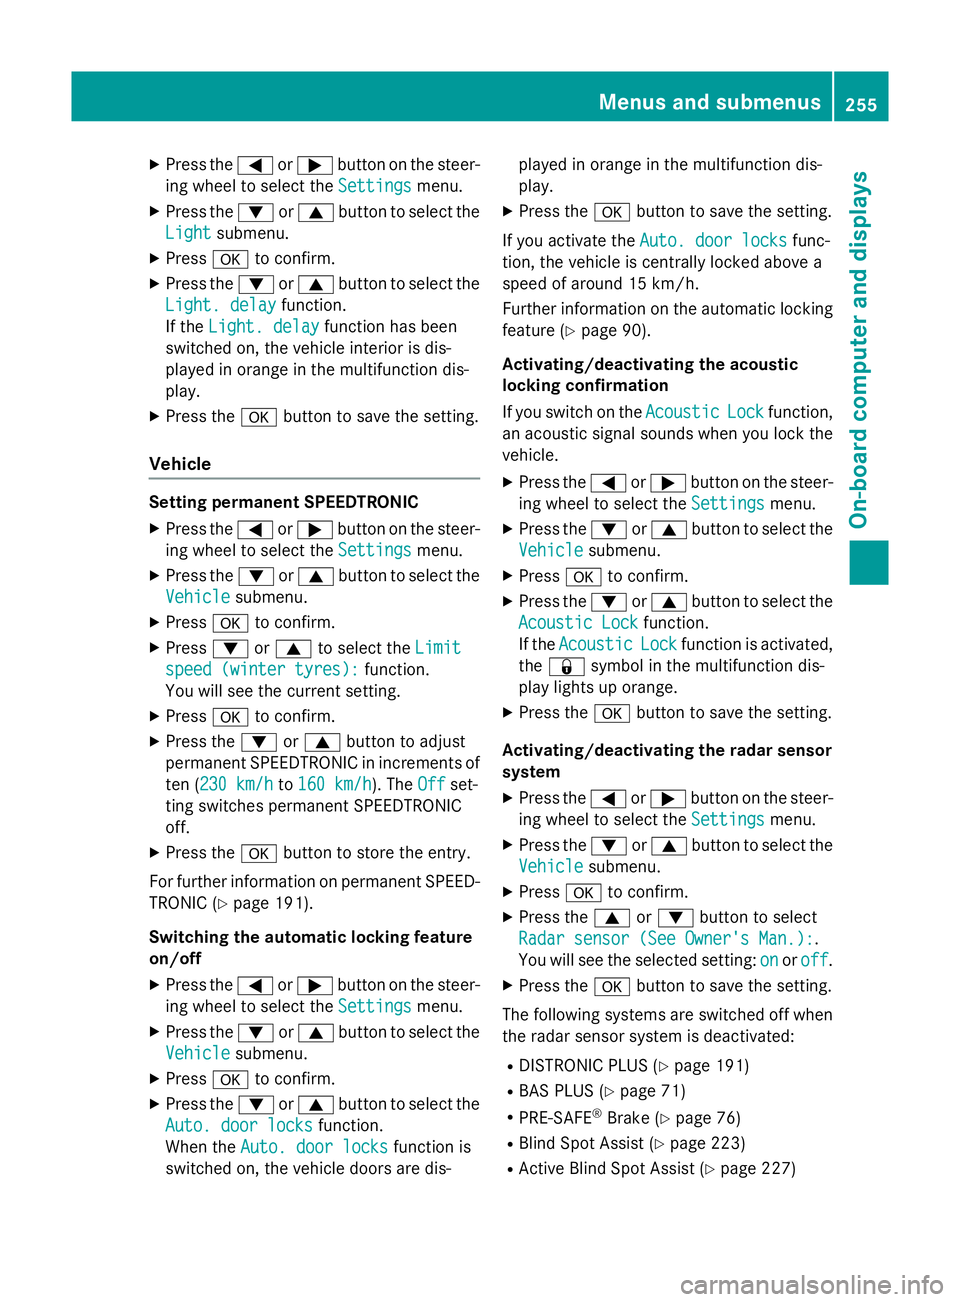
X
Press the =or; button on the steer-
ing wheel to select the Settings Settingsmenu.
X Press the :or9 button to select the
Light
Light submenu.
X Press ato confirm.
X Press the :or9 button to select the
Light. delay Light. delay function.
If the Light. delay
Light. delay function has been
switched on, the vehicle interior is dis-
played in orange in the multifunction dis-
play.
X Press the abutton to save the setting.
Vehicle Setting permanent SPEEDTRONIC
X Press the =or; button on the steer-
ing wheel to select the Settings Settingsmenu.
X Press the :or9 button to select the
Vehicle
Vehicle submenu.
X Press ato confirm.
X Press :or9 to select the Limit
Limit
speed (winter tyres):
speed (winter tyres): function.
You will see the current setting.
X Press ato confirm.
X Press the :or9 button to adjust
permanent SPEEDTRONIC in increments of
ten (230 km/h 230 km/h to160 km/h
160 km/h). The Off
Offset-
ting switches permanent SPEEDTRONIC
off.
X Press the abutton to store the entry.
For further information on permanent SPEED- TRONIC (Y page 191).
Switching the automatic locking feature
on/off
X Press the =or; button on the steer-
ing wheel to select the Settings Settingsmenu.
X Press the :or9 button to select the
Vehicle
Vehicle submenu.
X Press ato confirm.
X Press the :or9 button to select the
Auto. door locks
Auto. door locks function.
When the Auto. door locks
Auto. door locks function is
switched on, the vehicle doors are dis- played in orange in the multifunction dis-
play.
X Press the abutton to save the setting.
If you activate the Auto. door locks Auto. door locks func-
tion, the vehicle is centrally locked above a
speed of around 15 km/h.
Further information on the automatic locking feature (Y page 90).
Activating/deactivating the acoustic
locking confirmation
If you switch on the Acoustic AcousticLock
Lockfunction,
an acoustic signal sounds when you lock the
vehicle.
X Press the =or; button on the steer-
ing wheel to select the Settings
Settingsmenu.
X Press the :or9 button to select the
Vehicle
Vehicle submenu.
X Press ato confirm.
X Press the :or9 button to select the
Acoustic Lock
Acoustic Lock function.
If the Acoustic
Acoustic Lock
Lockfunction is activated,
the & symbol in the multifunction dis-
play lights up orange.
X Press the abutton to save the setting.
Activating/deactivating the radar sensor
system X Press the =or; button on the steer-
ing wheel to select the Settings Settingsmenu.
X Press the :or9 button to select the
Vehicle
Vehicle submenu.
X Press ato confirm.
X Press the 9or: button to select
Radar sensor (See Owner's Man.):
Radar sensor (See Owner's Man.):.
You will see the selected setting: on onoroff
off.
X Press the abutton to save the setting.
The following systems are switched off when
the radar sensor system is deactivated:
R DISTRONIC PLUS (Y page 191)
R BAS PLUS (Y page 71)
R PRE-SAFE ®
Brake (Y page 76)
R Blind Spot Assist (Y page 223)
R Active Blind Spot Assist (Y page 227) Menus and submenus
255On-board computer and displays Z
Page 268 of 417
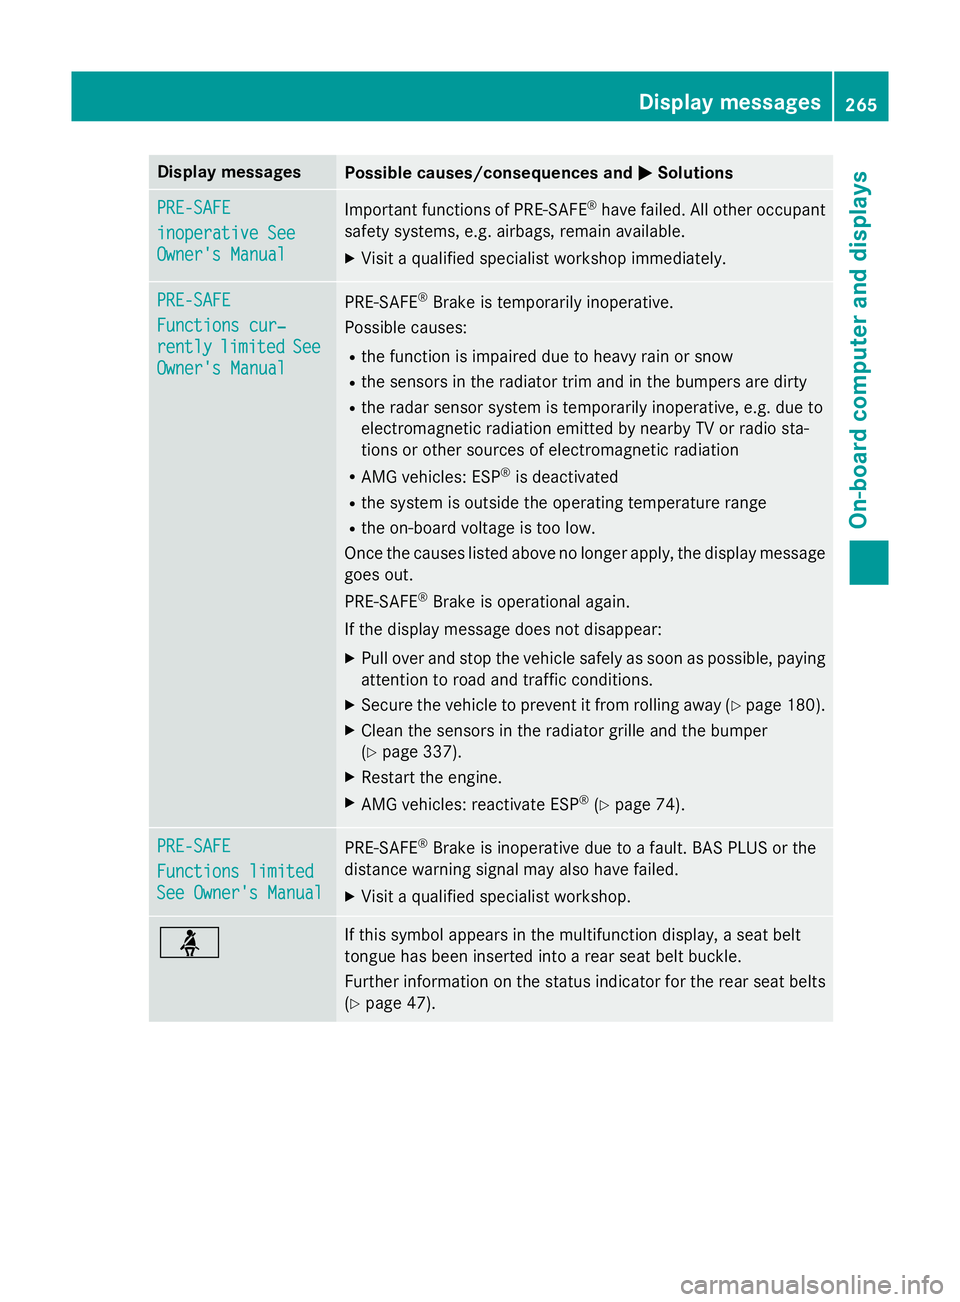
Display messages
Possible causes/consequences and
M
MSolutions PRE-SAFE
PRE-SAFE
inoperative See inoperative See
Owner's Manual Owner's Manual
Important functions of PRE-SAFE
®
have failed. All other occupant
safety systems, e.g. airbags, remain available.
X Visit a qualified specialist workshop immediately. PRE-SAFE
PRE-SAFE
Functions cur‐ Functions cur‐
rently rently
limited
limited See
See
Owner's Manual
Owner's Manual PRE-SAFE
®
Brake is temporarily inoperative.
Possible causes:
R the function is impaired due to heavy rain or snow
R the sensors in the radiator trim and in the bumpers are dirty
R the radar sensor system is temporarily inoperative, e.g. due to
electromagnetic radiation emitted by nearby TV or radio sta-
tions or other sources of electromagnetic radiation
R AMG vehicles: ESP ®
is deactivated
R the system is outside the operating temperature range
R the on-board voltage is too low.
Once the causes listed above no longer apply, the display message goes out.
PRE ‑SAFE ®
Brake is operational again.
If the display message does not disappear:
X Pull over and stop the vehicle safely as soon as possible, paying
attention to road and traffic conditions.
X Secure the vehicle to prevent it from rolling away (Y page 180).
X Clean the sensors in the radiator grille and the bumper
(Y page 337).
X Restart the engine.
X AMG vehicles: reactivate ESP ®
(Y page 74). PRE-SAFE PRE-SAFE
Functions limited Functions limited
See Owner's Manual See Owner's Manual
PRE-SAFE
®
Brake is inoperative due to a fault. BAS PLUS or the
distance warning signal may also have failed.
X Visit a qualified specialist workshop. ü If this symbol appears in the multifunction display, a seat belt
tongue has been inserted into a rear seat belt buckle.
Further information on the status indicator for the rear seat belts
(Y page 47). Display
messages
265On-board computer and displays Z
Page 281 of 417
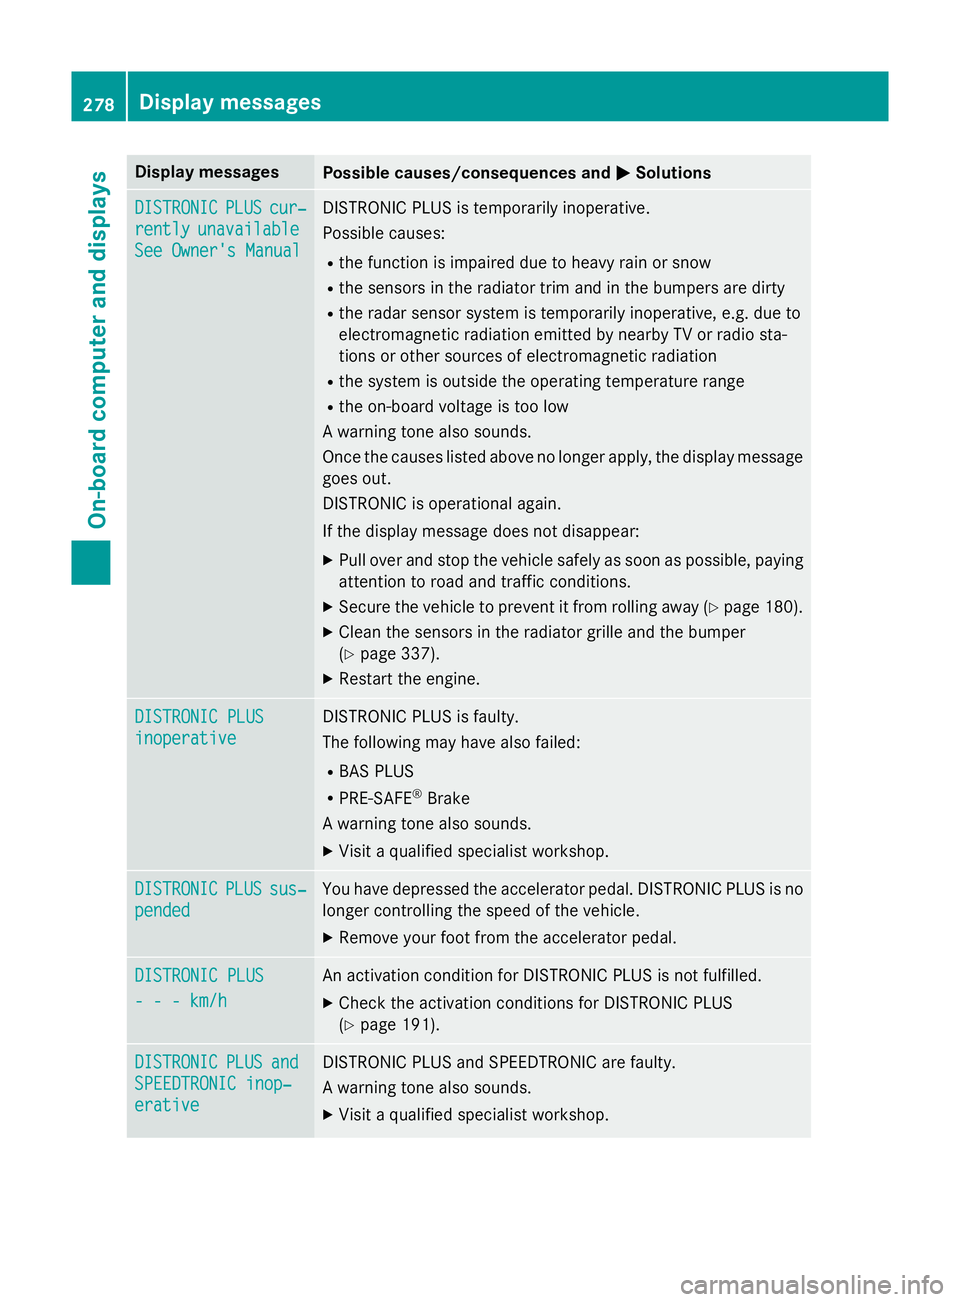
Display messages
Possible causes/consequences and
M
MSolutions DISTRONIC
DISTRONIC
PLUS
PLUScur‐
cur‐
rently
rently unavailable
unavailable
See Owner's Manual
See Owner's Manual DISTRONIC PLUS is temporarily inoperative.
Possible causes:
R the function is impaired due to heavy rain or snow
R the sensors in the radiator trim and in the bumpers are dirty
R the radar sensor system is temporarily inoperative, e.g. due to
electromagnetic radiation emitted by nearby TV or radio sta-
tions or other sources of electromagnetic radiation
R the system is outside the operating temperature range
R the on-board voltage is too low
A warning tone also sounds.
Once the causes listed above no longer apply, the display message goes out.
DISTRONIC is operational again.
If the display message does not disappear:
X Pull over and stop the vehicle safely as soon as possible, paying
attention to road and traffic conditions.
X Secure the vehicle to prevent it from rolling away (Y page 180).
X Clean the sensors in the radiator grille and the bumper
(Y page 337).
X Restart the engine. DISTRONIC PLUS DISTRONIC PLUS
inoperative inoperative DISTRONIC PLUS is faulty.
The following may have also failed:
R BAS PLUS
R PRE-SAFE ®
Brake
A warning tone also sounds.
X Visit a qualified specialist workshop. DISTRONIC DISTRONIC
PLUS
PLUSsus‐
sus‐
pended
pended You have depressed the accelerator pedal. DISTRONIC PLUS is no
longer controlling the speed of the vehicle.
X Remove your foot from the accelerator pedal. DISTRONIC PLUS
DISTRONIC PLUS
- - - km/h - - - km/h An activation condition for DISTRONIC PLUS is not fulfilled.
X Check the activation conditions for DISTRONIC PLUS
(Y page 191). DISTRONIC
DISTRONIC
PLUS
PLUSand
and
SPEEDTRONIC inop‐
SPEEDTRONIC inop‐
erative erative DISTRONIC PLUS and SPEEDTRONIC are faulty.
A warning tone also sounds.
X Visit a qualified specialist workshop. 278
Display
messagesOn-board computer and displays
Page 285 of 417
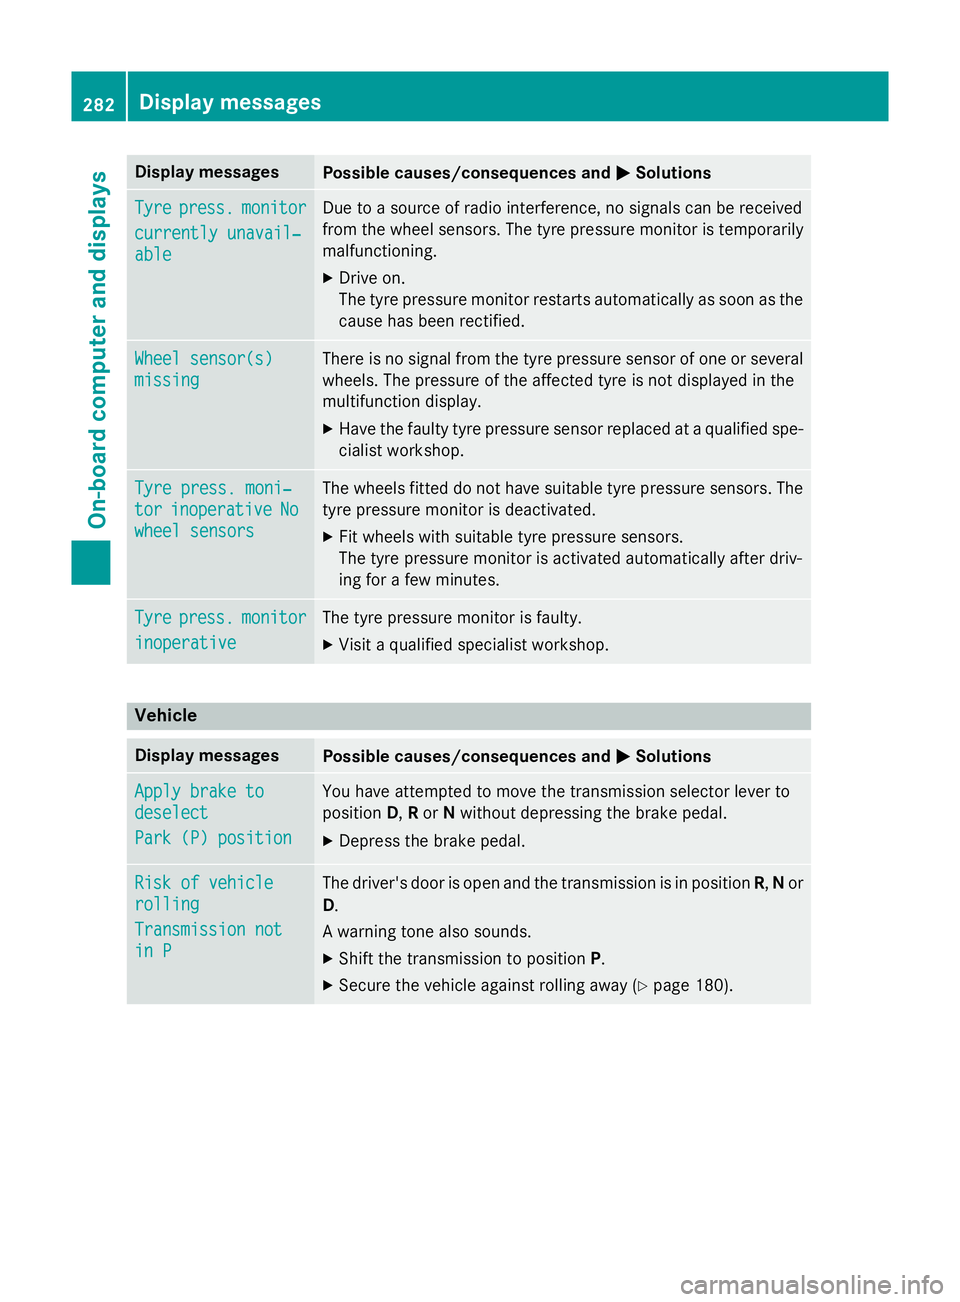
Display messages
Possible causes/consequences and
M
MSolutions Tyre
Tyre
press.
press. monitor
monitor
currently unavail‐
currently unavail‐
able able Due to a source of radio interference, no signals can be received
from the wheel sensors. The tyre pressure monitor is temporarily
malfunctioning.
X Drive on.
The tyre pressure monitor restarts automatically as soon as the
cause has been rectified. Wheel sensor(s) Wheel sensor(s)
missing missing There is no signal from the tyre pressure sensor of one or several
wheels. The pressure of the affected tyre is not displayed in the
multifunction display.
X Have the faulty tyre pressure sensor replaced at a qualified spe-
cialist workshop. Tyre press. moni‐ Tyre press. moni‐
tor tor
inoperative
inoperative No
No
wheel sensors
wheel sensors The wheels fitted do not have suitable tyre pressure sensors. The
tyre pressure monitor is deactivated.
X Fit wheels with suitable tyre pressure sensors.
The tyre pressure monitor is activated automatically after driv-
ing for a few minutes. Tyre Tyre
press.
press. monitor
monitor
inoperative
inoperative The tyre pressure monitor is faulty.
X Visit a qualified specialist workshop. Vehicle
Display messages
Possible causes/consequences and
M
MSolutions Apply brake to
Apply brake to
deselect deselect
Park (P) position Park (P) position You have attempted to move the transmission selector lever to
position
D,Ror Nwithout depressing the brake pedal.
X Depress the brake pedal. Risk of vehicle Risk of vehicle
rolling rolling
Transmission not Transmission not
in P in P The driver's door is open and the transmission is in position
R,Nor
D.
A warning tone also sounds. X Shift the transmission to position P.
X Secure the vehicle against rolling away (Y page 180).282
Display
messagesOn-board computer and displays
Page 340 of 417
should drive for a few minutes after clean-
ing. Braking heats the brake discs and the
brake pads/linings, thus drying them. The
vehicle can then be parked up.
Cleaning the windows G
WARNING
If the windscreen wipers are set in motion
when cleaning the windscreen or wiper
blades, you could become trapped. There is a danger of injury.
Always switch off the windscreen wipers and
the ignition before cleaning the windscreen or wiper blades.
! Do not use dry cloths, abrasive products,
solvents or cleaning agents containing sol- vents to clean the inside of the windows. Do
not touch the insides of the windows with
hard objects, e.g. an ice scraper or ring.
There is otherwise a risk of damaging the
windows.
! Clean the water drainage channels of the
windscreen and the rear window at regular
intervals. Deposits such as leaves, petals
and pollen may under certain circumstan-
ces prevent water from draining away. This
can lead to corrosion damage and damage to electronic components.
X Clean the inside and outside of the win-
dows with a damp cloth and a cleaning
agent that is recommended and approved
by Mercedes-Benz.
Cleaning the wiper blades G
WARNING
If the windscreen wipers are set in motion
when cleaning the windscreen or wiper
blades, you could become trapped. There is a danger of injury.
Always switch off the windscreen wipers and
the ignition before cleaning the windscreen or wiper blades. !
Do not pull on the wiper blade. Otherwise,
the wiper blade could be damaged.
! Do not clean wiper blades too often and
do not rub them too hard. Otherwise, the
graphite coating could be damaged. This
could cause wiper noise.
! Hold the wiper arm securely when folding
back. The windscreen could be damaged if
the wiper arm hits against it suddenly.
X Fold the wiper arms away from the wind-
screen.
X Clean the wiper blades carefully using a
damp cloth.
X Fold the windscreen wipers back again
before switching on the ignition.
Cleaning the exterior lighting !
Only use cleaning agents or cleaning
cloths that are suitable for plastic lenses.
Unsuitable cleaning agents or cleaning
cloths could scratch or damage the plastic lenses of the exterior lighting.
X Clean the plastic lenses of the exterior
lighting using a wet sponge and a mild
cleaning agent, e.g. Mercedes-Benz car
shampoo or cleaning cloths.
Mirror turn signals !
Only use cleaning agents or cleaning
cloths that are suitable for plastic lenses.
Unsuitable cleaning agents or cleaning
cloths could scratch or damage the plastic lenses of the mirror turn signals.
X Clean the plastic lenses of the mirror turn
signals in the exterior mirror housing using
a wet sponge and mild cleaning agent, e.g.
Mercedes-Benz car shampoo or cleaning
cloths.
Cleaning the sensors !
If you clean the sensors with a high-pres-
sure cleaner, make sure that you keep a
distance of at least 30 cm between the Care
337Maintenance and care Z
Page 341 of 417
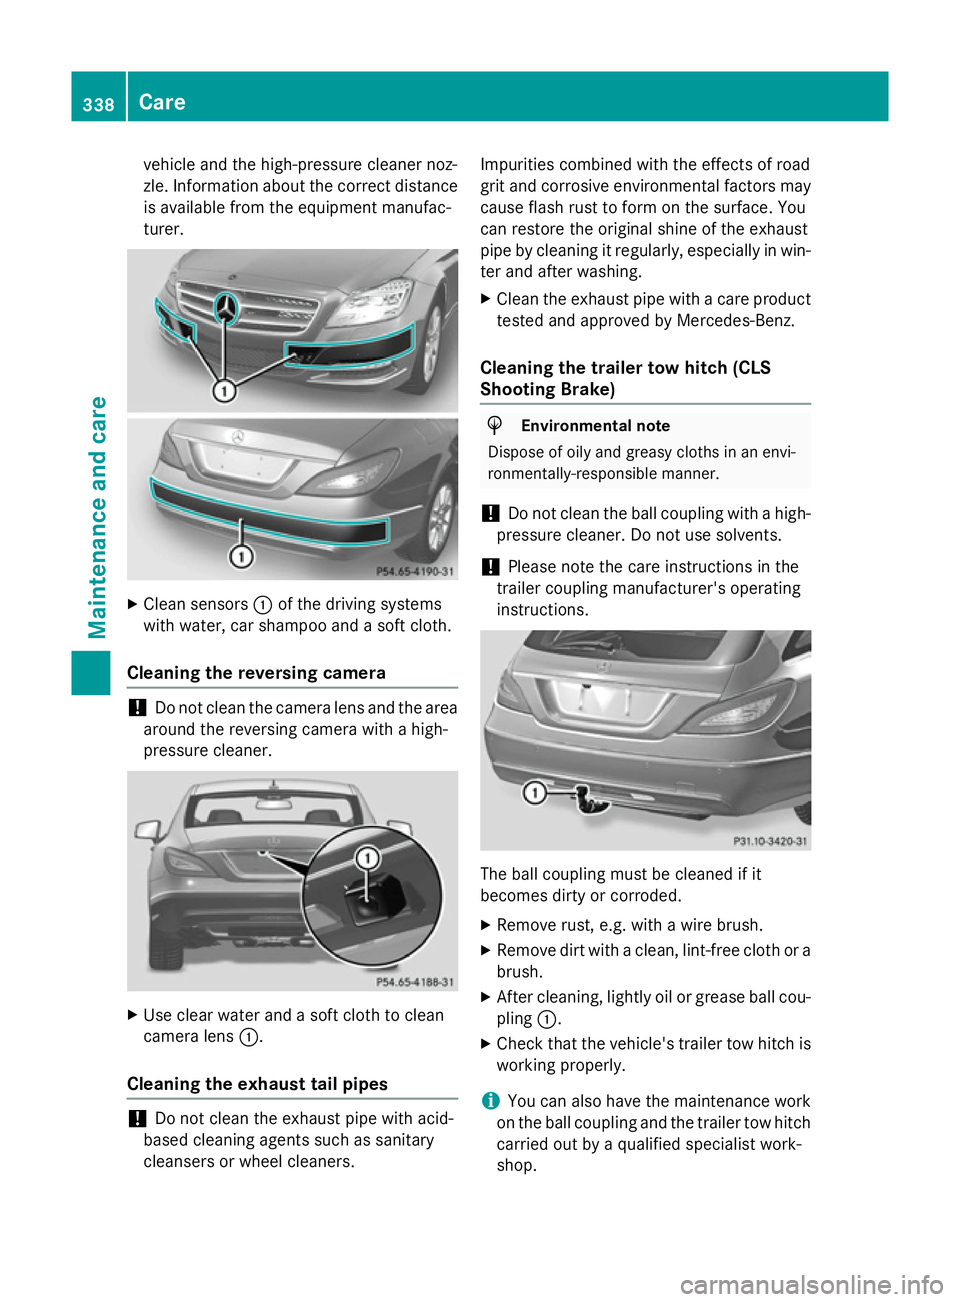
vehicle and the high-pressure cleaner noz-
zle. Information about the correct distance is available from the equipment manufac-
turer. X
Clean sensors :of the driving systems
with water, car shampoo and a soft cloth.
Cleaning the reversing camera !
Do not clean the camera lens and the area
around the reversing camera with a high-
pressure cleaner. X
Use clear water and a soft cloth to clean
camera lens :.
Cleaning the exhaust tail pipes !
Do not clean the exhaust pipe with acid-
based cleaning agents such as sanitary
cleansers or wheel cleaners. Impurities combined with the effects of road
grit and corrosive environmental factors may
cause flash rust to form on the surface. You
can restore the original shine of the exhaust
pipe by cleaning it regularly, especially in win-
ter and after washing.
X Clean the exhaust pipe with a care product
tested and approved by Mercedes-Benz.
Cleaning the trailer tow hitch (CLS
Shooting Brake) H
Environmental note
Dispose of oily and greasy cloths in an envi-
ronmentally-responsible manner.
! Do not clean the ball coupling with a high-
pressure cleaner. Do not use solvents.
! Please note the care instructions in the
trailer coupling manufacturer's operating
instructions. The ball coupling must be cleaned if it
becomes dirty or corroded.
X Remove rust, e.g. with a wire brush.
X Remove dirt with a clean, lint-free cloth or a
brush.
X After cleaning, lightly oil or grease ball cou-
pling :.
X Check that the vehicle's trailer tow hitch is
working properly.
i You can also have the maintenance work
on the ball coupling and the trailer tow hitch
carried out by a qualified specialist work-
shop. 338
CareMaintenance and care