2014 MERCEDES-BENZ CLS-Class wheel
[x] Cancel search: wheelPage 185 of 270

i
SIRIUS XM Radio offers more than 130
radio stations in digital quality, for example
100% commercial-free music, sports, news
and entertainment.
SIRIUS XM Radio employs a fleet of high-
performance satellites to broadcast around
the clock in the contiguous USA and Can-
ada.
The satellite radio program is available for
a monthly fee. Details are available from
the SIRIUS XM Service Center and at
http://www.sirius.com (USA) or
http://www.siriuscanada.com (Can-
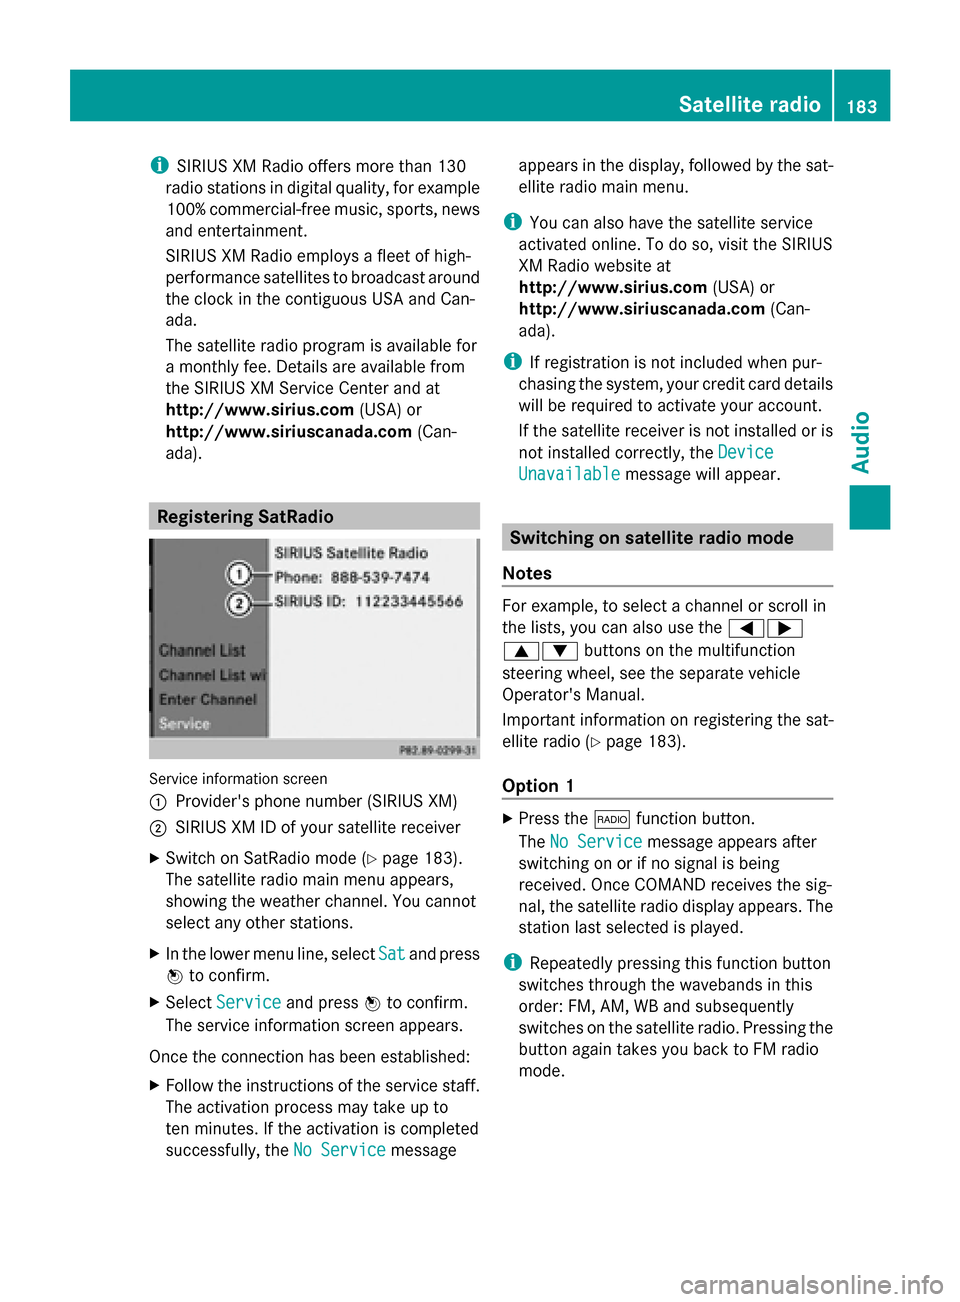
ada). Registering SatRadio
Service information screen
0043
Provider's phone number (SIRIUS XM)
0044 SIRIUS XM ID of your satellite receiver
X Switch on SatRadio mode (Y page 183).
The satellite radio main menu appears,
showing the weather channel. You cannot
select any other stations.
X In the lower menu line, select Sat
Sat and press
0098 to confirm.
X Select Service Service and press 0098to confirm.
The service information screen appears.
Once the connection has been established:
X Follow the instructions of the service staff.
The activation process may take up to
ten minutes. If the activation is completed
successfully, the No Service No Servicemessage appears in the display, followed by the sat-
ellite radio main menu.
i You can also have the satellite service
activated online. To do so, visit the SIRIUS
XM Radio website at
http://www.sirius.com (USA) or
http://www.siriuscanada.com (Can-
ada).
i If registration is not included when pur-
chasing the system, your credit card details
will be required to activate your account.
If the satellite receiver is not installed or is
not installed correctly, the Device Device
Unavailable
Unavailable message will appear. Switching on satellite radio mode
Notes For example, to select a channel or scroll in
the lists, you can also use the
00590065
00630064 buttons on the multifunction
steering wheel, see the separate vehicle
Operator's Manual.
Important information on registering the sat-
ellite radio (Y page 183).
Option 1 X
Press the 002Afunction button.
The No Service No Service message appears after
switching on or if no signal is being
received. Once COMAND receives the sig-
nal, the satellite radio display appears. The
station last selected is played.
i Repeatedly pressing this function button
switches through the wavebands in this
order: FM, AM, WB and subsequently
switches on the satellite radio. Pressing the
button again takes you back to FM radio
mode. Satellite radio
183Audio
Page 215 of 270

Selecting a track
The function is not supported by all Blue-
tooth ®
audio devices.
X To skip forward or back to a track: press
the 0048 or0049 button on COMAND.
or
X Press the 0063or0064 button briefly on
the multifunction steering wheel.
X Rapid scroll: press and hold the 0063
or 0064 button on the multifunction steer-
ing wheel until the desired track is reached.
If you press and hold the 0063or0064 but-
ton, the rapid scrolling speed is increased. Selecting playback options
If the Bluetooth ®
audio device supports the
corresponding function, the following options
are available:
R Normal Track Sequence Normal Track Sequence
The tracks are played in the normal order
(e.g. track 1, 2, 3, etc.).
Audio data playback is determined by the
order in which the tracks are written to the
data carrier. Alphabetical order is the most
common. Once all the tracks in a folder
have been played, the tracks in the next
folder are played.
R Random Tracks
Random Tracks
All the tracks on the medium are played in
random order (e.g. track 3, 8, 5 etc.).
X Select BT BTAudio
Audio by sliding 00520064and turning
00790052007A the COMAND controller and press
0098 to confirm.
The 003Bdot indicates the option selected.
X Select the option by turning 00790052007Athe
COMAND controller and press 0098to con-
firm.
If you select Random Tracks
Random Tracks, you will see
a corresponding symbol in the display/
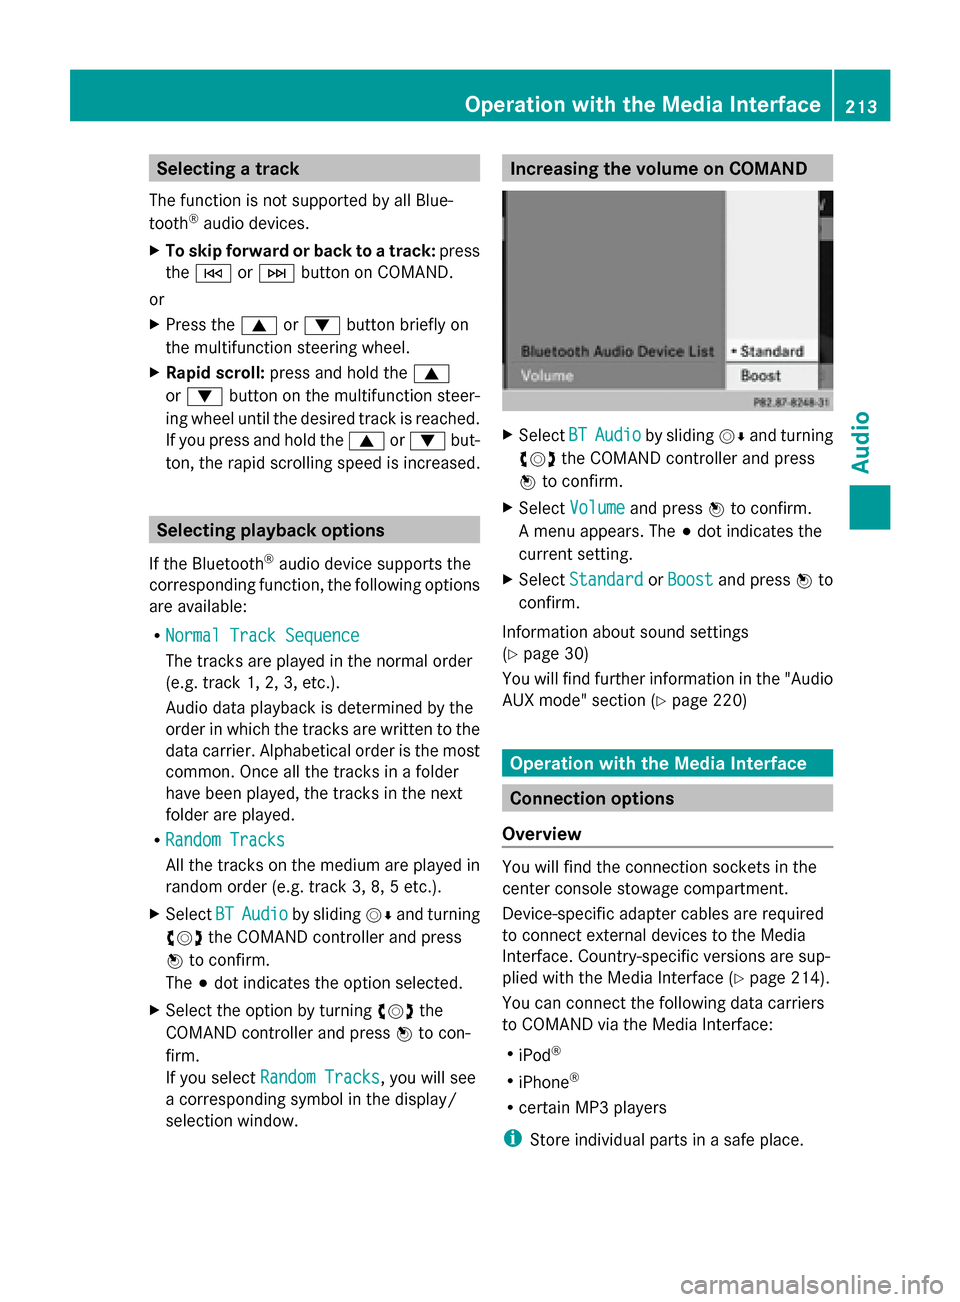
selection window. Increasing the volume on COMAND
X
Select BT
BT Audio Audio by sliding 00520064and turning
00790052007A the COMAND controller and press
0098 to confirm.
X Select Volume
Volume and press 0098to confirm.
A menu appears. The 003Bdot indicates the
current setting.
X Select Standard
Standard orBoost
Boost and press 0098to
confirm.
Information about sound settings
(Y page 30)
You will find further information in the "Audio
AUX mode" section (Y page 220) Operation with the Media Interface
Connection options
Overview You will find the connection sockets in the
center console stowage compartment.
Device-specific adapter cables are required
to connect external devices to the Media
Interface. Country-specific versions are sup-
plied with the Media Interface (Y
page 214).
You can connect the following data carriers
to COMAND via the Media Interface:
R iPod ®
R iPhone ®
R certain MP3 players
i Store individual parts in a safe place. Operation with the Media Interface
213Audio Z
Page 237 of 270

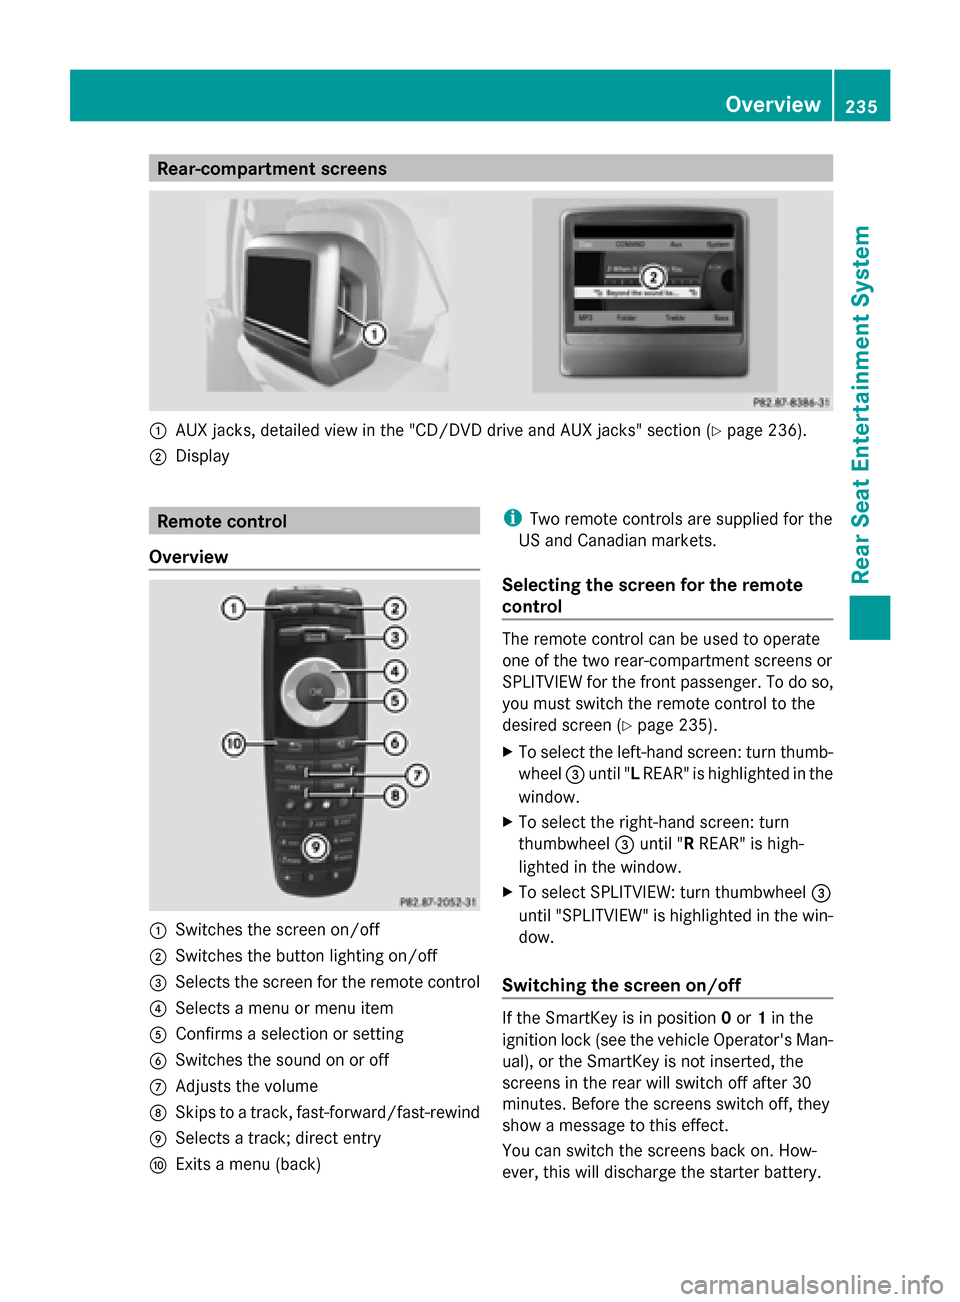
Rear-compartment screens
0043
AUX jacks, detailed view in the "CD/DVD drive and AUX jacks" section (Y page 236).
0044 Display Remote control
Overview 0043
Switches the screen on/off
0044 Switches the button lighting on/off
0087 Selects the screen for the remote control
0085 Selects a menu or menu item
0083 Confirms a selection or setting
0084 Switches the sound on or off
006B Adjusts the volume
006C Skips to a track, fast-forward/fast-rewind
006D Selects a track; direct entry
006E Exits a menu (back) i
Two remote controls are supplied for the
US and Canadian markets.
Selecting the screen for the remote
control The remote control can be used to operate
one of the two rear-compartment screens or
SPLITVIEW for the front passenger. To do so,
you must switch the remote control to the
desired screen (Y
page 235).
X To select the left-hand screen: turn thumb-
wheel 0087until " LREAR" is highlighted in the
window.
X To select the right-hand screen: turn
thumbwheel 0087until "R REAR" is high-
lighted in the window.
X To select SPLITVIEW: turn thumbwheel 0087
until "SPLITVIEW" is highlighted in the win-
dow.
Switching the screen on/off If the SmartKey is in position
0or 1in the
ignition lock (see the vehicle Operator's Man-
ual), or the SmartKey is not inserted, the
screens in the rear will switch off after 30
minutes. Before the screens switch off, they
show a message to this effect.
You can switch the screens back on. How-
ever, this will discharge the starter battery. Overview
235Rear Seat Entertainment System Z
Page 254 of 270

X
To select a folder: press the0064button
on the remote control.
X Highlight one of the two folder symbols
with the 0059or0065 button and press
008B to confirm.
Depending on your selection, the previous
or next folder is selected and the first track
is played.
Additional setting option:
R Adjusting the sound settings (Y page 240)
Video DVD mode X
To hide a menu: confirmMenu Menuwith the
008B button.
The video image is played in full screen
mode.
Additional setting options:
R Adjusting the brightness, contrast and
color (Y page 241)
R Changing the picture format (Y page 241)
R Adjusting the sound settings (Y page 240)AUX mode
Introduction
You can connect one external video source to
each of the displays of the Rear Seat Enter-
tainment System (AUX display) and also one
external video source to the rear-compart-
ment CD/DVD drive (AUX drive) with a sound
and video signal.
Please see the corresponding operating
instructions for information on how to oper-
ate the external video source.
For further details about external video sour-
ces, please consult an authorized Mercedes-
Benz Center. Connecting AUX equipment
AUX drive The AUX drive jacks are located on the CD/
DVD drive next to the CD/DVD eject button
(Y
page 236).
Displaying AUX The AUX display jacks are on the side of the
screen (Y
page 235).
Audio and video connection X
Insert the audio plugs for the left and right
signals into the corresponding Land R
jacks.
X Insert the video plug into the Vjack. Activating AUX mode
AUX drive X
Select Aux Auxin the menu using the
006300590065 buttons on the remote
control and press the 008Bbutton to confirm.
The AUX menu appears.
X Select Source
Source from the AUX menu and
press the 008Bbutton to confirm.
X Select Disc Drive Aux
Disc Drive Aux and press the008B
button to confirm.
You will hear and see the content of the
external video source if it is connected to
the CD/DVD drive and switched to play-
back. If no video image is available from the
AUX source connected, you will see an
audio menu.
Displaying AUX X
Select the screen by turning the scroll
wheel on the remote control ( Ypage 235) 252
AUX modeRear Seat Entertainment System