Page 240 of 270

Adjusting the volume of the head-
phones X
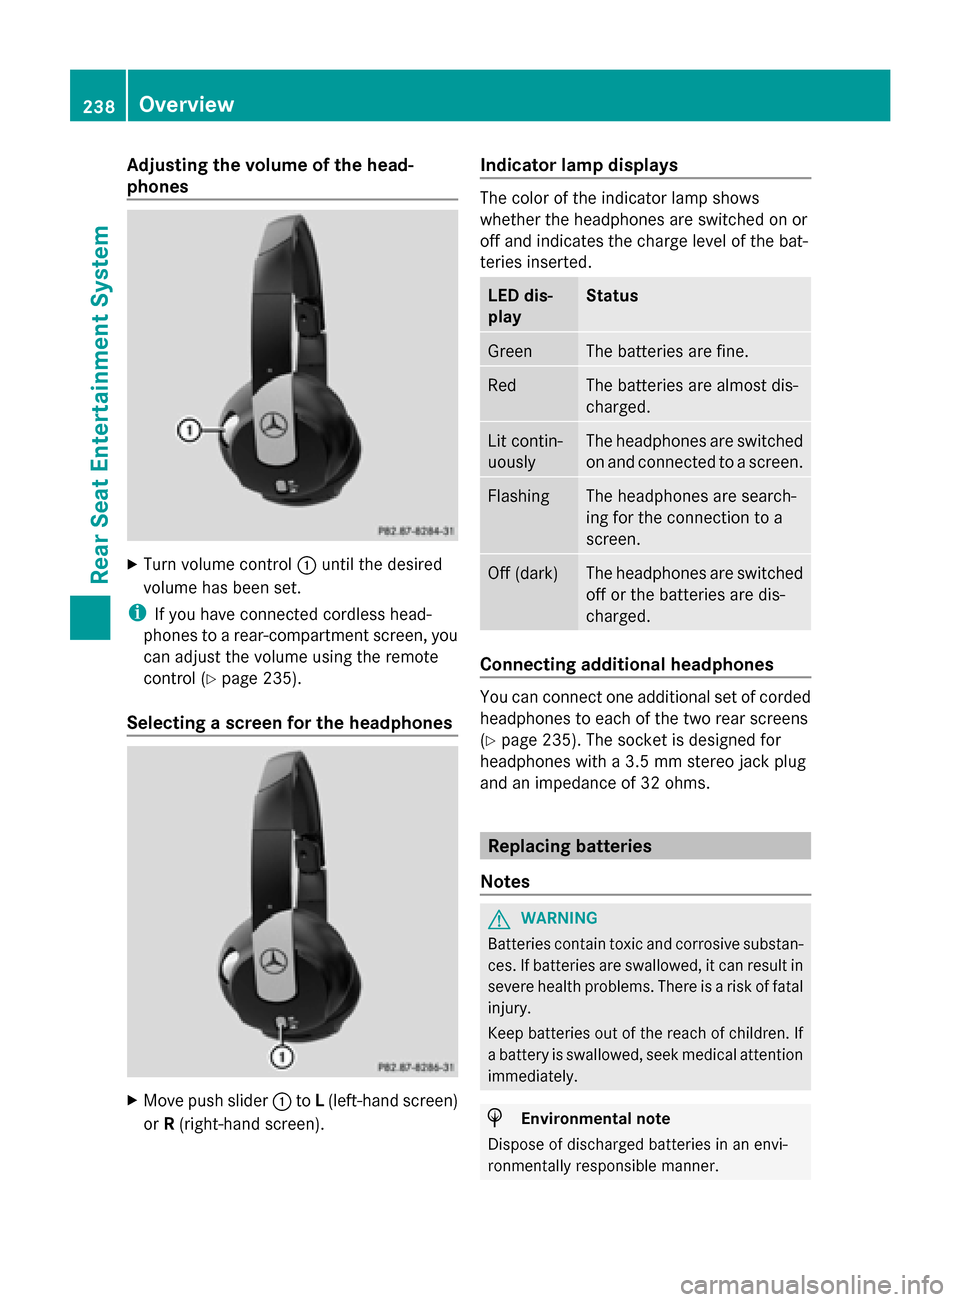
Turn volume control 0043until the desired
volume has been set.
i If you have connected cordless head-
phones to a rear-compartment screen, you
can adjust the volume using the remote
control (Y page 235).
Selecting a screen for the headphones X
Move push slider 0043toL(left-hand screen)
or R(right-hand screen). Indicator lamp displays The color of the indicator lamp shows
whether the headphones are switched on or
off and indicates the charge level of the bat-
teries inserted. LED dis-
play Status
Green The batteries are fine.
Red The batteries are almost dis-
charged.
Lit contin-
uously The headphones are switched
on and connected to a screen.
Flashing The headphones are search-
ing for the connection to a
screen.
Off (dark) The headphones are switched
off or the batteries are dis-
charged.
Connecting additional headphones
You can connect one additional set of corded
headphones to each of the two rear screens
(Y page 235). The socket is designed for
headphones with a 3.5 mm stereo jack plug
and an impedance of 32 ohms. Replacing batteries
Notes G
WARNING
Batteries contain toxic and corrosive substan-
ces. If batteries are swallowed, it can result in
severe health problems. There is a risk of fatal
injury.
Keep batteries out of the reach of children. If
a battery is swallowed, seek medical attention
immediately. H
Environmental note
Dispose of discharged batteries in an envi-
ronmentally responsible manner. 238
OverviewRea
r Seat Entertainment System
Page 244 of 270

Switching the display design
X Select Settings
Settings using the0064button
and press 008Bto confirm.
X Select Day Mode
Day Mode, Night Mode
Night Mode orAuto‐
Auto‐
matic
matic using the 00630064 buttons and
press the 008Bbutton to confirm.
The dot indicates the current setting. Design Explanation
Day Mode
Day Mode The display is set per-
manently to day
design.
Night Mode Night Mode The display is set per-
manently to night
design.
Automatic Automatic The display design
changes depending on
the vehicle instrument
cluster illumination.
Setting the brightness
X Select Settings Settings using the0064button
and press 008Bto confirm.
X Select Brightness
Brightness using the00630064
buttons and press the 008Bbutton to confirm.
A scale appears.
X Adjust the brightness using the 00630064
buttons and press the 008Bbutton to confirm.
The brightness bar moves up or down. The
picture becomes lighter or darker in
accordance with the scale. Showing/hiding the picture
X To hide the picture: selectDisplay Off Display Off
in the system menu using the 00640065
buttons on the remote control and press
the 008Bbutton to confirm.
The picture is hidden.
X To display the picture: press the008Bbut-
ton. CD/audio DVD and MP3 mode
Important safety notes
G
WARNING
The CD/DVD drive is a class 1 laser product.
If you open the CD/DVD drive housing, you
could be exposed to invisible laser radiation.
This laser radiation could damage your retina.
There is a risk of injury.
Never open the housing. Always have main-
tenance and repair work carried out at a quali-
fied specialist workshop. General notes
You will find information on the following top-
ics in the Audio section:
R notes on CDs/DVDs (Y page 200)
R notes on MP3 mode (Y page 198)
R notes on copyright (Y page 200) Inserting a CD/DVD
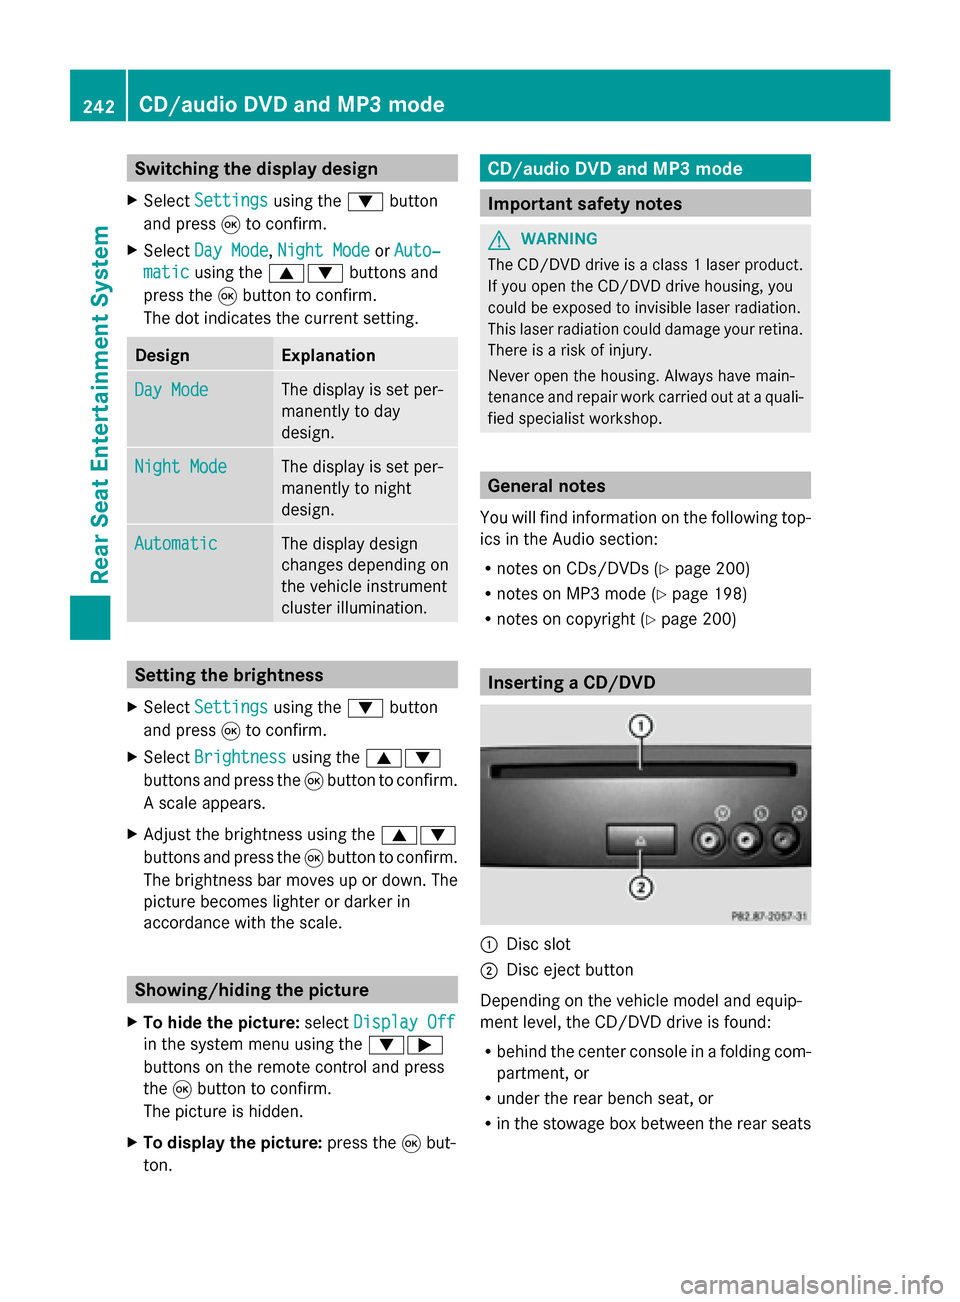
0043
Disc slot
0044 Disc eject button
Depending on the vehicle model and equip-
ment level, the CD/DVD drive is found:
R behind the center console in a folding com-
partment, or
R under the rear bench seat, or
R in the stowage box between the rear seats 242
CD/audio DVD and MP3 modeRear Seat Entertainment System
Page 248 of 270

X
Select Display Track Information
Display Track Information
using the 00630064 buttons and press the
008B button to confirm.
The function is switched on 0073or off 0053,
depending on the previous status. Video DVD mode
Important safety notes
G
WARNING
The CD/DVD drive is a class 1 laser product.
If you open the CD/DVD drive housing, you
could be exposed to invisible laser radiation.
This laser radiation could damage your retina.
There is a risk of injury.
Never open the housing. Always have main-
tenance and repair work carried out at a quali-
fied specialist workshop. General notes
DVD playback conditions Playback problems may occur when playing
copied discs. There is a large variety of discs,
DVD authoring software, writing software and
writers available. This variety means that
there is no guarantee that the Rear Seat
Entertainment System will be able to play
video DVDs that you have copied yourself.
Further information can be found under video
(Y page 225). Information regarding
COMAND also applies to the Rear Seat Enter-
tainment System.
Function restrictions Depending on the DVD, it is possible that cer-
tain functions or actions described in this
section will be temporarily blocked or may not
function at all. As soon as you try to activate
these functions or actions, you will see the
0047
symbol in the display. Switching to video DVD mode
X Insert a video DVD ( Ypage 242).
The Rear Seat Entertainment System loads
the disc.
If disc mode was the last mode selected, it
will now be active.
If it was not, switch on video DVD mode as
described in the following instruction.
X Select Disc Discin the menu using the
006300590065 buttons on the remote
control and confirm by pressing the 008Bbut-
ton.
If the video DVD fulfills the playback crite-
ria, the film either starts automatically or
the menu stored on the DVD appears. If the
DVD menu appears, you must start the film
manually.
X Select the corresponding menu item in the
DVD menu. Showing/hiding the control menu
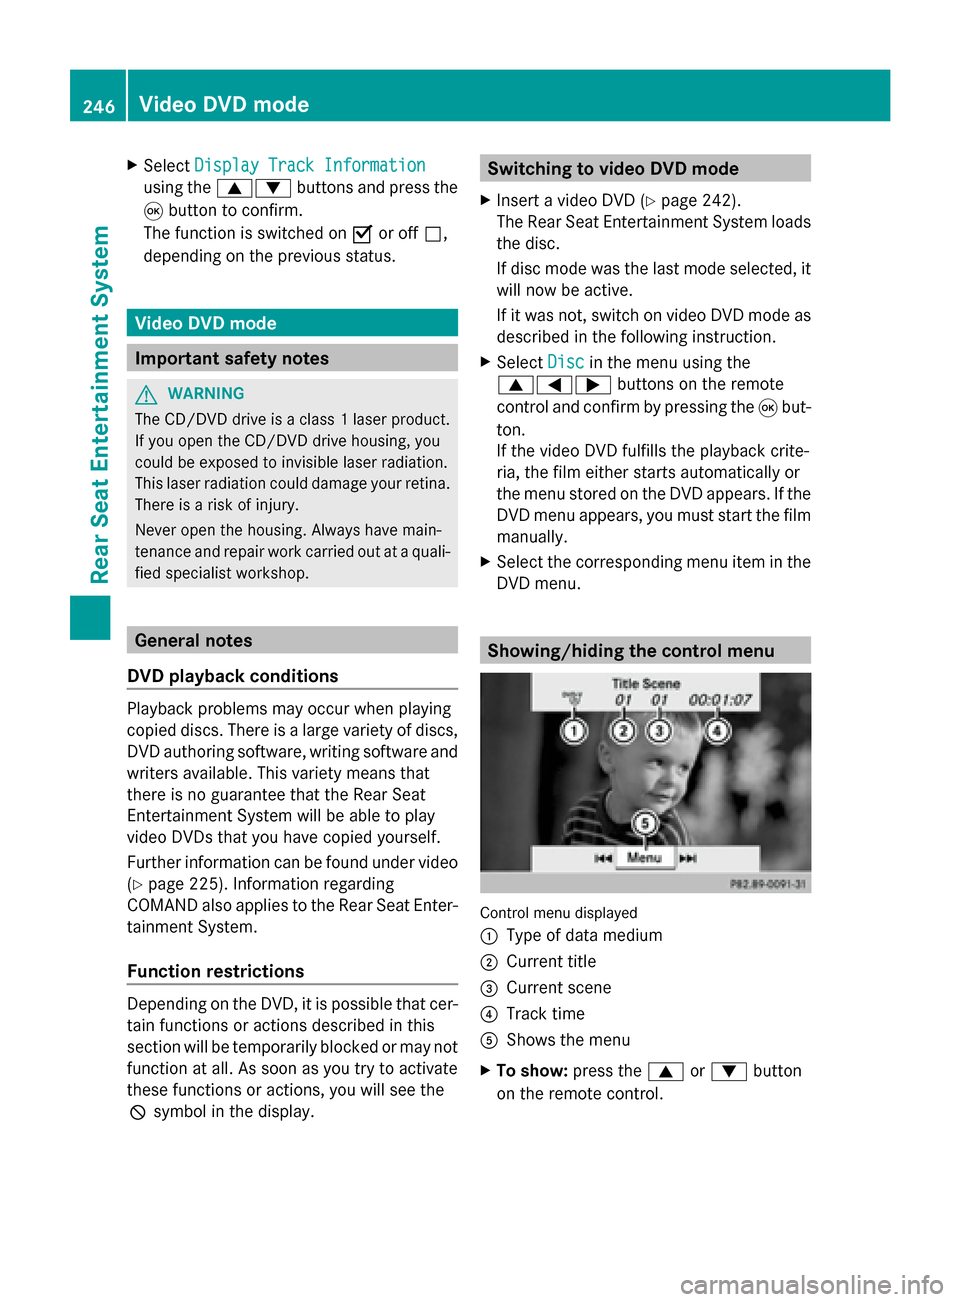
Control menu displayed
0043
Type of data medium
0044 Current title
0087 Current scene
0085 Track time
0083 Shows the menu
X To show: press the0063or0064 button
on the remote control. 246
Video DVD modeRear Seat Entertainment System
Page:
< prev 1-8 9-16 17-24