2014 MERCEDES-BENZ CLA-Class dimensions
[x] Cancel search: dimensionsPage 21 of 358

Top Tether
............................................ 61
Towing Important safety guidelines ........... 307
Installing the towing eye ................ 308
Removing the towing eye ............... 309
Towing a trailer
ESP ®
(Electronic Stability Pro-
gram) .............................................. .71
Towing away
With both axles on the ground ....... 309
With front axle raised ..................... 309
Tow-starting
Emergency engine starting ............ 310
Important safety notes .................. 307
Installing the towing eye ................ 308
Removing the towing eye ............... 309
Transmission
see Automatic transmission
Transmission position display ......... 147
Transporting the vehicle .................. 309
Trim pieces (cleaning instruc-
tions) .................................................. 293
Trip computer (on-board com-
puter) .................................................. 199
Trip meter see Trip odometer
Trip odometer
Calling up ....................................... 199
Resetting (on-board computer) ...... 200
Trunk
Emergency release .......................... 86
Emergency release button ............... 86
Important safety notes .................... 84
Opening/closing (manually from
outside) ............................................ 84
Opening (automatically from out-
side) ................................................. 85
Opening automatically from
inside .............................................. .85
Trunk emergency release button ....... 86
Trunk lid Display message ............................ 241
Opening dimensions ...................... 353
Trunk load (maximum) ...................... 353
Turn signals Changing bulbs (front) ................... 117
Changing bulbs (rear ).................... 117 Display message ............................ 226
Switching on/of f........................... 110
Type identification plate
see Vehicle identification plate U
Unlocking Emergency unlocking ....................... 83
From inside the vehicle (central
unlocking button) ............................. 82 V
Vanity mirror (in the sun visor) ........ 264
Vehicle Correct use ...................................... 26
Equipment ....................................... 22
Individual settings .......................... 207
Limited Warranty ............................. 27
Loading .......................................... 324
Locking (in an emergency) ............... 83
Locking (SmartKey ).......................... 76
Lowering ........................................ 340
Maintenance .................................... 23
Parking for a long period ................ 160
Pulling away ................................... 142
Raising ........................................... 337
Reporting problems ......................... 26
Securing from rolling away ............ 337
Towing away .................................. 307
Tow-starting ................................... 307
Transporting .................................. 309
Unlocking (in an emergency) ........... 83
Unlocking (SmartKey )...................... 76
Vehicle data ................................... 353
Vehicle data ....................................... 353
Vehicle dimensions ........................... 353
Vehicle emergency locking ................ 83
Vehicle identification number see VIN
Vehicle identification plate .............. 346
Vehicle maintenance see ASSYST PLUS
Vehicle tool kit .................................. 296
Video (DVD) ........................................ 203
VIN ...................................................... 346 Index
19
Page 86 of 358
X
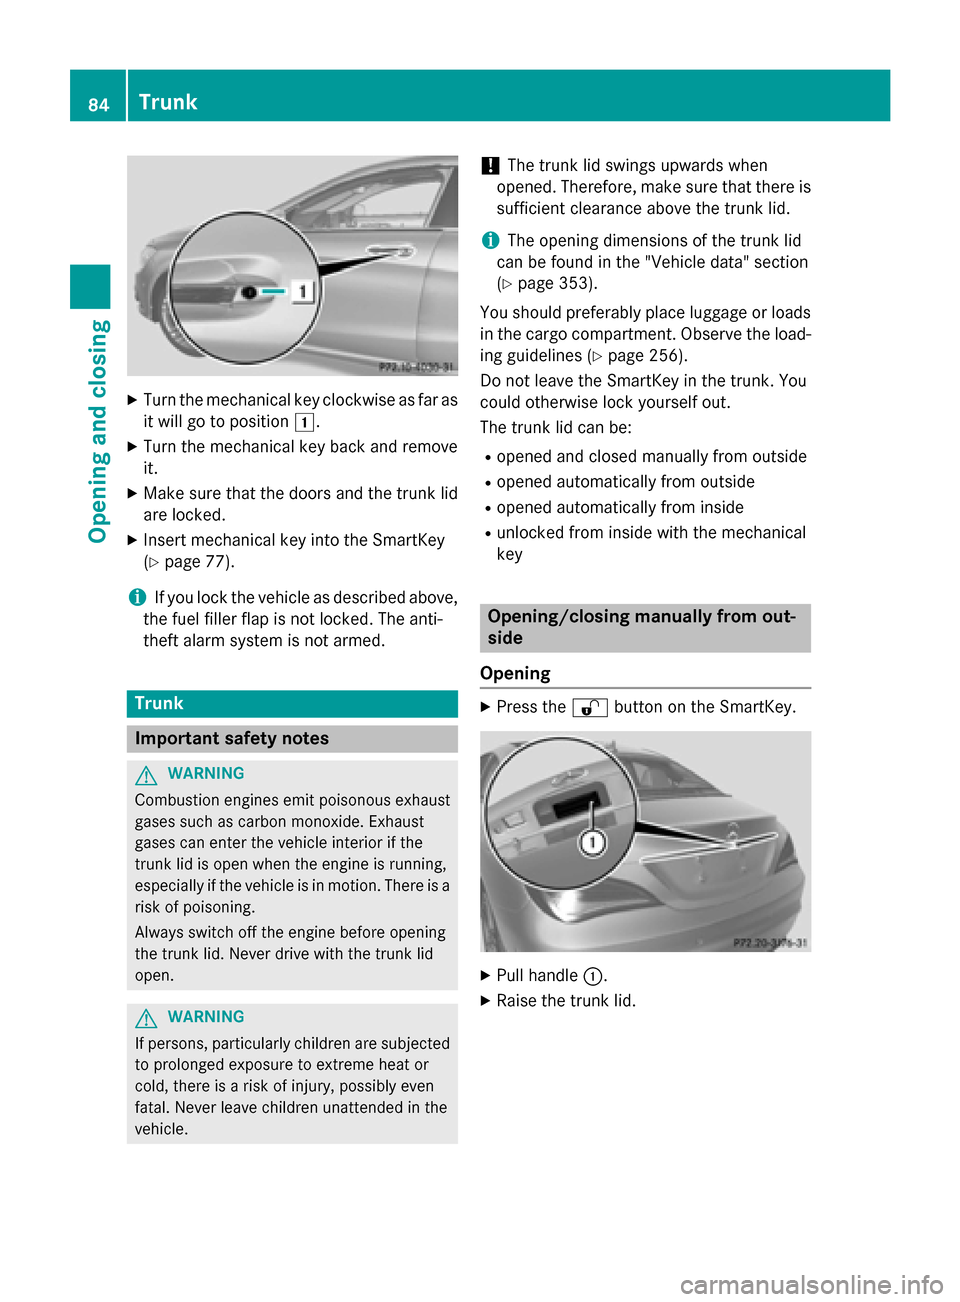
Turn the mechanical key clockwise as far as
it will go to position 0047.
X Turn the mechanical key back and remove
it.
X Make sure that the doors and the trunk lid
are locked.
X Insert mechanical key into the SmartKey
(Y page 77).
i If you lock the vehicle as described above,
the fuel filler flap is not locked. The anti-
theft alarm system is not armed. Trunk
Important safety notes
G
WARNING
Combustion engines emit poisonous exhaust
gases such as carbon monoxide. Exhaust
gases can enter the vehicle interior if the
trunk lid is open when the engine is running,
especially if the vehicle is in motion. There is a risk of poisoning.
Always switch off the engine before opening
the trunk lid. Never drive with the trunk lid
open. G
WARNING
If persons, particularly children are subjected to prolonged exposure to extreme heat or
cold, there is a risk of injury, possibly even
fatal. Never leave children unattended in the
vehicle. !
The trunk lid swings upwards when
opened. Therefore, make sure that there is
sufficient clearance above the trunk lid.
i The opening dimensions of the trunk lid
can be found in the "Vehicle data" section
(Y page 353).
You should preferably place luggage or loads in the cargo compartment. Observe the load-
ing guidelines (Y page 256).
Do not leave the SmartKey in the trunk. You
could otherwise lock yourself out.
The trunk lid can be:
R opened and closed manually from outside
R opened automatically from outside
R opened automatically from inside
R unlocked from inside with the mechanical
key Opening/closing manually from out-
side
Opening X
Press the 0036button on the SmartKey. X
Pull handle 0043.
X Raise the trunk lid. 84
TrunkOpening and closing
Page 87 of 358
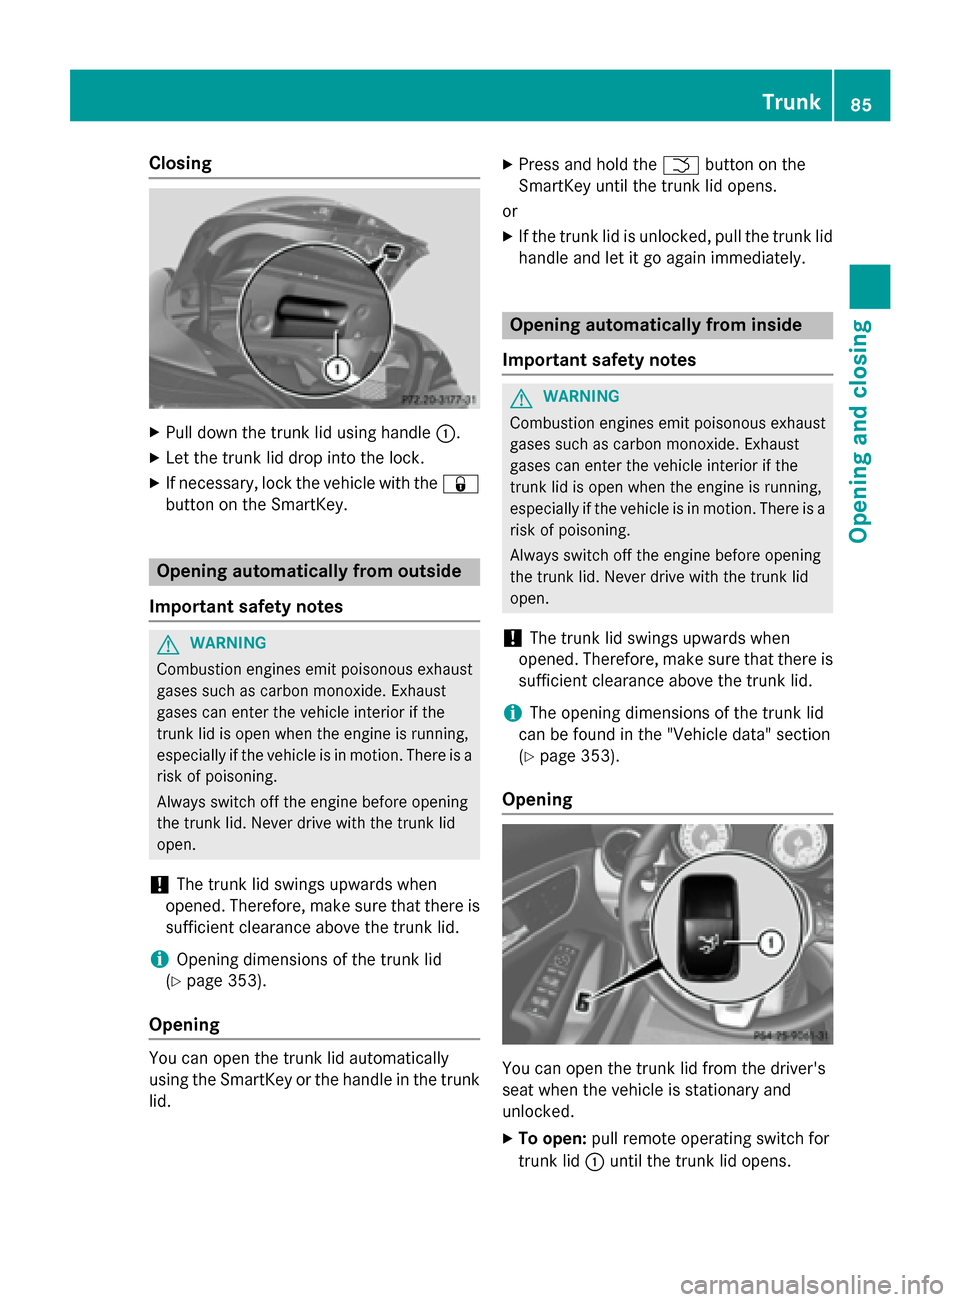
Closing
X
Pull down the trunk lid using handle 0043.
X Let the trunk lid drop into the lock.
X If necessary, lock the vehicle with the 0037
button on the SmartKey. Opening automatically from outside
Important safety notes G
WARNING
Combustion engines emit poisonous exhaust
gases such as carbon monoxide. Exhaust
gases can enter the vehicle interior if the
trunk lid is open when the engine is running,
especially if the vehicle is in motion. There is a risk of poisoning.
Always switch off the engine before opening
the trunk lid. Never drive with the trunk lid
open.
! The trunk lid swings upwards when
opened. Therefore, make sure that there is
sufficient clearance above the trunk lid.
i Opening dimensions of the trunk lid
(Y page 353).
Opening You can open the trunk lid automatically
using the SmartKey or the handle in the trunk
lid. X
Press and hold the 0054button on the
SmartKey until the trunk lid opens.
or
X If the trunk lid is unlocked, pull the trunk lid
handle and let it go again immediately. Opening automatically from inside
Important safety notes G
WARNING
Combustion engines emit poisonous exhaust
gases such as carbon monoxide. Exhaust
gases can enter the vehicle interior if the
trunk lid is open when the engine is running,
especially if the vehicle is in motion. There is a risk of poisoning.
Always switch off the engine before opening
the trunk lid. Never drive with the trunk lid
open.
! The trunk lid swings upwards when
opened. Therefore, make sure that there is
sufficient clearance above the trunk lid.
i The opening dimensions of the trunk lid
can be found in the "Vehicle data" section
(Y page 353).
Opening You can open the trunk lid from the driver's
seat when the vehicle is stationary and
unlocked.
X To open: pull remote operating switch for
trunk lid 0043until the trunk lid opens. Trunk
85Opening and closing Z
Page 88 of 358
Emergency release
If the trunk lid can no longer be opened from
outside the vehicle, use the emergency
release on the inside of the trunk lid.
! The trunk lid swings upwards when
opened. Therefore, make sure that there is
sufficient clearance above the trunk lid.
i The opening dimensions of the trunk lid
can be found in the "Vehicle data" section
(Y page 353).
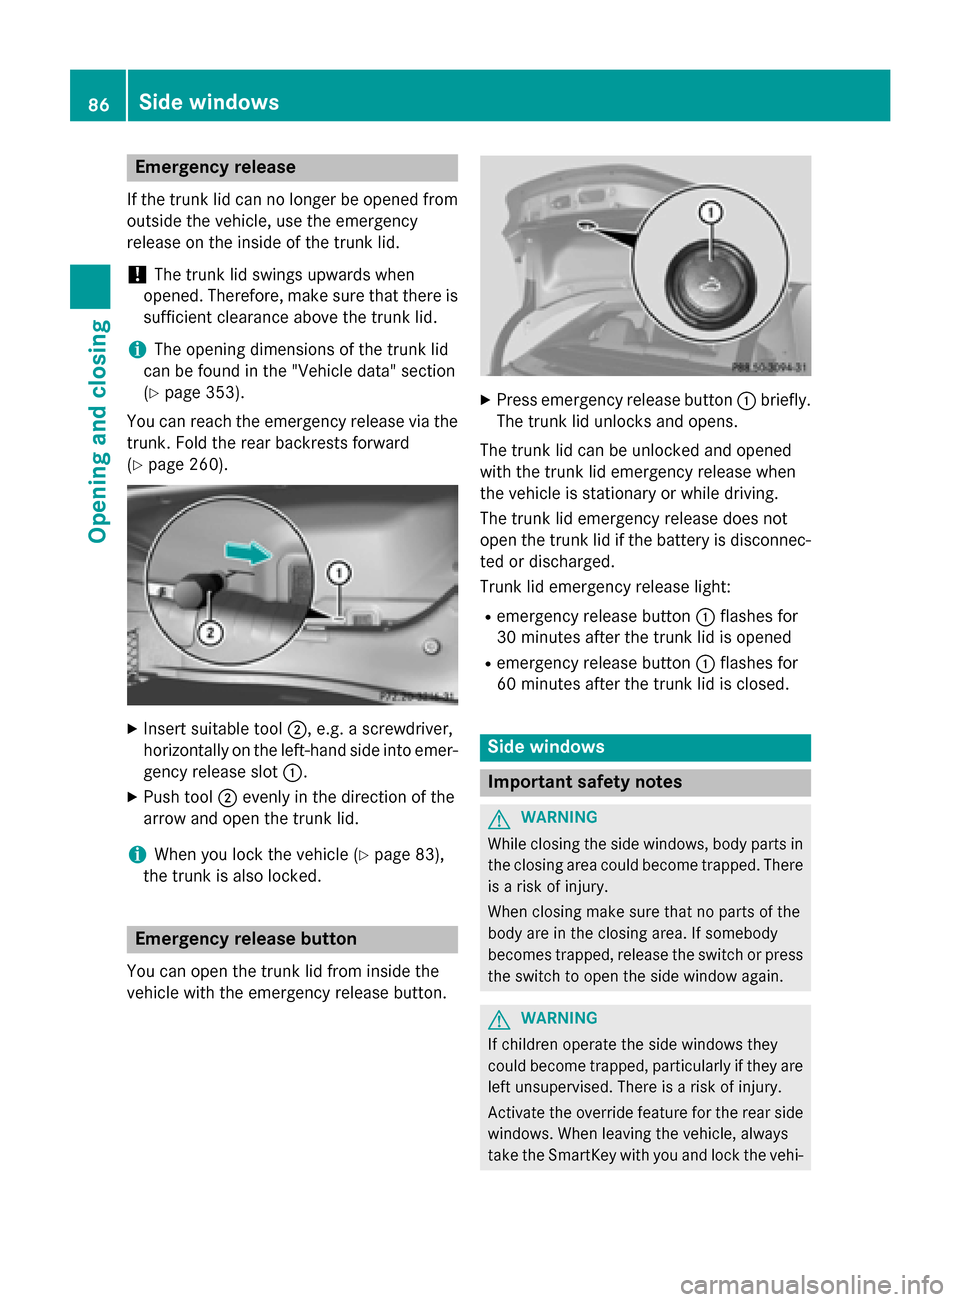
You can reach the emergency release via the
trunk. Fold the rear backrests forward
(Y page 260). X
Insert suitable tool 0044, e.g. a screwdriver,
horizontally on the left-hand side into emer- gency release slot 0043.
X Push tool 0044evenly in the direction of the
arrow and open the trunk lid.
i When you lock the vehicle (Y
page 83),
the trunk is also locked. Emergency release button
You can open the trunk lid from inside the
vehicle with the emergency release button. X
Press emergency release button 0043briefly.
The trunk lid unlocks and opens.
The trunk lid can be unlocked and opened
with the trunk lid emergency release when
the vehicle is stationary or while driving.
The trunk lid emergency release does not
open the trunk lid if the battery is disconnec- ted or discharged.
Trunk lid emergency release light:
R emergency release button 0043flashes for
30 minutes after the trunk lid is opened
R emergency release button 0043flashes for
60 minutes after the trunk lid is closed. Side windows
Important safety notes
G
WARNING
While closing the side windows, body parts in the closing area could become trapped. There is a risk of injury.
When closing make sure that no parts of the
body are in the closing area. If somebody
becomes trapped, release the switch or press
the switch to open the side window again. G
WARNING
If children operate the side windows they
could become trapped, particularly if they are left unsupervised. There is a risk of injury.
Activate the override feature for the rear side
windows. When leaving the vehicle, always
take the SmartKey with you and lock the vehi- 86
Side windowsOpening and closing
Page 316 of 358
Useful information
i This Operator's manual describes all
models and all standard and optional equip- ment of your vehicle available at the time of
publication of the Operator's manual.
Country-specific differences are possible.
Please note that your vehicle may not be
equipped with all features described. This
also applies to safety-related systems and
functions.
i Read the information on qualified special-
ist workshops (Y page 26). Important safety notes
G
WARNING
If wheels and tires of the wrong size are used, the wheel brakes or suspension components
may be damaged. There is a risk of an acci-
dent.
Always replace wheels and tires with those
that fulfill the specifications of the original
part.
When replacing wheels, make sure to use the
correct:
R designation
R model
When replacing tires, make sure to use the
correct:
R designation
R manufacturer
R model G
WARNING
A flat tire severely impairs the driving, steer-
ing and braking characteristics of the vehicle.
There is a risk of accident.
Tires without run-flat characteristics:
R do not drive with a flat tire.
R immediately replace the flat tire with your
emergency spare wheel or spare wheel, or
consult a qualified specialist workshop. Tires with run-flat characteristics:
R pay attention to the information and warn-
ing notices on MOExtended tires (tires with
run-flat characteristics).
Accessories that are not approved for your
vehicle by Mercedes-Benz or that are not
being used correctly can impair operating
safety.
Before purchasing and using non-approved
accessories, visit a qualified specialist work-
shop and inquire about:
R suitability
R legal stipulations
R factory recommendations
Information on dimensions and types of
wheels and tires for your vehicle can be found (Y page 340).
Information on air pressure for the tires on
your vehicle can be found:
R on the vehicle's Tire and Loading Informa-
tion placard on the B-pillar
R on the tire pressure label on the fuel filler
flap (Y page 156)
R under "Tire pressure" (Y page 317)
i Further information on wheels and tires
can be obtained at any qualified specialist
workshop. Operation
Information on driving
R If the vehicle is heavily loaded, check the
tire pressures and correct them if neces-
sary.
R While driving, pay attention to vibrations,
noises and unusual handling characteris-
tics, e.g. pulling to one side. This may indi- cate that the wheels or tires are damaged.If you suspect that a tire is defective,
reduce your speed immediately. Stop the
vehicle as soon as possible to check the
wheels and tires for damage. Hidden tire
damage could also be causing the unusual 314
OperationWheels and tires
Page 320 of 358
Follow recommended tire inflation pressures
and check the pressure of all the tires includ-
ing the spare wheel:
R monthly, at least
R if the load changes
R before beginning a long journey
R under different operating conditions, e.g.
off-road driving
If necessary, correct the tire pressure.
Use a suitable pressure gauge to check the
tire pressure. The outer appearance of a tire
does not permit any reliable conclusion about the tire pressure. On vehicles equipped with
the electronic tire pressure monitor, the tire
pressure can be checked in the on-board
computer.
The recommended tire pressures for the tires
mounted at the factory can be found on the
labels described here.
1.) Tire and Loading Information placard
on the B-pilla ron the driver's side of the vehi-
cle (Y page 324).
The Tire and Loading Information placard con-
tains the recommended tire pressures for
cold tires. The recommended tire pressures
are valid for the maximum permissible load
and up to the maximum permissible vehicle
speed. 0043
Recommended tire pressures
Option 2) Tire pressure table on the inside of
the fuel filler flap.
The tire pressure table contains the recom-
mended pressures for cold tires for various operating conditions, i.e. differing load and
speed conditions.
i Specifications shown in the examples of
tire pressure tables are for illustration pur-
poses only. Tire pressure specifications are
vehicle-specific and may deviate from the
data shown here. Tire pressure specifica-
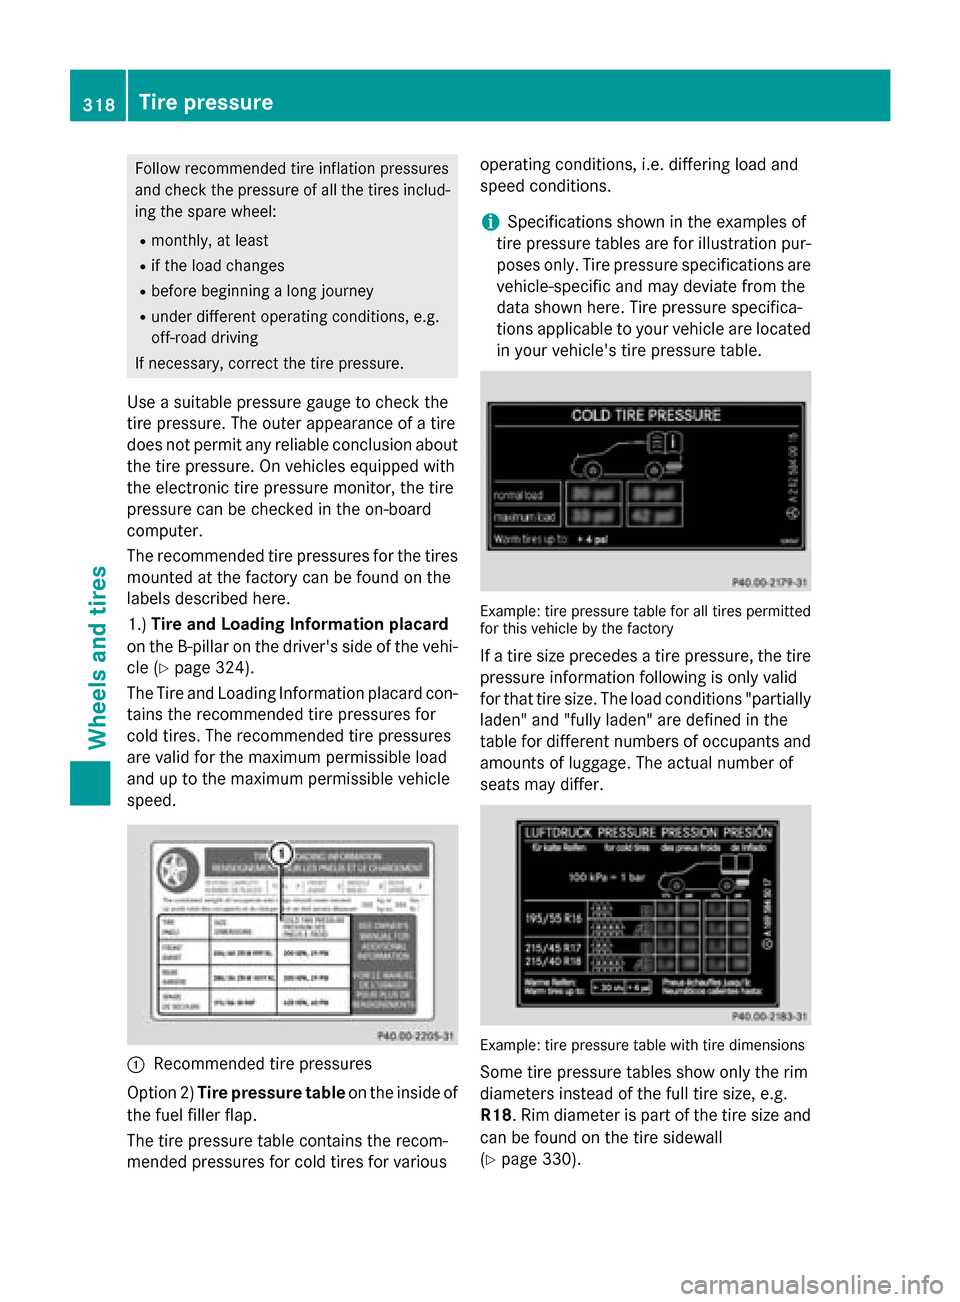
tions applicable to your vehicle are located in your vehicle's tire pressure table. Example: tire pressure table for all tires permitted
for this vehicle by the factory
If a tire size precedes a tire pressure, the tire pressure information following is only valid
for that tire size. The load conditions "partially
laden" and "fully laden" are defined in the
table for different numbers of occupants and amounts of luggage. The actual number of
seats may differ. Example: tire pressure table with tire dimensions
Some tire pressure tables show only the rim
diameters instead of the full tire size, e.g.
R18 . Rim diameter is part of the tire size and
can be found on the tire sidewall
(Y page 330). 318
Tire pressureWheels and tires
Page 338 of 358

be found under "MOExtended tires (tires with
run-flat characteristics" (Y page 297).Rotating the wheels
G
WARNING
Interchanging the front and rear wheels may
severely impair the driving characteristics if
the wheels or tires have different dimensions. The wheel brakes or suspension components
may also be damaged. There is a risk of acci-
dent.
Rotate front and rear wheels only if the wheels and tires are of the same dimensions.
! On vehicles equipped with a tire pressure
monitor, electronic components are loca-
ted in the wheel.
Tire-mounting tools should not be used
near the valve. This could damage the elec- tronic components.
Only have tires changed at a qualified spe-cialist workshop.
Always pay attention to the instructions and
safety notes when changing a wheel
(Y page 335).
The wear patterns on the front and rear tires
differ, depending on the operating conditions.
Rotate the wheels before a clear wear pattern has formed on the tires. Front tires typically
wear more on the shoulders and the rear tires in the center.
If your vehicle's tire configuration allows, you can rotate the wheels according to the inter-
vals in the tire manufacturer's warranty book
in your vehicle documents. If no warranty
book is available, the tires should be rotated
every 3,000 to 6,000 miles (5,000 to
10,000 km), or earlier if tire wear requires. Do not change the direction of wheel rotation.
Clean the contact surfaces of the wheel and
the brake disc thoroughly every time a wheel
is rotated. Check the tire pressure and reac-
tivate the tire pressure monitor if necessary. Direction of rotation
Tires with a specified direction of rotation
have additional benefits, e.g. if there is a risk of hydroplaning. You will only gain these ben-
efits if the correct direction of rotation is
maintained.
An arrow on the sidewall of the tire indicates
its correct direction of rotation. Storing wheels
Store wheels that are not being used in a cool, dry and preferably dark place. Protect the
tires from oil, grease, gasoline and diesel. Cleaning the wheels
G
WARNING
The water jet from a circular jet nozzle (dirt
blasters) can cause invisible exterior damage to the tires or chassis components. Compo-
nents damaged in this way may fail unexpect-edly. There is a risk of an accident.
Do not use power washers with circular jet
nozzles to clean the vehicle. Have damaged
tires or chassis components replaced imme-
diately. Mounting a wheel
Preparing the vehicle X
Stop the vehicle on solid, non-slippery and
level ground.
X Apply the electric parking brake manually
(Y page 158).
X Bring the front wheels into the straight-
ahead position.
X Move the DIRECT SELECT lever to position
P.
X Switch off the engine. 336
Changing a wheelWheels and tires
Page 355 of 358

Warning symbol
0043advises you about:
R possible dangers
R having service work carried out at a quali-
fied specialist workshop
Filling capacities Missing values were not available at time of
going to print. Model Refrigerant
CLA 250
CLA 250 4MATIC
22.9 ± 0.4 oz
(650 ± 10 g) AMG vehicles
23.6 ± 0.4 oz
(670 ± 10 g) Model PAG oil
CLA 250
CLA 250 4MATIC
4.2 oz
(120 g) AMG vehicles
Vehicle data
General notes
Please note that for the specified vehicle
data: R the heights specified may vary as a result
of:
- tires
- load
- condition of the suspension
- optional equipment
R optional equipment reduces the maximum
payload. Dimensions and weights
Model
0043 0043
Opening height AMG vehicles
68.0 in
(1727 mm) All other models
68.9 in
(1749 mm) Missing values were not available at time of
going to print.
Model
Vehicle width
including exterior
mirrors
80.0 in (2032 mm)
Vehicle height
56.5 in (1436 mm)
Wheelbase
106.3 in (2699 mm)
Turning radius
36.1 ft (11 m)
Maximum roof
load
Model Vehicle length
AMG vehicles
184.7 in
(4691 mm) All other models
182.3 in
(4630 mm) Vehicle data
353Technical data Z