2014 MERCEDES-BENZ C-Class SEDAN tow
[x] Cancel search: towPage 178 of 362

and is shown in the multifunction display. If
the vehicle in fron
tisno longer detected and
displayed, DISTRONIC PLUS switches off and
a tone sounds.
X Briefly pull the cruise control lever towards
you 0021, or press it up 0002or down 0003.
DISTRONIC PLUS is selected.
X Press the cruise control lever repeatedly
up 0002 or down 0003until the desired speed
is set.
X Remove your foot from the accelerator
pedal.
Your vehicle adapts its speed to that of the
vehicle in front, but only up to the desired
stored speed.
i If you do not fully release the accelerator
pedal, the DISTRONIC PLUS Override message appears in the multifunction
display
.The set distance to a slower-
moving vehicle in front will then not be
maintained. You will be driving at the speed
you determine by the position of the
accelerator pedal.
Activating when driving towards a
stationary vehicle
If the vehicle in front of you is stationary, you
can only activate DISTRONIC PLUS once your
vehicle is stationary as well.
X Briefly pull the cruise control lever towards
you 0021, or press it up 0002or down 0003.
DISTRONIC PLUS is selected.
i DISTRONIC PLUS can only be activated at
under 20 mph (30 km/h) if avehicle in front
has been detected. For this reason, it is
helpful if you have the DISTRONIC PLUS
distance display shown in the instrument
cluster (Y page 213).
X Press the cruise control lever repeatedly
up 0002 or down 0003until the desired speed
is set.
i You can use the cruise control lever to set
the stored speed and the control on the cruise control lever to set the specified
minimum distance (Y
page 178).
Pulling away
X If the vehicle in front pulls away: remove
your foot from the brake pedal.
X Briefly pull the cruise control lever towards
you 0021.
or
X Accelerate briefly.
Your vehicle pulls away and adapts its
speed to that of the vehicle in front.
Driving
If there is no vehicle in front, DISTRONIC
PLUS operates in the same way as cruise
control.
If DISTRONIC PLUS detects that the vehicle
in fron thas slowed down, it brakes your
vehicle .Inthis way, the distance you have
selected is maintained.
If DISTRONIC PLUS detects that the vehicle
in front is driving faster, it accelerates your
vehicle, but only up to the speed you have
stored.
Changing lanes
If you change to the passing lane, DISTRONIC
PLUS supports you when:
R you are driving faster than 40 mph
(60 km/h)
R DISTRONIC PLUS is maintaining the
distance to a vehicle in front
R you switch on the appropriate turn signal
R DISTRONIC PLUS does not detect a danger
of collision
If these conditions are fulfilled, your vehicle
is accelerated. Acceleration will be
interrupted if changing lanes takes too long
or if the distance between your vehicle and
the vehicle in front becomes too small.
i When changing lanes, DISTRONIC PLUS
monitors the left lane on left-hand drive
vehicles and the right lane on right-hand
drive vehicles. 176
Driving systemsDriving and parking
Page 180 of 362

up
0002 or down 0003beyond the pressure
point.
Every time the cruise control lever is
pressed up 0002or down 0003, the last speed
stored is increased or reduced.
i DISTRONIC PLU Sis not deactivated if you
depress the accelerator pedal.Ify ou
accelerate to overtake, DISTRONIC PLUS
adjusts the vehicle's speed to the last
speed stored after you have finished
overtaking.
Storing the current speed or calling up
a stored speed X
Briefly pull the cruise control lever towards
you 0021.
X Remove your foot from the accelerator
pedal.
DISTRONIC PLUS is activated. The first
time it is activated, the current speed is
stored. Otherwise, it sets the vehicle cruise
speed to the previously stored value.
Setting the specified minimum distance You can set the specified minimum distance
for DISTRONIC PLUS by varying the time span
between one and two seconds. With this
function, you can set the minimum distance
that DISTRONIC PLUS keeps to the vehicle in
front, dependent on vehicle speed. You can
see this distance in the multifunction display
(Y
page 179).
i Make sure that you maintain a sufficient
distance to the vehicle in front and comply
with the minimum distance as required by
law. Adjust the distance to the vehicle in
front if necessary. X
To increase: turn control0003in direction
0022.
DISTRONIC PLUS then maintains a greater
distance between your vehicle and the
vehicle in front.
X To decrease: turn control0003in
direction 0002.
DISTRONIC PLUS then maintains a shorter
distance between your vehicle and the
vehicle in front.
DISTRONIC PLUS displays in the
speedometer When DISTRONIC PLUS is activated, one or
two segments
0003in the set speed range light
up.
i For design reasons, the speed displayed
in the speedometer may differ slightly from
the speed set for DISTRONIC PLUS.
If DISTRONIC PLUS detect savehicle in front,
segments 0003between speed of the vehicle in
front 0002and stored speed 0022light up. 178
Driving systemsDriving and parking
Page 182 of 362

DISTRONIC PLU
Sis automatically
deactivated if:
R you engage the parking brake
R you are driving slower than 15 mph
(25 km/h) and there is no vehicle in front,
or if the vehicle in front is no longer
detected
R ESP ®
intervenes or you deactivate ESP ®
R the transmission is in the P,Ror Nposition
R you pull the cruise control lever towards
you in order to pull awaya nd the front-
passenge rdoor or one of the rear doors is
open
R the vehicle has skidded
If DISTRONIC PLUS is deactivated, you will
hear a warning tone. You will see the
DISTRONIC PLUS Off message in the
multifunction display for approximately five
seconds.
If the vehicle has been stopped by DISTRONIC
PLUS and a malfunction occurs in the system,
the Brake Immediately message appears in
the multifunction display .Depress the brake
pedal immediately so that the vehicle does
not roll away. DISTRONIC PLUS is then
deactivated, and the message disappears.
Tips for driving with DISTRONIC PLUS General notes
The following contains descriptions of certain
road and traffic conditions in which you must
be particularly attentive. In such situations,
brake if necessary. DISTRONIC PLUS is then
deactivated. Cornering, going into and coming out of a
bend The ability of DISTRONIC PLUS to detect
vehicles when cornering is limited. Your
vehicle may brake unexpectedly or late.
Vehicles traveling on
adifferent line DISTRONIC PLUS may not detect vehicles
traveling on a different line. The distance to
the vehicle in fron
twill be too short.
Other vehicles changing lanes 180
Driving systemsDriving and parking
Page 184 of 362
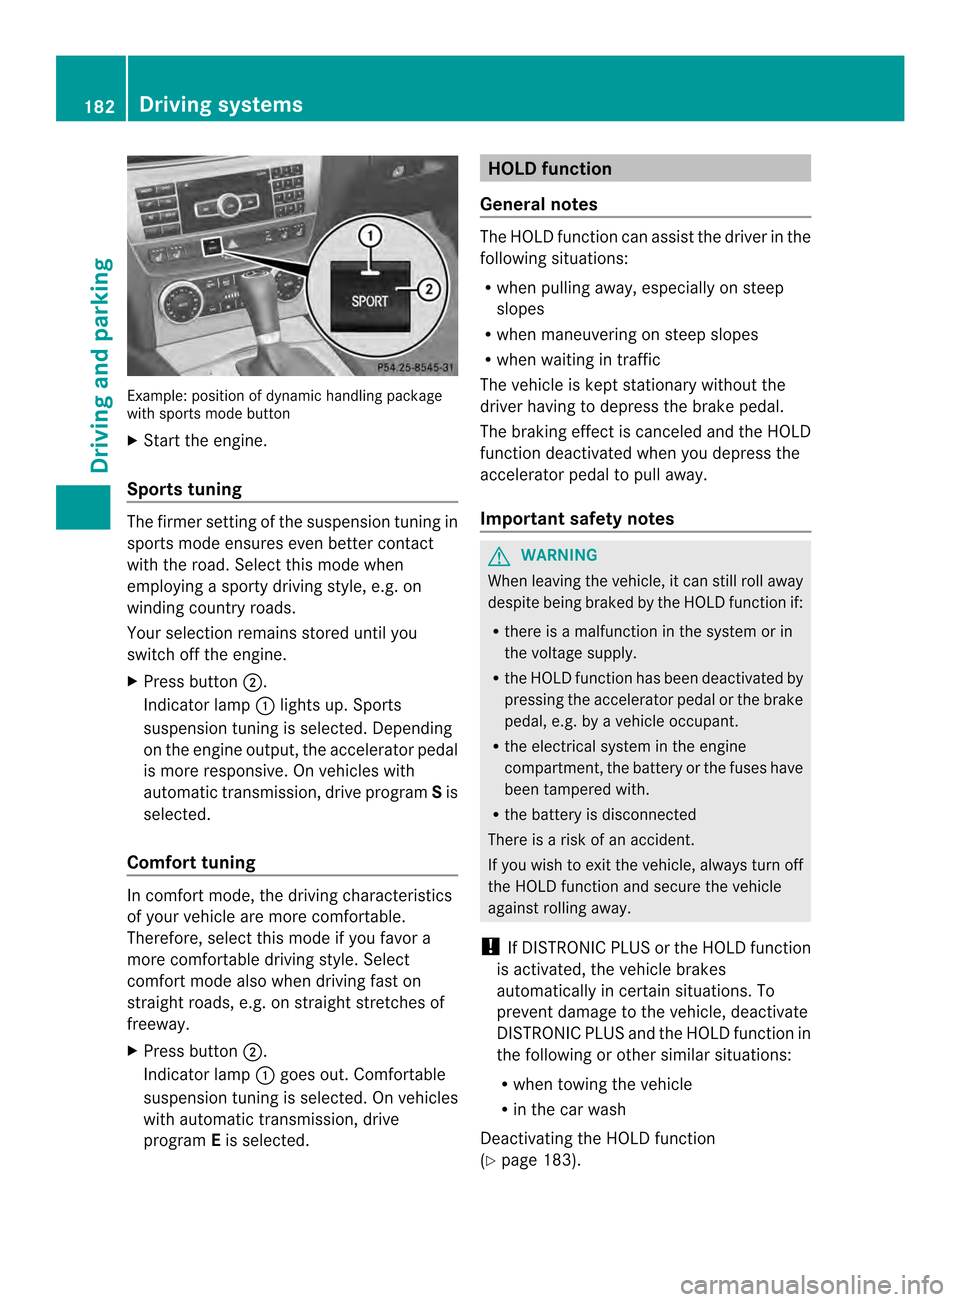
Example: positio
nofdynamic handling package
with sports mode button
X Start the engine.
Sports tuning The firmer setting of the suspension tuning in
sports mode ensures eve nbetter contact
with the road. Select this mode when
employing a sporty driving style, e.g. on
winding country roads.
Your selection remains stored until you
switch off the engine.
X Press button 0003.
Indicator lamp 0002lights up. Sports
suspension tuning is selected. Depending
on the engine output, the accelerator pedal
is more responsive. On vehicles with
automatic transmission, drive program Sis
selected.
Comfort tuning In comfort mode, the driving characteristics
of your vehicle are more comfortable.
Therefore, select this mode if you favor a
more comfortable driving style. Select
comfort mode also when driving fast on
straight roads, e.g. on straight stretches of
freeway.
X
Press button 0003.
Indicator lamp 0002goes out. Comfortable
suspension tuning is selected. On vehicles
with automatic transmission ,drive
program Eis selected. HOLD function
General notes The HOLD function can assist the drive
rinthe
following situations:
R when pulling away, especially on steep
slopes
R when maneuvering on steep slopes
R when waiting in traffic
The vehicle is kept stationary without the
driver having to depress the brake pedal.
The braking effect is canceled and the HOLD
function deactivated when you depress the
accelerator pedal to pull away.
Important safety notes G
WARNING
When leaving the vehicle, it can still roll away
despite being braked by the HOLD function if:
R there is a malfunction in the system or in
the voltage supply.
R the HOLD function has been deactivated by
pressing the accelerator pedal or the brake
pedal, e.g. by a vehicle occupant.
R the electrical system in the engine
compartment, the battery or the fuses have
been tampered with.
R the battery is disconnected
There is a risk of an accident.
If you wish to exit the vehicle, always turn off
the HOLD function and secure the vehicle
against rolling away.
! If DISTRONIC PLUS or the HOLD function
is activated, the vehicle brakes
automatically in certain situations. To
prevent damage to the vehicle, deactivate
DISTRONIC PLUS and the HOLD function in
the following or other similar situations:
R when towing the vehicle
R in the car wash
Deactivating the HOLD function
(Y page 183). 182
Driving systemsDriving and parking
Page 187 of 362

again after the vehicle has been driven a
certain distance. 4MATIC (permanent four-wheel drive)
4MATIC ensures that all four wheels are
permanently driven .Together with ESP ®
, it
improves the traction of your vehicle
whenever a drive wheel spins due to
insufficien tgrip.
If you fail to adapt yourd riving style, 4MATIC
can neither reduce the risk of accident nor
override the laws of physics. 4MATIC cannot
take account of road, weather and traffic
conditions. 4MATIC is only an aid.Y ou are
responsible for the distance to the vehicle in
front, for vehicle speed, for braking in good
time and for staying in your lane.
If a drive wheel spins due to insufficient grip:
R Only depress the accelerator pedal as far
as necessary when pulling away.
R Accelerate less when driving.
! Never tow the vehicle with one axle
raised. This may damage the transfer case.
Damage of this sort is not covered by the
Mercedes-Benz Limited Warranty. All
wheels must remain either on the ground
or be fully raised. Observe the instructions
for towing the vehicle with all wheels in full
contact with the ground.
i In wintry driving conditions, the maximum
effect of 4MATIC can only be achieved if
you use winter tires (M+S tires), with snow
chains if necessary. PARKTRONIC
Important safety notes PARKTRONIC is an electronic parking aid with
ultrasonic sensors. It monitors the area
around you rvehicle using six sensors in the
front bumper and four sensors in the rear
bumper. PARKTRONIC indicates visually and audibly the distance between your vehicle
and an object.
PARKTRONIC is only an aid. It is not a
replacement for your attention to your
immediate surroundings. You are always
responsible for safe maneuvering, parking
and exiting a parking space. When
maneuvering, parking or pulling out of a
parking space, make sure that there are no
persons, animals or objects in the area in
which you are maneuvering.
! When parking, pay particular attention to
objects above or below the sensors, such
as flower pots or trailer drawbars.
PARKTRONIC does not detec tsuch objects
when they are in the immediate vicinity of
the vehicle. You could damag ethe vehicle
or the objects.
The sensors may not detect snow and other
objects that absorb ultrasonic waves.
Ultrasonic sources such as an automatic
car wash, the compressed-air brakes on a
truck or a pneumatic drill could cause
PARKTRONIC to malfunction.
PARKTRONIC may not function correctly on
uneven terrain.
PARKTRONIC is activated automatically when
you:
R switch on the ignition
R shift the transmission to position D,Ror N
R release the parking brake
PARKTRONIC is deactivated at speeds above
11 mph (18 km/h). It is reactivated at lower
speeds. Driving systems
185Driving and parking Z
Page 191 of 362

Use Parking Guidance for parking spaces:
R that are parallel to the direction of travel
R that are on straight roads, not bends
R that are on the same level as the road, i.e.
not on the pavement, for example. Parking
Guidance may not detect flat curbs
Parking tips:
R On narrow roads, drive as close to the
parking space as possible.
R Parking spaces that are littered, overgrown
or partially occupied by trailer drawbars
might be identified incorrectly or not at all.
R Snowfall or heavy rain may lead to a parking
space being measured inaccurately.
R Pay attention to the PARKTRONIC
(Y page 186) warning messages during the
parking procedure.
R When transporting a load which protrudes
from your vehicle, you must not use Parking
Guidance.
R Never use Parking Guidance with snow
chains or an emergency spare wheel
mounted.
R Make sure that the tire pressures are
always correct.T his hasadirec teffect on
the steering instructions.
R The way you rvehicle is positioned in the
parking space after parkin gis dependent
on various factors. These include the
position and shape of the vehicles parked
in front and behind it and the conditions of
the location. In some cases, Parking
Guidance may guide you too far or not far
enough into a parking space. In some
cases, it may also lead you across or onto
the curb. If necessary, cancel the parking
procedure with Parking Guidance.
! If unavoidable, you should drive over
obstacles such as curbs slowly and not at
a sharp angle. Otherwise, you may damage
the wheels or tires. Detecting parking spaces 0002
Detected parking space on the left
0003 Parking symbol
0022 Detected parking space on the right
Parking Guidance is automatically activated
when you drive forwards. The system is
operational at speeds of up to approximately
22 mph (35 km/h). While in operation, the
system independently locates and measures
parking spaces on both sides of the vehicle.
When driving at speeds below 19 mph
(30 km/h), you will see parking symbol 0003as
a status indicator in the instrument cluster.
When a parking space has been detected, an
arrow towards the right 0022or the left 0002also
appears. Parking Guidance only displays
parking spaces on the front-passenger side
as standard. Parking spaces on the driver's
side are displayed as soon as the turn signal
on the driver's side is activated. To park on
the driver's side, you must leave the driver's
side turn signal switched on until you have
engaged reverse gear.
Parking Guidance will only detect parking
spaces:
R that are parallel to the direction of travel
R that are at least 5 ft (1.5 m) wide
R that are at least 4.3 ft (1.3 m) longer than
your vehicle
Ap arking space is displayed while you are
driving past it, and until you are
approximately 50 ft (15 m) away from it. Driving systems
189Driving and parking Z
Page 192 of 362

Parking
X
Stop the vehicle when the parking space
symbol shows the desired parking space in
the instrument cluster.
X Shift the transmission to position R.
The multifunction display shows the
Check Vehicle Surroundings Press 'OK' to Confirm message.
X Press the 000Bbutton on the multifunction
steering wheel to confirm.
The multifunction display switches to
Parking Guidance.
Depending on your distance from the
parking space, the Please Drive Backward message will appear in the
multifunction display. X
If necessary, reverse towards the parking
space. This is indicated by an arrow
pointing backwards.
Continue backing up until you hear a tone.
Stop –the stop position has been reached.
The arrow is white.
The Please Steer Wheel to the Right or
Please Steer Wheel to the Left message appears in the multifunction
display. X
While the vehicle is stationary, turn the
steering wheel in the specified direction until the arrow is white and a warning tone
sounds.
X To reverse into the parking space:
maintain the steering wheel angle and
reverse carefully.
X Stop as soon as you hear a warning tone,
The vehicle has reached the position in
which you need to countersteer.
The Please Steer Wheel to the Left or
Please Steer Wheel to the Right message appears in the multifunction
display.
X To countersteer: while the vehicle is
stationary, turn the steering wheel in the
specified direction until the arrow is white
and a warning tone sounds.
X To reverse into the parking space:
maintain the steering wheel angle and
reverse carefully.
X Stop as soon as you hear a warning tone,
at the latest when PARKTRONIC sounds the
continuous warning tone.
The Parking Guidance Finished message appears in the multifunction
display and a tone sounds. You may be
asked to steer in
adifferent direction and
the nchange gear. In this case, further
displays in the multifunction display will
direct you to the final position.
X Maneuver if necessary.
X Always observe the warning messages
displayed by PARKTRONIC (Y page 186).
Canceling Parking Guidance X
Press the PARKTRONIC button on the
center console (Y page 187).
Parking Guidance is canceled immediately
and PARKTRONIC is deactivated.
Parking Guidance is canceled automatically if
it is no longer possible to guide you into the
parking space, or if a malfunction occurs.
The parking space symbol goes out and a
warning tone sounds. The Parking Guidance Canceled message appears in the
multifunction display. 190
Driving systemsDriving and parking
Page 193 of 362

Rear view camera
General notes 0002
Rear view camera
Rear view camera 0002is an optical parking and
maneuvering aid. It shows the area behind
your vehicle in the COMAND display.
The rea rview camera is located in the handle
strip of the trunk lid.
Important safety notes The rear view camera is only an aid. It is not
a replacement for your attention to your
immediate surroundings. You are always
responsible for safe maneuvering and
parking. When maneuverin gorparking, make
sure that there are no persons, animals or
objects in the area in which you are
maneuvering.
Under the following circumstances, the rear
view camera will no tfunction, or will function
in a limited manner:
R if the trunk lid is open
R in heavy rain, snow or fog
R at night or in very dark places
R if the camera is exposed to very bright light
R if the area is lit by fluorescent light or LED
lighting (the display may flicker)
R if there is a sudde nchange in temperature,
e.g. when driving into a heated garage in
winter R
if the camera lens is dirty or obstructed
R if the rear of your vehicle is damaged. In
this event, have the camera position and
setting checked at a qualified specialist
workshop
The field of vision and other functions of the
rear view camera may be restricted due to
additional accessories on the rear of the
vehicle (e.g. license plate holder, bicycle
rack).
View through the camera The area behind the vehicle is displayed as a
mirror image, as in the rear view mirror.
The rear view camera may show a distorted
view of obstacles, show them incorrectly or
not at all. The rear view camera does not show
objects in the following positions:
R
very close to the rear bumper
R under the rear bumper
R in the area immediately above the tailgate
handle
! Objects not at ground level may appearto
be further away than they actually are, e.g.:
R the bumper of a parked vehicle
R the drawbar of a trailer
R the ball coupling of a trailer tow hitch
R the rear section of an HGV
R a slanted post
Use the guidelines only for orientation.
Approach objects no further than the
bottom-most guideline.
Activating the rear view camera X
Make sure that the SmartKey is in position
2in the ignition lock.
X Make sure that the rear view camera
function is selected in COMAND (see the
separate operating instructions for
COMAND).
X Engage reverse gear.
The area behind the vehicle is shown in the
COMAND display. Driving systems
191Driving and parking Z