2014 MERCEDES-BENZ C-CLASS ESTATE fuse box location
[x] Cancel search: fuse box locationPage 15 of 489

Flat tyre
Changing a wheel/fitting the
spare wheel .................................. .441
MOExtended tyres ......................... 413
Preparing the vehicle ..................... 412
TIREFIT kit ...................................... 414
see Emergency spare wheel
Floormat ............................................. 391
Foglamps (extended range) .............. 139
Fording
On flooded roads ........................... 219
Frequencies
Mobile phone ................................. 468
Two-way radio ................................ 468
Front-passenger front airbag deac-
tivation
Display message ............................ 330
Front-passenger front airbag deac-
tivation system
Operation ......................................... 54
Problems ......................................... 59
System self-test ............................... 57
Fuel
Additives ........................................ 473
Consumption information .............. 474
Consumption statistics .................. 301
Displaying the current consump-
tion ................................................ 300
Displaying the range ..................... .300
Driving tips ................................... .215
E10 ................................................ 472
Fuel gauge ....................................... 34
Grade (petrol) ................................ 472
Important safety notes .................. 471
Low outside temperatures ............. 473
Problem (malfunction) ................... 207
Quality (diesel )............................... 473
Refuelling ....................................... 204
Tank content/reserve fue l............. 471
Fuel consumption (Audio 20) ........... 279
Fuel consumption (COMAND
Online) ................................................ 279
Fuel filler flap
Opening ......................................... 206
Fuel filter (white display message) .. 337Fuel level
Calling up the range (on-board
computer) ...................................... 300
Gaug e.............................................. 34
Fuel tank
Capacity ........................................ 471
Problem (malfunction) ................... 207
Fuses
Allocation chart ............................. 430
Before changing ............................. 428
Dashboard fuse box ....................... 429
Fuse box in the engine compart-
ment .............................................. 429
Fuse box in the front-passenger
footwell .......................................... 429
Fuse box in the luggage compart-
ment .............................................. 430
Important safety notes .................. 428 G
Generated electrical energy (Audio 20) ...................................................... 279
Generated electrical energy
(COMAND Online) .............................. 279
Genuine Mercedes-Benz parts ........... 24
Glove compartment .......................... 371 H
HANDS-FREE ACCESS ....................... 103
Hazard warning lamps ...................... 137
Head restraints
Adjusting ....................................... 121
Adjusting (electrically) ................... 122
Adjusting (manually) ...................... 122
Adjusting (rear) .............................. 122
Fitting/removing (rear) .................. 122
Head-up display
Adjusting the brightness ................ 312
Function/note s............................. 297
Important safety notes .................. 297
Setting the position ....................... 312
Storing settings (memory func-
tion) ............................................... 131
Switching on or off ......................... 298
Switching the display on/off ......... 312 12
Index
Page 432 of 489

X
Make sure that the ignition is switched off
(Y page 185).
or
X When using the key, turn the key to position
0 in the ignition lock and remove it
(Y page 185).
All indicator lamps in the instrument cluster
must be off.
The fuses are located in various fuse boxes:
R fuse box on the driver's side of the dash-
board
R fuse box in the front-passenger footwell
R fuse box in the engine compartment on the
driver's side
The fuse allocation chart is on the fuse box in
the luggage compartment (Y page 430).Dashboard fuse box
! Do not use a pointed object such as a
screwdriver to open the cover in the dash-
board. You could damage the dashboard or
the cover.
! Make sure that no moisture can enter the
fuse box when the cover is open.
! When closing the cover, make sure that it
is lying correctly on the fuse box. Moisture seeping in or dirt could otherwise impair
the operation of the fuses. X
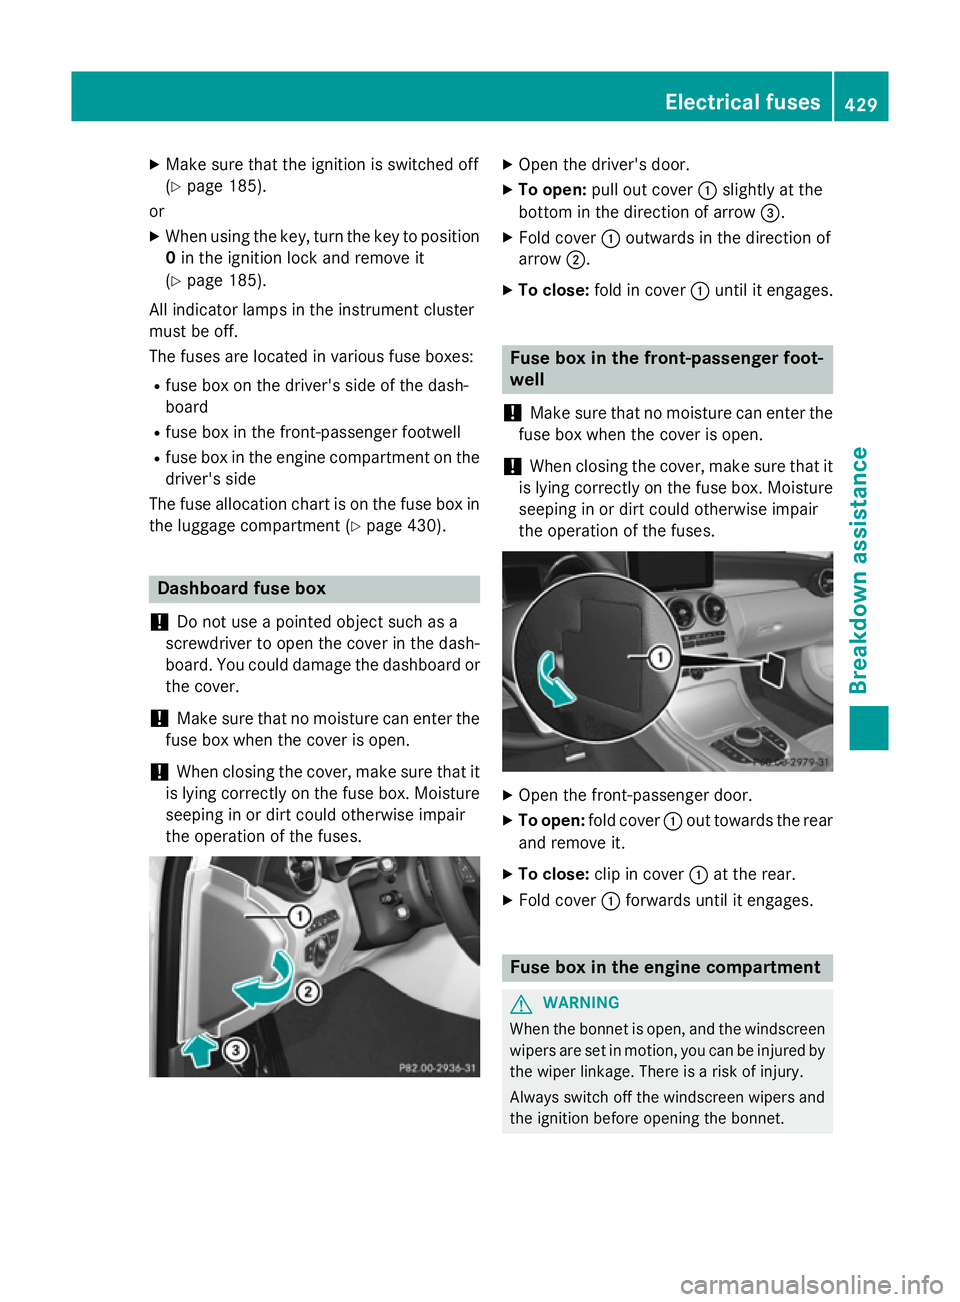
Open the driver's door.
X To open: pull out cover :slightly at the
bottom in the direction of arrow =.
X Fold cover :outwards in the direction of
arrow ;.
X To close: fold in cover :until it engages. Fuse box in the front-passenger foot-
well
! Make sure that no moisture can enter the
fuse box when the cover is open.
! When closing the cover, make sure that it
is lying correctly on the fuse box. Moisture seeping in or dirt could otherwise impair
the operation of the fuses. X
Open the front-passenger door.
X To open: fold cover :out towards the rear
and remove it.
X To close: clip in cover :at the rear.
X Fold cover :forwards until it engages. Fuse box in the engine compartment
G
WARNING
When the bonnet is open, and the windscreen wipers are set in motion, you can be injured by
the wiper linkage. There is a risk of injury.
Always switch off the windscreen wipers and
the ignition before opening the bonnet. Electrical fuses
429Breakdown assistance Z
Page 433 of 489

!
Make sure that no moisture can enter the
fuse box when the cover is open.
! When closing the cover, make sure that it
is lying correctly on the fuse box. Moisture seeping in or dirt could otherwise impair
the operation of the fuses. X
Open the bonnet.
X To open: press safety clips :on the cover
together.
X Remove fuse box cover ;upwards. X
Remove any existing moisture from the
fuse box using a dry cloth.
X Loosen screws =, fold up fuse box lid ?
and remove it.
X To close: check whether the seal is posi-
tioned correctly in lid ?.
X Insert lid ?into the bracket at the rear of
the fuse box.
X Fold down lid ?of the fuse box and tighten
screws =. Fuse box in the luggage compartment
! Make sure that no moisture can enter the
fuse box when the cover is open.
! When closing the cover, make sure that it
is lying correctly on the fuse box. Moisture seeping in or dirt could otherwise impair
the operation of the fuses. X
Open the tailgate.
X Swing the luggage compartment floor
upwards (Y page 380).
X To open: swing cover :upwards in the
direction of the arrow.
X To close: fold down cover :in the oppo-
site direction to the arrow.
Make sure that the cover is in the recess
provided for it.
i The fuse allocation chart is in a recess on
the side of the fuse box. You can find the
corresponding fuse rating and fuse type on the fuse allocation chart. 430
Electrical fusesBreakdown assistance