2014 MERCEDES-BENZ C-CLASS ESTATE park assist
[x] Cancel search: park assistPage 82 of 489
If COLLISION PREVENTION ASSIST PLUS
detects that there is a risk of a collision, you
will be warned visually and acoustically. If you do not react to the visual and audible collision
warning, autonomous braking can be initiated in critical situations. If you apply the brake
yourself in a critical situation, the COLLISION
PREVENTION ASSIST PLUS adaptive Brake
Assist assists you.
Important safety notes In particular, the detection of obstacles can
be impaired in the case of:
R dirt on the sensors or obscured sensors
R snow or heavy rain
R interference by other radar sources
R strong radar reflections, for example, in
multi-storey car parks
R a narrow vehicle travelling in front, e.g. a
motorcycle
R a vehicle travelling in front on a different
line
R new vehicles or after a service on the COL-
LISION PREVENTION ASSIST PLUS system
Please observe the information in the sec-
tion on running-in the vehicle
(Y page 184).
Following damage to the front end of the vehi- cle, have the configuration and operation of
the radar sensor checked at a qualified spe-
cialist workshop. This also applies to colli-
sions at slow speeds where there is no visible
damage to the front of the vehicle.
Distance warning function Important safety notes
i Observe the "Important safety notes" sec-
tion for driving safety systems (Y page 76).G
WARNING
The distance warning function does not react:
R to people or animals
R to oncoming vehicles R
to crossing traffic
R when cornering
Thus, the distance warning function cannot
provide a warning in all critical situations.
There is a risk of an accident.
Always pay careful attention to the traffic sit- uation and be ready to brake. G
WARNING
The distance warning function cannot always
clearly identify objects and complex traffic
situations.
In such cases, the distance warning function
may:
R give an unnecessary warning
R not give a warning
There is a risk of an accident.
Always pay careful attention to the traffic sit-
uation; do not rely on the distance warning
function alone.
Function X To activate/deactivate: activate or deac-
tivate the distance warning function in the
on-board computer (Y page 310).
If the distance warning function is deactiva-
ted, the æsymbol appears in the assis-
tance graphics display.
The distance warning function can help you to
minimise the risk of a collision with the vehi-
cle in front or reduce the effects of such a
collision. If the distance warning function
detects that there is a risk of a collision, you
will be warned visually and acoustically.
The distance warning function issues a warn- ing at speeds:
R of approximately 30 km/h or more, if, over
several seconds, the distance maintained
to the vehicle travelling in front is insuffi-
cient. The ·distance warning lamp
then lights up in the instrument cluster.
R of approximately 7 km/h or more, if you
rapidly approach a vehicle in front. An inter-
mittent warning tone will then sound and Driving safety systems
79Safety Z
Page 83 of 489
the
· distance warning lamp will light
up in the instrument cluster.
X Brake immediately in order to increase the
distance from the vehicle in front.
or
X Take evasive action provided it is safe to do
so.
Due to the nature of the system, particularly
complicated but non-critical driving condi-
tions may also cause the system to display a warning.
With the help of the radar sensor system, the
distance warning function can detect obsta-
cles that are in the path of your vehicle for an
extended period of time.
Up to a speed of approximately 70 km/h, the distance warning function can also react to
stationary obstacles, such as stopped or
parked vehicles.
If you approach an obstacle and the distance
warning function detects a risk of a collision,
the system will alert you both visually and
acoustically.
Autonomous braking function If the driver does not react to the distance
warning signal in a critical situation, COLLI-
SION PREVENTION ASSIST PLUS can assist
with the autonomous braking function.
The autonomous braking function:
R gives the driver more time to react to criti-
cal driving situations
R can help the driver to avoid an accident or
R reduces the effects of an accident
Vehicles without DISTRONIC PLUS: the
autonomous braking function is available in
the following speed ranges:
R 7 - 105 km/h for moving objects
R 7 - 50 km/h for stationary objects Vehicles with DISTRONIC PLUS:
the auton-
omous braking function is available in the fol-
lowing speed ranges:
R 7 - 200 km/h for moving objects
R 7 - 50 km/h for stationary objects
If the autonomous braking function demands
particularly high braking force, preventative
passenger protection measures (PRE-SAFE ®
)
are activated simultaneously.
Adaptive Brake Assist i
Observe the "Important safety notes" sec-
tion (Y page 76).
Adaptive Brake Assist provides braking assis- tance in hazardous situations at speeds
above 7 km/h. It uses radar sensor technol-
ogy to assess the traffic situation. G
WARNING
Adaptive Brake Assist cannot always clearly
identify objects and complex traffic situa-
tions.
In such cases, Adaptive Brake Assist can:
R intervene unnecessarily
R not intervene
There is a risk of an accident.
Always pay careful attention to the traffic sit- uation and be ready to brake. Terminate the
intervention in a non-critical driving situation. G
WARNING
Adaptive Brake Assist does not react:
R to people or animals
R to oncoming vehicles
R to crossing traffic
R when cornering
As a result, the Adaptive Brake Assist may not intervene in all critical conditions. There is a
risk of an accident.
Always pay careful attention to the traffic sit- uation and be ready to brake.
Due to the nature of the system, particularly
complicated but non-critical driving condi- 80
Driving safety systemsSafety
Page 192 of 489
Automatic transmission
G
WARNING
If the engine speed is above the idling speed
and you engage transmission position Dor R,
the vehicle could pull away suddenly. There is a risk of an accident.
When engaging transmission position Dor R,
always firmly depress the brake pedal and do not simultaneously accelerate.
! If a warning tone sounds and the
Release park. brake Release park. brake message appears
in the multifunction display, the parking
brake is still applied. Release the parking
brake.
X Depress the brake pedal and keep it
depressed.
X Shift the transmission to position Dor R.
X Release the brake pedal.
X Carefully depress the accelerator pedal.
The electric parking brake (Y page 213) is
automatically released.
The red !indicator lamp in the instru-
ment cluster goes out.
It is only possible to shift the transmission
from position Pto the desired position if you
depress the brake pedal. Only then is the
parking lock released. If the brake pedal is not
depressed, the DIRECT SELECT lever can still be moved but the parking lock remains
engaged.
The vehicle locks centrally once you have
pulled away. The locking knobs in the doors
drop down.
You can open the doors from the inside at any
time.
You can also deactivate the automatic locking feature; see the Digital Owner's Manual.
i Upshifts take place at higher engine
speeds after a cold start. This helps the
catalytic converter to reach its operating
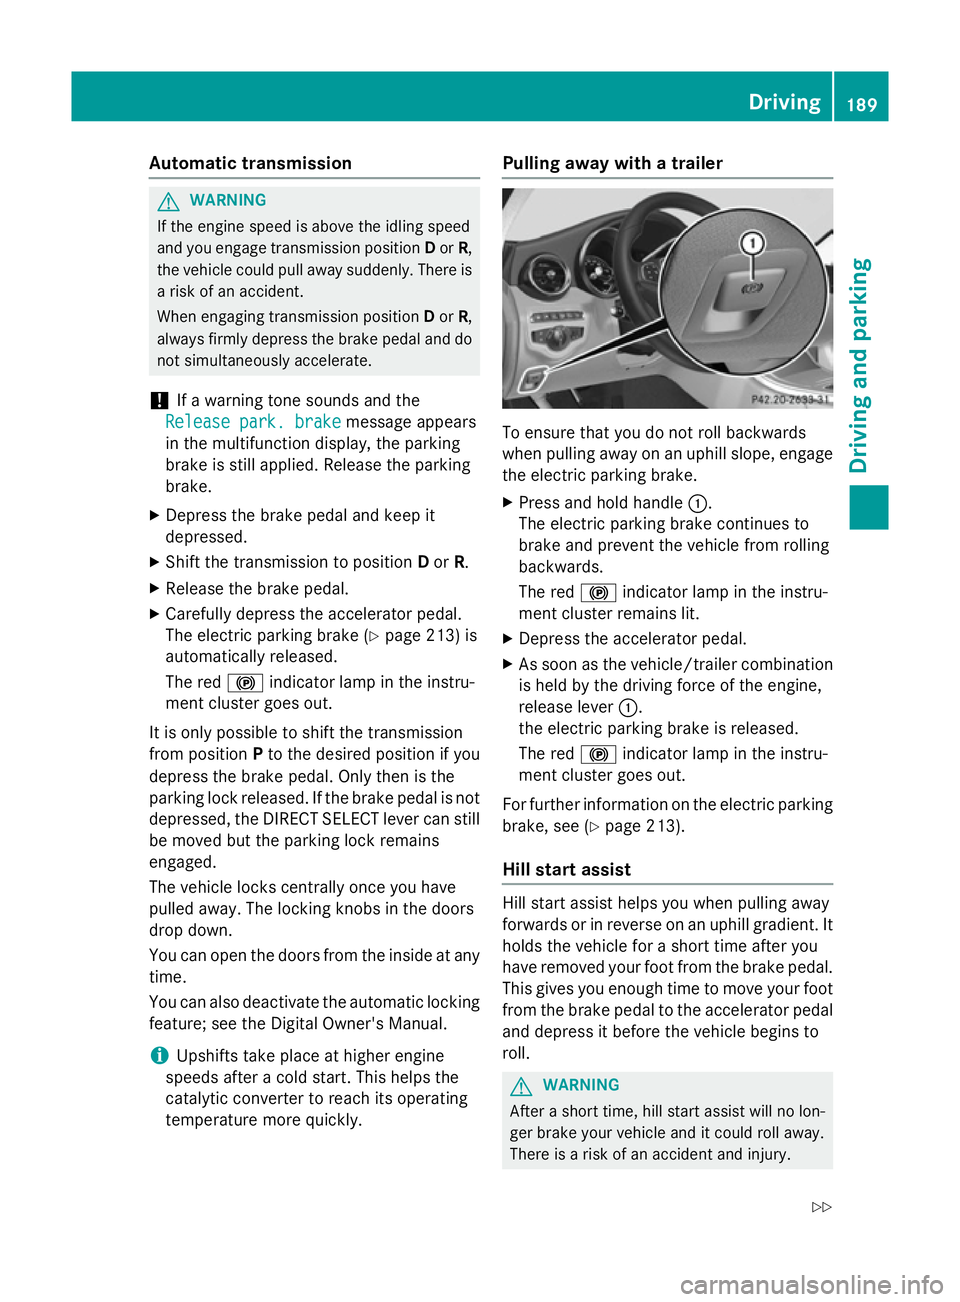
temperature more quickly. Pulling away with a trailer
To ensure that you do not roll backwards
when pulling away on an uphill slope, engage
the electric parking brake.
X Press and hold handle :.
The electric parking brake continues to
brake and prevent the vehicle from rolling
backwards.
The red !indicator lamp in the instru-
ment cluster remains lit.
X Depress the accelerator pedal.
X As soon as the vehicle/trailer combination
is held by the driving force of the engine,
release lever :.
the electric parking brake is released.
The red !indicator lamp in the instru-
ment cluster goes out.
For further information on the electric parking
brake, see (Y page 213).
Hill start assist Hill start assist helps you when pulling away
forwards or in reverse on an uphill gradient. It
holds the vehicle for a short time after you
have removed your foot from the brake pedal.
This gives you enough time to move your foot from the brake pedal to the accelerator pedal and depress it before the vehicle begins to
roll. G
WARNING
After a short time, hill start assist will no lon-
ger brake your vehicle and it could roll away.
There is a risk of an accident and injury. Driving
189Driving and pa rking
Z
Page 193 of 489
Therefore, quickly move your foot from the
brake pedal to the accelerator pedal. Never
leave the vehicle when it is held by hill start
assist.
X Remove your foot from the brake pedal.
The vehicle is then held for about a second.
X Pull away.
Hill start assist is not active if: R you are pulling away on a level road or a
downhill gradient.
R on vehicles with automatic transmission,
the transmission is in position N.
R the electric parking brake is applied.
R ESP ®
is malfunctioning. ECO start/stop function
Introduction The ECO start/stop function switches the
engine off automatically if the vehicle is stop-
ped under certain conditions.
When pulling away again, the engine starts
automatically. The ECO start/stop function
thereby helps you to reduce the fuel con-
sumption and emissions of your vehicle.
Important safety notes G
WARNING
If the engine is switched off automatically and you exit the vehicle, the engine is restarted
automatically. The vehicle may begin moving. There is a risk of accident and injury.
If you wish to exit the vehicle, always turn off
the ignition and secure the vehicle against
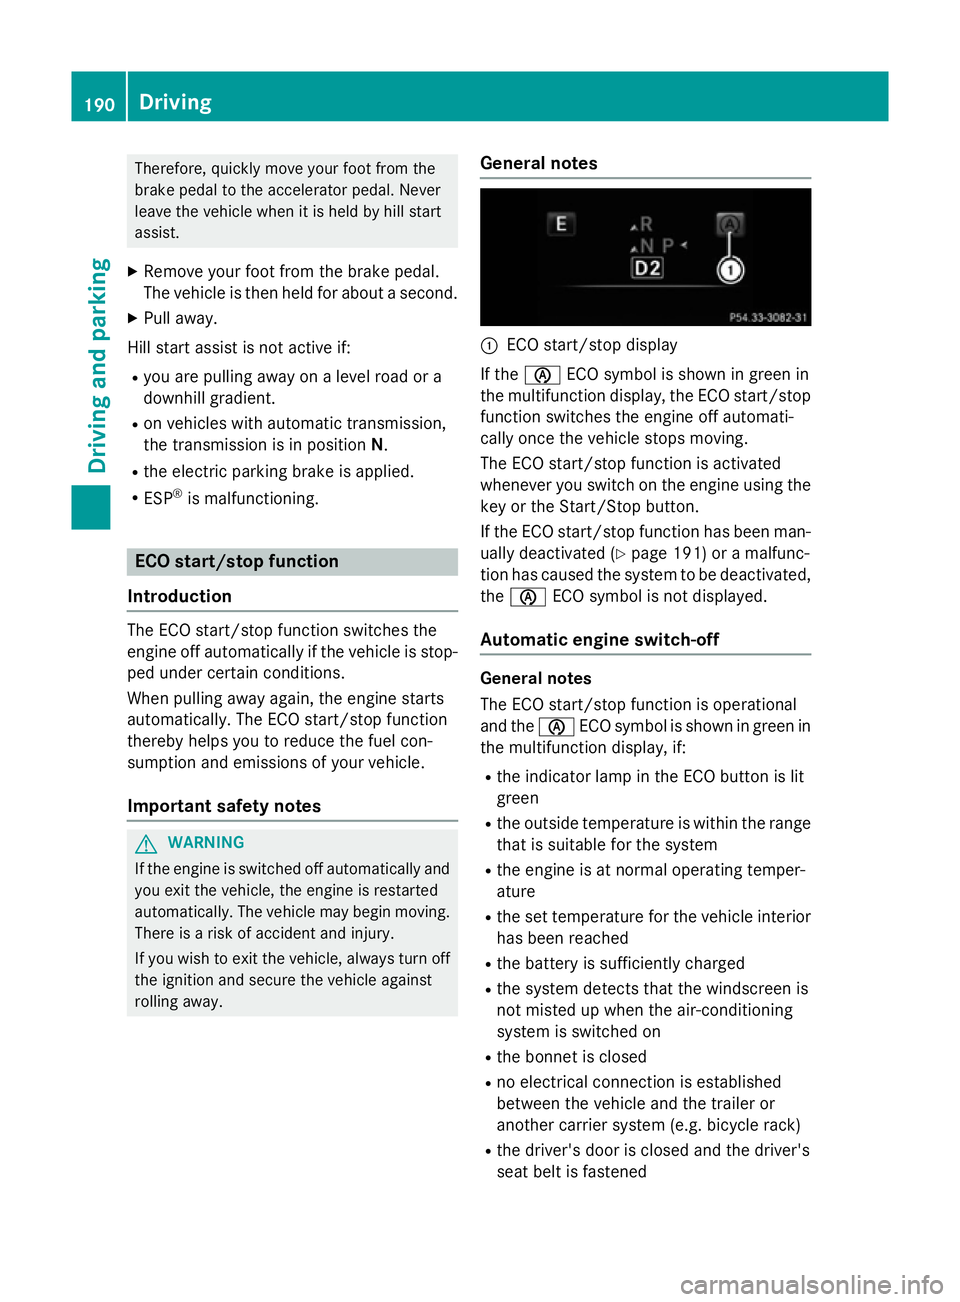
rolling away. General notes :
ECO start/stop display
If the è ECO symbol is shown in green in
the multifunction display, the ECO start/stop
function switches the engine off automati-
cally once the vehicle stops moving.
The ECO start/stop function is activated
whenever you switch on the engine using the
key or the Start/Stop button.
If the ECO start/stop function has been man- ually deactivated (Y page 191) or a malfunc-
tion has caused the system to be deactivated, the è ECO symbol is not displayed.
Automatic engine switch-off General notes
The ECO start/stop function is operational
and the
èECO symbol is shown in green in
the multifunction display, if:
R the indicator lamp in the ECO button is lit
green
R the outside temperature is within the range
that is suitable for the system
R the engine is at normal operating temper-
ature
R the set temperature for the vehicle interior
has been reached
R the battery is sufficiently charged
R the system detects that the windscreen is
not misted up when the air-conditioning
system is switched on
R the bonnet is closed
R no electrical connection is established
between the vehicle and the trailer or
another carrier system (e.g. bicycle rack)
R the driver's door is closed and the driver's
seat belt is fastened 190
DrivingDriving and parking
Page 198 of 489
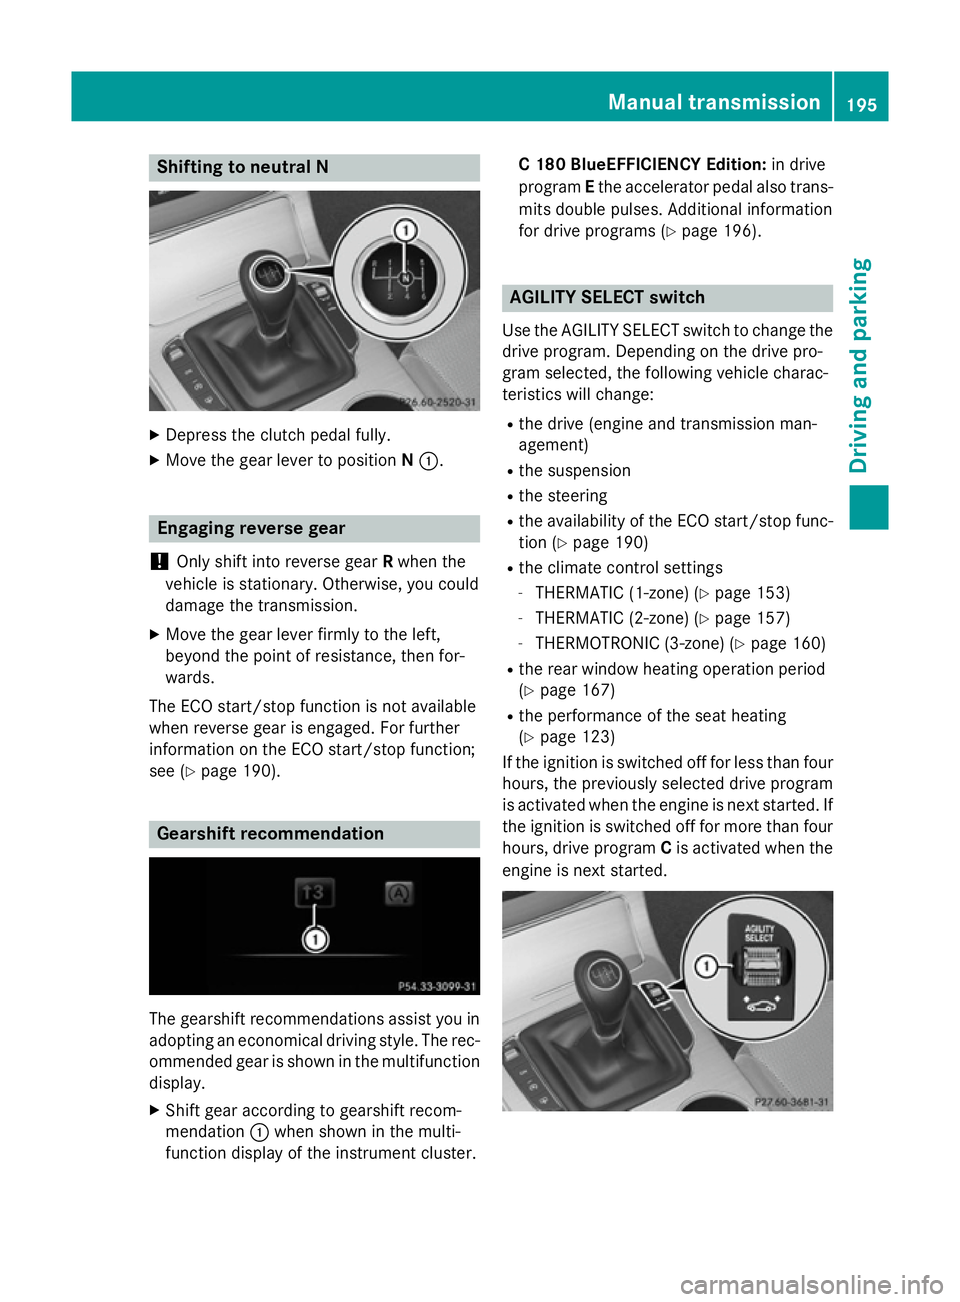
Shifting to neutral N
X
Depress the clutch pedal fully.
X Move the gear lever to position N:. Engaging reverse gear
! Only shift into reverse gear
Rwhen the
vehicle is stationary. Otherwise, you could
damage the transmission.
X Move the gear lever firmly to the left,
beyond the point of resistance, then for-
wards.
The ECO start/stop function is not available
when reverse gear is engaged. For further
information on the ECO start/stop function;
see (Y page 190). Gearshift recommendation
The gearshift recommendations assist you in
adopting an economical driving style. The rec- ommended gear is shown in the multifunction
display.
X Shift gear according to gearshift recom-
mendation :when shown in the multi-
function display of the instrument cluster. C 180 BlueEFFICIENCY Edition:
in drive
program Ethe accelerator pedal also trans-
mits double pulses. Additional information
for drive programs (Y page 196). AGILITY SELECT switch
Use the AGILITY SELECT switch to change the drive program. Depending on the drive pro-
gram selected, the following vehicle charac-
teristics will change:
R the drive (engine and transmission man-
agement)
R the suspension
R the steering
R the availability of the ECO start/stop func-
tion (Y page 190)
R the climate control settings
- THERMATIC (1-zone) (Y page 153)
- THERMATIC (2-zone) (Y page 157)
- THERMOTRONIC (3-zone) (Y page 160)
R the rear window heating operation period
(Y page 167)
R the performance of the seat heating
(Y page 123)
If the ignition is switched off for less than four
hours, the previously selected drive program
is activated when the engine is next started. If the ignition is switched off for more than fourhours, drive program Cis activated when the
engine is next started. Manual transmission
195Driving and parking Z
Page 206 of 489
Using the steering wheel gearshift paddles,
you can temporarily change gear yourself.
The transmission must be in position D.
Activating X
Shift the transmission to position D.
X Pull the left or right steering wheel gearshift
paddle (Y page 202).
Manual gearshifting is activated tempora-
rily. The selected gear appears in the mul-
tifunction display.
Further information on activating manual
gearshifting in hybrid vehicles (Y page 281).
Shifting gears Pulling on the left or right gear shift paddle
allows you to shift gears yourself for a limited
time. Depending on which gearshift paddle is pulled, the automatic transmission immedi-
ately shifts into the next gear up or down, if
permitted.
X To shift up: pull the right-hand steering
wheel gearshift paddle (Y page 202).
The automatic transmission shifts up to the
next gear.
If the maximum engine speed on the cur-
rently engaged gear is reached and you
continue to accelerate, the automatic
transmission automatically shifts up in
order to prevent engine damage.
X To shift down: pull on the left-hand steer-
ing wheel gearshift paddle (Y page 202).
The automatic transmission shifts down to
the next gear.
If the engine exceeds the maximum engine speed when shifting down, the automatic
transmission protects against engine dam- age by not shifting down.
Automatic downshifting occurs when
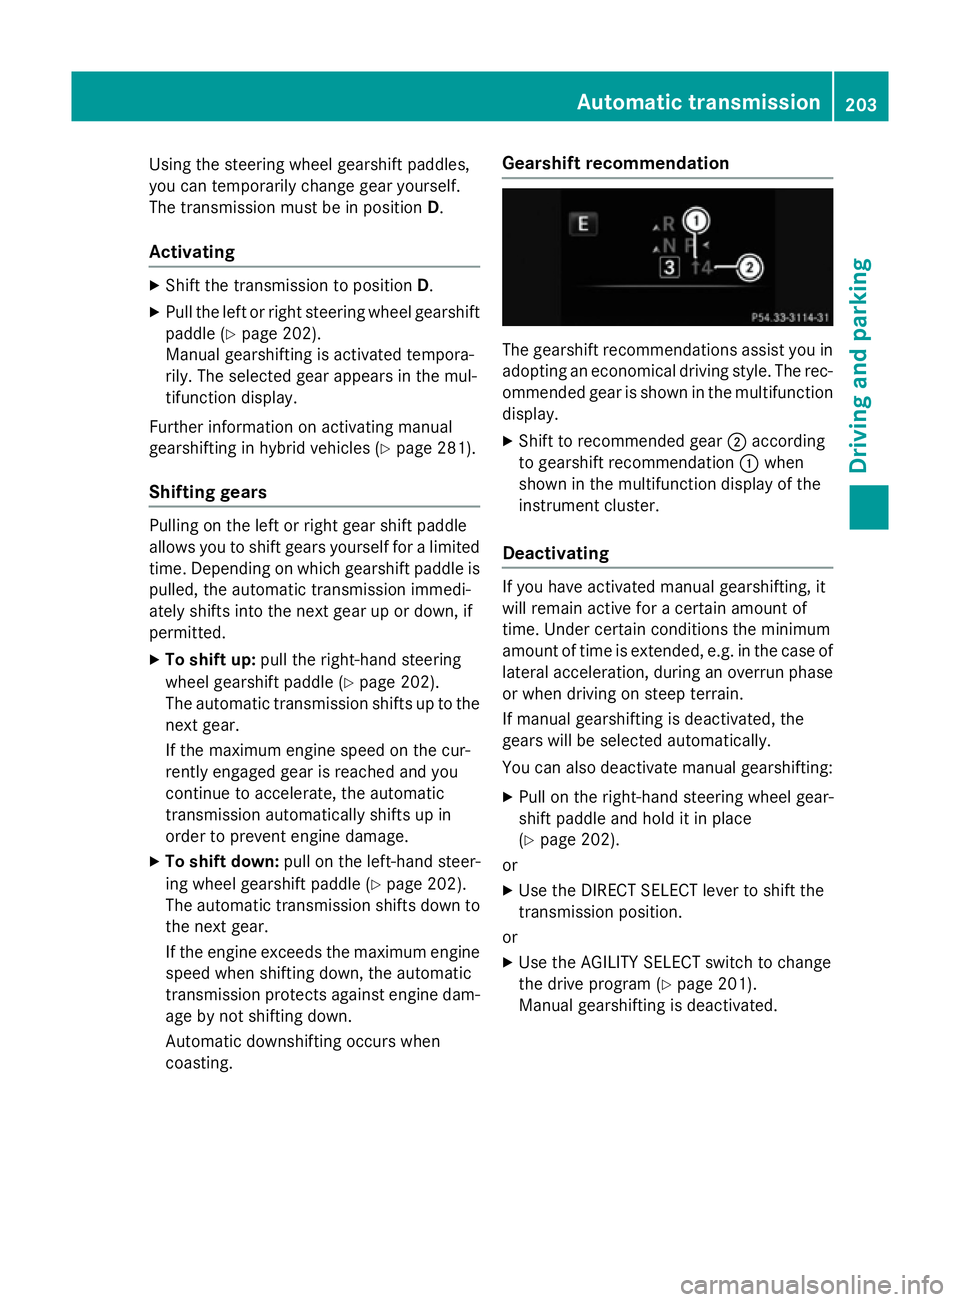
coasting. Gearshift recommendation The gearshift recommendations assist you in
adopting an economical driving style. The rec- ommended gear is shown in the multifunction
display.
X Shift to recommended gear ;according
to gearshift recommendation :when
shown in the multifunction display of the
instrument cluster.
Deactivating If you have activated manual gearshifting, it
will remain active for a certain amount of
time. Under certain conditions the minimum
amount of time is extended, e.g. in the case of
lateral acceleration, during an overrun phase
or when driving on steep terrain.
If manual gearshifting is deactivated, the
gears will be selected automatically.
You can also deactivate manual gearshifting:
X Pull on the right-hand steering wheel gear-
shift paddle and hold it in place
(Y page 202).
or
X Use the DIRECT SELECT lever to shift the
transmission position.
or X Use the AGILITY SELECT switch to change
the drive program (Y page 201).
Manual gearshifting is deactivated. Automatic transmission
203Driving and parking Z
Page 217 of 489
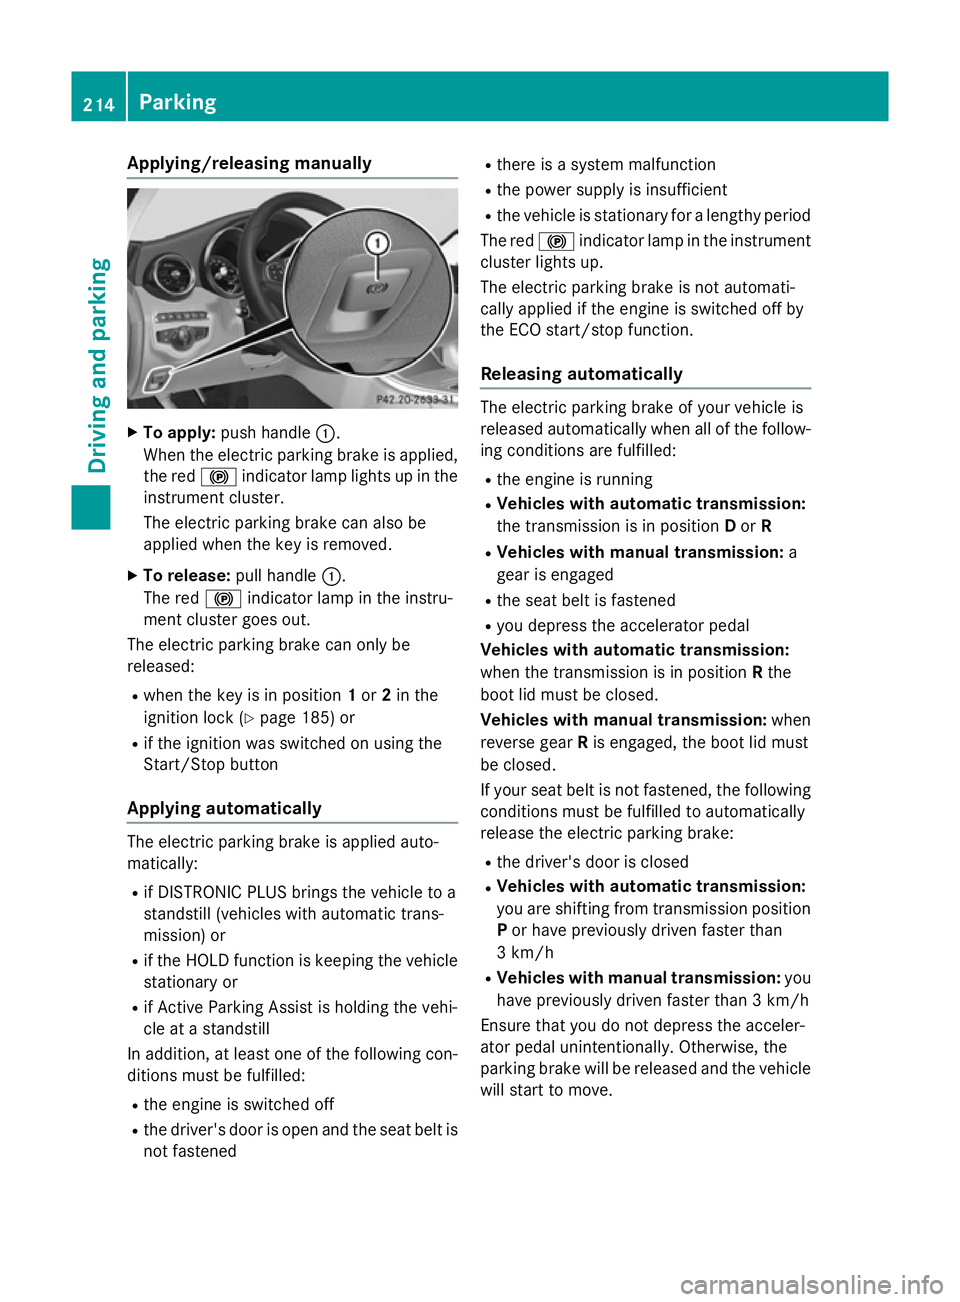
Applying/releasing manually
X
To apply: push handle :.
When the electric parking brake is applied, the red !indicator lamp lights up in the
instrument cluster.
The electric parking brake can also be
applied when the key is removed.
X To release: pull handle:.
The red !indicator lamp in the instru-
ment cluster goes out.
The electric parking brake can only be
released:
R when the key is in position 1or 2in the
ignition lock (Y page 185) or
R if the ignition was switched on using the
Start/Stop button
Applying automatically The electric parking brake is applied auto-
matically:
R if DISTRONIC PLUS brings the vehicle to a
standstill (vehicles with automatic trans-
mission) or
R if the HOLD function is keeping the vehicle
stationary or
R if Active Parking Assist is holding the vehi-
cle at a standstill
In addition, at least one of the following con-
ditions must be fulfilled:
R the engine is switched off
R the driver's door is open and the seat belt is
not fastened R
there is a system malfunction
R the power supply is insufficient
R the vehicle is stationary for a lengthy period
The red !indicator lamp in the instrument
cluster lights up.
The electric parking brake is not automati-
cally applied if the engine is switched off by
the ECO start/stop function.
Releasing automatically The electric parking brake of your vehicle is
released automatically when all of the follow-
ing conditions are fulfilled:
R the engine is running
R Vehicles with automatic transmission:
the transmission is in position Dor R
R Vehicles with manual transmission: a
gear is engaged
R the seat belt is fastened
R you depress the accelerator pedal
Vehicles with automatic transmission:
when the transmission is in position Rthe
boot lid must be closed.
Vehicles with manual transmission: when
reverse gear Ris engaged, the boot lid must
be closed.
If your seat belt is not fastened, the following conditions must be fulfilled to automatically
release the electric parking brake:
R the driver's door is closed
R Vehicles with automatic transmission:
you are shifting from transmission position
P or have previously driven faster than
3 km/h
R Vehicles with manual transmission: you
have previously driven faster than 3 km/h
Ensure that you do not depress the acceler-
ator pedal unintentionally. Otherwise, the
parking brake will be released and the vehicle will start to move. 214
ParkingDriving and pa
rking
Page 218 of 489
Emergency braking
The vehicle can also be braked during an
emergency by using the electric parking
brake.
X While driving, press handle :of the elec-
tric parking brake (Y page 213).
The vehicle is braked as long as you keep
handle :of the electric parking brake
depressed. The longer the electric parking
brake handle :is depressed, the greater the
braking force.
During braking:
R a warning tone sounds
R the Release parking brake
Release parking brake message
appears
R the red !indicator lamp in the instru-
ment cluster flashes
When the vehicle has been braked to a stand- still, the electric parking brake is applied. Parking up the vehicle
If you leave the vehicle parked up for longer
than four weeks, the battery may be damaged by exhaustive discharging and further dam-
aged in the event of this occurring again.
X Disconnect the battery or connect it to a
trickle charger.
i You can obtain information about trickle
chargers from a qualified specialist work-
shop.
If you leave the vehicle parked up for longer
than six weeks, it may suffer from lack of use.
X Visit a qualified specialist workshop and
seek advice.
Hybrid vehicles: observe the important
safety notes on the high-voltage battery
(Y page 273). Driving tips
General driving tips
Important safety notes G
WARNING
If you switch off the ignition while driving,
safety-relevant functions are only available
with limitations, or not at all. This could affect, for example, the power steering and the brake
boosting effect. You will require considerably
more effort to steer and brake. There is a risk of an accident.
Do not switch off the ignition while driving.
Drive sensibly – save fuel Observe the following tips to save fuel:
X The tyres should always be inflated to the
recommended tyre pressure.
X Remove unnecessary loads.
X Remove roof racks when they are not nee-
ded.
X Warm up the engine at low engine speeds.
X Avoid frequent acceleration or braking.
X Have all maintenance work carried out as
indicated by the service intervals in the
Service Booklet or by the service interval
display.
Fuel consumption also increases when driv-
ing in cold weather, in stop-start traffic, on
short journeys and in hilly terrain. ECO display
The ECO display shows you how economical
your driving style is. The ECO display assists
you in achieving the most economical driving
style for the selected settings and prevailing
conditions. Consumption can be significantly influenced by your driving style. Driving tips
215Driving and parking Z