2014 MERCEDES-BENZ C-CLASS ESTATE key battery
[x] Cancel search: key batteryPage 139 of 489
X
Press the Rbutton.
The yellow Rindicator lamp in the
instrument cluster lights up.
X To switch off the rear foglamp: press the
R button.
The yellow Rindicator lamp in the
instrument cluster goes out.
Side lamps ! If the battery has been excessively dis-
charged, the side lamps or parking lamps
are automatically switched off to enable
the next engine start. Always park your
vehicle safely and sufficiently lit according
to legal standards. Avoid the continuous
use of the Tside lamps for several
hours. If possible, switch on the Xright
or the Wleft parking lamp.
X To switch on: turn the light switch to T.
The green Tindicator lamp in the instru-
ment cluster lights up.
Parking lamps
Switching on the parking lamps ensures that
the corresponding side of the vehicle is illu-
minated.
X To switch on the parking lamps: the key
is not in the ignition lock or it is in posi-
tion 0.
X Turn the light switch to W(left-hand side
of the vehicle) or X(right-hand side of
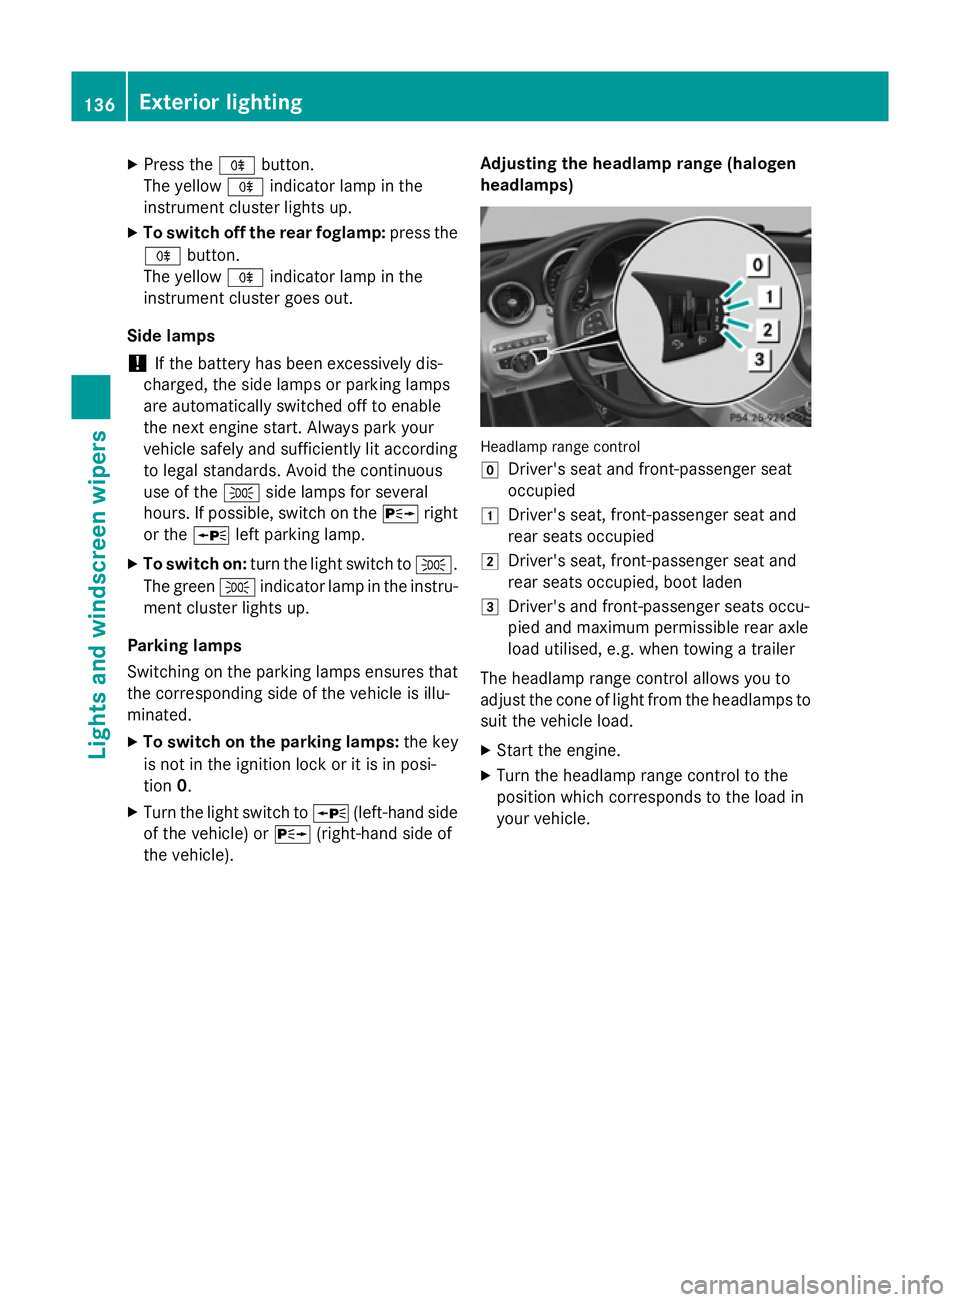
the vehicle). Adjusting the headlamp range (halogen
headlamps) Headlamp range control
g
Driver's seat and front-passenger seat
occupied
1 Driver's seat, front-passenger seat and
rear seats occupied
2 Driver's seat, front-passenger seat and
rear seats occupied, boot laden
3 Driver's and front-passenger seats occu-
pied and maximum permissible rear axle
load utilised, e.g. when towing a trailer
The headlamp range control allows you to
adjust the cone of light from the headlamps to suit the vehicle load.
X Start the engine.
X Turn the headlamp range control to the
position which corresponds to the load in
your vehicle. 136
Exterior lightingLights and windscreen wipers
Page 144 of 489
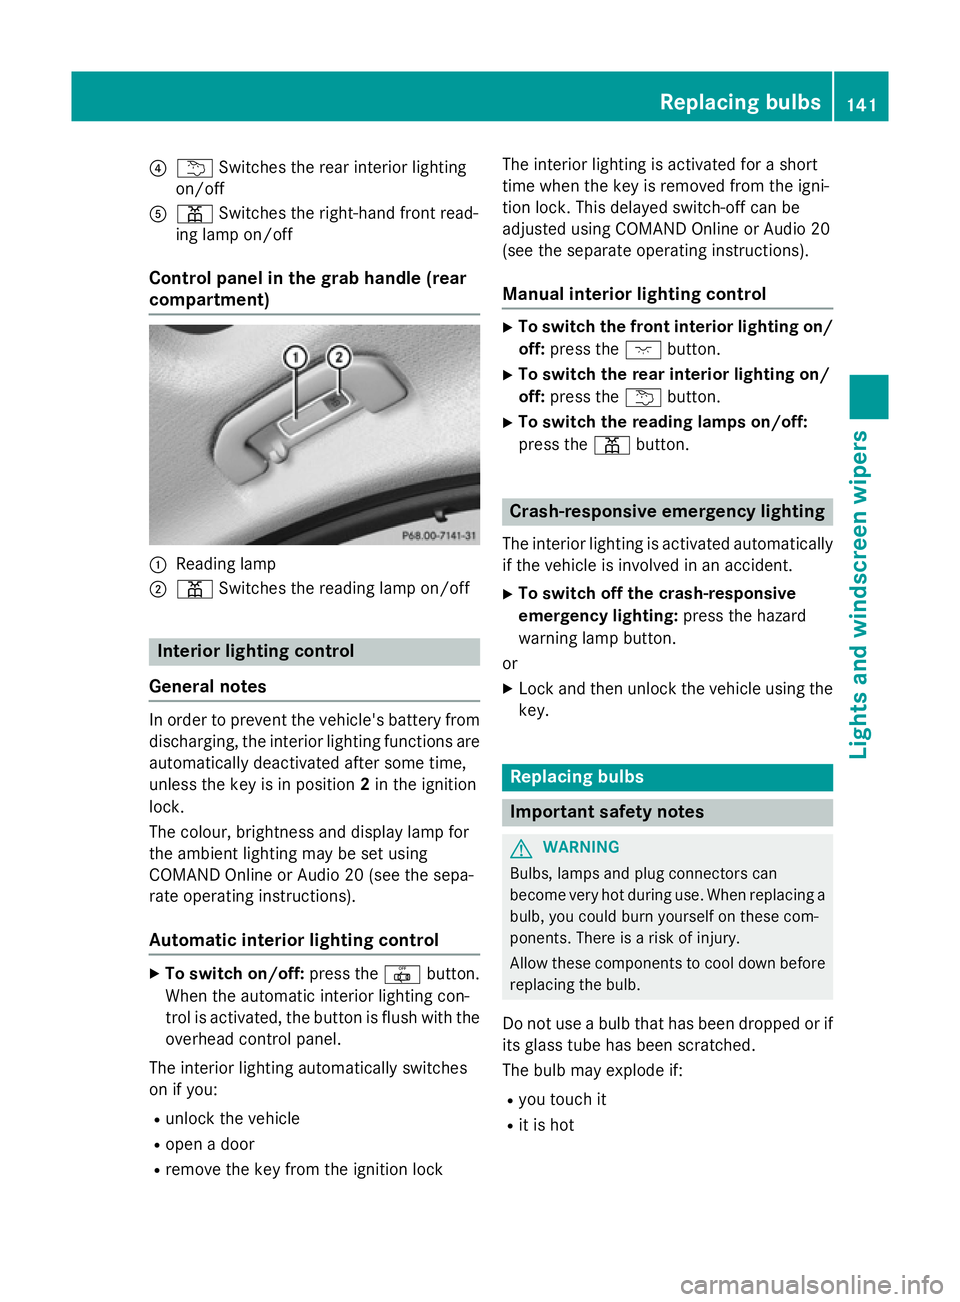
?
u Switches the rear interior lighting
on/off
A p Switches the right-hand front read-
ing lamp on/off
Control panel in the grab handle (rear
compartment) :
Reading lamp
; p Switches the reading lamp on/off Interior lighting control
General notes In order to prevent the vehicle's battery from
discharging, the interior lighting functions are
automatically deactivated after some time,
unless the key is in position 2in the ignition
lock.
The colour, brightness and display lamp for
the ambient lighting may be set using
COMAND Online or Audio 20 (see the sepa-
rate operating instructions).
Automatic interior lighting control X
To switch on/off: press the|button.
When the automatic interior lighting con-
trol is activated, the button is flush with the overhead control panel.
The interior lighting automatically switches
on if you:
R unlock the vehicle
R open a door
R remove the key from the ignition lock The interior lighting is activated for a short
time when the key is removed from the igni-
tion lock. This delayed switch-off can be
adjusted using COMAND Online or Audio 20
(see the separate operating instructions).
Manual interior lighting control X
To switch the front interior lighting on/
off: press the cbutton.
X To switch the rear interior lighting on/
off: press the ubutton.
X To switch the reading lamps on/off:
press the pbutton. Crash-responsive emergency lighting
The interior lighting is activated automatically
if the vehicle is involved in an accident.
X To switch off the crash-responsive
emergency lighting: press the hazard
warning lamp button.
or X Lock and then unlock the vehicle using the
key. Replacing bulbs
Important safety notes
G
WARNING
Bulbs, lamps and plug connectors can
become very hot during use. When replacing a bulb, you could burn yourself on these com-
ponents. There is a risk of injury.
Allow these components to cool down beforereplacing the bulb.
Do not use a bulb that has been dropped or if
its glass tube has been scratched.
The bulb may explode if:
R you touch it
R it is hot Replacing bulbs
141Lights and windscreen wipers Z
Page 170 of 489
with air dehumidification" function can only
be activated using Audio 20/COMAND
Online.
X Switch on automatic mode using the Ã
rocker switch.
X If the windows continue to mist up, activate
the windscreen demisting function using
the ¬ rocker switch.
i You should only select this setting until
the windscreen is clear again.
Windows misted up on the outside X
Activate the windscreen wipers.
X Switch on automatic mode using the Ã
rocker switch.
i If you clean the windows regularly, they
do not mist up so quickly. Rear window heating
General notes The rear window heating has a high current
draw. You should therefore switch it off as
soon as the window is clear. It otherwise
switches off automatically after several
minutes.
If the battery voltage is too low, the rear win-
dow heating may switch off.
Activating/deactivating X
Turn the key to position 2in the ignition
lock (Y page 185).
X Press the ¤rocker switch up or down.
The indicator lamp above the ¤rocker
switch lights up or goes out. Operating the climate control system
167Climate control
Page 171 of 489

Problems with the rear window heating
Problem
Possible causes/consequences and
M
MSolutions The rear window heat-
ing has switched off
prematurely or cannot
be activated. The battery has not been sufficiently charged.
X Switch off any consumers that are not required, e.g. reading
lamps, interior lighting or the seat heating.
When the battery is sufficiently charged, the rear window heat- ing can be activated again. Activating/deactivating air-recircula-
tion mode
General notes You can also temporarily deactivate the flow
of fresh air manually if unpleasant odours are
entering the vehicle from outside. The air
already inside the vehicle will then be recir-
culated.
If you activate air-recirculation mode, the win-
dows can mist up more quickly, in particular
at low temperatures. Only use air-recircula-
tion mode briefly to prevent the windows
misting up.
Activating/deactivating X
Turn the key to position 2in the ignition
lock (Y page 185).
X To activate: press thegrocker switch
up or down.
The indicator lamp above the grocker
switch lights up.
Air-recirculation mode is activated automati-
cally: R at high outside temperatures
R at high levels of pollution (THERMOTRONIC
automatic climate control only)
R in a tunnel (vehicles with a navigation sys-
tem only)
The indicator lamp above the grocker
switch is not lit when automatic air-recircula- tion mode is activated. Outside air is added
after approximately 30 minutes. X
To deactivate: press thegrocker
switch up or down.
The indicator lamp above the grocker
switch goes out.
Air-recirculation mode is deactivated auto-
matically:
R after approximately five minutes at outside
temperatures below approximately 5 †
R after approximately five minutes if cooling
with air dehumidification is deactivated
R after approximately 30 minutes at outside
temperatures above approximately 5 † if
the cooling with air dehumidification func-
tion is activated Convenience opening/closing using
the air-recirculation button
G
WARNING
When the convenience closing feature is oper- ating, parts of the body could become trapped
in the closing area of the side window and the
sliding sunroof. There is a risk of injury.
Observe the complete closing procedure
when the convenience closing feature is oper-
ating. When closing make sure that no parts of the body are in the closing area. G
WARNING
During convenience opening parts of the body could be drawn in or become trapped
between the side window and window frame.
There is a risk of injury. 168
Operating the climate control systemClimate control
Page 173 of 489
Activating/deactivating
X
Turn the key to position 0in the ignition
lock or remove it (Y page 185).
X To activate: press the!rocker switch
up or down.
The indicator lamp above the !rocker
switch lights up.
The blower will run at a low speed regardless of the airflow setting.
If you activate the residual heat function at
high temperatures, only the ventilation will be
activated. The blower runs at medium speed.
X To deactivate: press the!rocker
switch up or down.
The indicator lamp above the !rocker
switch goes out.
Residual heat is deactivated automatically:
R after approximately 30 minutes
R when the ignition is switched on
R if the battery voltage drops
R when the auxiliary heating is switched on Perfume atomiser
Operating the perfume atomiser G
WARNING
If children open the perfume vial, they could
drink the perfume or it could come into con-
tact with their eyes. There is a risk of injury. Do not leave children unsupervised in the vehicle.
If the perfume liquid has been drunk, consult
a doctor. If perfume comes into contact with
your eyes or skin, rinse the eyes with clean
water. If you continue to experience difficul-
ties, consult a doctor. H
Environmental note Full perfume vials must not
be disposed of with house-
hold rubbish. They must be
collected separately and dis-
posed of in an environmen- tally responsible recycling
system.
Dispose of full perfume vials
in an environmentally
responsible manner and
take them to a special waste
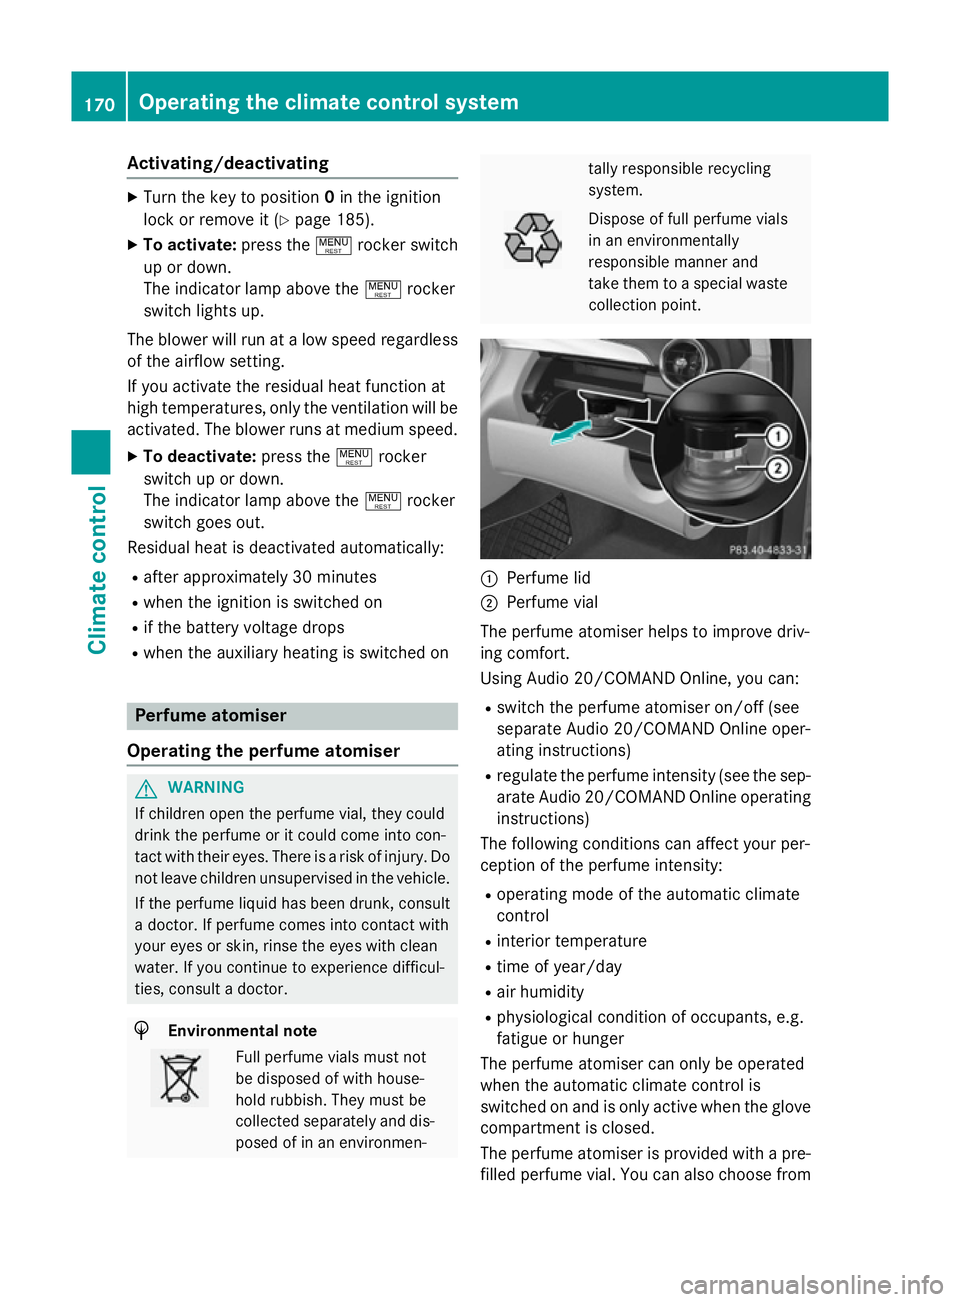
collection point. :
Perfume lid
; Perfume vial
The perfume atomiser helps to improve driv-
ing comfort.
Using Audio 20/COMAND Online, you can:
R switch the perfume atomiser on/off (see
separate Audio 20/COMAND Online oper-
ating instructions)
R regulate the perfume intensity (see the sep-
arate Audio 20/COMAND Online operating
instructions)
The following conditions can affect your per-
ception of the perfume intensity:
R operating mode of the automatic climate
control
R interior temperature
R time of year/day
R air humidity
R physiological condition of occupants, e.g.
fatigue or hunger
The perfume atomiser can only be operated
when the automatic climate control is
switched on and is only active when the glove compartment is closed.
The perfume atomiser is provided with a pre-
filled perfume vial. You can also choose from 170
Operating the climate control systemClimate cont
rol
Page 175 of 489
Problems with the perfume atomiser
Problem
Possible causes/consequences and
M
MSolutions The vehicle interior is
not perfumed although
the perfume atomiser
has been activated. The perfume vial has not been pushed into the holder as far as it
will go.
X Slide the perfume vial into the holder as far as it will go. The perfume vial is not filled sufficiently.
X Pre-filled vials: dispose of the empty vial.
X Use a new pre-filled vial.
X Refillable vials: refill the vial with a maximum of 15 ml of the
same perfume. The perfume atomiser is faulty.
X Have the perfume atomiser checked at a qualified specialist
workshop. Ionisation
Ionisation is used to purify and freshen the air
in the vehicle interior, which is conducive to a
pleasant climate.
The ionisation of the interior air is odourless
and cannot, directly, be perceived in the vehi- cle interior.
You can switch ionisation on/off using Audio
20/COMAND Online (see the separate oper-
ating instructions).
Ionisation can only be operated when the
automatic climate control is switched on. The side air vent on the driver's side must be
open. Pre-entry climate control using the
key
General notes The "Pre-entry climate control via key" func-
tion is only available for hybrid vehicles.
Before getting in, the driver's seat area can be briefly warmed or ventilated in advance and
the air from the air vents can be pre-cooled. The high-voltage battery must be sufficiently
charged before "Pre-entry climate control via
key" can be activated.
When the vehicle is pre-cooled, the following
functions are activated:
R automatic climate control
R blower
R seat ventilation
If the vehicle is preheated, the seat heating is
activated.
If you have switched on the perfume atomiser or ionisation using Audio 20/COMAND
Online, it will be activated together with the
pre-entry climate control.
Activating the perfume atomiser/ionisation
(see separate Audio 20/COMAND Online
operating instructions).
Activating/deactivating "Pre-entry cli-
mate control via key" Before "Pre-entry climate control via key" can
be activated, you must activate the function
via Audio 20/COMAND Online (see separate operating instructions). 172
Operating the climate control systemClimate control
Page 177 of 489
Problems with "Pre-entry climate control via key"
Problem
Possible causes/consequences and
M
MSolutions "Pre-entry climate con-
trol via key" cannot be
activated or has been
deactivated. The charge status of the high-voltage battery is under the specified
minimum charge status.
X Start the engine when the vehicle is at a standstill.
The internal combustion engine drives the electric motor. The
electric motor is operating as an alternator. The high-voltage
battery is charging.
Further information on charging the high-voltage battery
(Y page 420). The pre-entry climate control was started more than once when
the engine was switched off.
X Switch on the engine and let it run for more than ten seconds.
X Try again to activate "Pre-entry climate control via key". The difference between the interior temperature and the desired
temperature is too small.
X Increase the difference between the interior temperature and
the desired temperature. Remote activation of heating and ven-
tilation system
General notes Remote activation is only available on vehi-
cles with the BlueEFFICIENCY package.
The driver's and front-passenger seat areas
can also be heated or ventilated when the
engine is switched off.
The starter battery must be sufficiently
charged before remote activation can be acti-
vated.
When the vehicle is heated, the following
functions are activated:
R seat heating
R rear window heating
R exterior mirror heating
When the vehicle is ventilated, the following
functions are activated:
R blower
R seat ventilation If you have switched on the perfume atomiser
or ionisation using Audio 20/COMAND
Online, these will be activated together with
remote activation.
Activating the perfume atomiser/ionisation
(see separate COMAND Online operating
instructions).
Activating/deactivating the remote
activation function X
To switch on remote activation: push the
climate control symbol button on the key.
The air-conditioning functions are switched on, for up to 10 minutes for heating and up
to 120 minutes for ventilation.
At outside temperatures below 20 †, the
heating functions are activated.
At outside temperatures above 20 †, the
ventilation functions are activated. 174
Operating the climate control systemClimate control
Page 193 of 489
Therefore, quickly move your foot from the
brake pedal to the accelerator pedal. Never
leave the vehicle when it is held by hill start
assist.
X Remove your foot from the brake pedal.
The vehicle is then held for about a second.
X Pull away.
Hill start assist is not active if: R you are pulling away on a level road or a
downhill gradient.
R on vehicles with automatic transmission,
the transmission is in position N.
R the electric parking brake is applied.
R ESP ®
is malfunctioning. ECO start/stop function
Introduction The ECO start/stop function switches the
engine off automatically if the vehicle is stop-
ped under certain conditions.
When pulling away again, the engine starts
automatically. The ECO start/stop function
thereby helps you to reduce the fuel con-
sumption and emissions of your vehicle.
Important safety notes G
WARNING
If the engine is switched off automatically and you exit the vehicle, the engine is restarted
automatically. The vehicle may begin moving. There is a risk of accident and injury.
If you wish to exit the vehicle, always turn off
the ignition and secure the vehicle against
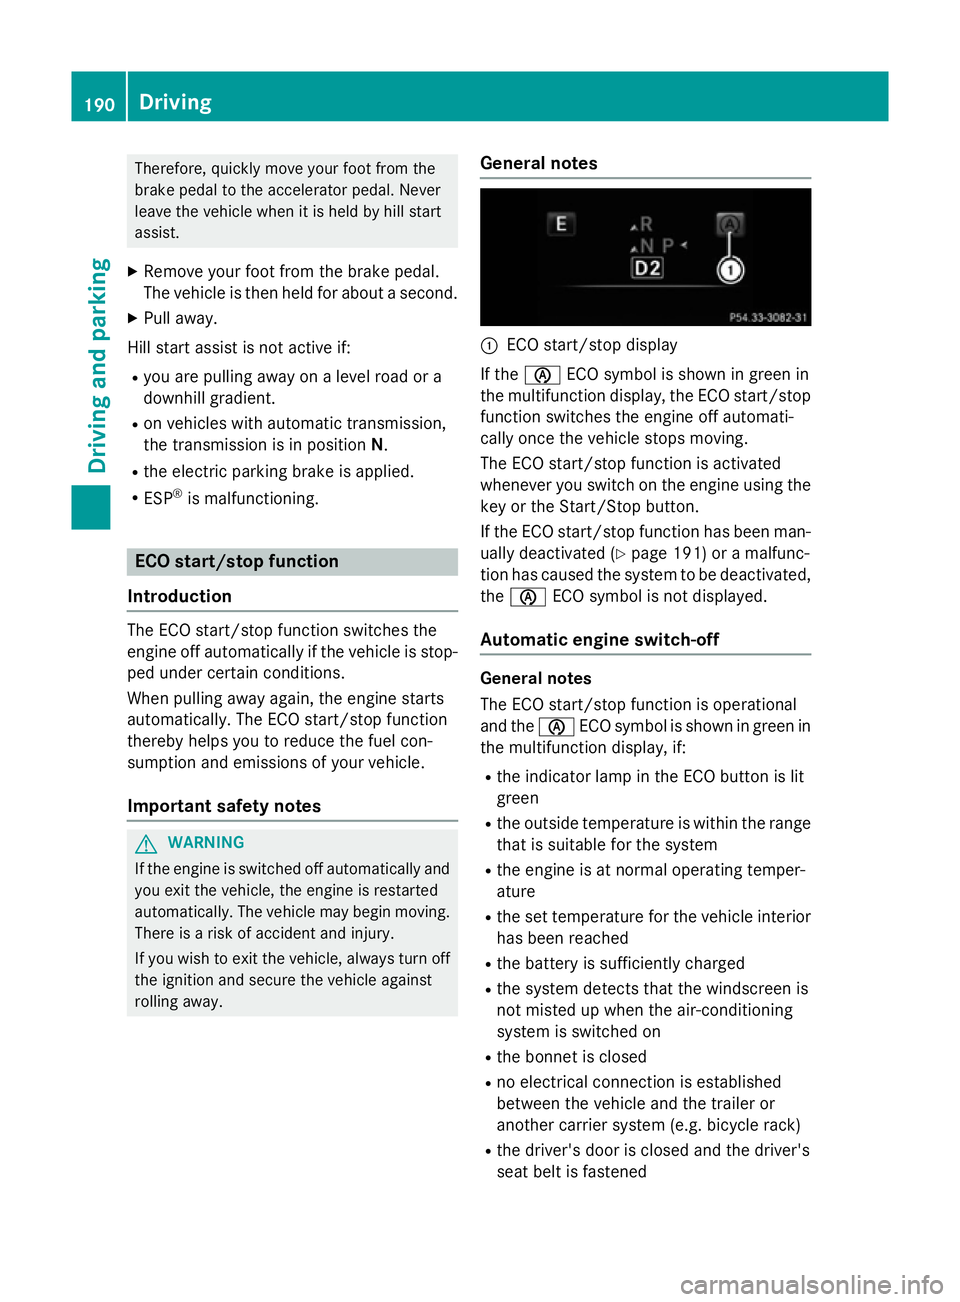
rolling away. General notes :
ECO start/stop display
If the è ECO symbol is shown in green in
the multifunction display, the ECO start/stop
function switches the engine off automati-
cally once the vehicle stops moving.
The ECO start/stop function is activated
whenever you switch on the engine using the
key or the Start/Stop button.
If the ECO start/stop function has been man- ually deactivated (Y page 191) or a malfunc-
tion has caused the system to be deactivated, the è ECO symbol is not displayed.
Automatic engine switch-off General notes
The ECO start/stop function is operational
and the
èECO symbol is shown in green in
the multifunction display, if:
R the indicator lamp in the ECO button is lit
green
R the outside temperature is within the range
that is suitable for the system
R the engine is at normal operating temper-
ature
R the set temperature for the vehicle interior
has been reached
R the battery is sufficiently charged
R the system detects that the windscreen is
not misted up when the air-conditioning
system is switched on
R the bonnet is closed
R no electrical connection is established
between the vehicle and the trailer or
another carrier system (e.g. bicycle rack)
R the driver's door is closed and the driver's
seat belt is fastened 190
DrivingDriving and parking