2014 MERCEDES-BENZ C-Class light
[x] Cancel search: lightPage 240 of 270
X
Point the remote control at the rear-com-
partment screen which has been selected
for remote operation.
X Press button 0043on the remote control
(Y page 237).
The respective rear-compartment screen
switches on or off.
i You can only switch the screens on using
the remote control if the ignition is
switched on.
Switching the button lighting on/off X
Press button 0044on the remote control
(Y page 237).
Depending on the previous status, the but-
ton lighting is switched on or off.
i If you do not use the remote control for
about 15 seconds, the button lighting
switches off automatically.
Switching the sound on or off X
Press button 0084on the remote control
(Y page 237).
The sound is switched on/off.
Selecting a menu/menu item and con-
firming your selection X
Select a menu/menu item using the
0059006500630064 buttons on the
remote control and press the 008Bbutton to
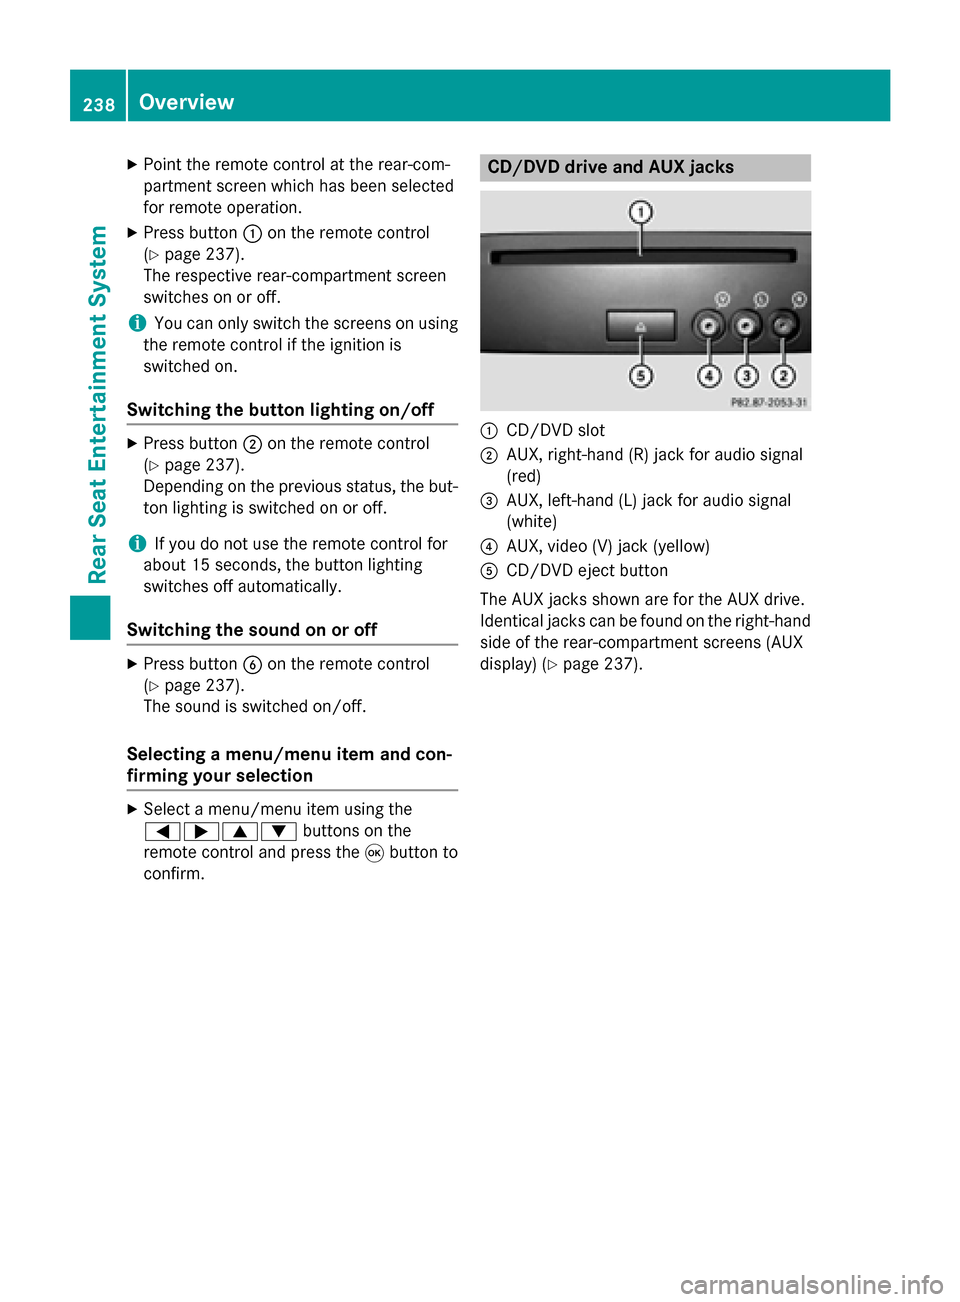
confirm. CD/DVD drive and AUX jacks
0043
CD/DVD slot
0044 AUX, right-hand (R) jack for audio signal
(red)
0087 AUX, left-hand (L) jack for audio signal
(white)
0085 AUX, video (V) jack (yellow)
0083 CD/DVD eject button
The AUX jacks shown are for the AUX drive.
Identical jacks can be found on the right-hand side of the rear-compartment screens (AUX
display) (Y page 237).238
OverviewRear Seat Entertainment System
Page 243 of 270
X
To open the battery compartment:
remove battery compartment cover 0087on
the back of the remote control.
X To do so, press down retaining lug 0044and
take off battery compartment cover 0087.
X Remove discharged batteries 0083from the
tray.
X Insert the new batteries. Observe the polar-
ity markings on the batteries and battery
compartment when doing so.
Left-hand battery: the positive pole (+)
must face upwards.
Right-hand battery: the positive pole (+)
must face downwards.
X To close the battery compartment:
insert battery compartment cover 0087start-
ing with retaining lugs 0085into the battery
compartment and allow catch tab 0044to
engage in place.
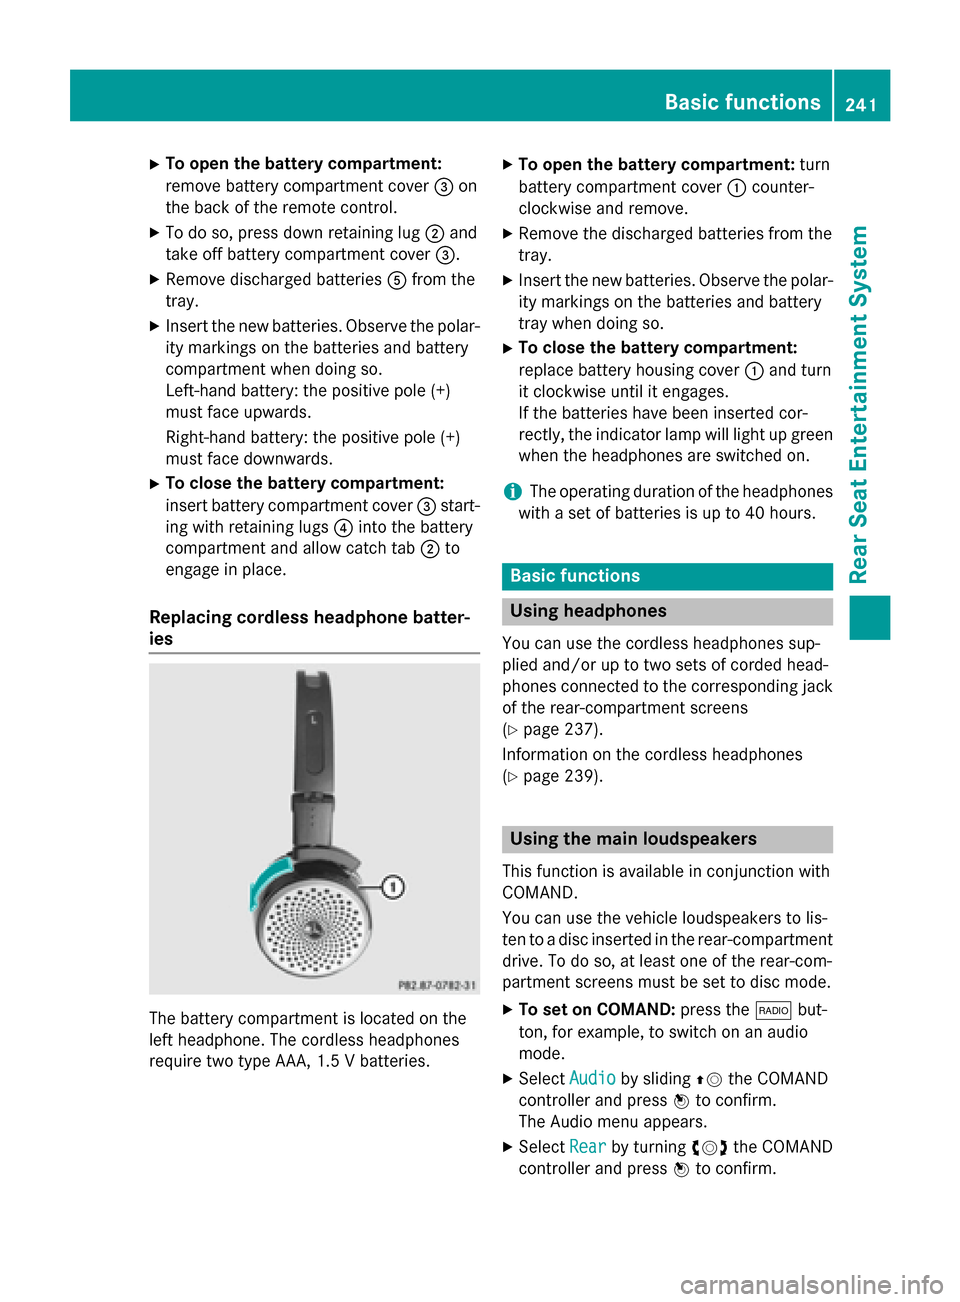
Replacing cordless headphone batter-
ies The battery compartment is located on the
left headphone. The cordless headphones
require two type AAA, 1.5 V batteries. X
To open the battery compartment: turn
battery compartment cover 0043counter-
clockwise and remove.
X Remove the discharged batteries from the
tray.
X Insert the new batteries. Observe the polar-
ity markings on the batteries and battery
tray when doing so.
X To close the battery compartment:
replace battery housing cover 0043and turn
it clockwise until it engages.
If the batteries have been inserted cor-
rectly, the indicator lamp will light up green
when the headphones are switched on.
i The operating duration of the headphones
with a set of batteries is up to 40 hours. Basic functions
Using headphones
You can use the cordless headphones sup-
plied and/or up to two sets of corded head-
phones connected to the corresponding jack
of the rear-compartment screens
(Y page 237).
Information on the cordless headphones
(Y page 239). Using the main loudspeakers
This function is available in conjunction with
COMAND.
You can use the vehicle loudspeakers to lis-
ten to a disc inserted in the rear-compartment drive. To do so, at least one of the rear-com-
partment screens must be set to disc mode.
X To set on COMAND: press the002Abut-
ton, for example, to switch on an audio
mode.
X Select Audio Audioby sliding 00970052the COMAND
controller and press 0098to confirm.
The Audio menu appears.
X Select Rear
Rear by turning 00790052007Athe COMAND
controller and press 0098to confirm. Basic functions
241Rear Seat Entertainment System Z
Page 246 of 270
Setting the brightness
X Select Settings
Settings using the0064button
and press 008Bto confirm.
X Select Brightness
Brightness using the00630064
buttons and press the 008Bbutton to confirm.
A scale appears.
X Adjust the brightness using the 00630064
buttons and press the 008Bbutton to confirm.
The brightness bar moves up or down. The picture becomes lighter or darker in
accordance with the scale. Showing/hiding the picture
X To hide the picture: selectDisplay Off Display Off
in the system menu using the 00640065
buttons on the remote control and press
the 008Bbutton to confirm.
The picture is hidden.
X To display the picture: press the008Bbut-
ton. CD/audio DVD and MP3 mode
Important safety notes
G
WARNING
The CD/DVD drive is a class 1 laser product. If you open the housing of the CD/DVD drive,
there is a risk of exposure to invisible laser
radiation. This laser radiation could damage
your retina. There is a risk of injury.
Never open the housing. Always have main-
tenance and repair work carried out at a quali- fied specialist workshop. General notes
You will find information on the following top- ics in the Audio section:
R notes on CDs/DVDs (Y page 204)
R notes on MP3 mode (Y page 202)
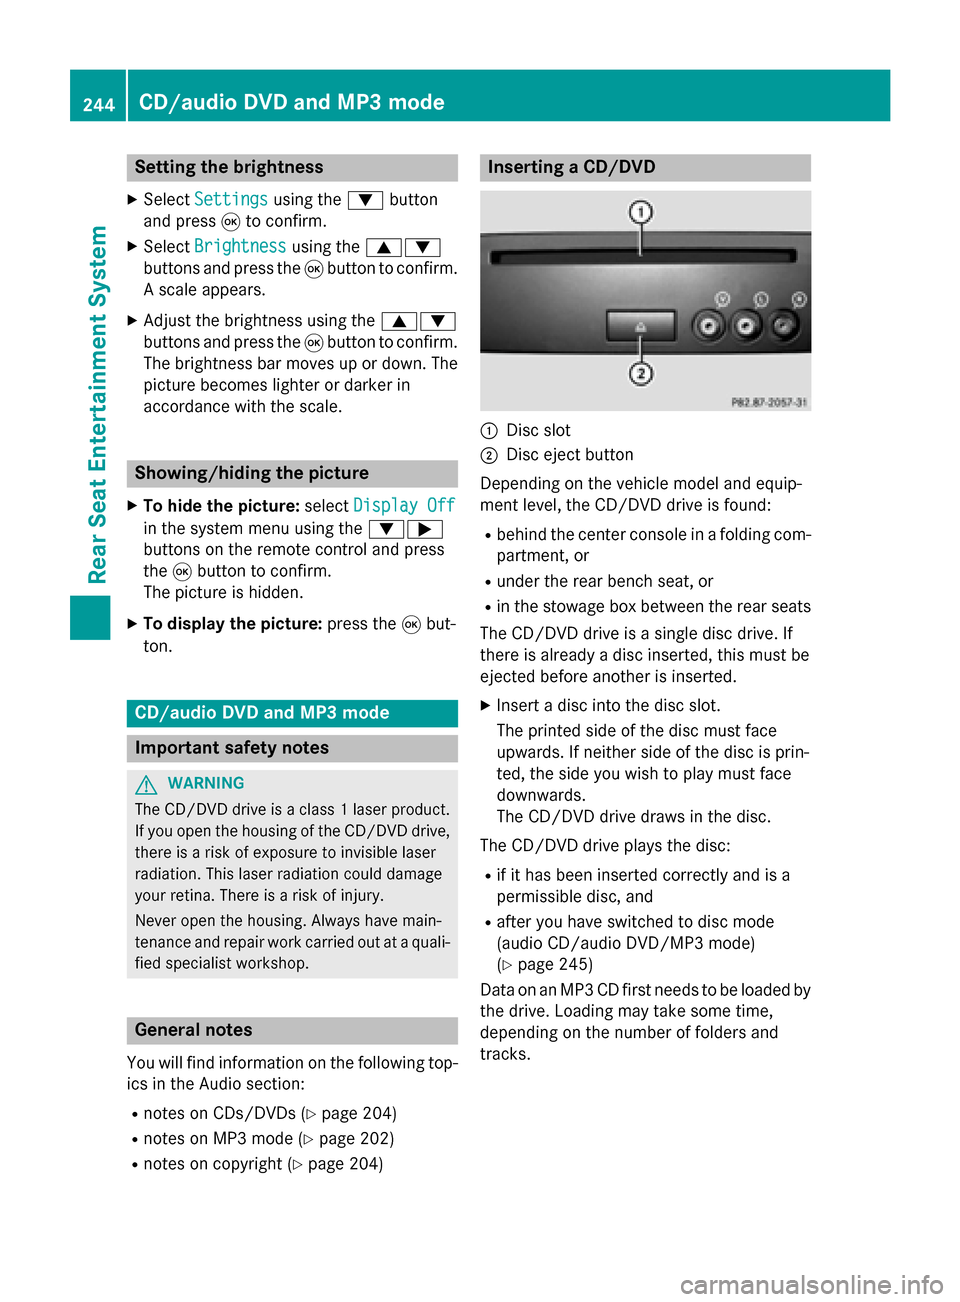
R notes on copyright (Y page 204) Inserting a CD/DVD
0043
Disc slot
0044 Disc eject button
Depending on the vehicle model and equip-
ment level, the CD/DVD drive is found:
R behind the center console in a folding com-
partment, or
R under the rear bench seat, or
R in the stowage box between the rear seats
The CD/DVD drive is a single disc drive. If
there is already a disc inserted, this must be
ejected before another is inserted.
X Insert a disc into the disc slot.
The printed side of the disc must face
upwards. If neither side of the disc is prin-
ted, the side you wish to play must face
downwards.
The CD/DVD drive draws in the disc.
The CD/DVD drive plays the disc:
R if it has been inserted correctly and is a
permissible disc, and
R after you have switched to disc mode
(audio CD/audio DVD/MP3 mode)
(Y page 245)
Data on an MP3 CD first needs to be loaded by the drive. Loading may take some time,
depending on the number of folders and
tracks. 244
CD/audio DVD and MP3 modeRear Seat Entertainment System
Page 249 of 270
X
To interrupt playback: select00DBusing
the 006400590065 buttons on the remote
control and press the 008Bbutton to confirm.
The 00CF display changes to 00D0.
X To continue playback: select00D0and
press the 008Bbutton to confirm.
Playback continues from the point where it
was interrupted.
X To stop playback: while playback is inter-
rupted, select 00DBagain and press the 008B
button to confirm.
Playback stops and returns to the begin-
ning of the DVD. 00D0is highlighted.
X To restart playback: select00D0and
press the 008Bbutton to confirm.
Playback starts from the beginning of the
DVD. Setting the audio format
The content of an audio DVD can be divided
into up to 9 groups. The availability and type
of group depends on the respective DVD. A
group can contain music in different sound
qualities (stereo and multichannel formats,
for example), or bonus tracks.
X Select DVD-Audio
DVD-Audio using
the 006400590065 buttons on the remote
control and press 008Bto confirm.
X Select Group
Group using the 00630064 buttons
and press the 008Bbutton to confirm.
The list of available audio formats appears. The 0036dot indicates the format currently
selected.
X Select an audio format using the 00630064
buttons and press the 008Bbutton to confirm.
X To exit the menu: press the0059or0065
button. Playback options
Further information on playback options is
available in the "Audio" section (Y page 202).X
Select CD
CD, DVD-Audio DVD-Audio orMP3
MP3 using
the 006400590065 buttons on the remote
control and press the 008Bbutton to confirm.
The options list appears. The 0036dot indi-
cates the option currently selected.
X Select Normal
Normal Track
TrackSequence
Sequence ,Random
Random
Tracks
Tracks orRandom Folder
Random Folder using the
00630064 buttons and press the 008Bbutton
to confirm.
The option is switched on. For all options
except Normal Track Sequence
Normal Track Sequence, you will
see a corresponding display in the display/
selection window.
i If you switch the data carrier which you
are currently listening to, the Normal
Normal
Track Sequence Track Sequence option is activated auto-
matically. If an option is selected, it
remains selected after the Rear Seat Enter- tainment System is switched on or off. Switching track information on/off
(MP3 mode only)
If the function is switched on, folder and track
names are displayed.
If the function is switched off, disc and file
names are displayed.
X Select MP3 MP3using the 006400590065 but-
tons on the remote control and press the
008B button to confirm.
X Select Display Track Information Display Track Information
using the 00630064 buttons and press the
008B button to confirm.
The function is switched on 0073or off 0053,
depending on the previous status. Video DVD mode
Important safety notes
G
WARNING
The CD/DVD drive is a class 1 laser product. If you open the housing of the CD/DVD drive,
there is a risk of exposure to invisible laser Video DVD mode
247Rear Seat Entertainment System
Z
Page 251 of 270
Showing/hiding the menu
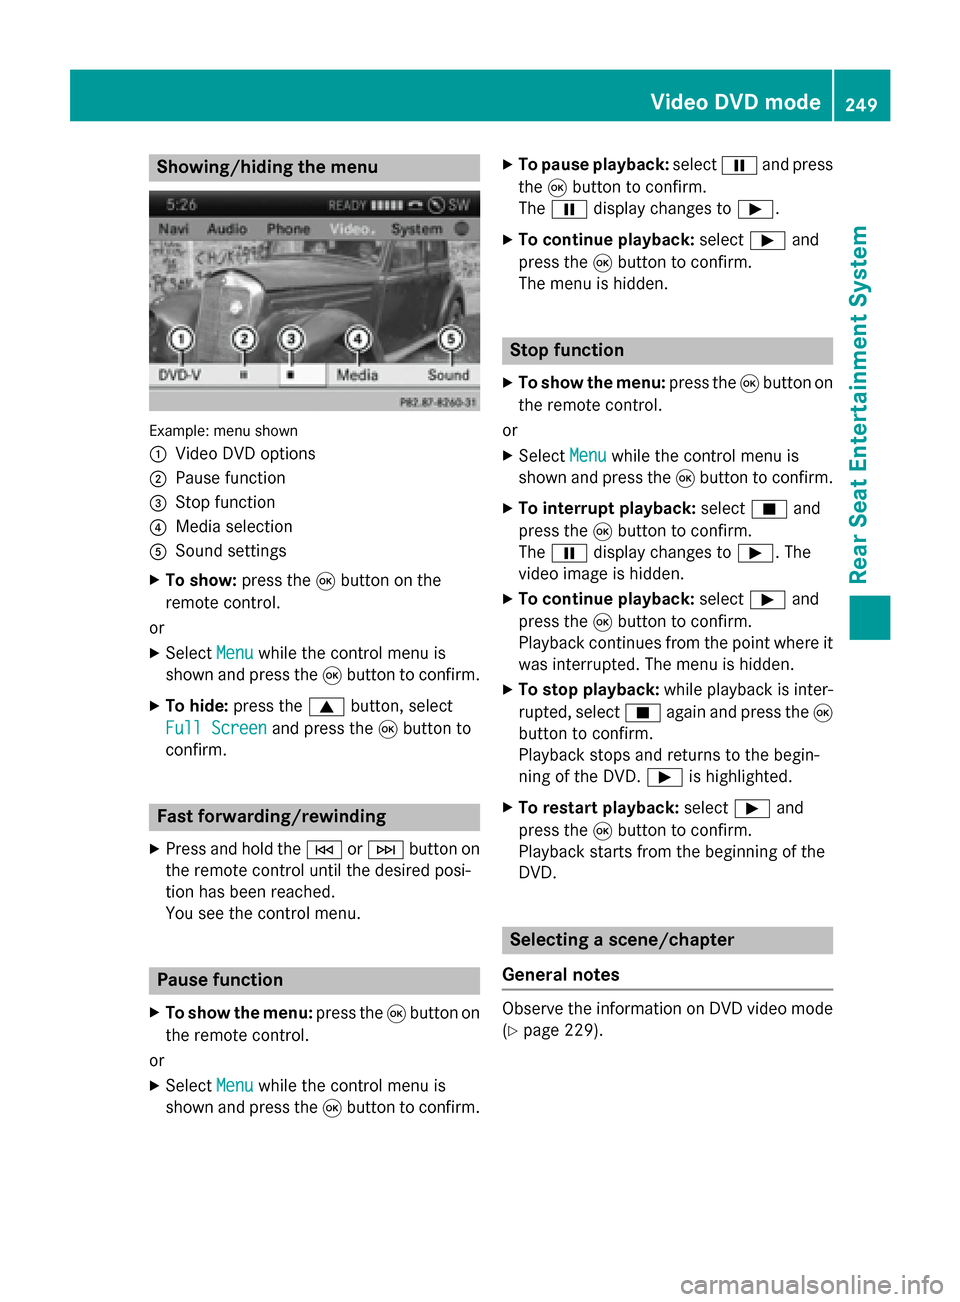
Example: menu shown
0043
Video DVD options
0044 Pause function
0087 Stop function
0085 Media selection
0083 Sound settings
X To show: press the008Bbutton on the
remote control.
or
X Select Menu Menuwhile the control menu is
shown and press the 008Bbutton to confirm.
X To hide: press the 0063button, select
Full Screen
Full Screen and press the008Bbutton to
confirm. Fast forwarding/rewinding
X Press and hold the 0048or0049 button on
the remote control until the desired posi-
tion has been reached.
You see the control menu. Pause function
X To show the menu: press the008Bbutton on
the remote control.
or
X Select Menu Menuwhile the control menu is
shown and press the 008Bbutton to confirm. X
To pause playback: select00CFand press
the 008Bbutton to confirm.
The 00CF display changes to 00D0.
X To continue playback: select00D0and
press the 008Bbutton to confirm.
The menu is hidden. Stop function
X To show the menu: press the008Bbutton on
the remote control.
or
X Select Menu
Menuwhile the control menu is
shown and press the 008Bbutton to confirm.
X To interrupt playback: select00DBand
press the 008Bbutton to confirm.
The 00CF display changes to 00D0. The
video image is hidden.
X To continue playback: select00D0and
press the 008Bbutton to confirm.
Playback continues from the point where it
was interrupted. The menu is hidden.
X To stop playback: while playback is inter-
rupted, select 00DBagain and press the 008B
button to confirm.
Playback stops and returns to the begin-
ning of the DVD. 00D0is highlighted.
X To restart playback: select00D0and
press the 008Bbutton to confirm.
Playback starts from the beginning of the
DVD. Selecting a scene/chapter
General notes Observe the information on DVD video mode
(Y
page 229). Video DVD mode
249Rear Seat Entertainment System Z
Page 254 of 270
X
Select Audio Language
Audio Language and press the008B
button to confirm.
A menu appears after a short while. The 0036
dot in front of an entry indicates the cur-
rently selected language.
X Select a language using the 00630064but-
tons and press the 008Bbutton to confirm.
X To exit the menu: press the0059or0065
button. Subtitles and camera angle
These functions are not available on all DVDs.
The number of subtitle languages and camera
angles available depends on the content of
the DVD. It may also be possible to access the settings from the DVD menu.
X Press the 008Bbutton on the remote control
and show the menu.
X Select DVD-Video DVD-Video and press the 008Bbutton
on the remote control to confirm.
X Select DVD Functions
DVD Functions and press the008B
button to confirm.
X Select Subtitles
Subtitles orCamera Angle
Camera Angle and
press the 008Bbutton to confirm.
In both cases, a menu appears after a few
seconds. The 0036dot in front of an entry
indicates the current setting.
X Select a setting using the 00630064but-
tons and press the 008Bbutton to confirm.
X To exit the menu: press the0059or0065
button. Interactive content
DVDs can also contain interactive content
(e.g. a video game). In a video game, you may be able to influence events by selecting and
triggering actions. The type and number of
actions depend on the DVD.
X Select an action using the
006300650064 buttons on the remote control and press the
008Bbutton to
execute it.
A menu appears and the first entry, Select Select,
is highlighted.
X Press the 008Bbutton. Operation with an active COMAND
source
Switching the function on/off in
COMAND
You can transfer an audio or video source
selected in COMAND to the Rear Seat Enter-
tainment System. If you subsequently switch
modes in COMAND, the new source will not
be transmitted to the Rear Seat Entertain-
ment System.
X To switch on the function in COMAND:
switch to the desired audio mode in
COMAND, e.g. CD mode (Y page 197), or
show the menu in video DVD mode
(Y page 228).
X Select the menu item at the bottom left,
e.g. CD CDin audio CD mode, by sliding 00520064
and turning 00790052007Athe COMAND controller
and press 0098to confirm. X
Select Active Aud./Vid. Source For
Active Aud./Vid. Source For
Rear
Rear and press 0098to confirm.
In the status bar at the top, you will see the
headphones icon and the _icon for the
source that has been switched on.
X To switch off the function in COMAND:
switch on the desired audio mode in 252
Operation with an active COMAND sourceRear Seat Entertainment System
Page 255 of 270
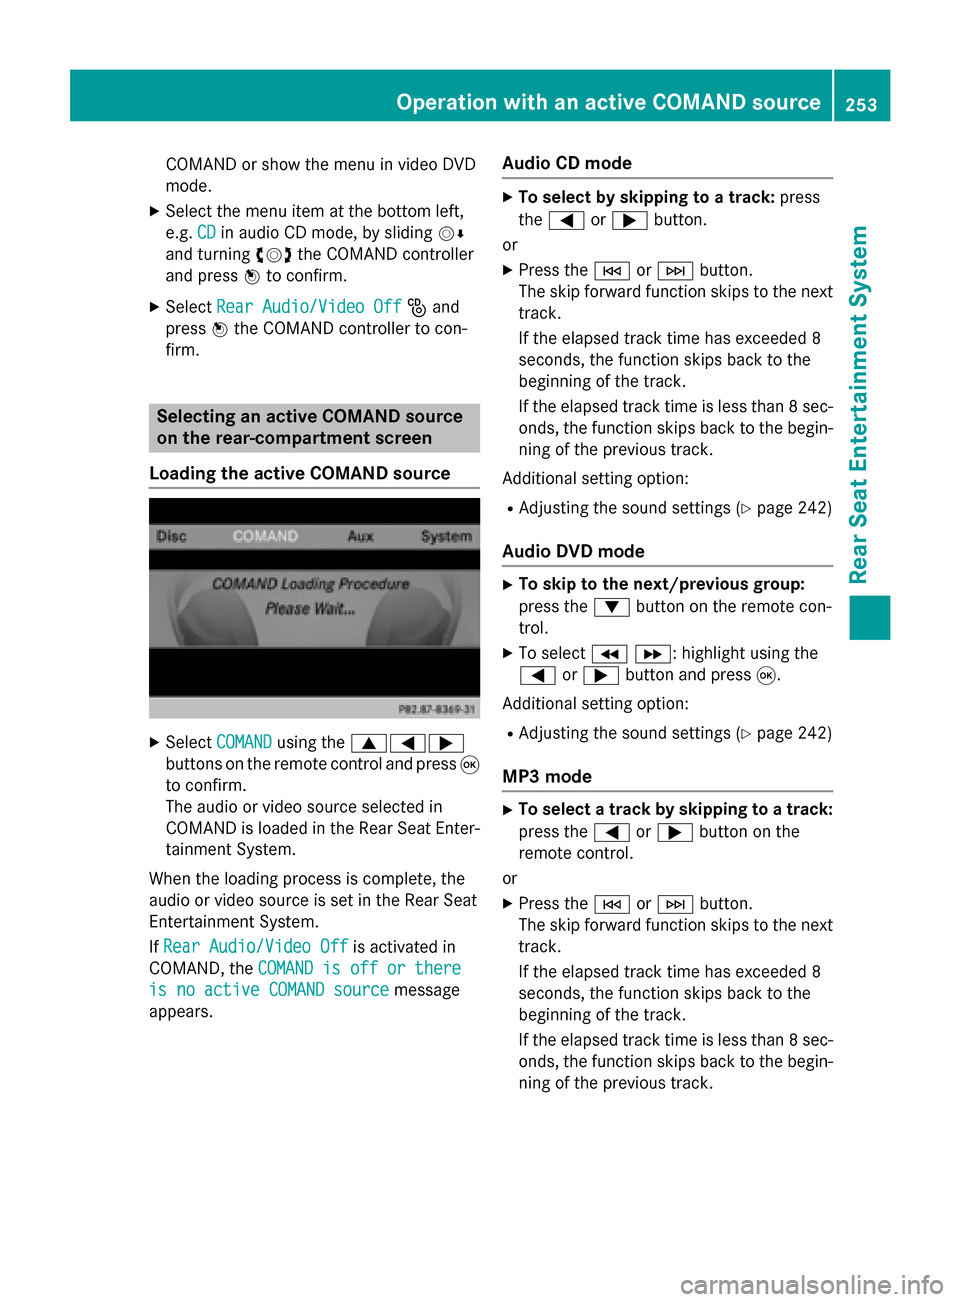
COMAND or show the menu in video DVD
mode.
X Select the menu item at the bottom left,
e.g. CD
CD in audio CD mode, by sliding 00520064
and turning 00790052007Athe COMAND controller
and press 0098to confirm.
X Select Rear Audio/Video Off Rear Audio/Video Off _and
press 0098the COMAND controller to con-
firm. Selecting an active COMAND source
on the rear-compartment screen
Loading the active COMAND source X
Select COMAND COMAND using the 006300590065
buttons on the remote control and press 008B
to confirm.
The audio or video source selected in
COMAND is loaded in the Rear Seat Enter- tainment System.
When the loading process is complete, the
audio or video source is set in the Rear Seat
Entertainment System.
If Rear Audio/Video Off
Rear Audio/Video Off is activated in
COMAND, the COMAND is off or there COMAND is off or there
is no active COMAND source
is no active COMAND source message
appears. Audio CD mode X
To select by skipping to a track: press
the 0059 or0065 button.
or X Press the 0048or0049 button.
The skip forward function skips to the next track.
If the elapsed track time has exceeded 8
seconds, the function skips back to the
beginning of the track.
If the elapsed track time is less than 8 sec- onds, the function skips back to the begin-
ning of the previous track.
Additional setting option:
R Adjusting the sound settings (Y page 242)
Audio DVD mode X
To skip to the next/previous group:
press the 0064button on the remote con-
trol.
X To select 004E004F : highlight using the
0059 or0065 button and press 008B.
Additional setting option: R Adjusting the sound settings (Y page 242)
MP3 mode X
To select a track by skipping to a track:
press the 0059or0065 button on the
remote control.
or
X Press the 0048or0049 button.
The skip forward function skips to the next track.
If the elapsed track time has exceeded 8
seconds, the function skips back to the
beginning of the track.
If the elapsed track time is less than 8 sec- onds, the function skips back to the begin-
ning of the previous track. Operation with an active COMAND source
253Rear Seat Entertainment System Z
Page 256 of 270
X
To select a folder: press the0064button
on the remote control.
X Highlight one of the two folder symbols
with the 0059or0065 button and press 008B
to confirm.
Depending on your selection, the previous
or next folder is selected and the first track
is played.
Additional setting option:
R Adjusting the sound settings (Y page 242)
Video DVD mode X
To hide a menu: confirmMenu Menuwith the 008B
button.
The video image is played in full screen
mode.
Additional setting options: R Adjusting the brightness, contrast and
color (Y page 242)
R Changing the picture format (Y page 243)
R Adjusting the sound settings (Y page 242)AUX mode
Introduction
You can connect one external video source to each of the displays of the Rear Seat Enter-
tainment System (AUX display) and also one
external video source to the rear-compart-
ment CD/DVD drive (AUX drive) with a sound
and video signal.
Please see the corresponding operating
instructions for information on how to oper-
ate the external video source.
For further details about external video sour- ces, please consult an authorized Mercedes-
Benz Center. Connecting AUX equipment
AUX drive The AUX drive jacks are located on the
CD/DVD drive next to the CD/DVD eject but-
ton (Y page 238).
Displaying AUX The AUX display jacks are on the side of the
screen (Y
page 237).
Audio and video connection X
Insert the audio plugs for the left and right
signals into the corresponding Land R
jacks.
X Insert the video plug into the Vjack. Activating AUX mode
AUX drive X
Select Aux Auxin the menu using the
006300590065 buttons on the remote
control and press the 008Bbutton to confirm.
The AUX menu appears.
X Select Source Source from the AUX menu and
press the 008Bbutton to confirm.
X Select Disc Drive Aux
Disc Drive Aux and press the008B
button to confirm.
You will hear and see the content of the
external video source if it is connected to
the CD/DVD drive and switched to play-
back. If no video image is available from the AUX source connected, you will see an
audio menu.
Displaying AUX X
Select the screen by turning the scroll
wheel on the remote control (Y page 237)254
AUX modeRear Seat Entertainment System