2014 MERCEDES-BENZ B-Class Data setting
[x] Cancel search: Data settingPage 167 of 270

Managing access data of the mobile
phone network provider
Overview The access data of the mobile phone network
provider can be:
R edited
R copied, then edited and accepted for a new
provider name
R deleted
i Changes that you make to the access
data of a mobile phone network provider
apply to all mobile phones that use this
access data.
i When the Internet connection is active,
you cannot edit or delete the access data of
the currently set mobile phone network
provider.
Editing the access data X
Select a provider from the list of mobile
phone network providers by turning 00790052007A
the COMAND controller (Y page 161).
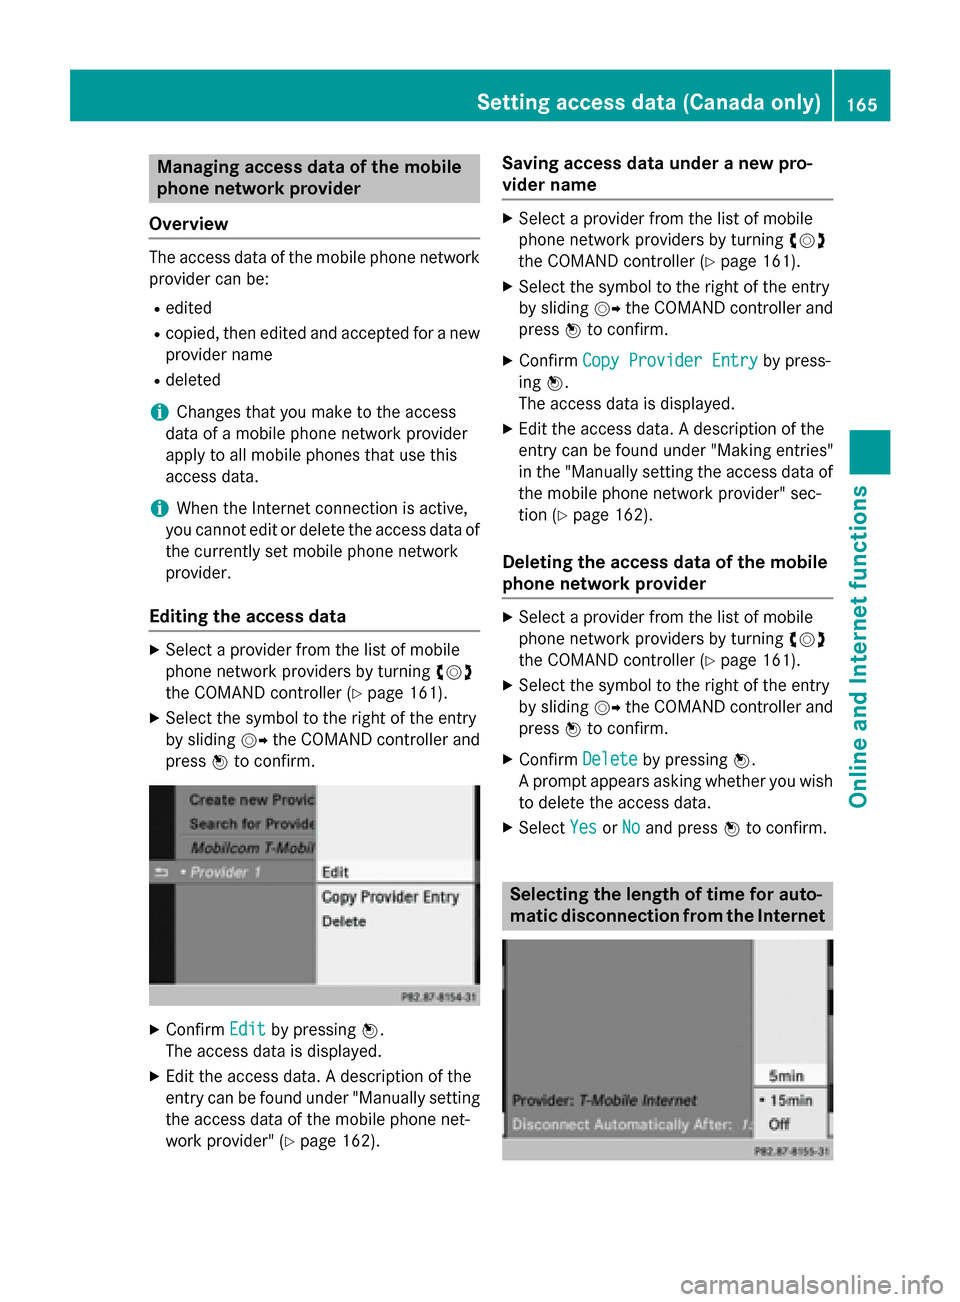
X Select the symbol to the right of the entry
by sliding 00520096the COMAND controller and
press 0098to confirm. X
Confirm Edit Editby pressing 0098.
The access data is displayed.
X Edit the access data. A description of the
entry can be found under "Manually setting the access data of the mobile phone net-
work provider" (Y page 162). Saving access data under a new pro-
vider name X
Select a provider from the list of mobile
phone network providers by turning 00790052007A
the COMAND controller (Y page 161).
X Select the symbol to the right of the entry
by sliding 00520096the COMAND controller and
press 0098to confirm.
X Confirm Copy Provider Entry Copy Provider Entry by press-
ing 0098.
The access data is displayed.
X Edit the access data. A description of the
entry can be found under "Making entries"
in the "Manually setting the access data of
the mobile phone network provider" sec-
tion (Y page 162).
Deleting the access data of the mobile
phone network provider X
Select a provider from the list of mobile
phone network providers by turning 00790052007A
the COMAND controller (Y page 161).
X Select the symbol to the right of the entry
by sliding 00520096the COMAND controller and
press 0098to confirm.
X Confirm Delete Deleteby pressing 0098.
A prompt appears asking whether you wish to delete the access data.
X Select Yes
YesorNo
No and press 0098to confirm. Selecting the length of time for auto-
matic disconnection from the InternetSetting access data (Canada only)
165Online and Internet functions Z
Page 185 of 270

Settings
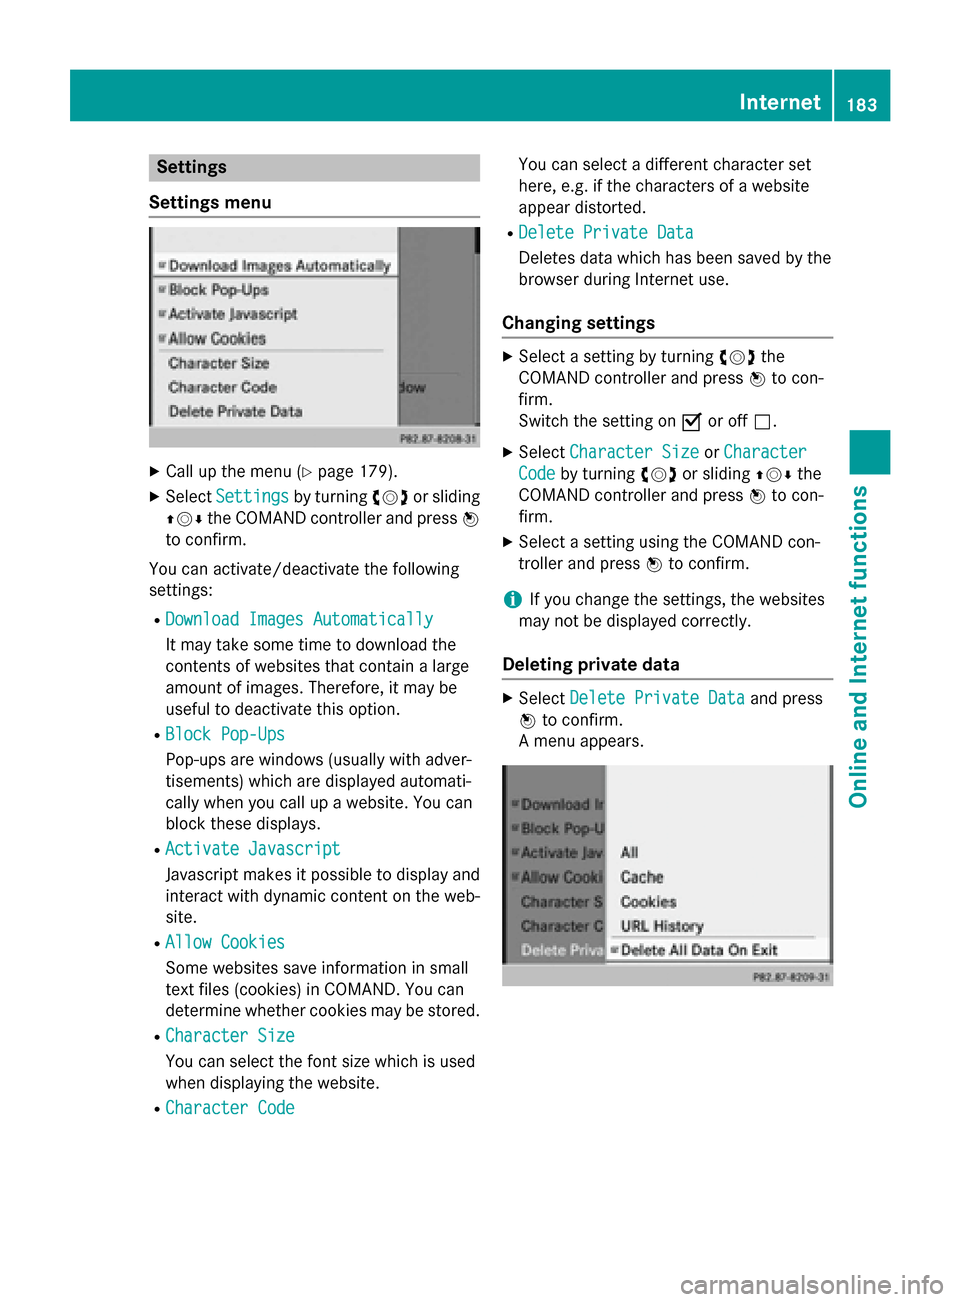
Settings menu X
Call up the menu (Y page 179).
X Select Settings
Settings by turning00790052007Aor sliding
009700520064 the COMAND controller and press 0098
to confirm.
You can activate/deactivate the following
settings:
R Download Images Automatically
Download Images Automatically
It may take some time to download the
contents of websites that contain a large
amount of images. Therefore, it may be
useful to deactivate this option.
R Block Pop-Ups
Block Pop-Ups
Pop-ups are windows (usually with adver-
tisements) which are displayed automati-
cally when you call up a website. You can
block these displays.
R Activate Javascript
Activate Javascript
Javascript makes it possible to display and
interact with dynamic content on the web-
site.
R Allow Cookies Allow Cookies
Some websites save information in small
text files (cookies) in COMAND. You can
determine whether cookies may be stored.
R Character Size Character Size
You can select the font size which is used
when displaying the website.
R Character Code
Character Code You can select a different character set
here, e.g. if the characters of a website
appear distorted.
R Delete Private Data Delete Private Data
Deletes data which has been saved by the
browser during Internet use.
Changing settings X
Select a setting by turning 00790052007Athe
COMAND controller and press 0098to con-
firm.
Switch the setting on 0073or off 0053.
X Select Character Size Character Size orCharacter
Character
Code
Code by turning 00790052007Aor sliding 009700520064the
COMAND controller and press 0098to con-
firm.
X Select a setting using the COMAND con-
troller and press 0098to confirm.
i If you change the settings, the websites
may not be displayed correctly.
Deleting private data X
Select Delete Private Data Delete Private Data and press
0098 to confirm.
A menu appears. Internet
183Online and Internet functions Z
Page 186 of 270

X
Select the setting by turning 00790052007Aor sliding
009700520064 the COMAND controller and press 0098
to confirm.
The 003Bdot in front of an entry indicates
which setting is active.
or
X Select Delete All Data On Exit Delete All Data On Exit and
press 0098to confirm.
Switch the setting on 0073or off 0053. Option Function
All
All Deletes all personal
data.
Cache Cache Deletes data in the
cache.
Cookies Cookies Deletes cookies that
are created by web-
sites which you have called up. URL History
URL History Deletes all websites
visited (path).
0073Delete All
Delete All
Data On Exit Data On Exit If this function is
activated
0073, all pri-
vate data is deleted
when you exit the
Internet browser. i
If you reset COMAND to the factory set-
tings (reset function), these settings are
deleted (Y page 47). Calling up the carousel view and clos-
ing the Internet browser
X To call up the carousel view: press the
003D back button for longer than two sec-
onds.
X To close the Internet browser: press the
003D back button again for longer than two
seconds. 184
InternetOnline and Internet functions
Page 217 of 270

X
Select Delete
Delete and press 0098to confirm.
A prompt appears asking whether you
really wish to deauthorize this device.
X Select Yes
YesorNo
No.
If you select Yes
Yes, the device will be deleted
from the Bluetooth ®
device list.
If you select No
No, the process will be can-
celed.
i Before re-authorizing the Bluetooth ®
audio device, you should also delete the
device name MB Bluetooth
MB Bluetooth from your
Bluetooth ®
audio device's Bluetooth ®
list.
See the Bluetooth ®
audio device's operat-
ing instructions. Switching to Bluetooth
®
audio mode
The Bluetooth ®
audio basic display Example: Bluetooth
®
audio basic display
0043 Track name
0044 Current playback settings (no symbol for
"Normal track sequence")
0087 Album name
0085 Sound settings
0083 Media list
0084 Artist
006B To stop 00DBor start 00D0playback
006C To connect a Bluetooth ®
audio device, to
increase the volume on COMAND
006D Bluetooth ®
audio data medium type
006E Data medium position in the media list
i If the Bluetooth ®
audio device connected
supports metadata and corresponding data is available, then the artist, track and album
name can be displayed.
Using the Bluetooth ®
audio basic dis-
play X
Connect Bluetooth ®
audio devices
(Y page 212)
or X Reconnect the Bluetooth ®
audio device
(Y page 214).
COMAND activates the Bluetooth ®
audio
device. The basic display appears and the
device starts playing.
Using the DISC button X
Press the 003Abutton one or more times.
By pressing the 003Abutton repeatedly, you
can switch modes in the following order:
R CD/MP3 (disc)
R Memory card mode
R MUSIC REGISTER
R USB storage device
R Media Interface or audio AUX mode
R Bluetooth ®
audio mode
Using the media list X
Select Bluetooth Audio Bluetooth Audio in the media list
by turning 00790052007Athe COMAND controller
and press 0098to confirm (Y page 198).
COMAND activates the connected device.
You will see a message to this effect. The
basic display then appears. Starting/stopping playback
X To start playback: select00D0by sliding
00520064 and turning 00790052007Athe COMAND con-
troller and press 0098to confirm.
Playback starts. 00DBis selected. Bluetooth
®
audio mode 215Audio Z
Page 219 of 270

have been played, the tracks in the next
folder are played.
R Random Tracks
Random Tracks
All the tracks on the medium are played in
random order (e.g. track 3, 8, 5 etc.).
X Select BT
BT Audio Audio by sliding 00520064and turning
00790052007A the COMAND controller and press 0098
to confirm.
The 003Bdot indicates the option selected.
X Select the option by turning 00790052007Athe
COMAND controller and press 0098to con-
firm.
If you select Random
Random Tracks Tracks, you will see a
corresponding symbol in the display/
selection window. Increasing the volume on COMAND
X
Select BT
BTAudio
Audio by sliding 00520064and turning
00790052007A the COMAND controller and press 0098
to confirm.
X Select Volume
Volume and press 0098to confirm.
A menu appears. The 003Bdot indicates the
current setting.
X Select Standard
Standard orBoost
Boost and press 0098to
confirm.
Information about sound settings
(Y page 30)
You will find further information in the "Audio AUX mode" section (Y page 223) Operation with the Media Interface
Connection options
Overview You will find the connection sockets in the
center console stowage compartment.
Device-specific adapter cables are required
to connect external devices to the Media
Interface. Country-specific versions are sup-
plied with the Media Interface (Y
page 218).
You can connect the following data carriers to
COMAND via the Media Interface:
R iPod ®
R iPhone ®
R certain MP3 players
i Store individual parts in a safe place.
Only use genuine Mercedes-Benz connec-
tion cables.
i iPod ®
and iPhone ®
are registered trade-
marks of Apple Inc., Cupertino, California,
USA.
i MP3 players that support MTP (
Media
Transfer Protocol) can be used.
This allows the MP3 player to be easily con- nected to the Media Interface and removed
after use. Audio data is played without
problem.
On some MP3 players, you have to activate
the relevant function; see the MP3 player
operating instructions.
Supported devices For details and a list of supported devices,
visit
http://www.mbusa-mobile.com. Or
call the Mercedes-Benz Customer Assistance
Center at 1-800-FOR-MERCedes
(1-800-367-6372) (for the USA) or Customer
Relations at 1-800-387-0100 (for Canada). Operation with the Media Interface
217Audio Z
Page 229 of 270

Notes on discs
! Do not affix stickers or labels to the discs.
They could peel off and damage COMAND.
Stickers can cause the disc to bend, which can result in read errors and disc recogni-
tion problems.
! COMAND is designed to play discs that
comply with the EN 60908 standard. There-
fore, you can only use discs with a maxi-
mum thickness of 1.3 mm.
If you insert thicker discs, e.g. those that
contain data on both sides (DVD on one
side and audio data on the other), they can- not be ejected and can damage the device.
Only use round discs with a diameter of
12 cm. Do not use discs with a diameter of 8 cm, even with an adapter.
Playback problems may occur when playing
copied discs. There are a large variety of
discs, DVD authoring software, writing soft-
ware and writers available. This variety means that there is no guarantee that the system will
be able to play discs that you have copied
yourself. DVD playback conditions
If video DVDs do not conform to the NTSC or PAL TV standards, they may create picture,
sound or other problems during playback.
COMAND is capable of playing back video
DVDs produced according to the following
standards:
R Region code 1 or region code 0 (no region
code)
R PAL or NTSC standard
You will generally find the relevant details
either on the DVD itself or on the DVD case.
i If you insert a video DVD with a different
region code, you will see a message to this
effect.
i COMAND is set to region code 1 at the
factory. This setting can be changed at an authorized Mercedes-Benz Center. This will
allow you to play video DVDs with a differ-
ent region code, provided that they are pro- duced in accordance with the PAL or NTSC
standard. The region code can be changed up to five times. Function restrictions
Depending on the DVD, it is possible that cer- tain functions or actions will be temporarily
blocked or may not function at all. As soon as
you try to activate these functions or actions, you will see the 0047symbol in the display. Inserting and removing DVDs
X Proceed as described in the "Inserting and
ejecting CDs and DVDs" section
(Y page 196). Switching to video DVD mode
Switching on automatically X
Insert a video DVD.
COMAND loads the medium inserted and
starts to play it.
Switching on using the DISC button X
Press the 003Abutton.
COMAND switches to the previous disc
operating mode.
By pressing the 003Abutton repeatedly, you
can switch modes in the following order:
R video DVD/CD/MP3 in the single DVD
drive (disc mode)
R memory card mode
R MUSIC REGISTER
R USB storage device
R Media Interface or audio AUX mode
R Bluetooth ®
audio mode Video
DVDmode
227Video Z
Page 230 of 270

X
Select Media
Mediaby sliding 00520064and turning
00790052007A the COMAND controller and press 0098
to confirm.
X Select a ývideo DVD from the media list
(Y page 230).
Switching on with the video menu X
Select Video
Videoin the main function bar by
sliding 00970052and turning 00790052007Athe COMAND
controller and press 0098to confirm.
Video DVD mode is switched on. Showing/hiding the control menu
X To show: in DVD video mode, slide 009700520064
the COMAND controller.
X To hide: slide009700520064 the COMAND control-
ler.
or X Wait for approximately eight seconds. Control menu displayed
0043
Type of data medium
0044 Current title
0087 Current scene
0085 Track time
0083 Shows the menu
i This function is not available while the
DVD's own menu is being displayed. Showing/hiding the menu
X To show: in full-screen DVD video mode,
press 0098the COMAND controller.
or X Select Menu
Menu while the control menu is
shown and press 0098to confirm.
X To hide: slide00970052the COMAND controller
and confirm Full Screen Full Screen by pressing0098. Menu shown
0043
Video DVD options
0044 Pause function
0087 Stop function
0085 Media selection
0083 Sound settings
i This function is not available while the
DVD's own menu is being displayed. Fast forwarding/rewinding
X In full-screen DVD video mode, slide 009500520096
and hold the COMAND controller until the
desired position is reached.
or
X Press and hold the 0048or0049 button
until the desired position is reached.
You see the control menu. 228
Video DVD modeVideo
Page 234 of 270

If your vehicle is equipped with Media Inter-
face, you can connect an external video
source (AUX video) (Y page 217).
The 1/8 inch audio/video jacks are in the
center console stowage compartment.
i In vehicles with a rear view camera, the
AUX video jack cannot be used for external video sources. Switching to AUX video mode
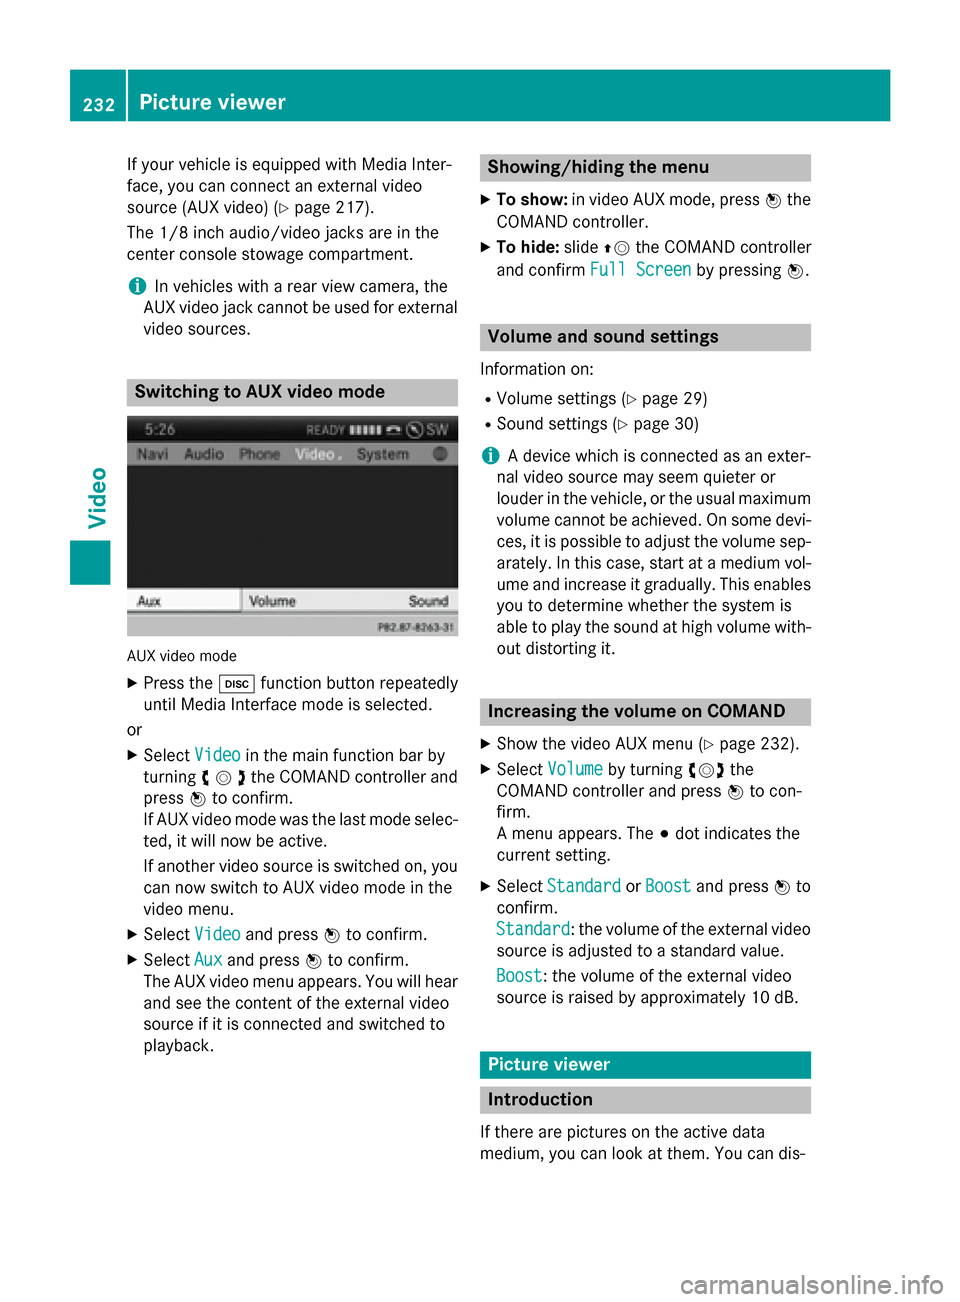
AUX video mode
X Press the 003Afunction button repeatedly
until Media Interface mode is selected.
or X Select Video
Videoin the main function bar by
turning 00790052007Athe COMAND controller and
press 0098to confirm.
If AUX video mode was the last mode selec-
ted, it will now be active.
If another video source is switched on, you can now switch to AUX video mode in the
video menu.
X Select Video
Video and press 0098to confirm.
X Select Aux
Aux and press 0098to confirm.
The AUX video menu appears. You will hear
and see the content of the external video
source if it is connected and switched to
playback. Showing/hiding the menu
X To show: in video AUX mode, press 0098the
COMAND controller.
X To hide: slide00970052the COMAND controller
and confirm Full Screen Full Screen by pressing0098. Volume and sound settings
Information on:
R Volume settings (Y page 29)
R Sound settings (Y page 30)
i A device which is connected as an exter-
nal video source may seem quieter or
louder in the vehicle, or the usual maximum
volume cannot be achieved. On some devi-
ces, it is possible to adjust the volume sep-
arately. In this case, start at a medium vol- ume and increase it gradually. This enables
you to determine whether the system is
able to play the sound at high volume with-
out distorting it. Increasing the volume on COMAND
X Show the video AUX menu (Y page 232).
X Select Volume
Volume by turning 00790052007Athe
COMAND controller and press 0098to con-
firm.
A menu appears. The 003Bdot indicates the
current setting.
X Select Standard Standard orBoost
Boost and press 0098to
confirm.
Standard Standard: the volume of the external video
source is adjusted to a standard value.
Boost Boost: the volume of the external video
source is raised by approximately 10 dB. Picture viewer
Introduction
If there are pictures on the active data
medium, you can look at them. You can dis- 232
Picture viewerVideo