2014 MAZDA MODEL CX-5 setup
[x] Cancel search: setupPage 237 of 528

Black plate (237,1)
Three-dimensional object on vehicle rear
Because the distance guide lines are displayed based on a flat surface, the distance to the
three-dimensional object displayed on the screen is different from the actual distance.
A
A
C B
CB
(Actual distance) B>C=A
Sensed distance on screen A>B>C(Screen display)
(Actual condition)
qPicture Quality Adjustment
WARNING
Always adjust the picture quality of the rear view monitor while the vehicle is
stopped:
Do not adjust the picture quality of the rear view monitor while driving the vehicle.
Adjusting the picture quality of the rear view monitor such as brightness, contrast,
color, and tint while driving the vehicle is dangerous as it could distract your
attention from the vehicle operation which could lead to an accident.
Picture quality adjustment can be done while the shift lever is in reverse (R).
There are four settings which can be adjusted including, brightness, contrast, color, and
tint. When adjusting, pay sufficient attention to the vehicle surroundings.
1. Press the setup button (
) to display the picture quality adjustment screen.
2. Touch the
andon-screen buttons to change the set value.
Touch the
on-screen button to return to the camera image display.
When Driving
Rear View Monitor
4-109
CX-5_8CT5-EA-12K_Edition1 Page237
Friday, October 19 2012 3:11 PM
Form No.8CT5-EA-12K
Page 238 of 528

Black plate (238,1)
Reset
All of the screen setting values can be reset to their initial settings.
1. Press the setup button (
) to display the picture quality adjustment screen.
2. Touch the
on-screen button.
3. Touch the
on-screen button.
4-110
When Driving
Rear View Monitor
CX-5_8CT5-EA-12K_Edition1 Page238
Friday, October 19 2012 3:11 PM
Form No.8CT5-EA-12K
Page 273 of 528

Black plate (273,1)
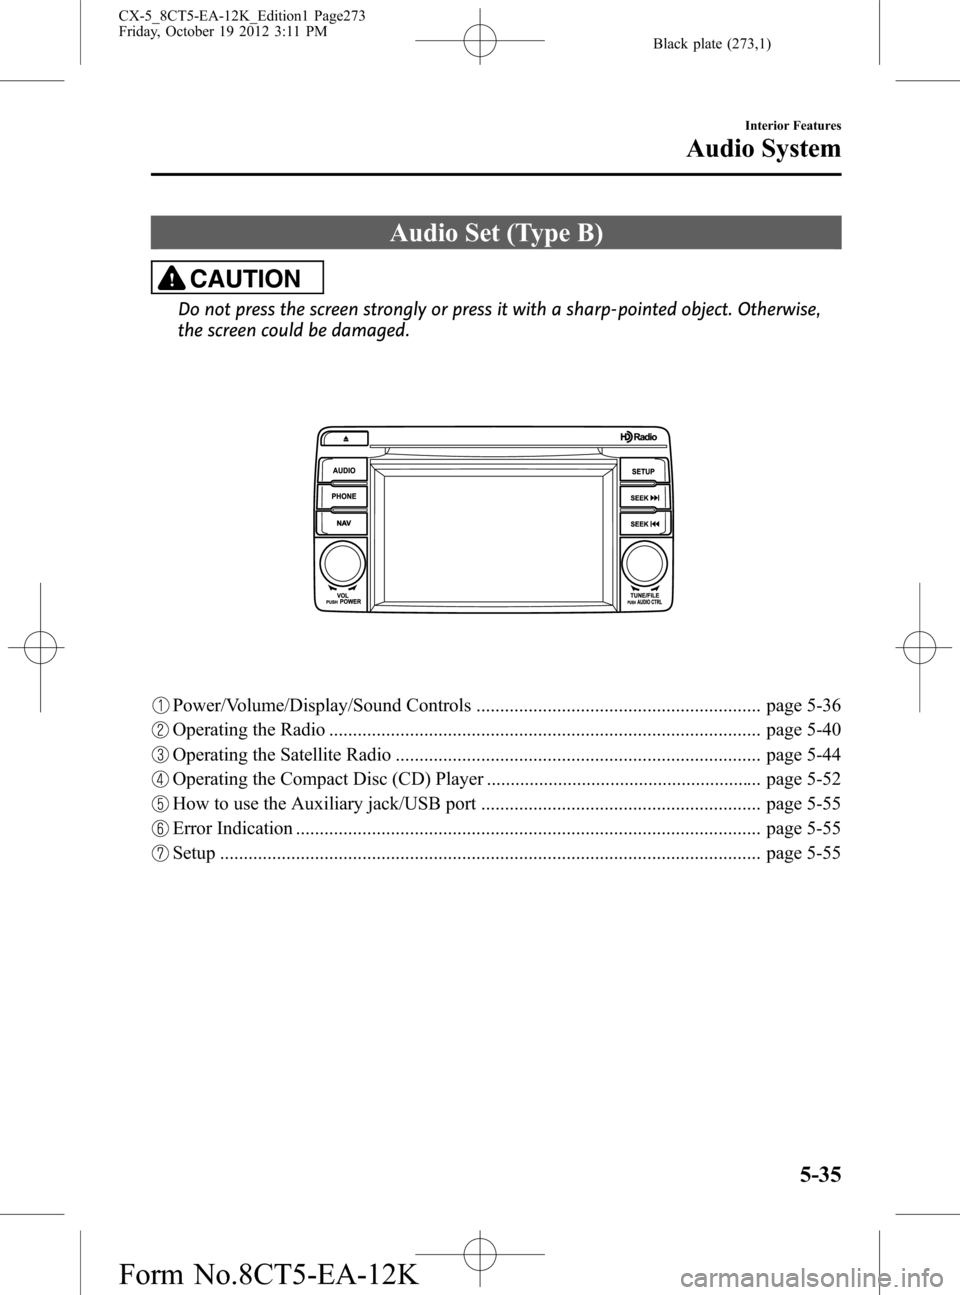
Audio Set (Type B)
CAUTION
Do not press the screen strongly or press it with a sharp-pointed object. Otherwise,
the screen could be damaged.
Power/Volume/Display/Sound Controls ............................................................ page 5-36
Operating the Radio ........................................................................................... page 5-40
Operating the Satellite Radio ............................................................................. page 5-44
Operating the Compact Disc (CD) Player .......................................................... page 5-52
How to use the Auxiliary jack/USB port ........................................................... page 5-55
Error Indication .................................................................................................. page 5-55
Setup .................................................................................................................. page 5-55
Interior Features
Audio System
5-35
CX-5_8CT5-EA-12K_Edition1 Page273
Friday, October 19 2012 3:11 PM
Form No.8CT5-EA-12K
Page 274 of 528

Black plate (274,1)
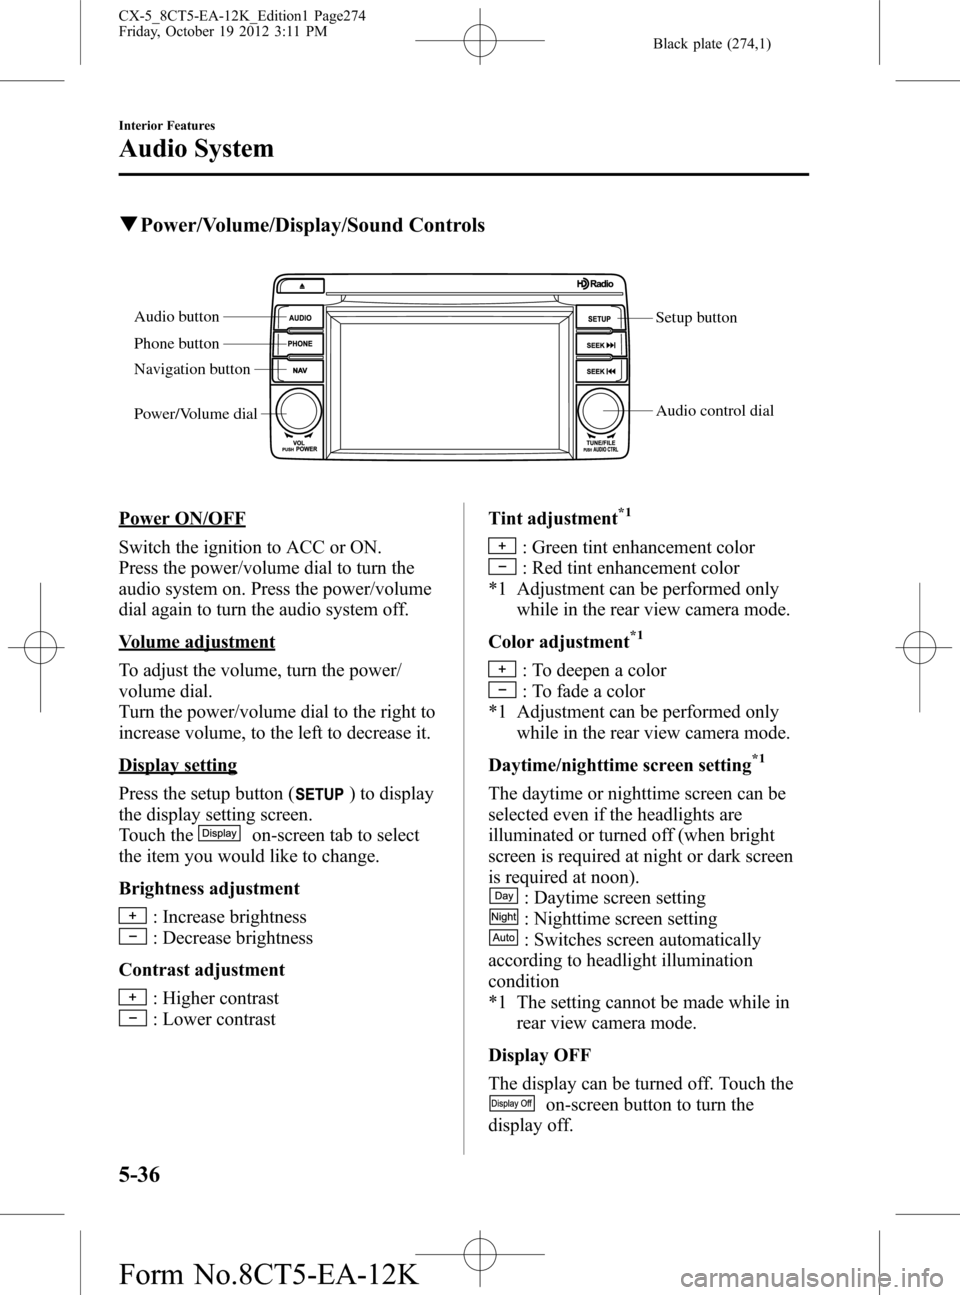
qPower/Volume/Display/Sound Controls
Setup button
Audio control dial Audio button
Phone button
Navigation button
Power/Volume dial
Power ON/OFF
Switch the ignition to ACC or ON.
Press the power/volume dial to turn the
audio system on. Press the power/volume
dial again to turn the audio system off.
Volume adjustment
To adjust the volume, turn the power/
volume dial.
Turn the power/volume dial to the right to
increase volume, to the left to decrease it.
Display setting
Press the setup button (
) to display
the display setting screen.
Touch the
on-screen tab to select
the item you would like to change.
Brightness adjustment
: Increase brightness
: Decrease brightness
Contrast adjustment
: Higher contrast
: Lower contrastTint adjustment
*1
: Green tint enhancement color
: Red tint enhancement color
*1 Adjustment can be performed only
while in the rear view camera mode.
Color adjustment
*1
: To deepen a color
: To fade a color
*1 Adjustment can be performed only
while in the rear view camera mode.
Daytime/nighttime screen setting
*1
The daytime or nighttime screen can be
selected even if the headlights are
illuminated or turned off (when bright
screen is required at night or dark screen
is required at noon).
: Daytime screen setting
: Nighttime screen setting
: Switches screen automatically
according to headlight illumination
condition
*1 The setting cannot be made while in
rear view camera mode.
Display OFF
The display can be turned off. Touch the
on-screen button to turn the
display off.
5-36
Interior Features
Audio System
CX-5_8CT5-EA-12K_Edition1 Page274
Friday, October 19 2012 3:11 PM
Form No.8CT5-EA-12K
Page 275 of 528

Black plate (275,1)
The display can be turned back on as
follows:
lPress the audio button ()to
display the audio screen.
lPress the navigation button ()to
display the navigation screen.
lPress the phone button ()to
display the Bluetooth®dial screen.lPress the setup button ()to
display the setup dial setting screen.
lPress the audio control dial to display
the setup sound setting screen.
lShift to the R position to change to the
rear view camera mode.
Shift to a position other than R to
return to the display off condition.
NOTE
The screen can also be turned off using voice
recognition.
Refer to Component Parts on page 5-78.
Display setting reset
All of the screen setting values can be
reset to their initial settings.
1. Touch the
on-screen button.
2. Touch the
on-screen button.
Audio sound adjustment
Press the audio control dial or touch the
on-screen button to display the
sound setting screen.
Indication Setting value
Bass
(Low pitch sound)
: Low pitch
enhancement
: Low pitch
reduction
Treble
(Treble sound)
: Treble
enhancement
: Treble reduction
Balance
(Left/right volume
balance)
: Right side
volume reduction
: Left side
volume reduction
Fader
(Front/back volume
balance)
: Front speaker
volume reduction
: Rear speaker
volume reduction
Button Beep
(Audio operation sound)
: on/off*1
Auto Level Control*2
(Automatic volume
adjustment): Level up: Level down
AudioPilot
*3
(Automatic volume
adjustment): on/off
Centerpoint
*3
(Automatic surround
level adjustment): on/off
*1 Some functions do not turn off
*2 Standard audio
*3 Bose
®Sound System
Automatic Level Control (ALC)
The automatic level control is a feature
that automatically adjusts audio volume
and sound quality according to the vehicle
speed. The volume increases in
accordance with the increase in vehicle
speed, and decreases as vehicle speed
decreases.
Interior Features
Audio System
5-37
CX-5_8CT5-EA-12K_Edition1 Page275
Friday, October 19 2012 3:11 PM
Form No.8CT5-EA-12K
Page 293 of 528

Black plate (293,1)
Display scroll
If a whole title cannot be displayed at one
time, touch the
on-screen button on
the right side of the title. When the last
character is displayed, touch the
on-
screen button to display the first character
of the title.
NOTE
lTheon-screen button is displayed only
if a whole title cannot be displayed at one
time.
lThe information viewable in the display is
only CD information (such as artist name,
song title) which has been recorded to the
CD.
lThis unit cannot display some characters.
Characters which cannot be displayed are
indicated by an asterisk (
).lThe number of characters which can be
displayed is restricted.
Message Display
If“CD Error”is displayed, it means that
there is some CD malfunction. Check the
CD for damage, dirt, or smudges, and
then properly reinsert. If the message
appears again, take the unit to an
Authorized Mazda Dealer for service.
qHow to use Auxiliary jack/USB port
Audio can be heard from the vehicle's
speakers by connecting a commercially-
available portable audio unit to the
auxiliary jack.
Use a commercially-available, non-
impedance (3.5
) stereo mini plug cable.
Contact an Authorized Mazda Dealer for
details.
In addition, audio can be played from the
vehicle audio device by connecting USB
device or an iPod to the USB port.
Refer to AUX/USB/iPod mode on page
5-58.
qError Indications
If you see an error indication on the
display, find the cause in the chart. If you
cannot clear the error indication, take the
vehicle to an Authorized Mazda Dealer.
IndicationCause Solution
CD
ErrorCD is inserted
upside downInsert the CD
properly. If the error
indication continues
to display, consult an
Authorized Mazda
Dealer.
CD is defectiveInsert another CD
properly. If the error
indication continues
to display, consult an
Authorized Mazda
Dealer.
qSetup
You can customize settings in the setup
display as follows:
Display
Refer to Power/Volume/Display/Sound
Controls on page 5-36.
Interior Features
Audio System
5-55
CX-5_8CT5-EA-12K_Edition1 Page293
Friday, October 19 2012 3:11 PM
Form No.8CT5-EA-12K
Page 294 of 528

Black plate (294,1)
Sound
Refer to Power/Volume/Display/Sound
Controls on page 5-36.
Vehicle
lDoor LockslLight ControllWipers Control
1. Press the setup button (
).
2. Touch the
on-screen tab to
display the vehicle setting screen.
3. Touch the desired setting item.
4. Select the desired setup item from the
list by touching it.
5. Touch the
on-screen button.
Language
1. Press the setup button (
).
2. Touch the
on-screen tab to
display the language setting screen.
3. Touch the desired language from the
list.
4. Touch the
on-screen button.
NOTE
Only the available languages are displayed.
Default (Vehicle settings only)
1. Press the setup button (
).
2. Touch the
on-screen tab.
3. Touch the
on-screen button.
4. Touch the
on-screen button.
5. Touch the
on-screen button.
NOTE
The settings for display, sound, and language
cannot be initialized.
Audio Control Switch
Operation
When the audio unit is turned on,
operation of the audio unit from the
steering wheel is possible.
NOTE
Because the audio unit will be turned off under
the following conditions, the switches will be
inoperable.
lWhen the ignition is switched off.lWhen the power button on the audio unit is
pressed and the audio unit is turned off.
Without Bluetooth®Hands-Free
With Bluetooth®Hands-Free
Talk buttonPick-up button
Talk buttonHang-up button
Pick-up button
5-56
Interior Features
Audio System
CX-5_8CT5-EA-12K_Edition1 Page294
Friday, October 19 2012 3:11 PM
Form No.8CT5-EA-12K
Page 319 of 528

Black plate (319,1)
3. Touch the device name which is
currently connected to display the
device information screen.
4. Touch the
on-screen button to
disconnect the Hands-Free device.
Touch the
on-screen button to
disconnect the audio device.
5. Touch the
on-screen button.
Registered device deletion
1. Touch the
on-screen tab.
2. Touch the
on-screen
button.
3. Touch the device name which you
want to delete.
4. Touch the
on-screen button.
5. Touch the
on-screen button.
NOTE
If you want to delete all of the pairing devices,
perform the restore default.
Changing PIN code
PIN code (4 digits) can be changed.
1. Touch the
on-screen tab.
2. Touch the
on-screen
button.
3. Touch the
on-screen button.
4. Delete the PIN code which is currently
set.
5. Input the new PIN code to be set.
6. Touch the
on-screen button.
Restore Default
All the pairing device information and
phonebook data can be deleted.
1. Touch the
on-screen tab.2. Touch the
on-screen
button.
3. Touch the
on-screen button.
4. Touch the
on-screen button.
qAvailable Language
The Bluetooth®Hands-Free System
applies to the following languages:
lEnglishlSpanishlFrench
Refer to Setup on page 5-55.
qVoice Recognition
The Mazda Bluetooth®Hands-free system
can be used to make calls or operate the
audio unit using voice recognition which
includes numerous convenient commands.
In this section, the basic operation of the
voice recognition is explained.
Activating Voice Recognition
To Activate the Main Menu: Press the
talk-button.
To Activate the Phone Menu: Press the
pick-up button. After activating the main
menu, say“Phone”.
To Activate the Navi Menu: After
activating the main menu, say
“Navigation”.
NOTE
lWhen activating the Phone Menu from the
Main Menu, the user is informed of the
available options (Call, Dial, Redial, Call
back ,Setup or Emergency) via voice
navigation.
lFor voice recognition details with the
navigation system, refer to the separate
“NAVIGATION SYSTEM Owner's
Manual”.
Interior Features
Bluetooth®
5-81
CX-5_8CT5-EA-12K_Edition1 Page319
Friday, October 19 2012 3:11 PM
Form No.8CT5-EA-12K