2014 LINCOLN MKZ HYBRID turn signal
[x] Cancel search: turn signalPage 52 of 445

2. Insert a coin into the slot and twist to
separate the housing. 3. Remove the batteries.
4. Install new batteries with the + facing
each other.
Note: Make sure to replace the label
between the two batteries.
5. Reinstall the housing and cover.
Car Finder Press the button twice within
three seconds. The horn will
sound and the turn signals will
flash. We recommend you use this method
to locate your vehicle, rather than using
the panic alarm.
Sounding a Panic Alarm
Note: The panic alarm will only operate
when the ignition is off. Press the button to activate the
alarm. Press the button again or
switch the ignition on to
deactivate. Remote Start WARNING
To avoid exhaust fumes, do not use
remote start if your vehicle is parked
indoors or areas that are not well
ventilated. Note:
Do not use remote start if your
vehicle is low on fuel. The remote start button is on the
transmitter.
This feature allows you to start your
vehicle from outside the vehicle. The
transmitter has an extended operating
range.
Vehicles with automatic climate control
can be configured to operate when the
vehicle is remote started.
See Climate
Control (page 124). A manual climate
control system will run at the setting it was
set to when you switched the vehicle off.
Many states and provinces have
restrictions for the use of remote start.
Check your local and state or provincial
laws for specific requirements regarding
remote start systems.
The remote start system will not work if:
• the ignition is on
• the alarm system is triggered
• you disable the feature
• the hood is open
• the transmission is not in
P
• the vehicle battery voltage is too low
• the service engine soon light is on.
50
MKZ (CC9) Keys and Remote ControlsE153891 E138623 E138624 E138625
Page 60 of 445

LOCKING AND UNLOCKING
You can use the power door lock control
or the remote control to lock and unlock
your vehicle.
Power Door Locks
The power door lock control is on the
driver and front passenger door panels.
Unlock
A
LockB
Door Lock Indicator
An LED on each door window trim will light
when you lock the door. It will remain lit
for up to 10 minutes after you switch off
the ignition.
Switch Inhibitor
When you electronically lock your vehicle,
the power door lock switch and interior
trunk release switch will no longer operate
after 20 seconds. You must unlock your
vehicle with the remote control or keyless
keypad, or switch the ignition on, to
restore function to these switches. You
can switch this feature on or off in the
information display. See General
Information (page 97). Rear Door Unlocking and Opening
Pull the interior door release handle twice
to unlock and open the rear door. The first
pull unlocks the door and the second pull
will unlatch the door.
Remote Control
You can use the remote control at any
time. The luggage compartment release
button only works when your vehicle
speed is less than 5 mph (8 km/h).
Unlocking the Doors (Two-Stage Unlock)
Press the button to unlock the
driver door.
Press the button again within
three seconds to unlock all doors. The turn
signals will flash.
Press and hold both the lock and unlock
buttons on the remote control for three
seconds to change between driver door
or all doors unlock mode. The turn signals
will flash twice to indicate a change to the
unlocking mode. Driver door unlock mode
will only unlock the driver door when the
unlock button is pressed once. All door
unlock mode unlocks all doors with one
press of the unlock button. The unlocking
mode applies to the remote control,
keyless entry keypad and intelligent
access. You can also change the mode in
the information display.
See General
Information (page 97).
Locking the Doors Press the button to lock all the
doors. The turn signals will
illuminate.
58
MKZ (CC9) LocksE138628 E138629 E138623
Page 61 of 445

Press the button again within three
seconds to confirm that all the doors are
closed. The doors will lock again, the horn
will sound and the turn signals will
illuminate if all the doors and the luggage
compartment are closed.
Mislock
If any door or the luggage compartment
is open, or if the hood is open on vehicles
with an anti-theft alarm or remote start, the
horn will sound twice and the lamps will
not flash. You can enable or disable this
feature in the information display. See
General Information (page 97).
Opening the Luggage Compartment Press twice within three seconds
to open the luggage
compartment.
Make sure to close and latch the luggage
compartment before driving your vehicle.
An unlatched luggage compartment may
cause objects to fall out or block your
view.
Activating Intelligent Access
You must have the intelligent access key
within 3 feet (1 meter) of your vehicle.
At a Door
Pull an exterior door handle to unlock and
open the door. Make sure not to touch the
lock sensor on top of the handle. Touch the top of the door handle to lock
your vehicle. There will be a brief delay
before you can unlock your vehicle again.
Note:
Keep the door handle surface clean
to avoid issues with operation.
At the Luggage Compartment Press the exterior release button hidden
above the license plate.
Smart Unlocks
This feature helps to prevent you from
unintentionally locking your intelligent
access key inside your vehicle
’s passenger
compartment or rear cargo area.
59
MKZ (CC9) LocksE138630 E146044 E164806
Page 87 of 445

Fold-Away Exterior Mirrors
Push the mirror toward the door window
glass. Make sure that you fully engage the
mirror in its support when returning it to
its original position.
Heated Exterior Mirrors
See Heated Windows and Mirrors (page
126).
Memory Mirrors
You can save and recall the mirror
positions through the memory function.
See
Memory Function (page 133).
Auto-Dimming Feature
(If Equipped)
The driver’ s exterior mirror will
automatically dim when the interior
auto-dimming mirror is activated.
Signal Indicator Mirrors
The outer portion of the appropriate mirror
housing will blink when the turn signal is
activated.
Integrated Blind Spot Mirrors (If Equipped) WARNING
Objects in the blind spot mirror are
closer than they appear.
Blind spot mirrors have an integrated
convex mirror built into the upper outboard
corner of the exterior mirrors. They are
designed to increase your visibility along
the side of your vehicle. Check the main mirror first before a lane
change, then check the blind spot mirror.
If no vehicles are present in the blind spot
mirror and the traffic in the adjacent lane
is at a safe distance, signal that you intend
to change lanes. Glance over your
shoulder to verify traffic is clear and
carefully change lanes.
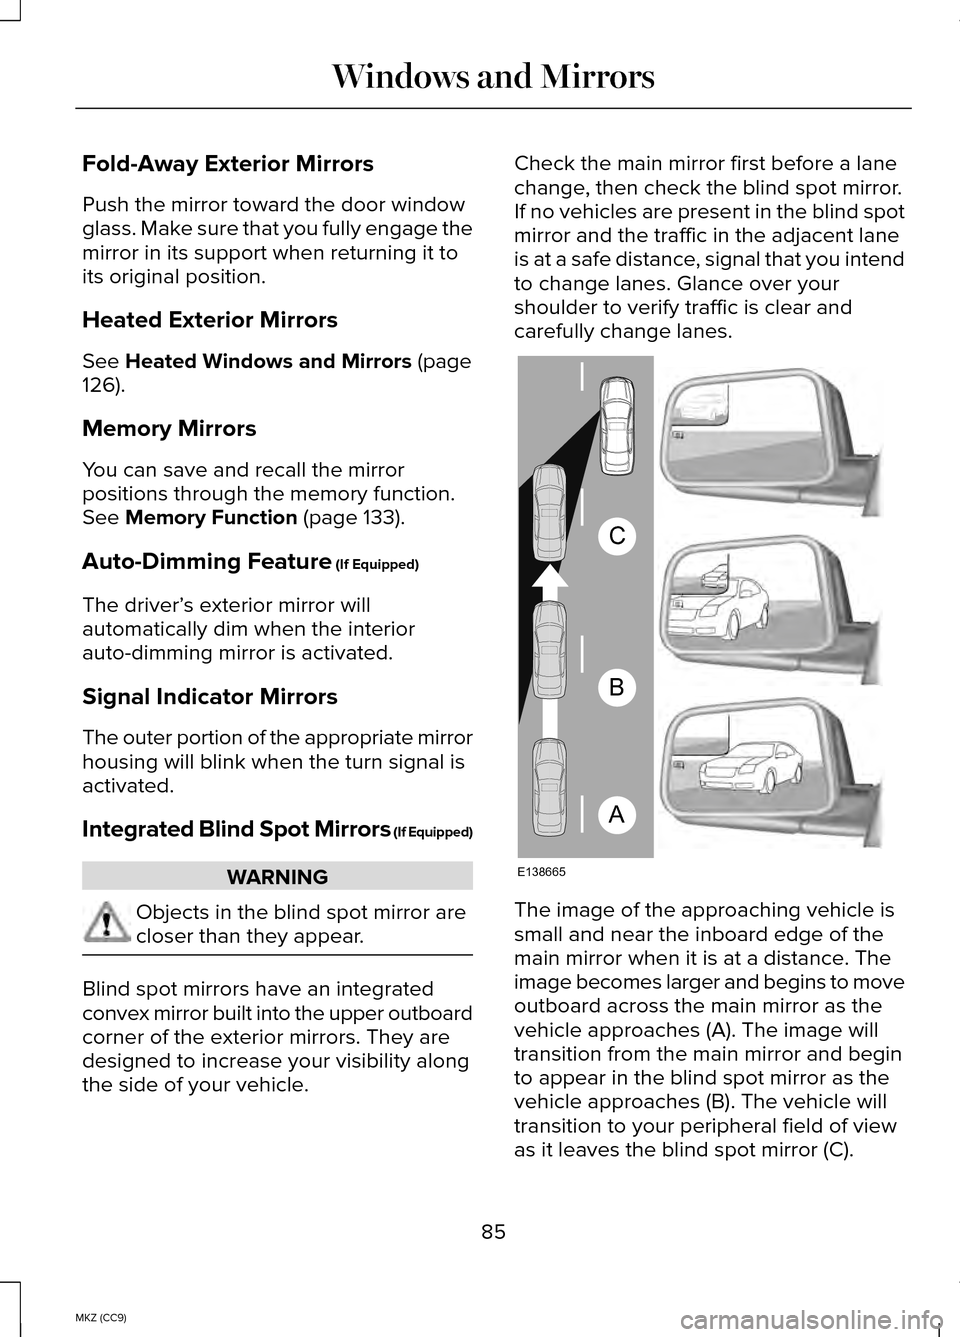
The image of the approaching vehicle is
small and near the inboard edge of the
main mirror when it is at a distance. The
image becomes larger and begins to move
outboard across the main mirror as the
vehicle approaches (A). The image will
transition from the main mirror and begin
to appear in the blind spot mirror as the
vehicle approaches (B). The vehicle will
transition to your peripheral field of view
as it leaves the blind spot mirror (C).
85
MKZ (CC9) Windows and MirrorsA
B
C
E138665
Page 94 of 445

Adaptive Cruise Control (If Equipped)
The speed control system
indicator light changes color to
indicate what mode the system
is in:
See Using Adaptive Cruise Control
(page 192).
On (white light): Lights when you turn the
adaptive cruise control system on. Turns
off when you turn the speed control
system off.
Engaged (green light): Lights when the
adaptive cruise control system engages.
Turns off when the speed control system
disengages.
Anti-Lock Braking System If it lights when you are driving,
this indicates a malfunction. You
will continue to have the normal
braking system (without Anti-lock braking
system) unless the brake system warning
lamp also lights. Have an authorized dealer
check the system.
Battery If it lights while driving, it
indicates a malfunction. Switch
off all unnecessary electrical
equipment and have an authorized dealer
check the system immediately.
Blind Spot Monitor
(If Equipped) Lights when you switch this
feature off or with a blind spot
message.
See Using Adaptive
Cruise Control (page 192). See
Information Messages (page 109). Brake System Lights when you engage the
parking brake with the ignition
on.
If it lights when you are driving, check that
the parking brake is not on. If the parking
brake is not on, this Brake System lamp
indicates low brake fluid level or a brake
system malfunction. Have an authorized
dealer check the system immediately. WARNING
Driving your vehicle with the warning
lamp on is dangerous. A significant
decrease in braking performance may
occur. It will take you longer to stop your
vehicle. Have an authorized dealer check
the system immediately. Driving extended
distances with the parking brake engaged
can cause brake failure and the risk of
personal injury. Cruise Control
(If Equipped)
Lights when you switch on
cruise control.
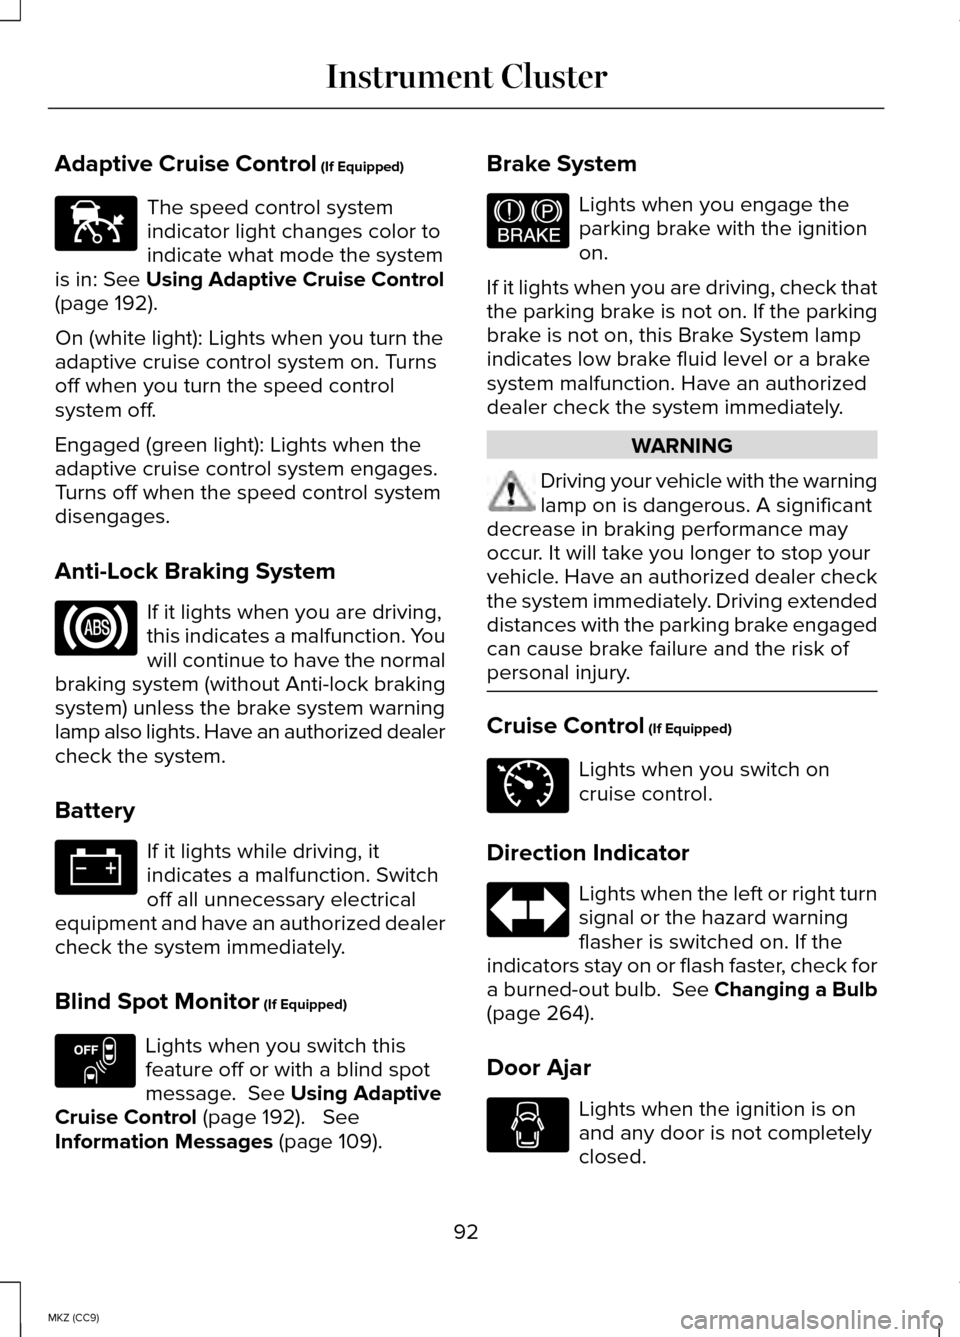
Direction Indicator Lights when the left or right turn
signal or the hazard warning
flasher is switched on. If the
indicators stay on or flash faster, check for
a burned-out bulb. See Changing a Bulb
(page
264).
Door Ajar Lights when the ignition is on
and any door is not completely
closed.
92
MKZ (CC9) Instrument ClusterE144524 E151262 E144522 E71340
Page 142 of 445

1. With your vehicle parked outside of
the garage, turn your ignition to the on
position, but do not start your vehicle.
2. Hold your hand-held garage door transmitter 1–3 inches (2–8
centimeters) away from the HomeLink
button you want to program.
3. Using both hands, simultaneously, press and hold the desired HomeLink
button and the hand-held transmitter
button. DO NOT release either one
until the HomeLink indicator light
flashes slowly and then rapidly. When
the indicator light flashes rapidly, both
buttons may be released. The rapid
flashing indicates successful training.
4. Press and hold the HomeLink button you programmed for five seconds, then
release. You may need to do this twice
to activate the door. If your garage
door does not operate, watch the
HomeLink indicator light.
If the indicator light stays on, the
programming is complete. See
Programming your garage door motor
later in this section.
If the indicator light flashes rapidly for 2
seconds and then turns to a constant light,
the HomeLink button is not programmed
yet. Do the following: Press and hold the HomeLink button while
you press and release the hand-held
transmitter button every 2 seconds. The
HomeLink indicator light will flash slowly
and then rapidly once the HomeLink
function button recognizes and accepts
the hand-held transmitter’
s radio
frequency signal.
After programming the HomeLink button,
begin programming your garage door
opener motor.
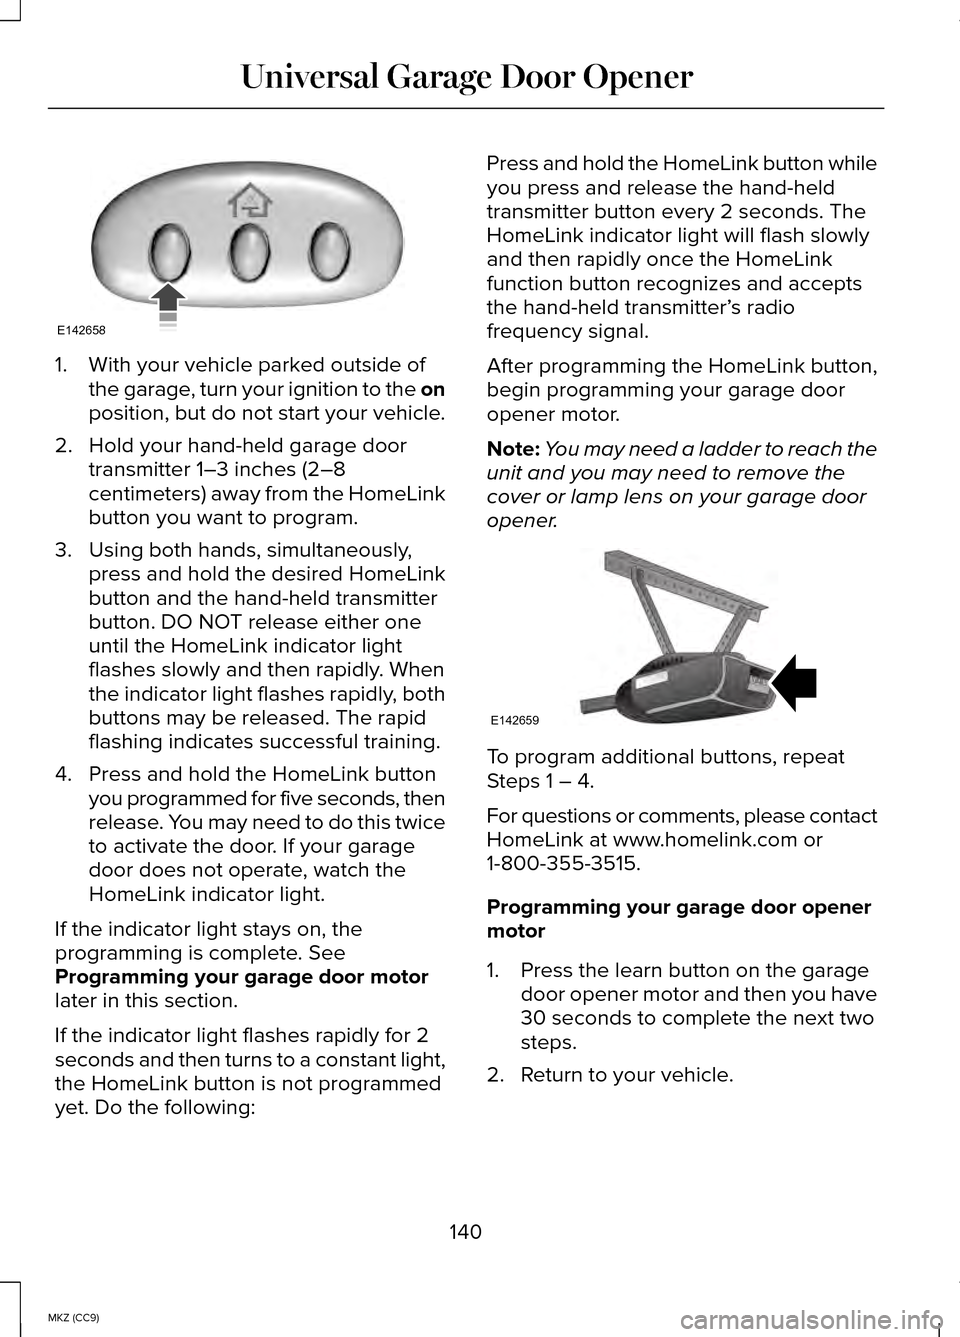
Note: You may need a ladder to reach the
unit and you may need to remove the
cover or lamp lens on your garage door
opener. To program additional buttons, repeat
Steps 1 – 4.
For questions or comments, please contact
HomeLink at www.homelink.com or
1-800-355-3515.
Programming your garage door opener
motor
1. Press the learn button on the garage
door opener motor and then you have
30 seconds to complete the next two
steps.
2. Return to your vehicle.
140
MKZ (CC9) Universal Garage Door OpenerE142658 E142659
Page 186 of 445

•
The sensing system reports the
obstacle which is closest to the front
or rear of the vehicle. For example, if
an obstacle is 24 inches (60
centimeters) from the front of the
vehicle and, at the same time, an
obstacle is only 16 inches (40
centimeters) from the rear of the
vehicle, the lower pitched tone sounds.
• An alternating warning sounds from
the front and rear if there are objects
at both bumpers that are closer than
10 inches (25 centimeters).
For specific information on the reverse
sensing portion of the system, refer to that
section.
ACTIVE PARK ASSIST (IF EQUIPPED) WARNING
This system is designed to be a
supplementary park aid. It may not
work in all conditions and is not intended
to replace the driver’ s attention and
judgment. The driver is responsible for
avoiding hazards and maintaining a safe
distance and speed, even when the
system is in use. Note:
The driver is always responsible for
controlling the vehicle, supervising the
system and intervening if required.
Note: The sensors may not detect objects
in heavy rain or other conditions that
cause disruptive reflections.
Note: The sensors may not detect objects
with surfaces that absorb ultrasonic
waves. The system detects an available parallel
parking space and automatically steers
the vehicle into the space (hands-free)
while you control the accelerator, gearshift
and brakes. The system visually and
audibly instructs you to park the vehicle.
The system may not function correctly if
something passes between the front
bumper and the parking space (i.e. a
pedestrian or cyclist) or if the edge of the
neighboring parked vehicle is high from
the ground (i.e. a bus, tow truck or flatbed
truck).
The system should not be used if:
•
a foreign object (i.e. bike rack or trailer)
is attached to the front or rear of the
vehicle or at another location close to
the sensors.
• an overhanging object (i.e. surfboard)
is attached to the roof.
• the front bumper or side sensors are
damaged (i.e. in a collision) or
obstructed by a foreign object (i.e. front
bumper cover).
• a mini-spare tire is in use.
Using Active Park Assist Press the button located on the
right side of the center stack.
The touch screen displays a message and
a corresponding graphic to indicate it's
searching for a parking space. Use the turn
signal to indicate which side of the vehicle
you want the system to search on.
Note: If the turn signal is not on, the
system automatically searches on the
vehicle's passenger side.
184
MKZ (CC9) Parking AidsE146186
Page 205 of 445

•
the road has no or poor lane markings
in the camera field-of-view
• the camera is obscured or unable to
detect the lane markings due to
environmental conditions (e.g.
significant sun angles or shadows,
snow, heavy rain, fog), traffic conditions
(e.g. following a large vehicle that is
blocking or shadowing the lane), or
vehicle conditions (e.g. poor headlamp
illumination).
See Troubleshooting for additional
information.
Green: Indicates that the system is
available or ready to provide a warning or
intervention, on the indicated side(s). Yellow: Indicates that the system is
providing or has just provided a lane
keeping aid intervention.
Red: Indicates that the system is providing
or has just provided a lane keeping alert
warning.
The system can be temporarily suppressed
at any time by the following:
•
Quick braking
• Fast acceleration
• Using the turn signal indicator
• Evasive steering maneuver
Troubleshooting Why is the feature not available (line markings are gray) when I can s\
ee the lane markings
on the road?
Vehicle speed is outside the operational range of the feature
Sun is shining directly into the camera lens
Quick intentional lane change
Staying too close to the lane marking
Driving at high speeds in curves
Previous feature activation happened within the last one second
Ambiguous lane markings (mainly in construction zones)
Rapid transition from light to dark or vice versa
Sudden offset in lane markings
ABS or AdvanceTrac activation
Camera blockage due to dirt, grime, fog, frost or water on the windshield
Driving too close to the vehicle in front of you
203
MKZ (CC9) Driving Aids