Page 467 of 844

GS350_OM_OM30D41U_(U)
4675-3. Using the audio system
5
Interior features
■Selecting one file/track at a time
Select “<” or “>” on the screen to select the next/previous file/track.
Turn the “TUNE/SCROLL” knob or press “<” or “>” on the
“PRST•TRACK” button to select the desired file/track.
■Selecting a file/track from the list
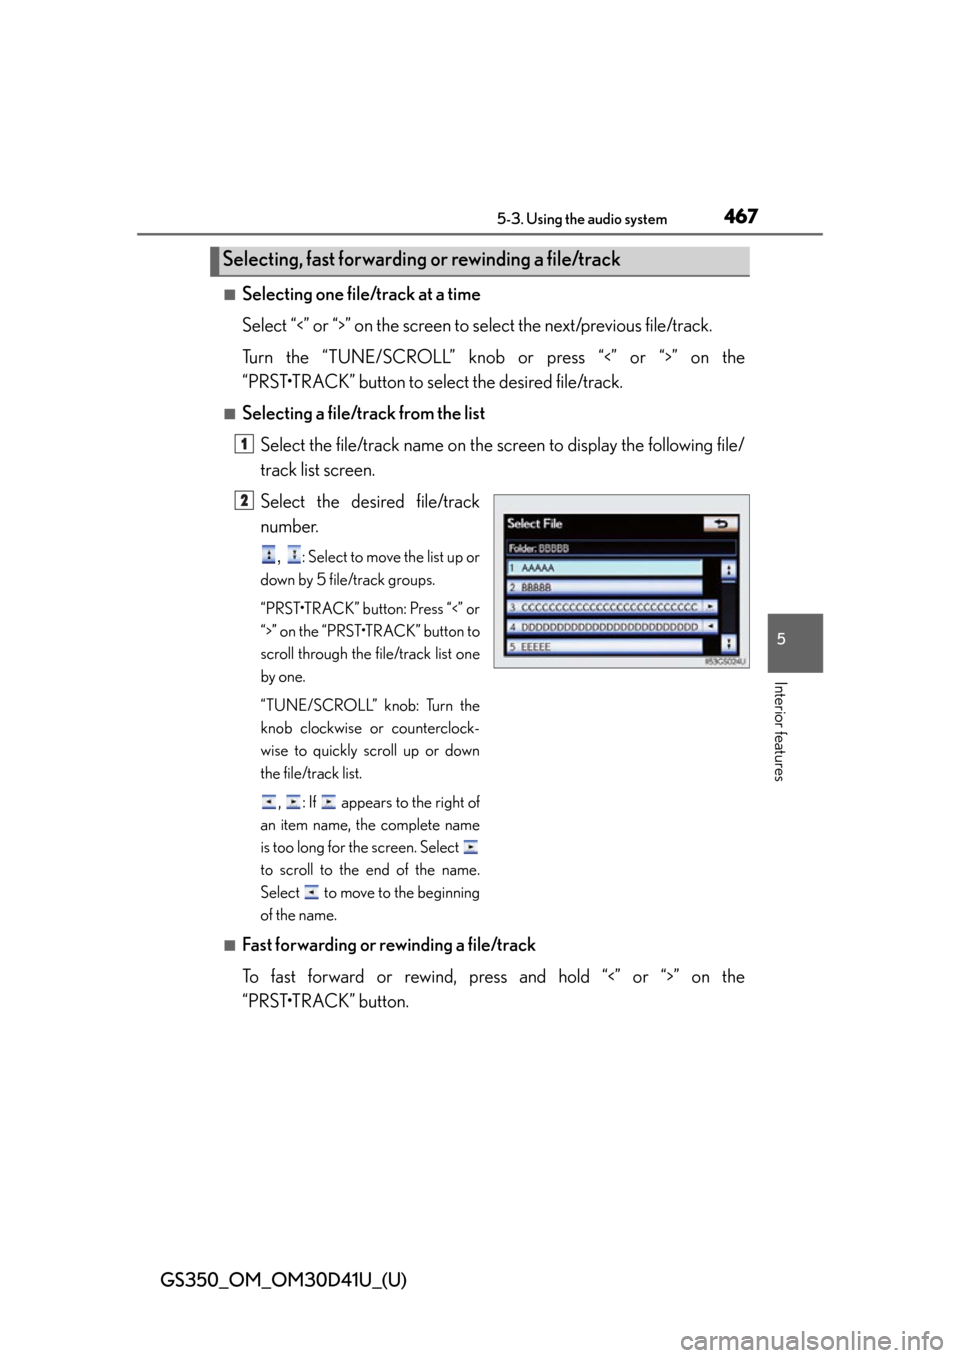
Select the file/track name on the scr een to display the following file/
track list screen.
Select the desired file/track
number.
, : Select to move the list up or
down by 5 file/track groups.
“PRST•TRACK” button: Press “<” or
“>” on the “PRST•TRACK” button to
scroll through the file/track list one
by one.
“TUNE/SCROLL” knob: Turn the
knob clockwise or counterclock-
wise to quickly scroll up or down
the file/track list.
, : If appears to the right of
an item name, the complete name
is too long for the screen. Select
to scroll to the end of the name.
Select to move to the beginning
of the name.
■Fast forwarding or rewinding a file/track
To fast forward or rewind, pres s and hold “<” or “>” on the
“PRST•TRACK” button.
Selecting, fast forwarding or rewinding a file/track
1
2
Page 478 of 844

478
GS350_OM_OM30D41U_(U)
5-3. Using the audio system
■Selecting one track at a time
Select “<” or “>” on the screen to select the next/previous track.
Turn the “TUNE/SCROLL” knob or press “<” or “>” on the
“PRST•TRACK” button to select the desired track.
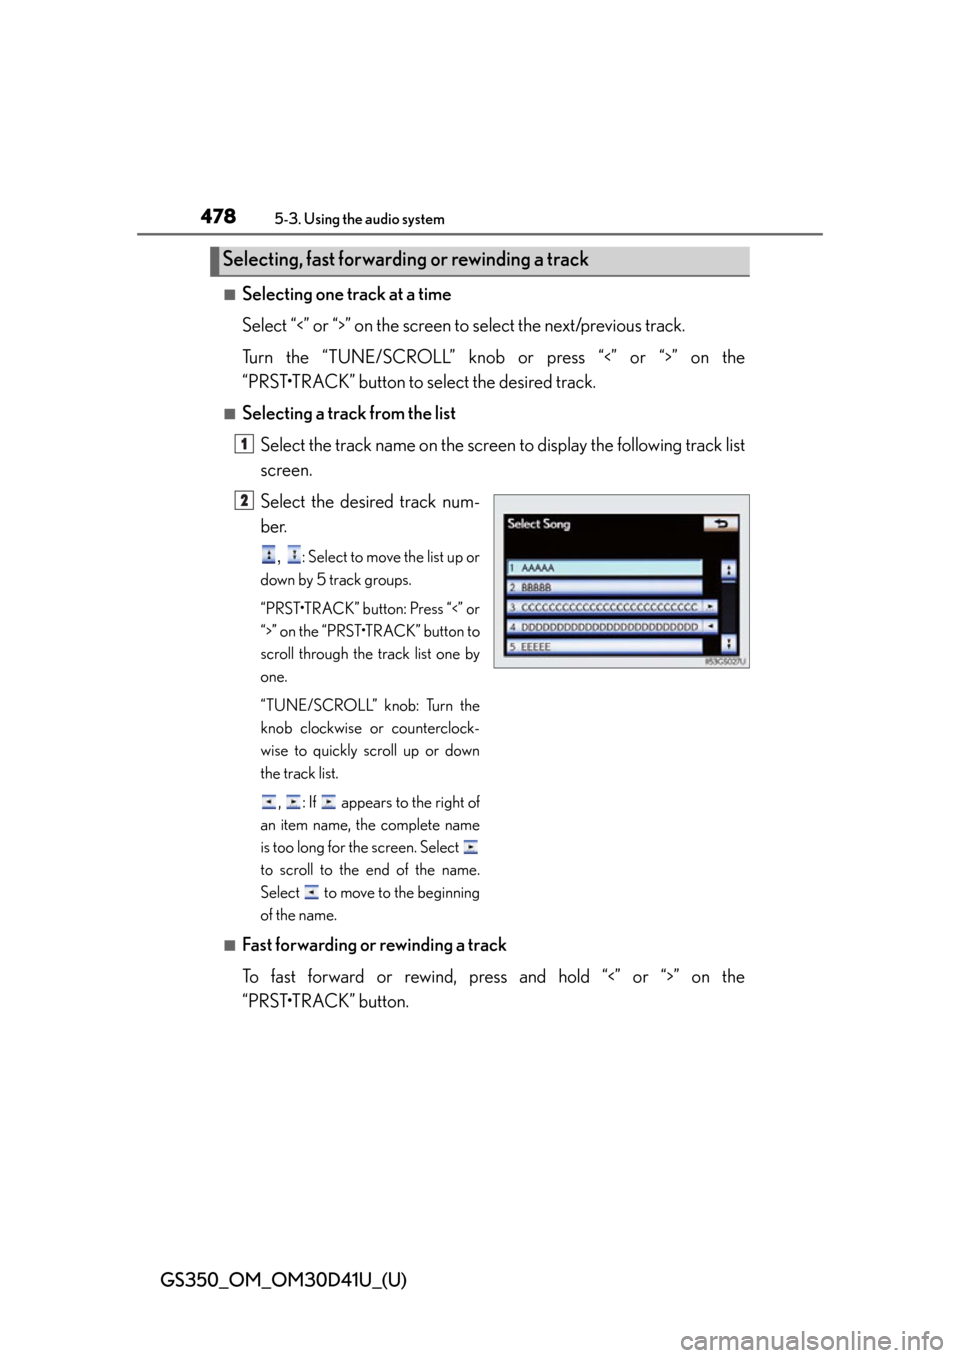
■Selecting a track from the list Select the track name on the screen to display the following track list
screen.
Select the desired track num-
ber.
, : Select to move the list up or
down by 5 track groups.
“PRST•TRACK” button: Press “<” or
“>” on the “PRST•TRACK” button to
scroll through the track list one by
one.
“TUNE/SCROLL” knob: Turn the
knob clockwise or counterclock-
wise to quickly scroll up or down
the track list.
, : If appears to the right of
an item name, the complete name
is too long for the screen. Select
to scroll to the end of the name.
Select to move to the beginning
of the name.
■Fast forwarding or rewinding a track
To fast forward or rewind, pres s and hold “<” or “>” on the
“PRST•TRACK” button.
Selecting, fast forwarding or rewinding a track
1
2
Page 575 of 844
575
GS350_OM_OM30D41U_(U)5-7. Other interior features
5
Interior features
Clock
Pressing and holding will move
the clock hands backward.
Pressing and holding will move
the clock hands forward.
The clock can be adjusted by pressing the buttons.
1
2
Page 632 of 844

632
GS350_OM_OM30D41U_(U)
6-3. Do-it-yourself maintenance
■Adding engine oil
If the oil level is below or near the
low level mark, add engine oil of
the same type as that already in
the engine.
Make sure to check the oil type and prepare the items needed before
adding oil.
Remove the oil filler cap by turning it counterclockwise.
Add engine oil slowly, checking the dipstick.
Install the oil filler cap by turning it clockwise.
■Engine oil consumption
A certain amount of engine oil will be cons umed while driving. In the following situa-
tions, oil consumption may increase, and engine oil may need to be refilled in
between oil maintenance intervals.
●When the engine is new, for example direct ly after purchasing the vehicle or after
replacing the engine
●If low quality oil or oil of an inappropriate viscosity is used
●When driving at high engine speeds or with a heavy load, or when driving while
accelerating or decelerating frequently
●When leaving the engine idling for a long time, or when driving frequently through
heavy traffic
Engine oil selection P. 7 7 1
Oil quantity (Low Full) 1.6 qt. (1.5 L, 1.3 Imp.qt.)
Items Clean funnel
1
2
3
Page 664 of 844
664
GS350_OM_OM30D41U_(U)
6-3. Do-it-yourself maintenance
■Engine compartment (type A fuse box)
Fuse layout and amperage ratings
FuseAmpereCircuit
1LH J/B-B40Left-hand junction block
2VGRS40VGRS
3RH J/B-B40Right-hand junction block
4P/ I - B N O. 280F/PMP, EFI MAIN, A/F HTR, EDU, IG2
MAIN
5ALT150RH J/B ALT, P/I ALT, LH J/B ALT, LUG J/B
ALT
6P/ I A LT100RR DEF, TAIL, FR FOG, DEICER, PANEL,
RR S/SHADE
7RH J/B ALT80Right-hand junction block
8MPX-B10
Smart access system with push-button start,
electric tilt and telescopic steering column,
power seats, head-up display, front right-
hand door ECU, gauges and meters, steer-
ing sensor, yaw rate and G sensor, overhead
module, front left-hand door ECU, power
trunk opener and closer, RR CTRL SW,
clock, body ECU, CAN gateway ECU
Page 680 of 844
680
GS350_OM_OM30D41U_(U)
6-3. Do-it-yourself maintenance
Turn the bulb base counter-
clockwise.
Set the new light bulb.
Align the 3 tabs on the light bulb
with the mounting, and insert. Turn
it clockwise to set.
Set the connector.
After installing the connector,
shake the bulb base gently to check
that it is not loose, turn the fog lights
on once and visually confirm that
no light is leaking through the
mounting.
Reinstall the fender liner and
install the clips.
Insert the clips and turn to lock.
4
5
6
7
Page 681 of 844
GS350_OM_OM30D41U_(U)
6816-3. Do-it-yourself maintenance
6
Maintenance and care
■Front turn signal lights (vehicles with discharge headlights)For the left side only: To allow
enough working space, turn
the steering wheel all the way
to the right, then remove the
bolts and take off the cover.
Turn the bulb base counterclockwise.
1
2
Right sideLeft side
Page 683 of 844
GS350_OM_OM30D41U_(U)
6836-3. Do-it-yourself maintenance
6
Maintenance and care
■Front turn signal lights (vehicles with LED headlights)For the left side only: Remove
the bolt and move the washer
fluid filler opening.
Turn the bulb base counter-
clockwise.
Remove the light bulb.
1
2
3