Page 242 of 410
242
3. MEDIA OPERATION
CT200h_Navi_OM76113E_(EE)
13.12.06 15:16
Registering an additional device
1Select “Connect” on the Bluetooth®
audio control screen.
2For more information: P.58
Selecting a registered device
1Select “Connect” on the Bluetooth®
audio control screen.
2For more information: P.60
1Select .
Each time is selected, the mode
changes as follows:
• track repeat
album repeat off
CONNECTING A Bluetooth®
DEVICE
To use the Bluetooth® audio system,
it is necessary to register a Blue-
tooth
® device with the system.
LISTENING TO Bluetooth®
AUDIO
REPEATING
The track or album currently being
listened to can be repeated.
INFORMATION
Each time is selected, “RPT”/
“ALB.RPT” appears on the screen.
Page 277 of 410
277
6. TIPS FOR OPERATING THE AUDIO/VISUAL SYSTEM
4
AUDIO/VISUAL SYSTEM
CT200h_Navi_OM76113E_(EE)
13.12.06 15:16
Bluetooth®
Audio
“Music tracks not
supported. Check
your portable play-
er.”
This indicates a problem in the Bluetooth® de-
vice.
ModeMessageExplanation
Page 286 of 410

286
1. SPEECH COMMAND SYSTEM OPERATION
CT200h_Navi_OM76113E_(EE)
13.12.06 15:16
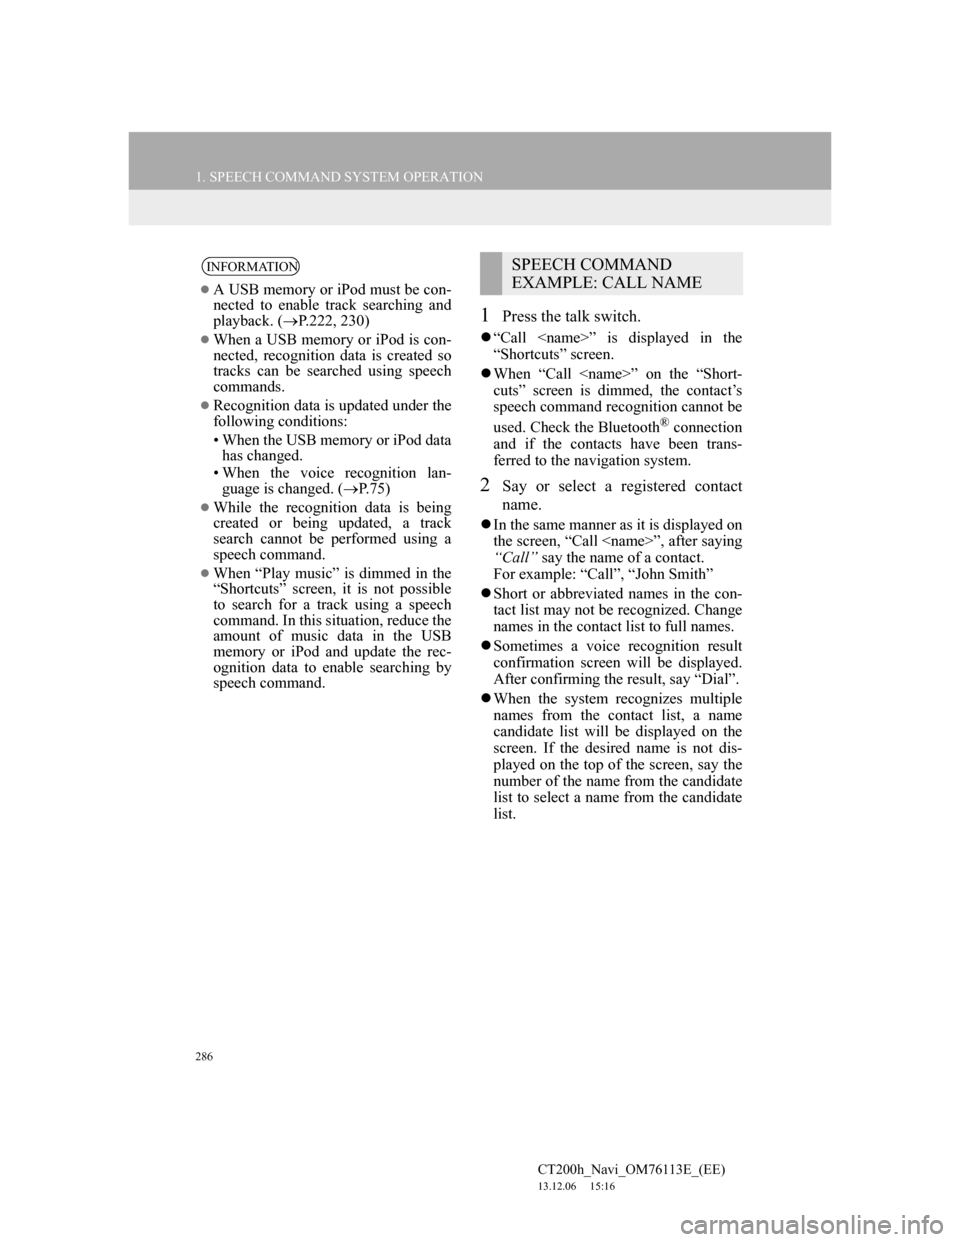
1Press the talk switch.
“Call ” is displayed in the
“Shortcuts” screen.
When “Call ” on the “Short-
cuts” screen is dimmed, the contact’s
speech command recognition cannot be
used. Check the Bluetooth
® connection
and if the contacts have been trans-
ferred to the navigation system.
2Say or select a registered contact
name.
In the same manner as it is displayed on
the screen, “Call ”, after saying
“Call” say the name of a contact.
For example: “Call”, “John Smith”
Short or abbreviated names in the con-
tact list may not be recognized. Change
names in the contact list to full names.
Sometimes a voice recognition result
confirmation screen will be displayed.
After confirming the result, say “Dial”.
When the system recognizes multiple
names from the contact list, a name
candidate list will be displayed on the
screen. If the desired name is not dis-
played on the top of the screen, say the
number of the name from the candidate
list to select a name from the candidate
list.
INFORMATION
A USB memory or iPod must be con-
nected to enable track searching and
playback. (P.222, 230)
When a USB memory or iPod is con-
nected, recognition data is created so
tracks can be searched using speech
commands.
Recognition data is updated under the
following conditions:
• When the USB memory or iPod data
has changed.
• When the voice recognition lan-
guage is changed. (P.75)
While the recognition data is being
created or being updated, a track
search cannot be performed using a
speech command.
When “Play music” is dimmed in the
“Shortcuts” screen, it is not possible
to search for a track using a speech
command. In this situation, reduce the
amount of music data in the USB
memory or iPod and update the rec-
ognition data to enable searching by
speech command.
SPEECH COMMAND
EXAMPLE: CALL NAME
Page 287 of 410

287
1. SPEECH COMMAND SYSTEM OPERATION
5
SPEECH COMMAND SYSTEM
CT200h_Navi_OM76113E_(EE)
13.12.06 15:16
When a contact has multiple telephone
numbers registered in the contact list, a
candidate list will be displayed. If the
desired telephone number is not dis-
played on the top of the screen, say the
number of the desired telephone num-
ber from the candidate list to select a
telephone number from the candidate
list.
3Say or select “Dial” to call the tele-
phone number.
1Press the talk switch.
“Dial ” is displayed in the
“Shortcuts” screen.
When “Dial ” on the “Short-
cuts” screen is dimmed, the telephone
number voice recognition cannot be
used. Check the Bluetooth
® phone con-
nection.
2Say the telephone number.
In the same manner as it is displayed on
the screen, “Dial ”, after say-
ing “Dial” say the telephone number.
Say the telephone number one digit at a
time.
For example, if the telephone number is
2345678:
Say “two three four five six seven
eight”
As the system cannot recognize addi-
tional numbers, say the complete num-
ber without stopping.
When the system recognizes multiple
telephone numbers, a telephone number
candidate list will be displayed on the
screen. If the desired telephone number
is not displayed on the top of the
screen, say the number of the desired
telephone number from the candidate
list to select a telephone number from
the candidate list.
3Say or select “Dial” to call the tele-
phone number.
SPEECH COMMAND
EXAMPLE: DIAL NUMBER
Page 299 of 410

299
1. LEXUS PARKING ASSIST MONITOR
CT200h_Navi_OM76113E_(EE)
13.12.06 15:16
6
PERIPHERAL MONITORING SYSTEM
2. PERPENDICULAR PARKING (ESTIMATED COURSE LINE DISPLAY MODE)
SCREEN DESCRIPTION
No.DisplayFunction
Vehicle width guide
line
Displays a guide path when the vehicle is being
backed straight up.
The displayed width is wider than the actual vehi-
cle width.
These guide lines align with the estimated course
lines when the vehicle is going straight ahead.
Estimated course linesShow a estimated course when the steering wheel is
turned.
Distance guide lines
Show distance behind the vehicle when the steering
wheel is turned.
The guide lines move in conjunction with the esti-
mated course lines.
The guide lines display points approximately 0.5 m
(1.5 ft.) (red) and approximately 1 m (3 ft.) (yel-
low) from the centre of the edge of the bumper.
Distance guide line
Shows distance behind the vehicle.
Displays a point approximately 0.5 m (1.5 ft.)
(blue) from the edge of the bumper.
WA R N I N G
If the steering wheel is straight and the vehicle width guide lines and the estimated
course lines are not in alignment, have the vehicle inspected by your Lexus dealer
or repairer, or another duly qualified and equipped professional.
Page 303 of 410

303
1. LEXUS PARKING ASSIST MONITOR
CT200h_Navi_OM76113E_(EE)
13.12.06 15:16
6
PERIPHERAL MONITORING SYSTEM
4. PARALLEL PARKING
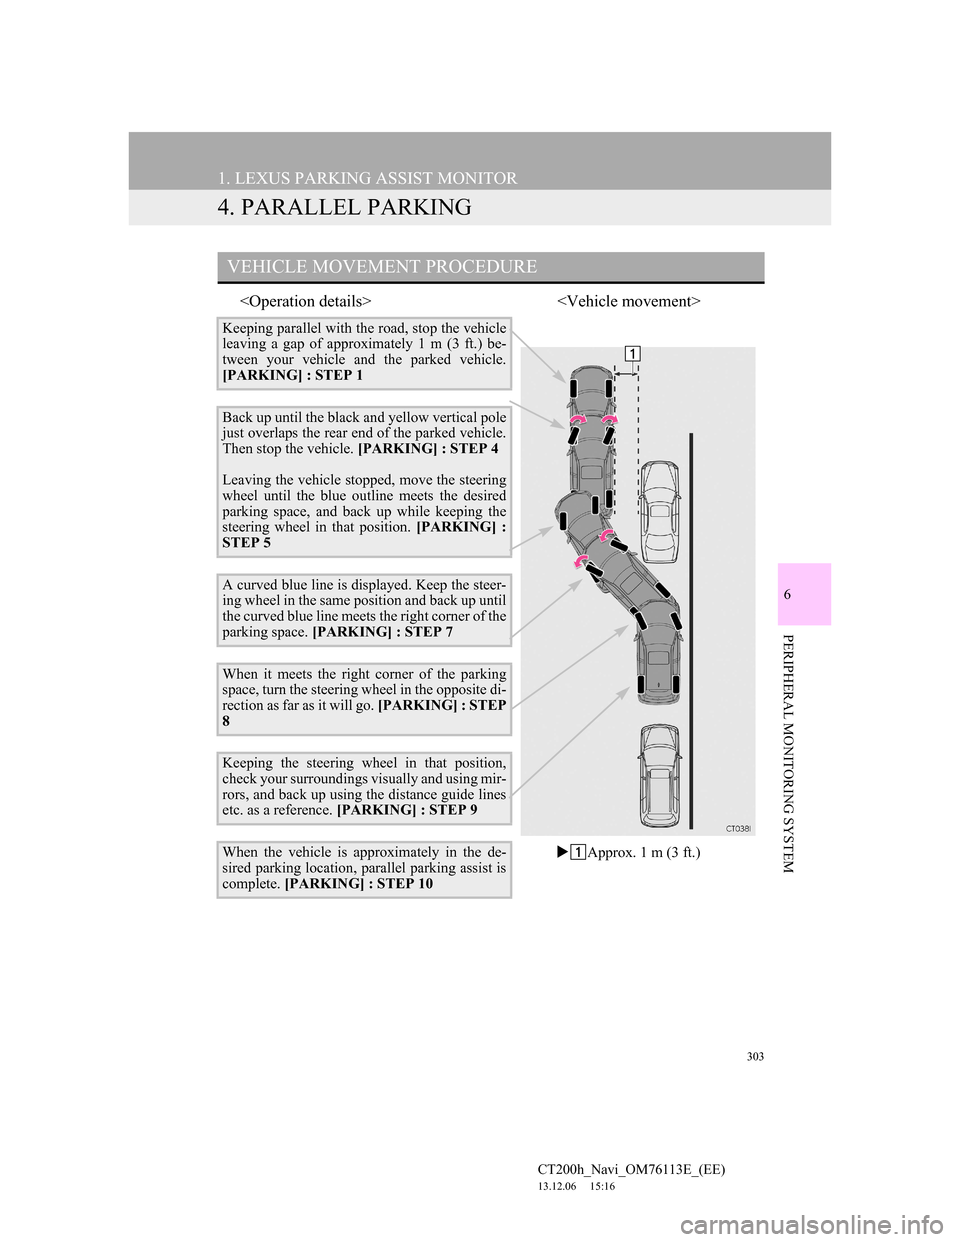
VEHICLE MOVEMENT PROCEDURE
Keeping parallel with the road, stop the vehicle
leaving a gap of approximately 1 m (3 ft.) be-
tween your vehicle and the parked vehicle.
[PARKING] : STEP 1
Back up until the black and yellow vertical pole
just overlaps the rear end of the parked vehicle.
Then stop the vehicle. [PARKING] : STEP 4
Leaving the vehicle stopped, move the steering
wheel until the blue outline meets the desired
parking space, and back up while keeping the
steering wheel in that position. [PARKING] :
STEP 5
A curved blue line is displayed. Keep the steer-
ing wheel in the same position and back up until
the curved blue line meets the right corner of the
parking space. [PARKING] : STEP 7
When it meets the right corner of the parking
space, turn the steering wheel in the opposite di-
rection as far as it will go. [PARKING] : STEP
8
Keeping the steering wheel in that position,
check your surroundings visually and using mir-
rors, and back up using the distance guide lines
etc. as a reference. [PARKING] : STEP 9
When the vehicle is approximately in the de-
sired parking location, parallel parking assist is
complete. [PARKING] : STEP 10Approx. 1 m (3 ft.)
Page 306 of 410
306
1. LEXUS PARKING ASSIST MONITOR
CT200h_Navi_OM76113E_(EE)
13.12.06 15:16
2Shift the shift position to “R”.
3Make sure the monitor displays the
part behind the rear tyres of the
parked vehicle, and touch .
If the area is not displayed, move the
vehicle to forward.
4With the steering wheel straight,
back up slowly to a position at which
the black and yellow vertical pole
just overlaps the rear end of the
parked vehicle. Then stop the vehi-
cle.
Black and yellow vertical pole
Back the vehicle up to here
5Turn the steering wheel with the ve-
hicle stopped until the blue outline
meets the desired parking space.
If the extended line from the blue out-
line is displayed, the parallel parking
assist is operational.
Blue outline
Black and yellow vertical pole
Extended line
Page 307 of 410
307
1. LEXUS PARKING ASSIST MONITOR
6
PERIPHERAL MONITORING SYSTEM
CT200h_Navi_OM76113E_(EE)
13.12.06 15:16
Turn the steering wheel right
Black and yellow vertical pole
Blue outline
WA R N I N G
Be sure to check that there are no
obstacles inside the blue outline.
If there are any obstacles inside the
blue outline, do not use the parallel
parking assist.
When positioning the blue outline
over the parking space, be sure to
position it so that the extended blue
line may not cross the tyre of the
vehicle parked in front of the empty
space.
If the extended line of the blue outline
is crossing the parked vehicle, your
vehicle may be too close. Check that
there is a gap of approximately 1 m (3
ft.) between your vehicle and the
parked vehicle.
Extended line overlapping wheel