2014 Lancia Voyager AUX
[x] Cancel search: AUXPage 199 of 364

NOTE: If your vehicle has experi-
enced any damage in the area
where the sensor is located, even if
the fascia is not damaged, the sen-
sor may have become misaligned.
Take your vehicle to an authorized
dealer to verify sensor alignment.
Having a sensor that is misaligned
will result in the BSM not operat-
ing to specification.
Calibrate Compass (for
versions/markets, where
provided)
Refer to “Compass Display” for more
information.
Compass Variance (for
versions/markets, where
provided)
Refer to “Compass Display” for more
information.
Turn Menu Off
Press and release SELECT to turn the
menu off.SOUND SYSTEMS
Refer to your Sound Systems Booklet.
NAVIGATION SYSTEM
(for versions/markets,
where provided)
Refer to your Uconnect® User Manual.
iPod®/USB/MP3
CONTROL (for
versions/markets, where
equipped)
NOTE: This section is for sales
code RES and REQ/REL/RET ra-
dios only with Uconnect®. For
sales code RBZ/RHB, RHR, RHP,
RHW or RB2 touch-screen radio
iPod®/USB/MP3 control feature,
refer to the separate RBZ/RHB,
RHR, RHP, RHW or RB2 User's
Manual. iPod®/USB/MP3 control
is available only for versions/
markets, where provided with
these radios.This feature allows an iPod® or exter-
nal USB device to be plugged into the
USB port, located in the glove com-
partment.
iPod® control supports Mini, 4G,
Photo, Nano, 5G iPod® and iPhone®
devices. Some iPod® software ver-
sions may not fully support the iPod®
control features. Please visit Apple’s
website for software updates.
NOTE:
If the radio has a USB port, refer
to the appropriate Uconnect®
Multimedia radio User’s Manual
for iPod® or external USB de-
vice support capability.
Connecting an iPod® or con- sumer electronic audio device to
the AUX port located in the ra-
dio faceplate, plays media, but
does not use the iPod® /MP3
control feature to control the
connected device.
193
Page 200 of 364

CONNECTING THE iPod®
OR EXTERNAL USB
DEVICE
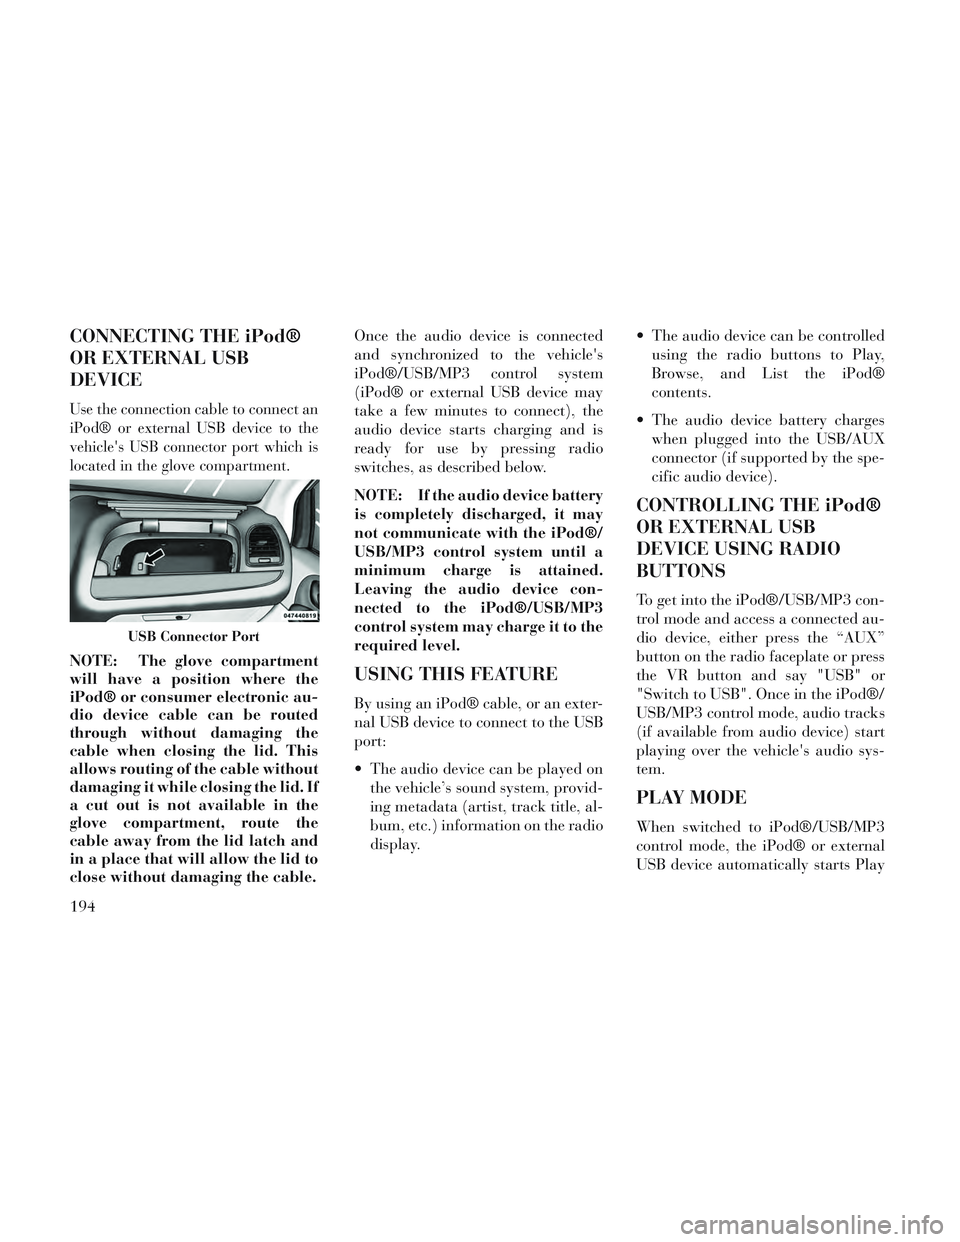
Use the connection cable to connect an
iPod® or external USB device to the
vehicle's USB connector port which is
located in the glove compartment.
NOTE: The glove compartment
will have a position where the
iPod® or consumer electronic au-
dio device cable can be routed
through without damaging the
cable when closing the lid. This
allows routing of the cable without
damaging it while closing the lid. If
a cut out is not available in the
glove compartment, route the
cable away from the lid latch and
in a place that will allow the lid to
close without damaging the cable.Once the audio device is connected
and synchronized to the vehicle's
iPod®/USB/MP3 control system
(iPod® or external USB device may
take a few minutes to connect), the
audio device starts charging and is
ready for use by pressing radio
switches, as described below.
NOTE: If the audio device battery
is completely discharged, it may
not communicate with the iPod®/
USB/MP3 control system until a
minimum charge is attained.
Leaving the audio device con-
nected to the iPod®/USB/MP3
control system may charge it to the
required level.USING THIS FEATURE
By using an iPod® cable, or an exter-
nal USB device to connect to the USB
port:
The audio device can be played on
the vehicle’s sound system, provid-
ing metadata (artist, track title, al-
bum, etc.) information on the radio
display. The audio device can be controlled
using the radio buttons to Play,
Browse, and List the iPod®
contents.
The audio device battery charges when plugged into the USB/AUX
connector (if supported by the spe-
cific audio device).
CONTROLLING THE iPod®
OR EXTERNAL USB
DEVICE USING RADIO
BUTTONS
To get into the iPod®/USB/MP3 con-
trol mode and access a connected au-
dio device, either press the “AUX”
button on the radio faceplate or press
the VR button and say "USB" or
"Switch to USB". Once in the iPod®/
USB/MP3 control mode, audio tracks
(if available from audio device) start
playing over the vehicle's audio sys-
tem.
PLAY MODE
When switched to iPod®/USB/MP3
control mode, the iPod® or external
USB device automatically starts Play
USB Connector Port
194
Page 204 of 364

Touch the 1 soft-key to select anaudio channel, then touch the
VES™ Disc soft-key in the media
column.
Using the Remote Control
Select an audio channel (Channel 1 for 2nd row screen and Channel 2
for 3rd row screen), then press the
source key and select VES™ Disc
from the menu.
Press popup/menu key to navigate disc menu and options.
NOTE: Due to the size of the con-
tent on a Blu-ray disc, the disc may
not start playing immediately.
PLAY VIDEO GAMES
Connect the video game console to the
Auxiliary RCA input jacks or HDMI
port, located on the left side behind
the second row seat. When connecting an external source
to the AUX input, be sure to follow the
standard color coding for the VES™
jacks.
NOTE: Certain high-end video
games, such as Playstation3 and
XBox360 will exceed the power
limit of the vehicle's Power In-
verter. Refer to the Power Inverter
section in your vehicle's Owner's
Manual for more information.
LISTEN TO AN AUDIO
SOURCE ON CHANNEL 2
WHILE A VIDEO IS
PLAYING ON CHANNEL 1
Ensure the Remote Control and
Headphone switch is on Channel 2.
DUAL VIDEO SCREEN
NOTE: Typically there are two
different ways to operate the fea-
tures of the Video Entertainment
System (VES™).
The Remote Control
The Touch-Screen Radio (for
versions/markets, where pro-
vided)
PLAY A DVD USING THE
TOUCH-SCREEN RADIO
NOTE: Headunit DVD player
does not play Blu-Ray discs.
1. Press the OPEN/CLOSE or LOAD
hard-key on the radio faceplate
(Touch-Screen).
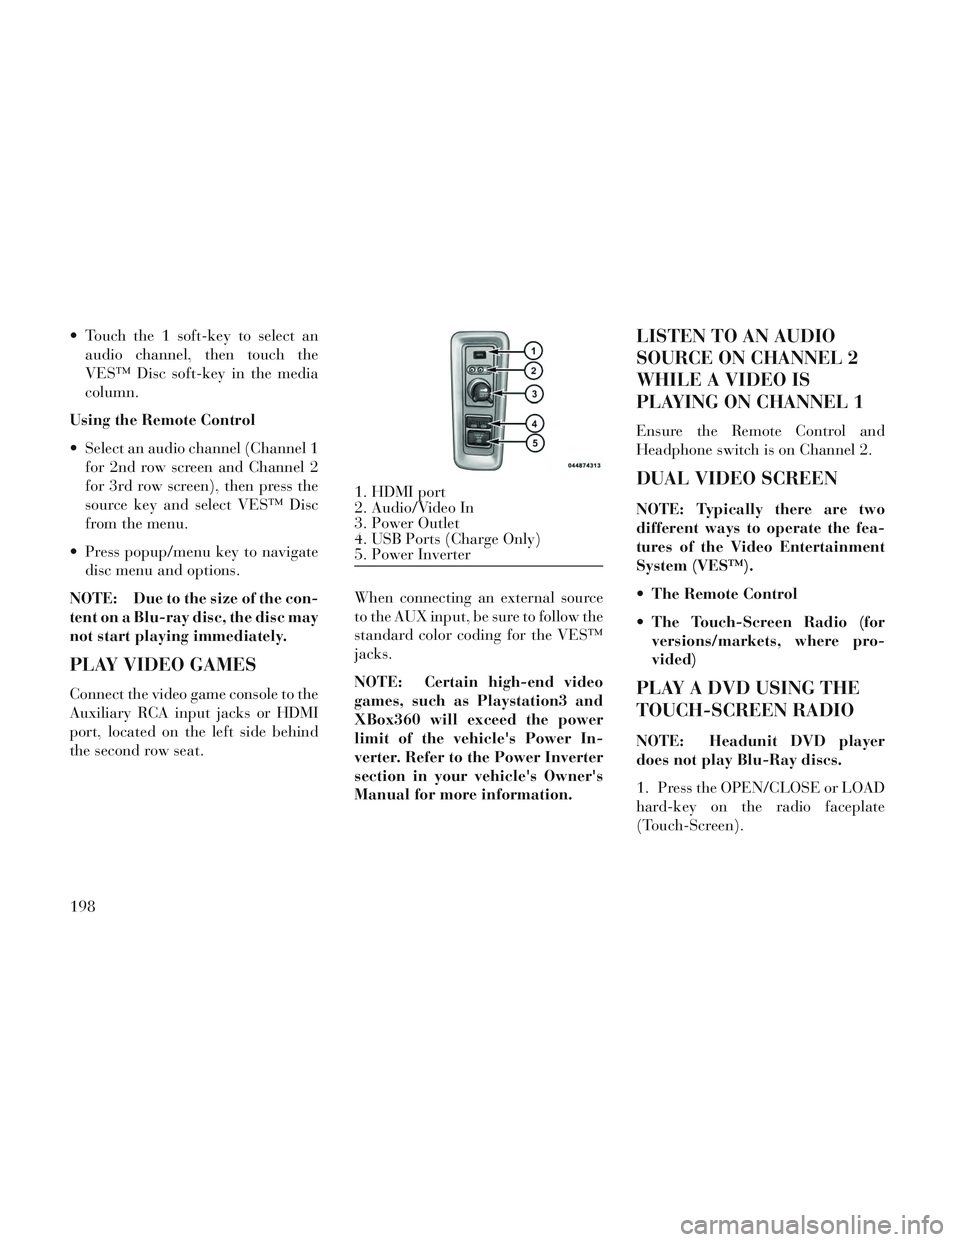
1. HDMI port
2. Audio/Video In
3. Power Outlet
4. USB Ports (Charge Only)
5. Power Inverter
198
Page 215 of 364

1. CD: Ability to Fast Forward, Re-
wind, Scan, and Track Up/Down.
2. CD Changer (in radio): Ability to
Disk Up/Down and program all listed
CD controls (Fast Forward, Rewind,
Scan, and Track Up/Down).
The VES™ can even control radio
modes or video modes while the radio
is turned off. The VES™ can access
the radio modes or disc modes by
navigating to those modes on the
VES™ and activating a radio mode or
disc mode.
INFORMATION MODE
DISPLAY
1. Channel 1 Mode2. Channel 1 Audio Only/Mute
3. Channel 2 Audio Only/Mute
4. Channel 2 Mode
5. Remote Control Lock Out
6. Clock
7. Source Mode
NUMERIC KEYPAD MENU
When the display for either Channel 1
or Channel 2 shows DIRECT TUNE,
pressing the remote control’s OK but-
ton activates a numeric keypad menu.
This screen makes it easy to enter a
specific tuner frequency, or track
number. To enter the desired digit:
1. Press the remote control’s naviga-
tion buttons (▲,
▼,►,◄) to navi-
gate to the desired digit.
2. When the digit is highlighted,
press the remote control’s
ENTER/OK button to select the digit.
Repeat these steps until all digits are
entered. 3. To delete the last digit, navigate to
the Del button and press the remote
control’s ENTER/OK button.
4. After all of the digits are entered,
navigate to the Go button and press
the remote control’s ENTER/OK but-
ton.
DISC MENU
When listening to a CD Audio or CD
Data disc, pressing the remote con-
trol’s POP UP/MENU button displays
a list of all commands which control
playback of the disc. Using the op-
tions you can activate or cancel Scan
play and Random play.
DISPLAY SETTINGS
When watching a video source (DVD
Video with the disc in Play mode, Aux
Video, etc.), pressing the remote con-
trol’s SETUP button activates the
Display Settings menu. These settings
control the appearance of the video on
the screen. The factory default set-
tings are already set for optimum
viewing, so there is no need to change
these settings under normal circum-
stances.
Information Mode Video Screen
Display
209
Page 359 of 364

Oil Filter, Change............309
Onboard Diagnostic System.....307
Operator Manual (Owner's Manual)..6
Outside Rearview Mirrors.......82
Overhead Console............144
Overhead Travel InformationCenter
..................144
Overheating, Engine......178, 286
Owner's Manual(Operator Manual)
...........6
Paint Care.................321
Parking Brake............. .245
ParkSense System, Rear.......138
Pedals, Adjustable...........135
Personal Settings............189
Pets, Transporting............68
Phone, Cellular..............89
Phone, Hands-Free (Uconnect®). .89
Placard, Tire and Loading
Information
............. .256
Power
Door Locks
..............23
Lift Gate................33
Mirrors.................83
Outlet (Auxiliary Electrical
Outlet)
................149
Seats..................111
Sliding Door..............29
Steering............244, 245
Windows................26
Pregnant Women and Seat Belts. . .46
Preparation for Jacking........290
PretensionersSeat Belts
................41
Programmable ElectronicFeatures
................189
Radial Ply Tires.............260
Radio Operation.............218
Radio Remote Controls........217
Radio (Sound Systems)........193
Rear Air Conditioning.........222
Rear Camera.............. .143
Rear Cross Path..............87
Rear Fog Lights.............178
Rear ParkSense System........138
Rearview Mirrors.............82
Rear Window Features........160
Reclining Front Seats.........115
Recorder, Event Data..........55
Recreational Towing..........284
Refrigerant................312
Reminder, Seat Belt...........45
Remote Keyless Entry (RKE).....18
Remote Sound System (Radio)
Controls
................217
Removable Floor Console.......159
Repeater Lights, Side.........332
Replacement Keys............16
Replacement Parts...........307
Replacement Tires...........264
Resetting Oil ChangeIndicator
............173, 184
Restraint, Head.............115
Restraints, Child.............56
Rocking Vehicle When Stuck. . . .298
Roof Rack (Luggage Rack).....161
Rotation, Tires............. .266
Safety Checks Inside Vehicle.....69
Safety Checks Outside Vehicle....71
Safety, Exhaust Gas...........69
Safety Information, Tire.......252
Safety Tips.................68
Schedule, Maintenance. . . .340, 343
Seat Belt Maintenance.........324
Seat Belt Reminder............45
Seat Belts.............. .35, 69
Adjustable Shoulder Belt.....39
Adjustable Upper Shoulder
Anchorage
...............39
And Pregnant Women.......46
Child Restraint............56
Front Seat...............36
Inspection...............69
Pretensioners.............41
353