2014 Lancia Thema instrument panel
[x] Cancel search: instrument panelPage 180 of 332

Resetting A Trip Info Function
To Reset any of the three Trip Info
functions, select the function you
want to reset using the UP or DOWN
buttons. Push the SELECT button
until the feature displays zero.
TIRE BAR
Press and release the UP or DOWN
button until “Tire BAR” is high-
lighted in the EVIC. Press and release
the SELECT button and one of the
following will be displayed:
If tire pressure is OK for all tires avehicle ICON is displayed with tire
pressure values in each corner of
the ICON.
If one or more tires have low pres- sure, "Inflate to XXX" is displayed
with the vehicle ICON and the tire
pressure values in each corner of
the ICON.
If the Tire Pressure system requires service, "Service Tire Pressure Sys-
tem" is displayed. Tire pressure is an information only
function and cannot be reset. Press
and release the BACK button to re-
turn to the main menu.
VEHICLE INFO
(CUSTOMER
INFORMATION FEATURES)
(for versions/markets,
where provided)
Press and release the UP or DOWN
button until "Vehicle Info" is high-
lighted in the EVIC. Press and release
the SELECT button and Coolant
Temp will be displayed. Press the UP
or DOWN button to scroll through the
following information displays.
Coolant Temp
Displays the actual coolant tempera-
ture.
Oil Pressure
Displays the actual oil pressure.
Trans Temperature
Displays the actual transmission
temperature. Engine Hours
Displays the number of hours of en-
gine operation.
MESSAGES #
Select from Main Menu using the UP
or DOWN buttons. This feature shows
the number of stored warning mes-
sages (in the # place holder). Pressing
the SELECT button will allow you to
see what the stored messages are.
Pressing the BACK button takes you
back to the Main Menu.
TURN MENU OFF
Select from Main Menu using the
DOWN button. Pressing the SELECT
button blanks the menu display.
Pressing any one of the four steering
wheel buttons brings the menu back.
Uconnect® SETTINGS
The Uconnect® system uses a combi-
nation of soft and hard keys located
on the center of the instrument panel
that allows you to access and change
the customer programmable features.
174
Page 181 of 332

HARD-KEYS
Hard-Keys are located below the
Uconnect® system in the center of the
instrument panel. In addition, there is
a Scroll/Enter control knob located on
the right side of the Climate Controls
in the center of the instrument panel.
Turn the control knob to scroll
through menus and change settings
(i.e., 30, 60, 90), press the center of
the control knob one or more times to
select or change a setting (i.e., ON,
OFF).
SOFT-KEYS
Soft-Keys are accessible on the
Uconnect® touchscreen.
CUSTOMER
PROGRAMMABLE
FEATURES — Uconnect®
8.4 SETTINGS
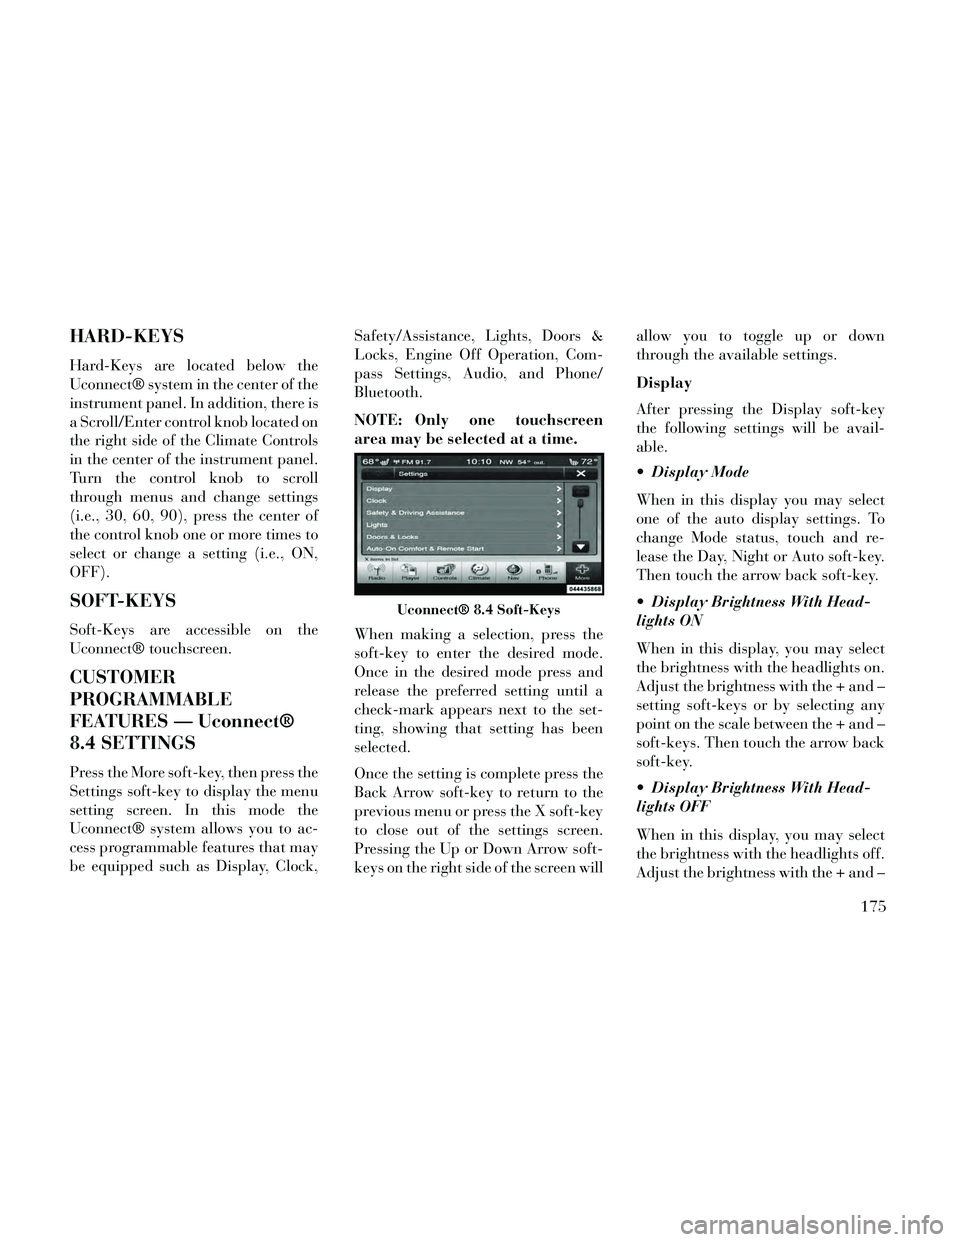
Press the More soft-key, then press the
Settings soft-key to display the menu
setting screen. In this mode the
Uconnect® system allows you to ac-
cess programmable features that may
be equipped such as Display, Clock,Safety/Assistance, Lights, Doors &
Locks, Engine Off Operation, Com-
pass Settings, Audio, and Phone/
Bluetooth.
NOTE: Only one touchscreen
area may be selected at a time.
When making a selection, press the
soft-key to enter the desired mode.
Once in the desired mode press and
release the preferred setting until a
check-mark appears next to the set-
ting, showing that setting has been
selected.
Once the setting is complete press the
Back Arrow soft-key to return to the
previous menu or press the X soft-key
to close out of the settings screen.
Pressing the Up or Down Arrow soft-
keys on the right side of the screen willallow you to toggle up or down
through the available settings.
Display
After pressing the Display soft-key
the following settings will be avail-
able.
Display Mode
When in this display you may select
one of the auto display settings. To
change Mode status, touch and re-
lease the Day, Night or Auto soft-key.
Then touch the arrow back soft-key.
Display Brightness With Head-
lights ON
When in this display, you may select
the brightness with the headlights on.
Adjust the brightness with the + and –
setting soft-keys or by selecting any
point on the scale between the + and –
soft-keys. Then touch the arrow back
soft-key.
Display Brightness With Head-
lights OFF
When in this display, you may select
the brightness with the headlights off.
Adjust the brightness with the + and –
Uconnect® 8.4 Soft-Keys
175
Page 190 of 332

SETTING THE ANALOG
CLOCK
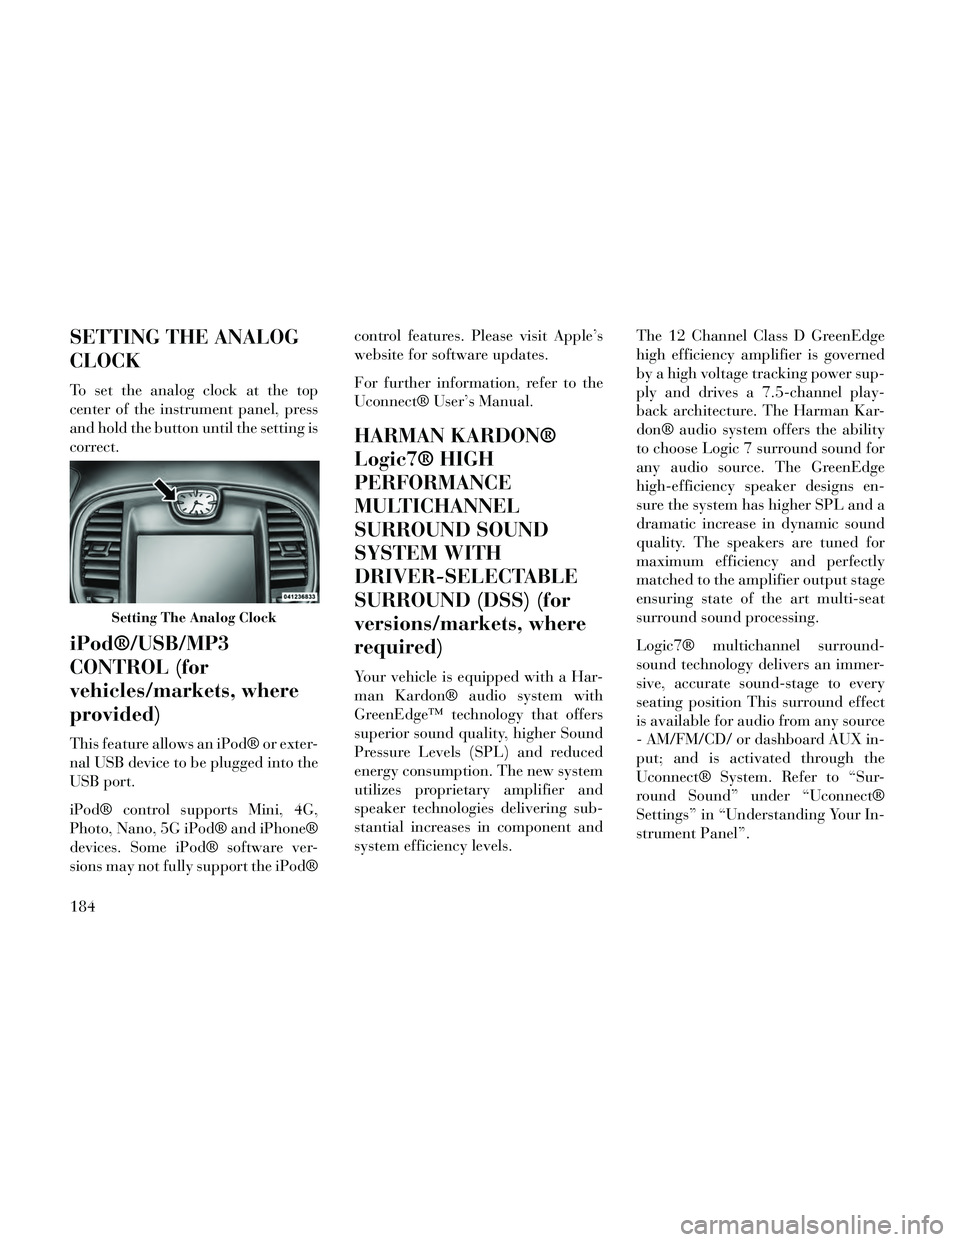
To set the analog clock at the top
center of the instrument panel, press
and hold the button until the setting is
correct.
iPod®/USB/MP3
CONTROL (for
vehicles/markets, where
provided)
This feature allows an iPod® or exter-
nal USB device to be plugged into the
USB port.
iPod® control supports Mini, 4G,
Photo, Nano, 5G iPod® and iPhone®
devices. Some iPod® software ver-
sions may not fully support the iPod®control features. Please visit Apple’s
website for software updates.
For further information, refer to the
Uconnect® User’s Manual.
HARMAN KARDON®
Logic7® HIGH
PERFORMANCE
MULTICHANNEL
SURROUND SOUND
SYSTEM WITH
DRIVER-SELECTABLE
SURROUND (DSS) (for
versions/markets, where
required)
Your vehicle is equipped with a Har-
man Kardon® audio system with
GreenEdge™ technology that offers
superior sound quality, higher Sound
Pressure Levels (SPL) and reduced
energy consumption. The new system
utilizes proprietary amplifier and
speaker technologies delivering sub-
stantial increases in component and
system efficiency levels.
The 12 Channel Class D GreenEdge
high efficiency amplifier is governed
by a high voltage tracking power sup-
ply and drives a 7.5-channel play-
back architecture. The Harman Kar-
don® audio system offers the ability
to choose Logic 7 surround sound for
any audio source. The GreenEdge
high-efficiency speaker designs en-
sure the system has higher SPL and a
dramatic increase in dynamic sound
quality. The speakers are tuned for
maximum efficiency and perfectly
matched to the amplifier output stage
ensuring state of the art multi-seat
surround sound processing.
Logic7® multichannel surround-
sound technology delivers an immer-
sive, accurate sound-stage to every
seating position This surround effect
is available for audio from any source
- AM/FM/CD/ or dashboard AUX in-
put; and is activated through the
Uconnect® System. Refer to “Sur-
round Sound” under “Uconnect®
Settings” in “Understanding Your In-
strument Panel”.
Setting The Analog Clock
184
Page 192 of 332

on the vehicle, the center button will
select the next available CD in the
player.
CD/DVD DISC
MAINTENANCE
To keep a CD/DVD in good condition,
take the following precautions:
1. Handle the disc by its edge; avoid
touching the surface.
2. If the disc is stained, clean the
surface with a soft cloth, wiping from
center to edge.
3. Do not apply paper or tape to the
disc; avoid scratching the disc.
4. Do not use solvents such as ben-
zene, thinner, cleaners, or anti-static
sprays.
5. Store the disc in its case after play-
ing.
6. Do not expose the disc to direct
sunlight.
7. Do not store the disc where tem-
peratures may become too high.NOTE: If you experience diffi-
culty in playing a particular disc, it
may be damaged (i.e., scratched,
reflective coating removed, a hair,
moisture or dew on the disc) over-
sized, or have protection encoding.
Try a known good disc before con-
sidering disc player service.
RADIO OPERATION AND
MOBILE PHONES
Under certain conditions, the mobile
phone being on in your vehicle can
cause erratic or noisy performance
from your radio. This condition may
be lessened or eliminated by relocat-
ing the mobile phone antenna. This
condition is not harmful to the radio.
If your radio performance does not
satisfactorily “clear” by the reposi-
tioning of the antenna, it is recom-
mended that the radio volume be
turned down or off during mobile
phone operation.
CLIMATE CONTROLS
The air conditioning and heating sys-
tem is designed to make you comfort-
able in all types of weather. This sys-
tem can be operated through either
the controls on the instrument panel
or through the Uconnect® system dis-
play.
When the Uconnect® system is in dif-
ferent modes (Radio, Player, Settings,
More, etc.) the driver and passenger
temperature settings will be indicated
at the top of the display.
GENERAL OVERVIEW
Hard-Keys
The hard-keys are located below the
Uconnect® screen, in the center of the
instrument panel.
186
Page 195 of 332

11. Driver Temperature Control
Down Button
Provides the driver with independent
temperature control. Push the button
for cooler temperature settings.
NOTE: In Sync mode, this but-
ton will also automatically adjust
the passenger temperature setting
at the same time.
12. Driver Temperature Control Up
Button
Provides the driver with independent
temperature control. Push the button
for warmer temperature settings.
NOTE: In Sync mode, this but-
ton will also automatically adjust
the passenger temperature setting
at the same time.
13. Modes
1. The airflow distribution mode can
be adjusted so air comes from the
instrument panel outlets, floor out-
lets, demist outlets and defrost out-
lets. The Mode settings are as follows: Panel Mode
Air comes from the outlets in
the instrument panel. Each of
these outlets can be individu-
ally adjusted to direct the flow of air.
The air vanes of the center outlets and
outboard outlets can be moved up and
down or side to side to regulate air-
flow direction. There is a shut off
wheel located below the air vanes to
shut off or adjust the amount of air-
flow from these outlets.
Bi-Level Mode Air comes from the instrument
panel outlets and floor outlets.
A slight amount of air is di-
rected through the defrost and side
window demister outlets.
NOTE: BI-LEVEL mode is de-
signed under comfort conditions
to provide cooler air out of the
panel outlets and warmer air from
the floor outlets.
Floor Mode Air comes from the floor out-
lets. A slight amount of air is
directed through the defrost
and side window demister outlets. Mix Mode
Air comes from the floor, de-
frost and side window demist
outlets. This mode works best
in cold or snowy conditions.
Defrost Mode Air comes from the windshield
and side window demist out-
lets. Use Defrost mode with
maximum temperature settings for
best windshield and side window de-
frosting and defogging. When the de-
frost mode is selected, the blower level
will increase.
14. SYNC
Press the Sync soft-key to toggle the
Sync feature On/Off. The Sync indi-
cator is illuminated when this feature
is enabled. Sync is used to synchro-
nize the passenger temperature set-
ting with the driver temperature set-
ting. Changing the passenger
temperature setting while in Sync will
automatically exit this feature.
189
Page 196 of 332

CLIMATE CONTROL
FUNCTIONS
A/C (Air Conditioning)
The Air Conditioning (A/C) button
allows the operator to manually acti-
vate or deactivate the air conditioning
system. When the air conditioning
system is turned on, cool dehumidi-
fied air will flow through the outlets
into the cabin. For improved fuel
economy, press the A/C button to turn
off the air conditioning and manually
adjust the blower and airflow mode
settings. Also, make sure to select only
Panel, Bi-Level or Floor modes.
NOTE:
If fog or mist appears on thewindshield or side glass, select
Defrost mode and increase
blower speed.
If your air conditioning perfor- mance seems lower than ex-
pected, check the front of the
A/C condenser (located in front
of the radiator), for an accumu-
lation of dirt or insects. Clean
with a gentle water spray from behind the radiator and through
the condenser. Fabric front fas-
cia protectors may reduce air-
flow to the condenser, reducing
air conditioning performance.
MAX A/C
Max A/C sets the control for maxi-
mum cooling performance.Press and
release to toggle between Max A/C
and the prior settings. The soft-key
illuminates when Max A/C is ON.
In MAX A/C, the blower level and
mode position can be adjusted to de-
sired user settings. Pressing other set-
tings will cause the MAX A/C opera-
tion to switch to the prior settings and
the MAX A/C indicator will turn off.
Recirculation
When outside air contains
smoke, odors, or high hu-
midity, or if rapid cooling is
desired, you may wish to
recirculate interior air by pressing the
Recirculation control button. The re-
circulation indicator will illuminate
when this button is selected. Push the button a second time to turn off the
Recirculation mode and allow outside
air into the vehicle.
NOTE: In cold weather, use of
Recirculation mode may lead to
excessive window fogging. The re-
circulation feature may be un-
available (soft-key button greyed
out) if conditions exist that could
create fogging on the inside of he
windshield. On systems with
Manual Climate Controls, the Re-
circulation mode is not allowed in
Defrost mode to improve window
clearing operation. Recirculation
will be disabled automatically if
this mode is selected. Attempting
to use Recirculation while in this
mode will cause the LED in the
control button to blink and then
turn off.
AUTOMATIC
TEMPERATURE CONTROL
(ATC)
ATC Hard-keys are located in the cen-
ter of the instrument panel.
190
Page 206 of 332

Battery Blanket Usage
A battery loses 60% of its cranking
power as the battery temperature de-
creases to -18°C. For the same de-
crease in temperature, the engine re-
quires twice as much power to crank
at the same RPM. The use of battery
blankets will greatly increase starting
capability at low temperatures.
Engine Starting Procedure
WARNING!
NEVER pour fuel or other flam-
mable liquid into the air inlet open-
ing in an attempt to start the ve-
hicle. This could result in a flash
fire causing serious personal injury.
1. The shift lever must be in the
NEUTRAL or PARK position before
you can start the engine.
2. With your foot on the brake pedal,
press the ENGINE START/STOP
button. 3. Watch the “Wait To Start Light” in
the instrument cluster. Refer to “In-
strument Cluster” in “Understanding
Your Instrument Panel” for further
information. It may glow for up to
three seconds, depending on engine
temperature.
4. When the “Wait To Start Light”
goes out, the engine will automati-
cally start.
5. After the engine starts, allow it to
idle for approximately 30 seconds be-
fore driving. This allows oil to circu-
late and lubricate the turbocharger.
Engine Warm Up
Avoid full throttle operation when the
engine is cold. When starting a cold
engine, bring the engine up to operat-
ing speed slowly to allow the oil pres-
sure to stabilize as the engine warms
up.
NOTE: High-speed, no-load run-
ning of a cold engine can result in
excessive white smoke and poor
engine performance. No-load en-
gine speeds should be kept under
1,200 RPM during the warm-up
period, especially in cold ambient
temperature conditions.
If temperatures are below 0°C, oper-
ate the engine at moderate speeds for
five minutes before full loads are ap-
plied.
Engine Idling – In Cold Weather
Avoid prolonged idling in ambient
temperatures below -18°C. Long pe-
riods of idling may be harmful to your
engine because combustion chamber
temperatures can drop so low that the
fuel may not burn completely. Incom-
plete combustion allows carbon and
varnish to form on piston rings and
injector nozzles. Also, the unburned
fuel can enter the crankcase, diluting
the oil and causing rapid wear to the
engine.
200
Page 219 of 332

To disengage AutoStick® mode, hold
the shift lever to the right or press and
hold the (+) shift paddle (for
versions/markets, where provided)
until “D” is once again indicated in
the instrument cluster. You can shift
in or out of the AutoStick® mode at
any time without taking your foot off
the accelerator pedal.
WARNING!
Do not downshift for additional en-
gine braking on a slippery surface.
The drive wheels could lose their
grip and the vehicle could skid,
causing a collision or personal in-
jury.
ALL-WHEEL DRIVE
(AWD) (for versions/
markets, where provided)
This vehicle is equipped with an ac-
tive on-demand All-Wheel Drive
(AWD) system which makes available
optimum traction for a wide variety of
road surface and driving conditions.
The system minimizes wheel slip byautomatically redirecting torque to
the front and rear wheels as necessary.
To maximize fuel economy, your AWD
vehicle automatically defaults to rear-
wheel drive (RWD) when road and
environmental conditions are such
that wheel slip is unlikely to occur.
When specific road and environmen-
tal conditions require increased levels
of road traction, the vehicle automati-
cally shifts into AWD mode. Auto-
matic AWD operation could be acti-
vated by outside temperature, wheel
slip, or other predetermined condi-
tions (there may be a slight delay for
AWD engagement after a wheel slip
condition occurs). AWD can also be
manually selected by moving the shift
lever into the AutoStick® mode (+/-)
(for versions/markets, where pro-
vided) or activating the windshield
wipers for an extended period of time.
Drive mode, RWD or AWD, is dis-
played momentarily in the Electronic
Vehicle Information Center (EVIC) in
the gauge area of the vehicle display
when the transmission is first shifted
into gear, and if the drive mode
changes during vehicle operation.NOTE: If the “SERVICE AWD
SYSTEM” warning message ap-
pears after engine start up, or dur-
ing driving, it means that the AWD
system is not functioning properly
and that service is required. Refer
to “Electronic Vehicle Information
Center (EVIC)” in “Understanding
Your Instrument Panel” for further
information.
CAUTION!
All wheels must have the same size
and type tires. Unequal tire sizes
must not be used. Unequal tire size
may cause failure of the front dif-
ferential and/or the transfer case.
DRIVING ON SLIPPERY
SURFACES
ACCELERATION
Rapid acceleration on snow covered,
wet, or other slippery surfaces may
cause the driving wheels to pull errati-
cally to the right or left. This phenom-
enon occurs when there is a difference
in the surface traction under the rear
(driving) wheels.
213