Page 11 of 457
Your vehicle at a glance
22
EXTERIOR OVERVIEW I
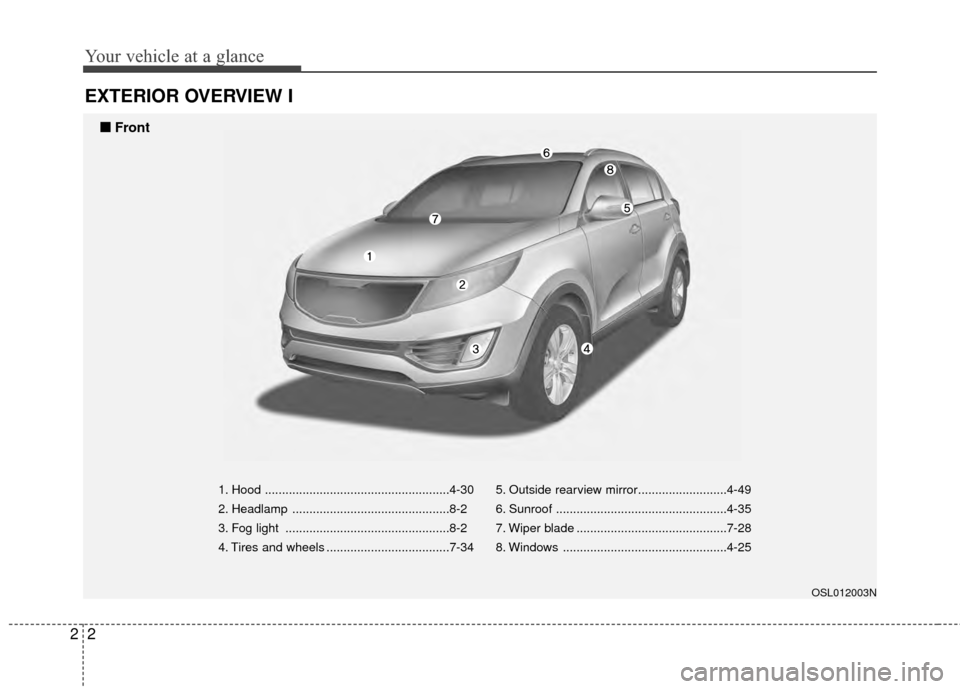
1. Hood ......................................................4-30
2. Headlamp ..............................................8-2
3. Fog light ................................................8-2
4. Tires and wheels ....................................7-345. Outside rearview mirror..........................4-49
6. Sunroof ..................................................4-35
7. Wiper blade ............................................7-28
8. Windows ................................................4-25
OSL012003N
■
■
Front
Page 13 of 457
Your vehicle at a glance
42
INTERIOR OVERVIEW
OSL014001N
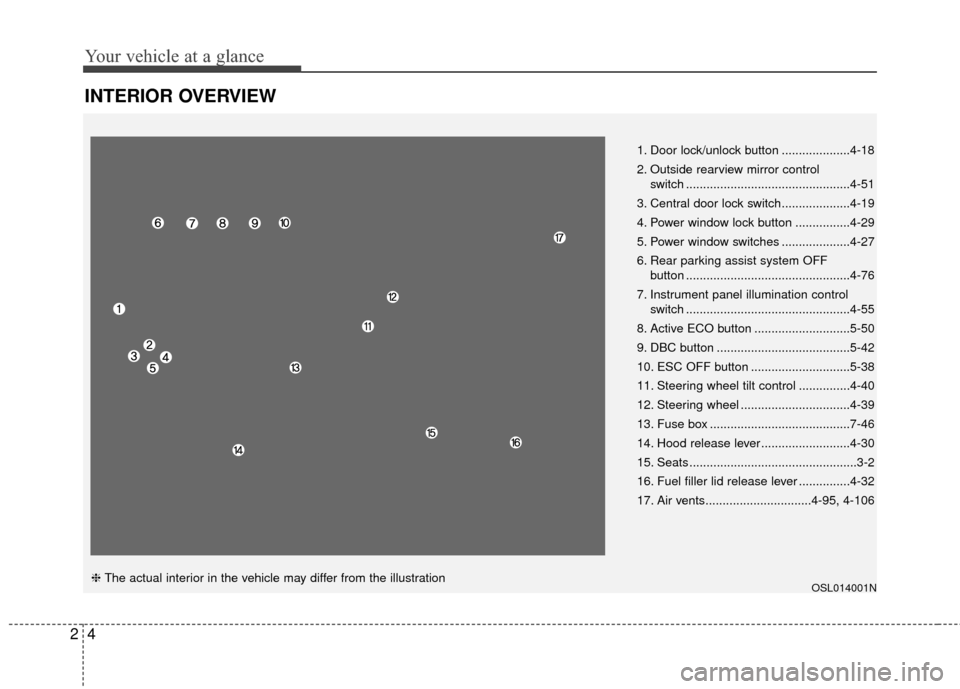
1. Door lock/unlock button ....................4-18
2. Outside rearview mirror control switch ................................................4-51
3. Central door lock switch....................4-19
4. Power window lock button ................4-29
5. Power window switches ....................4-27
6. Rear parking assist system OFF button ................................................4-76
7. Instrument panel illumination control switch ................................................4-55
8. Active ECO button ............................5-50
9. DBC button .......................................5-42
10. ESC OFF button .............................5-38
11. Steering wheel tilt control ...............4-40
12. Steering wheel ................................4-39
13. Fuse box .........................................7-46
14. Hood release lever ..........................4-30
15. Seats .................................................3-2
16. Fuel filler lid release lever ...............4-32
17. Air vents...............................4-95, 4-106
❈ The actual interior in the vehicle may differ from the illustration
Page 136 of 457
Features of your vehicle
44
4
D140100AHM
Inside rearview mirror
Adjust the rearview mirror so that the
center view through the rear window
is seen. Make this adjustment before
you start driving.
D140101AHM
Day/night rearview mirror
(if equipped)
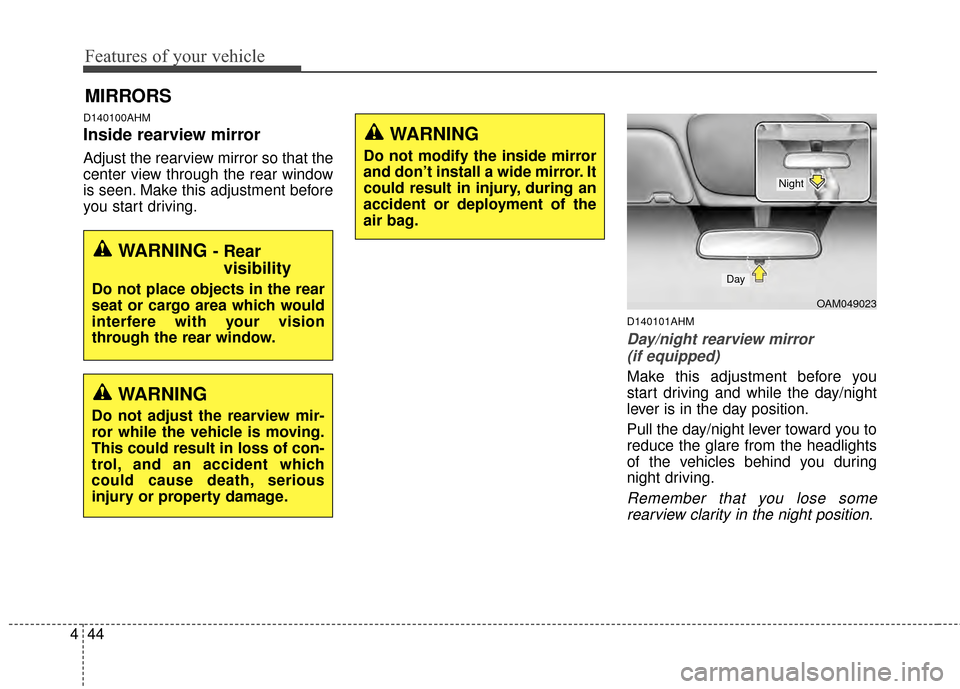
Make this adjustment before you
start driving and while the day/night
lever is in the day position.
Pull the day/night lever toward you to
reduce the glare from the headlights
of the vehicles behind you during
night driving.
Remember that you lose somerearview clarity in the night position.
MIRRORS
WARNING - Rear visibility
Do not place objects in the rear
seat or cargo area which would
interfere with your vision
through the rear window.
WARNING
Do not adjust the rearview mir-
ror while the vehicle is moving.
This could result in loss of con-
trol, and an accident which
could cause death, serious
injury or property damage.
WARNING
Do not modify the inside mirror
and don’t install a wide mirror. It
could result in injury, during an
accident or deployment of the
air bag.
OAM049023
Day
Night
Page 137 of 457
445
Features of your vehicle
D140102AHM-EE-C1
Electrochromic Mirror (ECM) (if equipped)
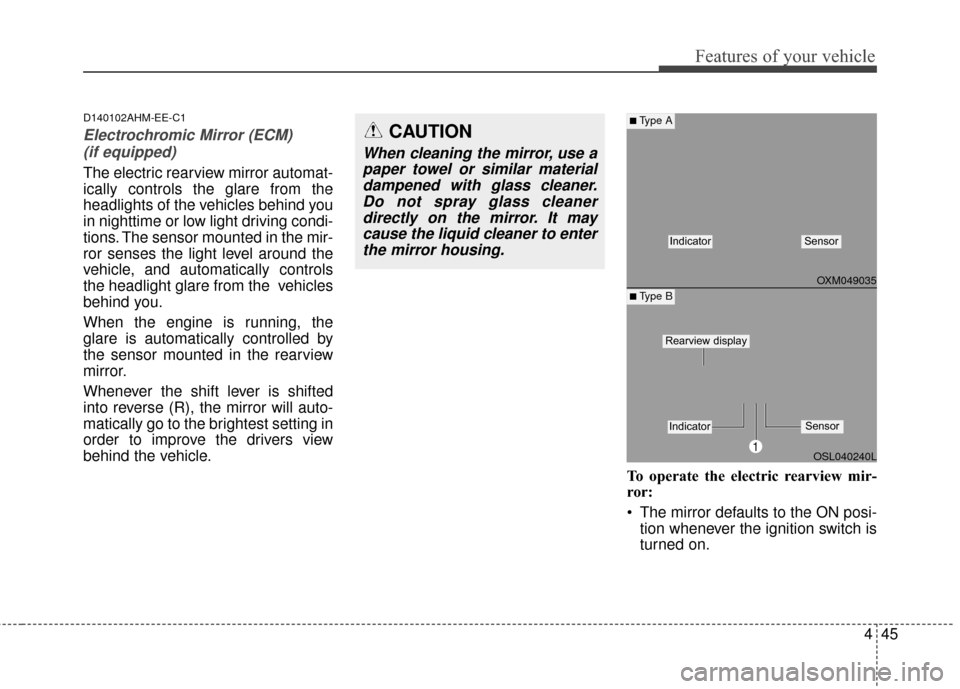
The electric rearview mirror automat-
ically controls the glare from the
headlights of the vehicles behind you
in nighttime or low light driving condi-
tions. The sensor mounted in the mir-
ror senses the light level around the
vehicle, and automatically controls
the headlight glare from the vehicles
behind you.
When the engine is running, the
glare is automatically controlled by
the sensor mounted in the rearview
mirror.
Whenever the shift lever is shifted
into reverse (R), the mirror will auto-
matically go to the brightest setting in
order to improve the drivers view
behind the vehicle.
To operate the electric rearview mir-
ror:
The mirror defaults to the ON posi-tion whenever the ignition switch is
turned on.
OXM049035
OSL040240L
■Type A
■ Type B
IndicatorSensor
1
IndicatorSensor
Rearview display
CAUTION
When cleaning the mirror, use apaper towel or similar materialdampened with glass cleaner.Do not spray glass cleanerdirectly on the mirror. It maycause the liquid cleaner to enterthe mirror housing.
Page 138 of 457
Features of your vehicle
46
4
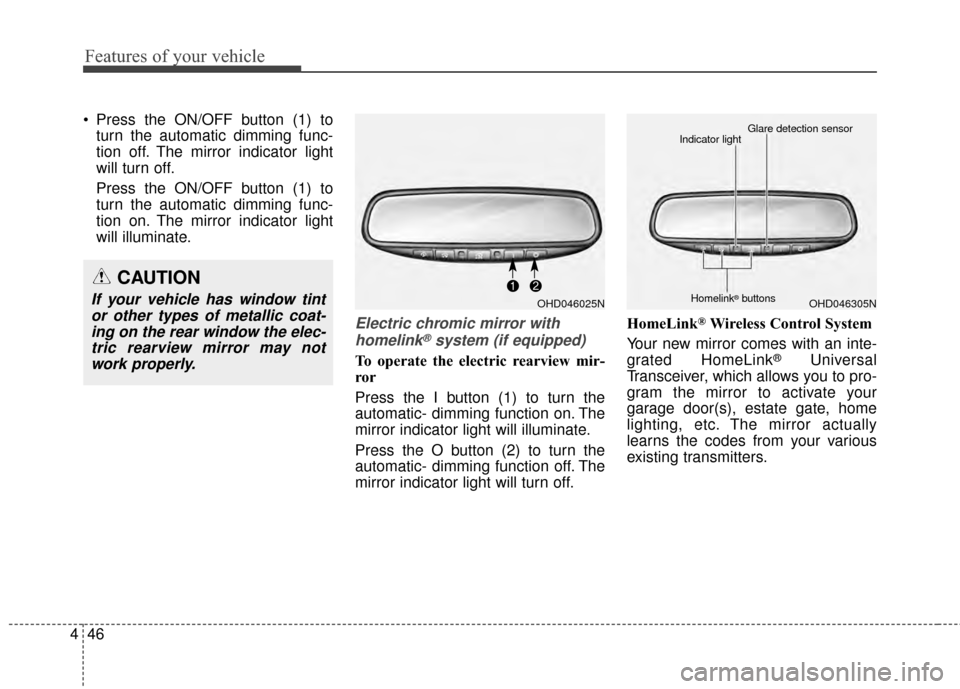
Press the ON/OFF button (1) to
turn the automatic dimming func-
tion off. The mirror indicator light
will turn off.
Press the ON/OFF button (1) to
turn the automatic dimming func-
tion on. The mirror indicator light
will illuminate.
Electric chromic mirror with
homelink®system (if equipped)
To operate the electric rearview mir-
ror
Press the I button (1) to turn the
automatic- dimming function on. The
mirror indicator light will illuminate.
Press the O button (2) to turn the
automatic- dimming function off. The
mirror indicator light will turn off. HomeLink
®Wireless Control System
Your new mirror comes with an inte-
grated HomeLink
®Universal
Transceiver, which allows you to pro-
gram the mirror to activate your
garage door(s), estate gate, home
lighting, etc. The mirror actually
learns the codes from your various
existing transmitters.
CAUTION
If your vehicle has window tint or other types of metallic coat-ing on the rear window the elec-tric rearview mirror may notwork properly.OHD046025NOHD046305N
Glare detection sensor
Indicator light
Homelink®buttons
Page 143 of 457
451
Features of your vehicle
Accessories
If you would like additional informa-
tion on the HomeLink
®Wireless
Control System, HomeLink®compat-
ible products, or to purchase other
accessories such as the HomeLink
®
Lighting Package, please contact
HomeLink®at 1-800-355-3515 or on
the internet at www.homelink®.com. This device complies with
Industry Canada Standard RSS-
210.
Operation is subject to the following
two conditions:
1.This device may not cause harmful
interference, and
2.This device must accept any inter- ference received, including inter-
ference that may cause undesired
operation.
D140200AHM-EU
Outside rearview mirror
Be sure to adjust the mirror angles
before driving.
Your vehicle is equipped with both
left-hand and right-hand outside
rearview mirrors. The mirrors can be
adjusted remotely with the remote
switch. The mirror heads can be fold-
ed back to prevent damage during an
automatic car wash or when passing
through a narrow street.
WARNING - Rearviewmirrors
The right outside rearview
mirror is convex. Objects seen
in the mirror are closer than
they appear.
Use your interior rearview mirror or direct observation to
determine the actual distance
of following vehicles when
changing lanes.
WARNING
The HomeLink®transmitter has
been tested and complies with
FCC and industry Canada rules.
Changes or modifications not
expressly approved by the party
responsible for compliance
could void the user’s authority
to operate the equipment.
IC: 4112104541A Gentex
MODEL/FCC ID: NZLSTDHL3
Page 144 of 457
Features of your vehicle
52
4
D140201AHM-EE
Remote control
Electric type
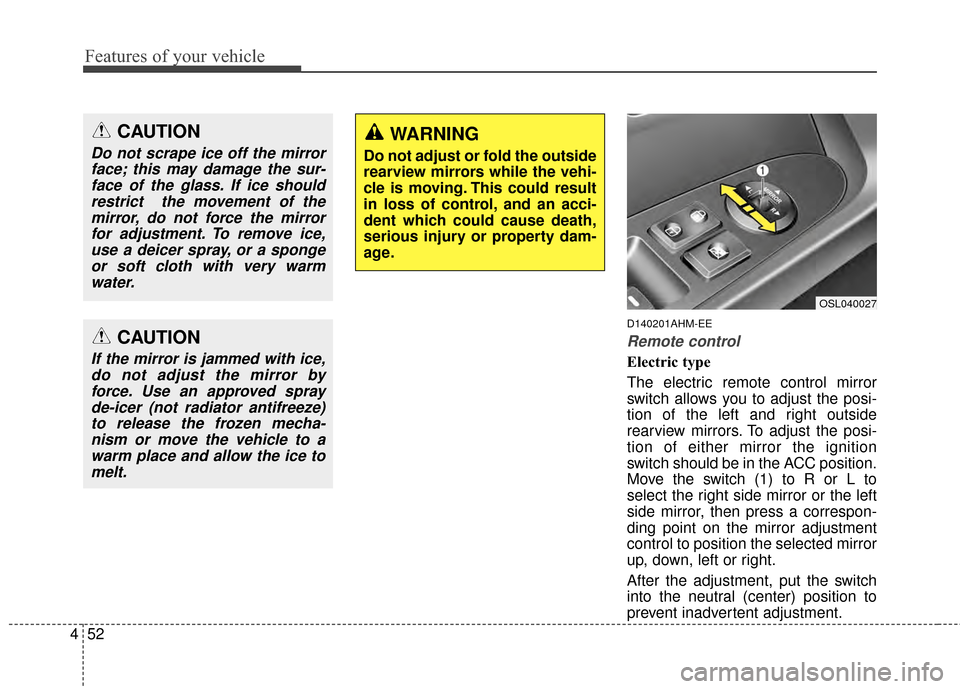
The electric remote control mirror
switch allows you to adjust the posi-
tion of the left and right outside
rearview mirrors. To adjust the posi-
tion of either mirror the ignition
switch should be in the ACC position.
Move the switch (1) to R or L to
select the right side mirror or the left
side mirror, then press a correspon-
ding point on the mirror adjustment
control to position the selected mirror
up, down, left or right.
After the adjustment, put the switch
into the neutral (center) position to
prevent inadvertent adjustment.
CAUTION
Do not scrape ice off the mirror
face; this may damage the sur-face of the glass. If ice shouldrestrict the movement of themirror, do not force the mirrorfor adjustment. To remove ice,use a deicer spray, or a spongeor soft cloth with very warmwater.
CAUTION
If the mirror is jammed with ice,do not adjust the mirror byforce. Use an approved sprayde-icer (not radiator antifreeze)to release the frozen mecha-nism or move the vehicle to awarm place and allow the ice tomelt.
WARNING
Do not adjust or fold the outside
rearview mirrors while the vehi-
cle is moving. This could result
in loss of control, and an acci-
dent which could cause death,
serious injury or property dam-
age.
OSL040027
Page 145 of 457
453
Features of your vehicle
D140202AHM-EU
Folding the outside rearview mir-ror
Manual type (if equipped)
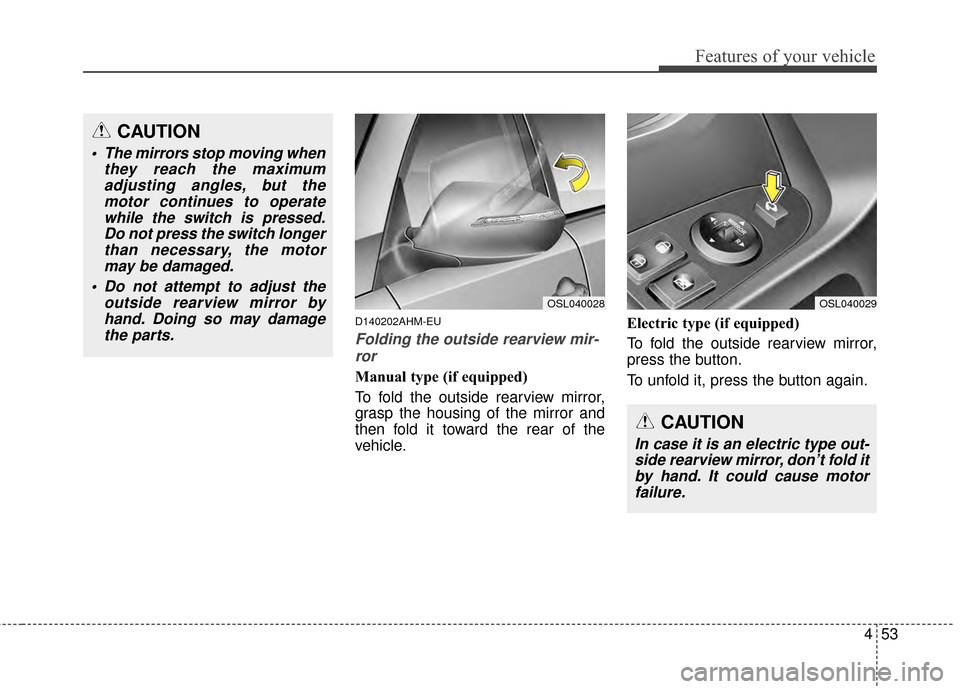
To fold the outside rearview mirror,
grasp the housing of the mirror and
then fold it toward the rear of the
vehicle. Electric type (if equipped)
To fold the outside rearview mirror,
press the button.
To unfold it, press the button again.
OSL040028OSL040029
CAUTION
The mirrors stop moving when
they reach the maximumadjusting angles, but themotor continues to operatewhile the switch is pressed.Do not press the switch longerthan necessary, the motormay be damaged.
Do not attempt to adjust the outside rearview mirror byhand. Doing so may damagethe parts.
CAUTION
In case it is an electric type out-side rearview mirror, don’t fold itby hand. It could cause motorfailure.