2014 KIA Sportage parking brake
[x] Cancel search: parking brakePage 14 of 457
25
Your vehicle at a glance
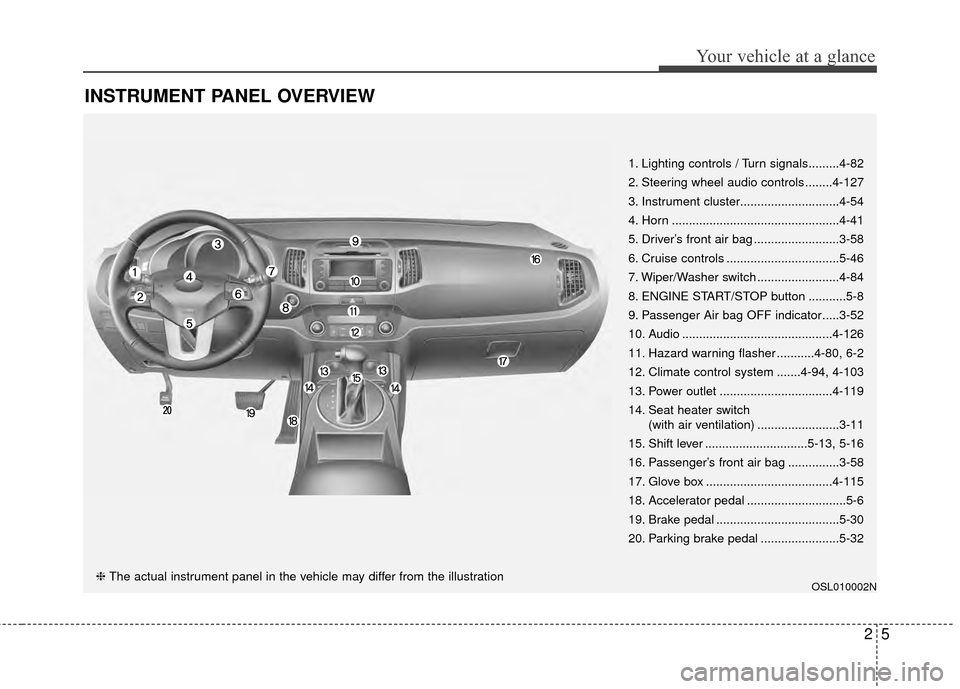
INSTRUMENT PANEL OVERVIEW
OSL010002N
1. Lighting controls / Turn signals.........4-82
2. Steering wheel audio controls ........4-127
3. Instrument cluster.............................4-54
4. Horn .................................................4-41
5. Driver’s front air bag .........................3-58
6. Cruise controls .................................5-46
7. Wiper/Washer switch ........................4-84
8. ENGINE START/STOP button ...........5-8
9. Passenger Air bag OFF indicator.....3-52
10. Audio ............................................4-126
11. Hazard warning flasher ...........4-80, 6-2
12. Climate control system .......4-94, 4-103
13. Power outlet .................................4-119
14. Seat heater switch(with air ventilation) ........................3-11
15. Shift lever ..............................5-13, 5-16
16. Passenger’s front air bag ...............3-58
17. Glove box .....................................4-115
18. Accelerator pedal .............................5-6
19. Brake pedal ....................................5-30
20. Parking brake pedal .......................5-32
❈ The actual instrument panel in the vehicle may differ from the illustration
Page 34 of 457
319
Safety features of your vehicle
C010303AHM
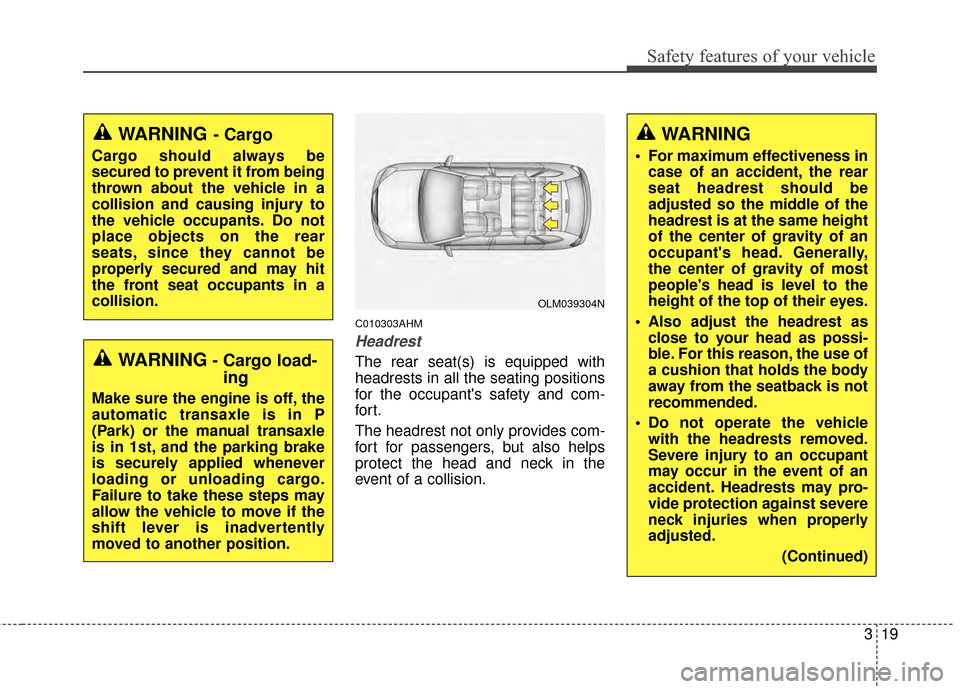
Headrest
The rear seat(s) is equipped with
headrests in all the seating positions
for the occupant's safety and com-
for t.
The headrest not only provides com-
fort for passengers, but also helps
protect the head and neck in the
event of a collision.
OLM039304N
WARNING
For maximum effectiveness incase of an accident, the rear
seat headrest should be
adjusted so the middle of the
headrest is at the same height
of the center of gravity of an
occupant's head. Generally,
the center of gravity of most
people's head is level to the
height of the top of their eyes.
Also adjust the headrest as close to your head as possi-
ble. For this reason, the use of
a cushion that holds the body
away from the seatback is not
recommended.
Do not operate the vehicle with the headrests removed.
Severe injury to an occupant
may occur in the event of an
accident. Headrests may pro-
vide protection against severe
neck injuries when properly
adjusted.
(Continued)
WARNING- Cargo load-ing
Make sure the engine is off, the
automatic transaxle is in P
(Park) or the manual transaxle
is in 1st, and the parking brake
is securely applied whenever
loading or unloading cargo.
Failure to take these steps may
allow the vehicle to move if the
shift lever is inadvertently
moved to another position.
WARNING- Cargo
Cargo should always be
secured to prevent it from being
thrown about the vehicle in a
collision and causing injury to
the vehicle occupants. Do not
place objects on the rear
seats, since they cannot be
properly secured and may hit
the front seat occupants in a
collision.
Page 110 of 457
Features of your vehicle
18
4
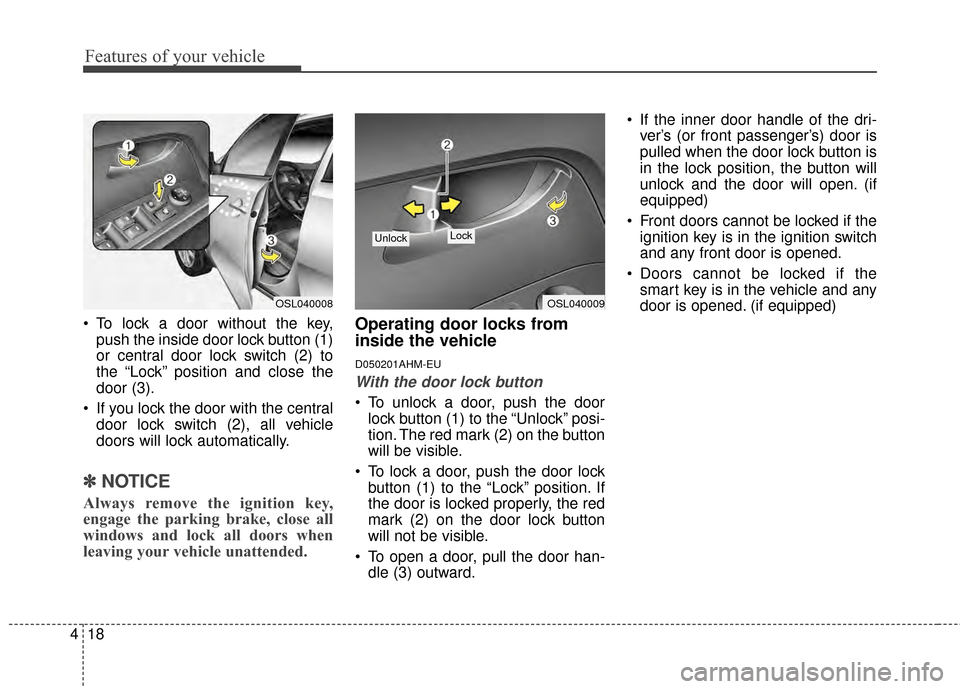
To lock a door without the key,
push the inside door lock button (1)
or central door lock switch (2) to
the “Lock” position and close the
door (3).
If you lock the door with the central door lock switch (2), all vehicle
doors will lock automatically.
✽ ✽ NOTICE
Always remove the ignition key,
engage the parking brake, close all
windows and lock all doors when
leaving your vehicle unattended.
Operating door locks from
inside the vehicle
D050201AHM-EU
With the door lock button
To unlock a door, push the door
lock button (1) to the “Unlock” posi-
tion. The red mark (2) on the button
will be visible.
To lock a door, push the door lock button (1) to the “Lock” position. If
the door is locked properly, the red
mark (2) on the door lock button
will not be visible.
To open a door, pull the door han- dle (3) outward. If the inner door handle of the dri-
ver’s (or front passenger’s) door is
pulled when the door lock button is
in the lock position, the button will
unlock and the door will open. (if
equipped)
Front doors cannot be locked if the ignition key is in the ignition switch
and any front door is opened.
Doors cannot be locked if the smart key is in the vehicle and any
door is opened. (if equipped)
OSL040009
Lock Unlock
OSL040008
Page 112 of 457
Features of your vehicle
20
4
D050300AAM-EE
Impact sensing door unlock
system (if equipped)
In the event of air bag deployment
resulting from a vehicle impact, all
doors will automatically unlock.
Auto door lock/unlock feature
(Automatic transaxle, if
equipped)
All doors will automatically lock
when the transaxle shift lever is
shifted out of P(Park).
All doors will automatically unlock when the transaxle shift lever is
shifted into P (Park).
Speed sensing door lock sys-
tem (Manual transaxle, if
equipped)
All doors will automatically lockafter the vehicle speed exceeds
about 15 km (9 mph).
All doors will automatically unlock when the engine is shut off and the
ignition key is removed.
WARNING- Unlockedvehicles
Leaving your vehicle unlocked
can invite theft or possible harm
to you or others from someone
hiding in your vehicle while you
are gone. Always remove the
ignition key, engage the parking
brake, close all windows and
lock all doors when leaving
your vehicle unattended.
WARNING- Unattendedchildren
An enclosed vehicle can
become extremely hot, causing
death or severe injury to unat-
tended children or animals who
cannot escape the vehicle.
Furthermore, children might
operate features of the vehicle
that could injure them, or they
could encounter other harm,
possibly from someone gaining
entry to the vehicle. Never leave
children or animals unattended
in your vehicle.
WARNING - Doors
The doors should always be
fully closed and locked while
the vehicle is in motion to pre-
vent accidental opening of the
door. Locked doors will also
discourage potential intruders
when the vehicle stops or
slows down.
Be careful when opening doors and watch for vehicles,
motorcycles, bicycles or
pedestrians approaching the
vehicle in the path of the door.
Opening a door when some-
thing is approaching can
cause damage or injury.
Page 158 of 457
Features of your vehicle
66
4
D150308AHM-EE
Parking brake & brake
fluid warning light
Parking brake warning
This light is illuminated when the
parking brake is applied with the igni-
tion switch in the START or ON posi-
tion. The warning light should go off
after a few seconds when the park-
ing brake is released.
Low brake fluid level warning
If the warning light remains on, it may
indicate that the brake fluid level in
the reservoir is low.
If the warning light remains on:
1.Drive carefully to the nearest safe location and stop your vehicle.
2.With the engine stopped, check the brake fluid level immediately and
add fluid as required. Then check
all brake components for fluid
leaks.
CAUTION
If the engine is not stoppedimmediately after the engine oilpressure warning light is illumi-nated, severe damage couldresult.
CAUTION
If the oil pressure warning lightstays on while the engine is run-ning, serious engine damagemay result. The oil pressurewarning light comes on when-ever there is insufficient oilpressure. In normal operation, itshould come on when the igni-tion switch is turned on, then goout when the engine is started.If the oil pressure warning lightstays on while the engine is run-ning, there is a serious malfunc-tion.
If this happens, stop the vehicleas soon as it is safe to do so,turn off the engine and checkthe oil level. If the oil level is low,fill the engine oil to the properlevel and start the engine again.If the light stays on with theengine running, turn the engineoff immediately. In any instancewhere the oil light stays onwhen the engine is running, theengine should be checked by anauthorized Kia dealer before thevehicle is driven again.
Page 159 of 457
467
Features of your vehicle
3.Do not drive the vehicle if leaks arefound, the warning light remains on
or the brakes do not operate prop-
erly. Have the vehicle towed to any
authorized Kia dealer for a brake
system inspection and necessary
repairs.
Your vehicle is equipped with dual-
diagonal braking systems. This
means you still have braking on two
wheels even if one of the dual sys-
tems should fail. With only one of the
dual systems working, more than
normal pedal travel and greater
pedal pressure are required to stop
the vehicle. Also, the vehicle will not
stop in as short a distance with only
a portion of the brake system work-
ing. If the brakes fail while you are
driving, shift to a lower gear for addi-
tional engine braking and stop the
vehicle as soon as it is safe to do so.
To check bulb operation, check
whether the parking brake and brake
fluid warning light illuminates when
the ignition switch is in the ON posi-
tion.D150312AAM
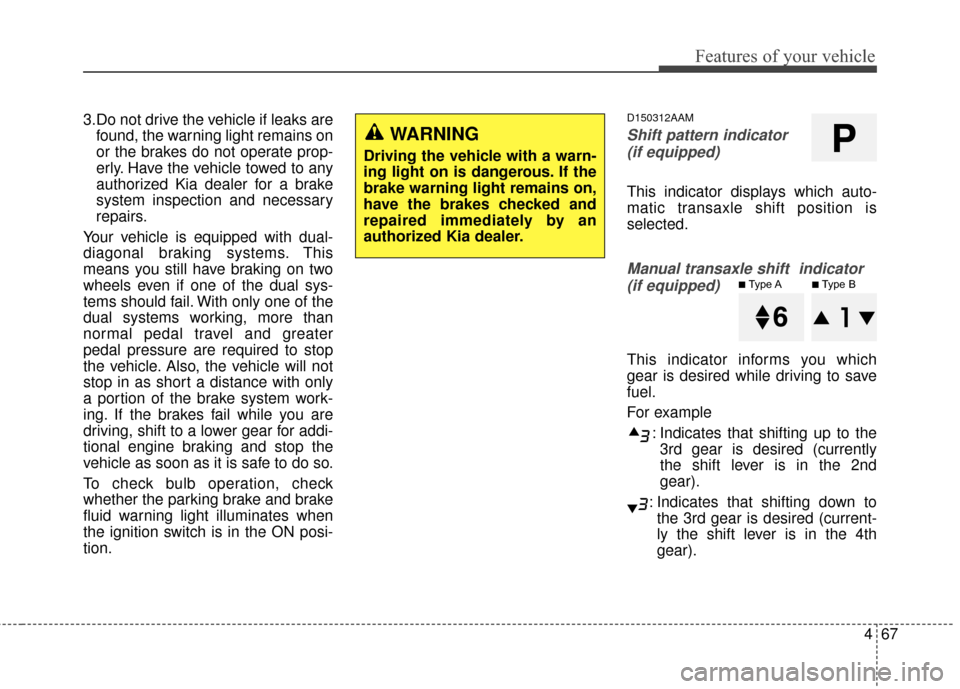
Shift pattern indicator (if equipped)
This indicator displays which auto-
matic transaxle shift position is
selected.
Manual transaxle shift indicator (if equipped)
This indicator informs you which
gear is desired while driving to save
fuel.
For example
: Indicates that shifting up to the3rd gear is desired (currently
the shift lever is in the 2nd
gear).
: Indicates that shifting down to the 3rd gear is desired (current-
ly the shift lever is in the 4th
gear).
WARNING
Driving the vehicle with a warn-
ing light on is dangerous. If the
brake warning light remains on,
have the brakes checked and
repaired immediately by an
authorized Kia dealer.P
■Type A■Type B
Page 169 of 457
477
Features of your vehicle
This system will activate when theindicator on the rear parking assist
OFF button is not illuminated. If
you desire to deactivate the Back-
up warning system, press the rear
parking assist OFF button. (The
indicator on the button will illumi-
nate.) To turn the system on, press
the button again. (The indicator on
the button will go off.)
The sensing distance while the Back-up warning system is in oper-
ation is approximately 120 cm (47
in.).
When more than two objects are sensed at the same time, the clos-
est one will be recognized first.Types of warning sound
When an object is 120 cm to 81 cm(47 in. to 32 in.) from the rear
bumper: Buzzer beeps intermit-
tently.
When an object is 80 cm to 41 cm (31 in. to 16 in.) from the rear
bumper: Buzzer beeps more fre-
quently.
When an object is within 40 cm (15 in.) of the rear bumper:
Buzzer sounds continuously.
Non-operational conditions of
Back-up warning system
The Back-up warning system may
not operate properly when:
1.Moisture is frozen to the sensor. (Itwill operate normally when the
moisture has been cleared.)
2.The sensor is covered with foreign matter, such as snow or water, or
the sensor cover is blocked. (It will
operate normally when the materi-
al is removed or the sensor is no
longer blocked.)
3.Driving on uneven road surfaces (unpaved roads, gravel, bumps,
gradient).
4.Objects generating excessive noise (vehicle horns, loud motorcy-
cle engines, or truck air brakes) are
within range of the sensor.
5.Heavy rain or water spray exists.
6.Wireless transmitters or mobile phones are within range of the
sensor.
7.The sensor is covered with snow.
8.Trailer towing
Page 177 of 457
485
Features of your vehicle
To signal a lane change, move the
turn signal lever slightly and hold it in
position (B). The lever will return to
the OFF position when released.
If an indicator stays on and does not
flash or if it flashes abnormally, one
of the turn signal bulbs may be
burned out and will require replace-
ment.
One-touch lane change function (if equipped)
To activate an one-touch lane
change function, move the turn sig-
nal lever slightly for less than 1.5
second and then release it. The lane
change signals will blink 3 times.
✽ ✽ NOTICE
If an indicator flash is abnormally
quick or slow, a bulb may be burned
out or have a poor electrical connec-
tion in the circuit.
D190700AAM-EU
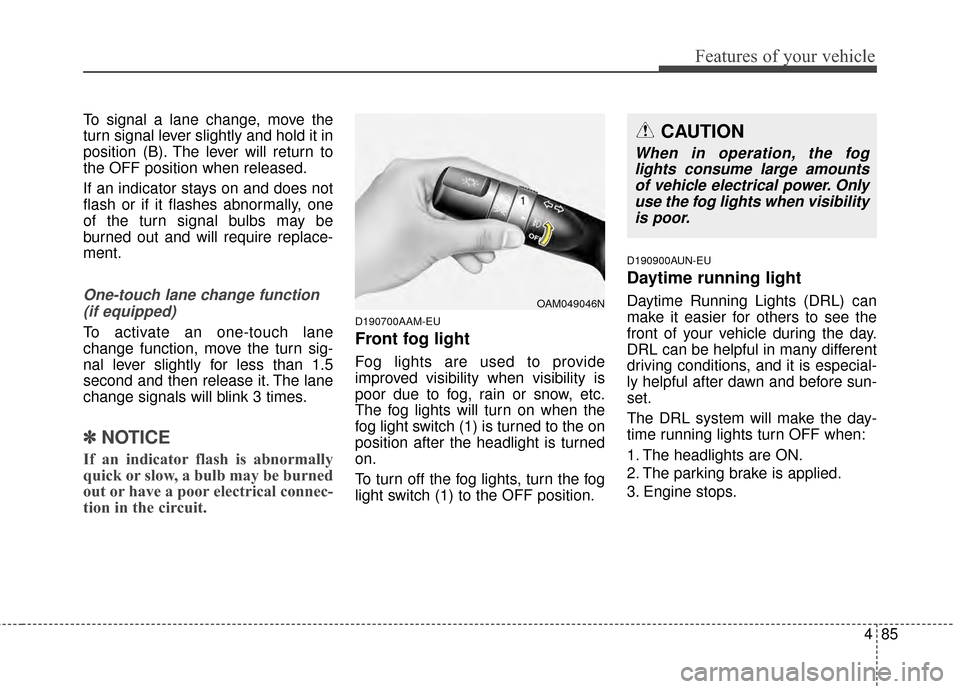
Front fog light
Fog lights are used to provide
improved visibility when visibility is
poor due to fog, rain or snow, etc.
The fog lights will turn on when the
fog light switch (1) is turned to the on
position after the headlight is turned
on.
To turn off the fog lights, turn the fog
light switch (1) to the OFF position.
D190900AUN-EU
Daytime running light
Daytime Running Lights (DRL) can
make it easier for others to see the
front of your vehicle during the day.
DRL can be helpful in many different
driving conditions, and it is especial-
ly helpful after dawn and before sun-
set.
The DRL system will make the day-
time running lights turn OFF when:
1. The headlights are ON.
2. The parking brake is applied.
3. Engine stops.OAM049046N
CAUTION
When in operation, the fog
lights consume large amountsof vehicle electrical power. Onlyuse the fog lights when visibilityis poor.