2014 KIA Sorento door lock
[x] Cancel search: door lockPage 3 of 508

ii
1
2
3
4
5
6
78I
IntroductionHow to use this manual / Fuel requirements / Vehicle break-in process / Vehicle handling instructions /Vehicle data collection and event data recorders Your vehicle at a glanceExterior overview / Interior overview / Instrument panel overview / Engi\
ne compartment Safety features of your vehicleSeats / Seat belts / Child restraint system / Air bagFeatures of your vehicleKeys / Door locks / Tailgate / Windows / Hood / Fuel filler lid / Panoramic sunroof / Steering wheel / Mirrors
/ Instrument cluster / Lighting / Wipers & Washers / Climate control system / Multimedia system / Etc.Driving your vehicleBefore driving / Engine start/stop button / Transaxle / All Wheel Drive (AWD) / Brake system /
Cruise control system / Active ECO system / Winter driving / Vehicle load limit / Etc.What to do in an emergencyRoad warning / Emergency while driving / Emergency starting / Engine overheat / Flat tire / Towing / Etc. MaintenanceEngine compartment / Maintenance service / Engine oil / Engine coolant /\
Brake fluid / Washer fluid /
Parking brake / Air cleaner / Wiper blades / Battery / Tire and wheels / Fuses / Etc. Specifications & Consumer informationIndex
table of contents
XM(FL) CAN(ENG) FOREWORD.QXP 1/23/2013 3:19 PM Page 3
Page 11 of 508
23
Your vehicle at a glance
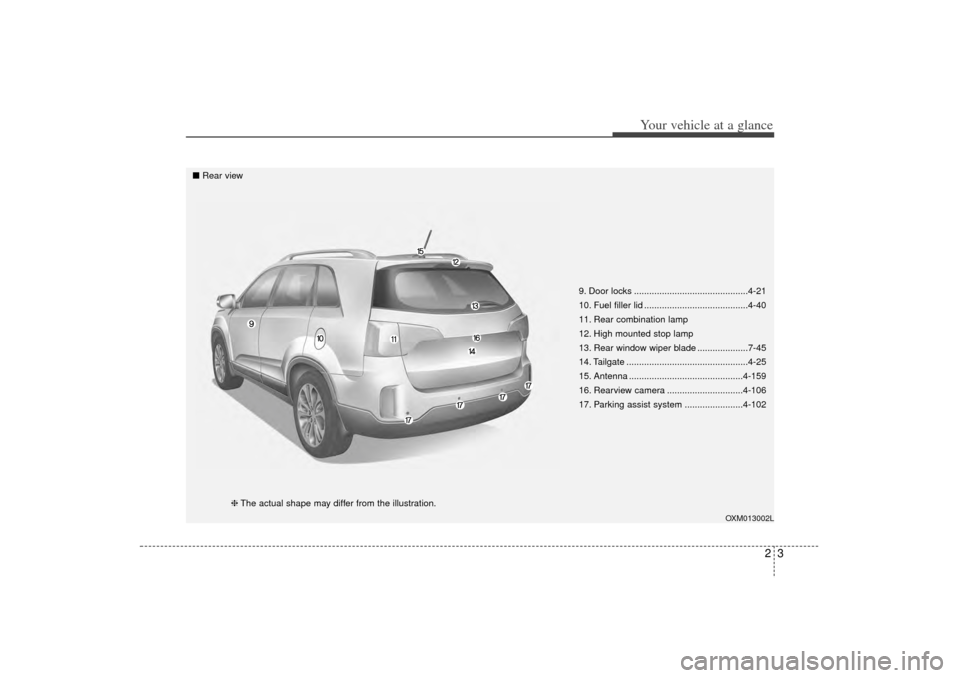
9. Door locks .............................................4-21
10. Fuel filler lid .........................................4-40
11. Rear combination lamp
12. High mounted stop lamp
13. Rear window wiper blade ....................7-45
14. Tailgate ................................................4-25
15. Antenna .............................................4-159
16. Rearview camera ..............................4-106
17. Parking assist system .......................4-102
OXM013002L
■Rear view
❈The actual shape may differ from the illustration.
XM(FL) CAN(ENG) 2.QXP 1/23/2013 3:21 PM Page 3
Page 12 of 508
Your vehicle at a glance42INTERIOR OVERVIEW
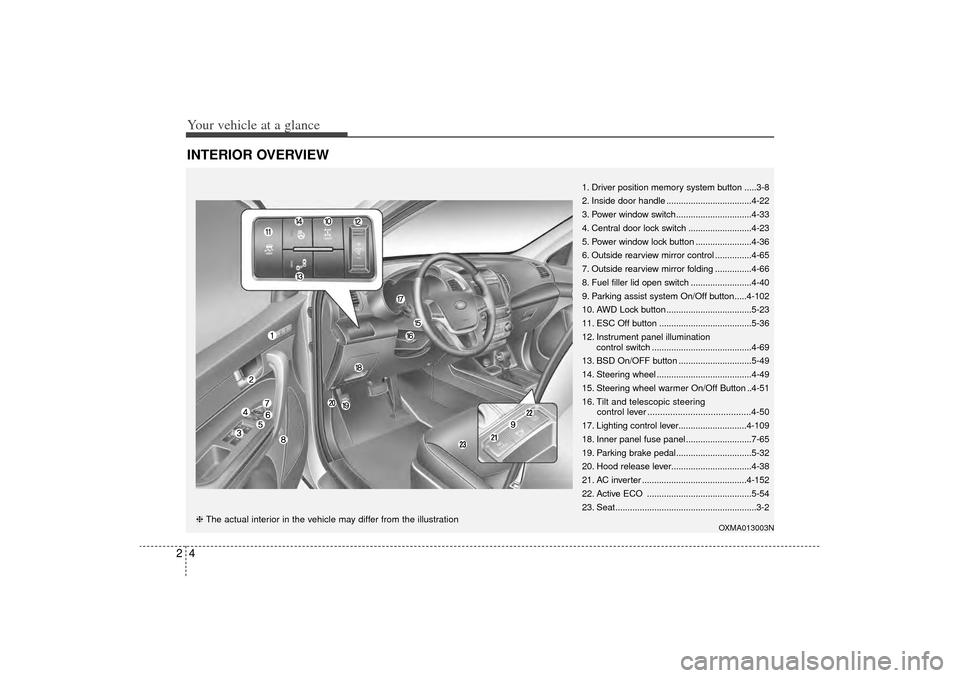
1. Driver position memory system button .....3-8
2. Inside door handle ...................................4-22
3. Power window switch...............................4-33
4. Central door lock switch ..........................4-23
5. Power window lock button .......................4-36
6. Outside rearview mirror control ...............4-65
7. Outside rearview mirror folding ...............4-66
8. Fuel filler lid open switch .........................4-40
9. Parking assist system On/Off button.....4-102
10. AWD Lock button ...................................5-23
11. ESC Off button ......................................5-36
12. Instrument panel illuminationcontrol switch .........................................4-69
13. BSD On/OFF button ..............................5-49
14. Steering wheel .......................................4-49
15. Steering wheel warmer On/Off Button ..4-51
16. Tilt and telescopic steering control lever .........................................4-50
17. Lighting control lever............................4-109
18. Inner panel fuse panel ...........................7-65
19. Parking brake pedal...............................5-32
20. Hood release lever.................................4-38
21. AC inverter ...........................................4-152
22. Active ECO ...........................................5-54
23. Seat..........................................................3-2
OXMA013003N
❈ The actual interior in the vehicle may differ from the illustration
XM(FL) CAN(ENG) 2.QXP 1/23/2013 3:21 PM Page 4
Page 42 of 508
Safety features of your vehicle28
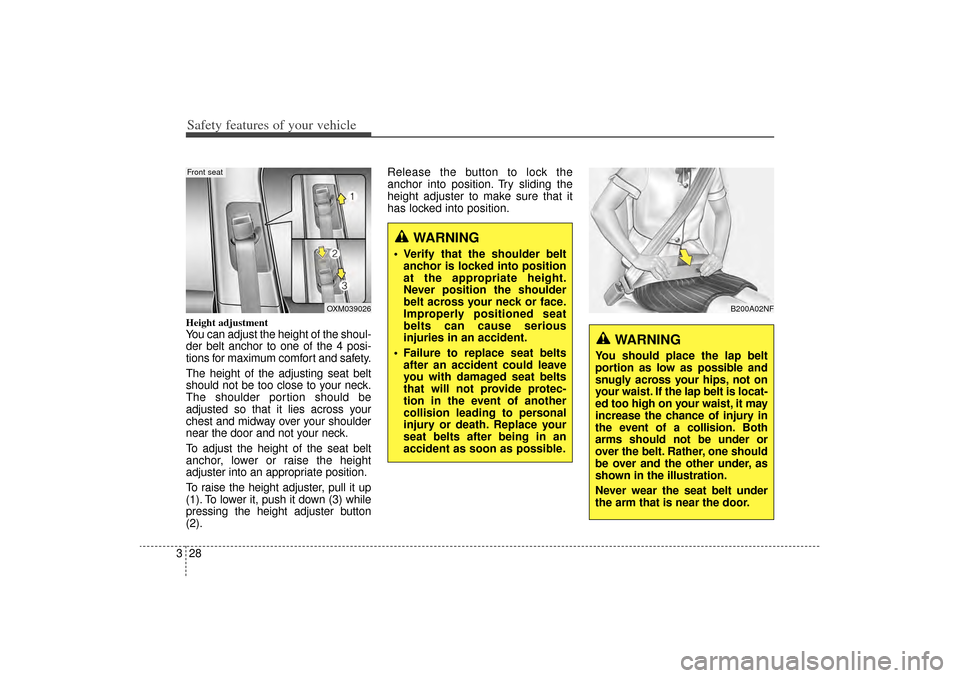
3Height adjustmentYou can adjust the height of the shoul-
der belt anchor to one of the 4 posi-
tions for maximum comfort and safety.
The height of the adjusting seat belt
should not be too close to your neck.
The shoulder portion should be
adjusted so that it lies across your
chest and midway over your shoulder
near the door and not your neck.
To adjust the height of the seat belt
anchor, lower or raise the height
adjuster into an appropriate position.
To raise the height adjuster, pull it up
(1). To lower it, push it down (3) while
pressing the height adjuster button
(2). Release the button to lock the
anchor into position. Try sliding the
height adjuster to make sure that it
has locked into position.
B200A02NF
WARNING
You should place the lap belt
portion as low as possible and
snugly across your hips, not on
your waist. If the lap belt is locat-
ed too high on your waist, it may
increase the chance of injury in
the event of a collision. Both
arms should not be under or
over the belt. Rather, one should
be over and the other under, as
shown in the illustration.
Never wear the seat belt under
the arm that is near the door.
WARNING
Verify that the shoulder belt
anchor is locked into position
at the appropriate height.
Never position the shoulder
belt across your neck or face.
Improperly positioned seat
belts can cause serious
injuries in an accident.
Failure to replace seat belts after an accident could leave
you with damaged seat belts
that will not provide protec-
tion in the event of another
collision leading to personal
injury or death. Replace your
seat belts after being in an
accident as soon as possible.
OXM039026
Front seat
XM(FL) CAN(ENG) 3.QXP 1/23/2013 3:25 PM Page 28
Page 64 of 508
Safety features of your vehicle50
3Do not install a child restraint on
the front passenger’s seat.Never place a rear-facing child
restraint in the front passenger’s
seat. If the air bag deploys, it would
impact the rear-facing child restraint,
causing serious or fatal injury.
In addition, do not place front-facing
child restraints in the front passen-
ger’s seat either. If the front passen-
ger air bag inflates, it could cause
serious or fatal injuries to the child.
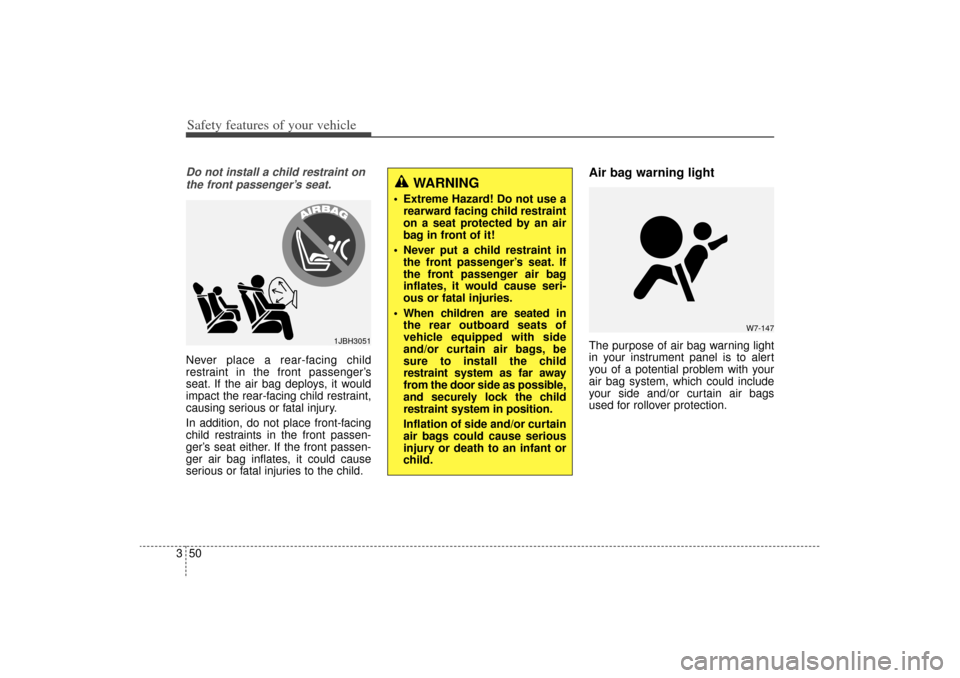
Air bag warning lightThe purpose of air bag warning light
in your instrument panel is to alert
you of a potential problem with your
air bag system, which could include
your side and/or curtain air bags
used for rollover protection.
1JBH3051
WARNING
Extreme Hazard! Do not use a rearward facing child restraint
on a seat protected by an air
bag in front of it!
Never put a child restraint in the front passenger’s seat. If
the front passenger air bag
inflates, it would cause seri-
ous or fatal injuries.
When children are seated in the rear outboard seats of
vehicle equipped with side
and/or curtain air bags, be
sure to install the child
restraint system as far away
from the door side as possible,
and securely lock the child
restraint system in position.
Inflation of side and/or curtain
air bags could cause serious
injury or death to an infant or
child.
W7-147
XM(FL) CAN(ENG) 3.QXP 1/23/2013 3:25 PM Page 50
Page 82 of 508
Safety features of your vehicle68
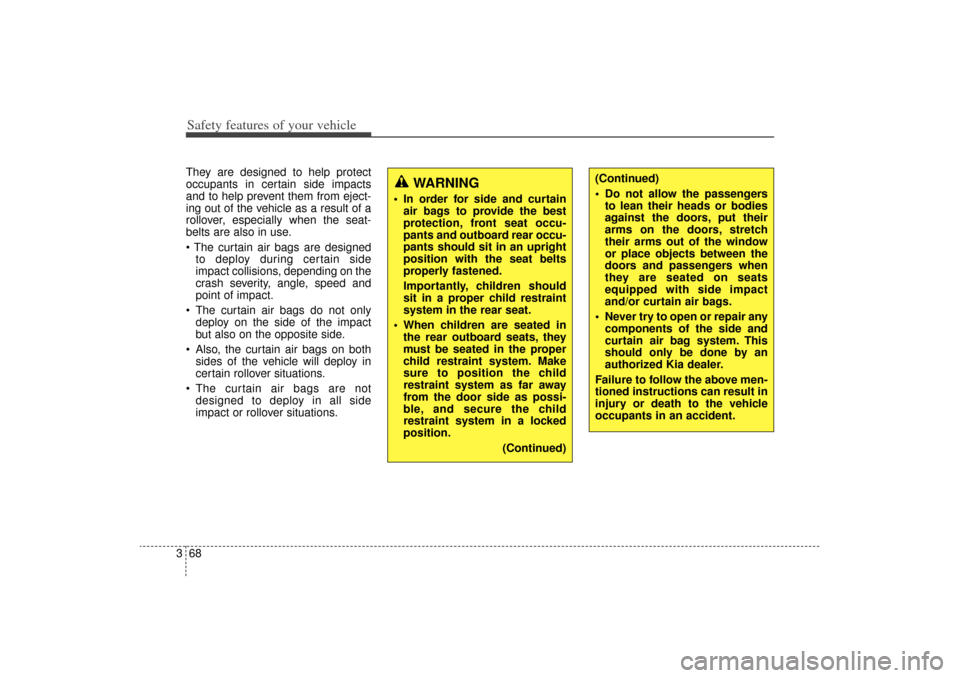
3They are designed to help protect
occupants in certain side impacts
and to help prevent them from eject-
ing out of the vehicle as a result of a
rollover, especially when the seat-
belts are also in use.
The curtain air bags are designed
to deploy during certain side
impact collisions, depending on the
crash severity, angle, speed and
point of impact.
The curtain air bags do not only deploy on the side of the impact
but also on the opposite side.
Also, the curtain air bags on both sides of the vehicle will deploy in
certain rollover situations.
The curtain air bags are not designed to deploy in all side
impact or rollover situations.
WARNING
In order for side and curtainair bags to provide the best
protection, front seat occu-
pants and outboard rear occu-
pants should sit in an upright
position with the seat belts
properly fastened.
Importantly, children should
sit in a proper child restraint
system in the rear seat.
When children are seated in the rear outboard seats, they
must be seated in the proper
child restraint system. Make
sure to position the child
restraint system as far away
from the door side as possi-
ble, and secure the child
restraint system in a locked
position.
(Continued)
(Continued)
Do not allow the passengersto lean their heads or bodies
against the doors, put their
arms on the doors, stretch
their arms out of the window
or place objects between the
doors and passengers when
they are seated on seats
equipped with side impact
and/or curtain air bags.
Never try to open or repair any components of the side and
curtain air bag system. This
should only be done by an
authorized Kia dealer.
Failure to follow the above men-
tioned instructions can result in
injury or death to the vehicle
occupants in an accident.
XM(FL) CAN(ENG) 3.QXP 1/23/2013 3:26 PM Page 68
Page 92 of 508
Features of your vehicleFolding key . . . . . . . . . . . . . . . . . . . . . . . . . . . . . . . . 4-4• Record your key number . . . . . . . . . . . . . . . . . . . . . . . 4-4
• Key operations . . . . . . . . . . . . . . . . . . . . . . . . . . . . . . . . 4-4
• Transmitter precautions . . . . . . . . . . . . . . . . . . . . . . . . 4-6
• Battery replacement . . . . . . . . . . . . . . . . . . . . . . . . . . . 4-7
• Immobilizer system . . . . . . . . . . . . . . . . . . . . . . . . . . . . 4-8Smart key . . . . . . . . . . . . . . . . . . . . . . . . . . . . . . . . 4-11• Record your key number . . . . . . . . . . . . . . . . . . . . . . 4-11
• Smart key function . . . . . . . . . . . . . . . . . . . . . . . . . . . 4-11
• Loss of the smart key . . . . . . . . . . . . . . . . . . . . . . . . . 4-15
• Smart key precautions . . . . . . . . . . . . . . . . . . . . . . . . 4-15
• Smart key immobilizer system . . . . . . . . . . . . . . . . . . 4-16
• Battery replacement . . . . . . . . . . . . . . . . . . . . . . . . . . 4-18Theft-alarm system . . . . . . . . . . . . . . . . . . . . . . . . 4-19• Armed stage . . . . . . . . . . . . . . . . . . . . . . . . . . . . . . . . . 4-19
• Theft-alarm stage . . . . . . . . . . . . . . . . . . . . . . . . . . . . 4-20
• Disarmed stage. . . . . . . . . . . . . . . . . . . . . . . . . . . . . . . 4-20Door locks . . . . . . . . . . . . . . . . . . . . . . . . . . . . . . . . 4-21• Operating door locks from outside the vehicle . . . . 4-21
• Operating door locks from inside the vehicle . . . . . . 4-22
• Impact sensing door unlock system . . . . . . . . . . . . . . 4-24
• Auto door lock/unlock feature (Automatic transaxle) . 4-24
• Child-protector rear door lock. . . . . . . . . . . . . . . . . . 4-24Tailgate . . . . . . . . . . . . . . . . . . . . . . . . . . . . . . . . . . 4-25\
• Opening the tailgate . . . . . . . . . . . . . . . . . . . . . . . . . . 4-25• Closing the tailgate . . . . . . . . . . . . . . . . . . . . . . . . . . . 4-25
• Power tailgate . . . . . . . . . . . . . . . . . . . . . . . . . . . . . . . 4-26
• Emergency tailgate safety release . . . . . . . . . . . . . . . 4-32
Windows . . . . . . . . . . . . . . . . . . . . . . . . . . . . . . . . 4-33• Power windows . . . . . . . . . . . . . . . . . . . . . . . . . . . . . . 4-34Hood. . . . . . . . . . . . . . . . . . . . . . . . . . . . . . . . . . . . \
. 4-38• Opening the hood . . . . . . . . . . . . . . . . . . . . . . . . . . . . 4-38
• Closing the hood . . . . . . . . . . . . . . . . . . . . . . . . . . . . . 4-38Fuel filler lid . . . . . . . . . . . . . . . . . . . . . . . . . . . . . . 4-40• Opening the fuel filler lid . . . . . . . . . . . . . . . . . . . . . . 4-40
• Closing the fuel filler lid . . . . . . . . . . . . . . . . . . . . . . . 4-40
• Emergency fuel filler lid release . . . . . . . . . . . . . . . . 4-43Panoramic sunroof . . . . . . . . . . . . . . . . . . . . . . . . . 4-44• Sunroof open warning. . . . . . . . . . . . . . . . . . . . . . . . . 4-45
• Sliding the sunroof . . . . . . . . . . . . . . . . . . . . . . . . . . . 4-45
• Tilting the sunroof . . . . . . . . . . . . . . . . . . . . . . . . . . . . 4-46
• Sunshade . . . . . . . . . . . . . . . . . . . . . . . . . . . . . . . . . . . 4-\
47
• Resetting the sunroof . . . . . . . . . . . . . . . . . . . . . . . . . 4-48Steering wheel . . . . . . . . . . . . . . . . . . . . . . . . . . . . . 4-49• Electric power steering (EPS) . . . . . . . . . . . . . . . . . . 4-49
• Tilt and telescopic steering . . . . . . . . . . . . . . . . . . . . 4-50
• Heated steering wheel . . . . . . . . . . . . . . . . . . . . . . . . . 4-51
• Horn . . . . . . . . . . . . . . . . . . . . . . . . . . . . . . . . . . . . \
. . . 4-51
• Flex steer . . . . . . . . . . . . . . . . . . . . . . . . . . . . . . . . . . . 4-\
52
4
XM(FL) CAN(ENG) 4a(~158).QXP 1/23/2013 3:46 PM Page 1
Page 95 of 508
Features of your vehicle44Record your key number
The key code number
is stamped on the bar
code tag attached to
the key set. Should
you lose your keys,
this number will enable an author-
ized Kia dealer to duplicate the keys
easily. Remove the bar code tag and
store it in a safe place. Also, record
the code number and keep it in a
safe and handy place, but not in the
vehicle.
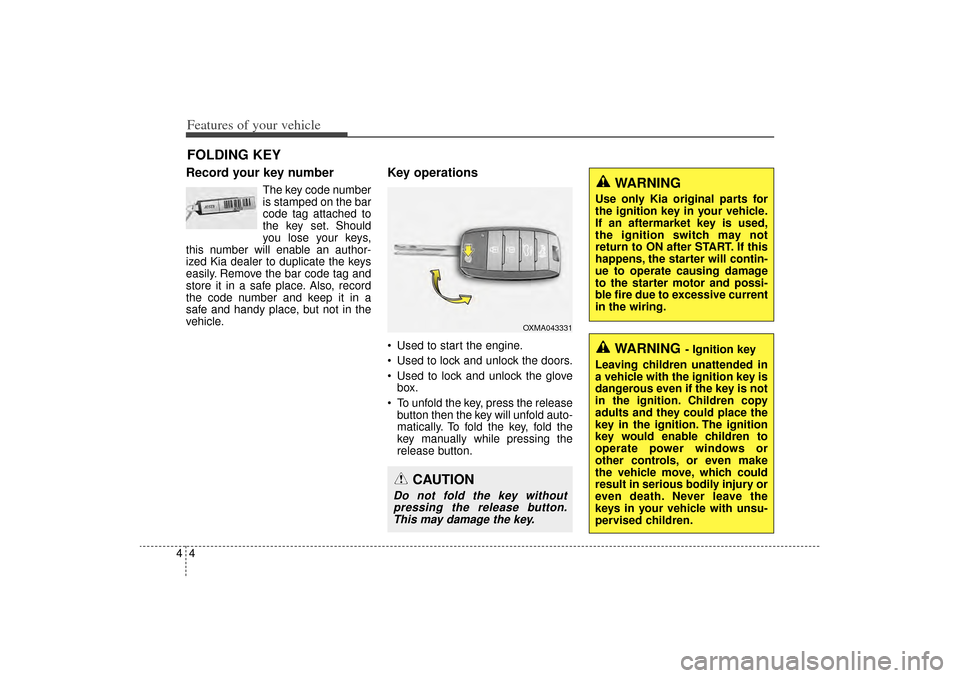
Key operations• Used to start the engine.
Used to lock and unlock the doors.
Used to lock and unlock the glove box.
To unfold the key, press the release button then the key will unfold auto-
matically. To fold the key, fold the
key manually while pressing the
release button.
FOLDING KEY
OXMA043331
CAUTION
Do not fold the key withoutpressing the release button.This may damage the key.
WARNING
- Ignition key
Leaving children unattended in
a vehicle with the ignition key is
dangerous even if the key is not
in the ignition. Children copy
adults and they could place the
key in the ignition. The ignition
key would enable children to
operate power windows or
other controls, or even make
the vehicle move, which could
result in serious bodily injury or
even death. Never leave the
keys in your vehicle with unsu-
pervised children.
WARNING
Use only Kia original parts for
the ignition key in your vehicle.
If an aftermarket key is used,
the ignition switch may not
return to ON after START. If this
happens, the starter will contin-
ue to operate causing damage
to the starter motor and possi-
ble fire due to excessive current
in the wiring.
XM(FL) CAN(ENG) 4a(~158).QXP 1/23/2013 3:46 PM Page 4