Page 11 of 382
Interior lights / 3-133Lighting / 3-137
Wipers and washers / 3-141 Horn / 3-145
Defroster / 3-145
Hazard warning flasher / 3-146
Manual climate control system / 3-147
Automatic climate control system / 3-159
Windshield defrosting and defogging / 3-173 Cluster ionizer / 3-176
Luggage net holder / 3-176 Roof rack / 3-177
Homelink® wireless control system / 3-178
Homelink® Wireless control system with rearview display / 3-182
Storage compartment / 3-186 Interior features / 3-189 Antenna / 3-195
Steering wheel mounted controls / 3-196 Audio system / 3-197
Sirius satellite radio information / 3-215 Rear seat entertainment system / 3-231
Features of your vehicle3
Page 120 of 382
3111
Features of your vehicle
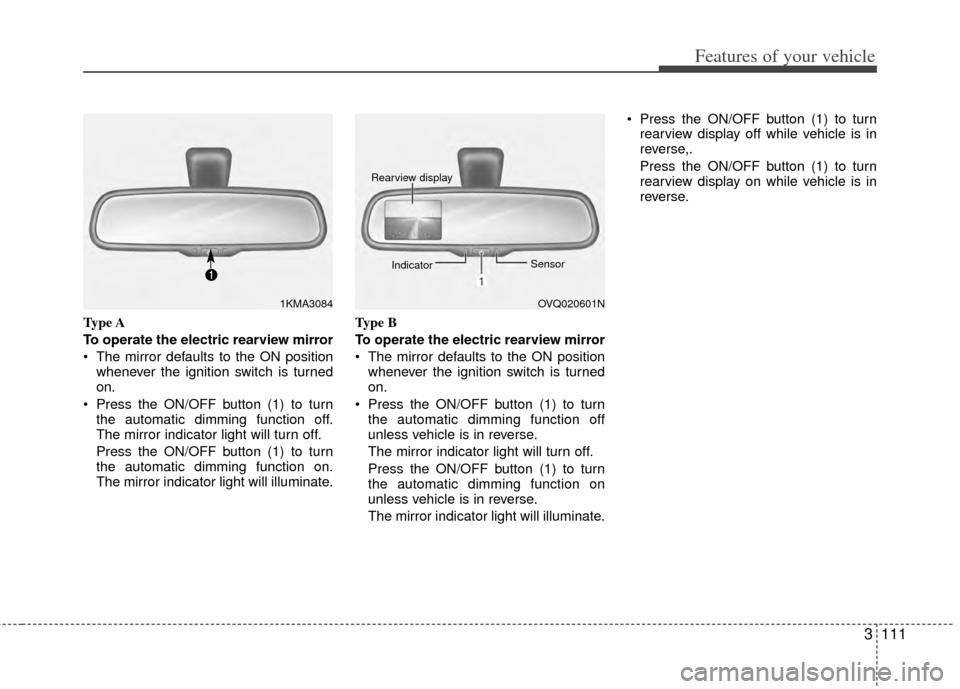
Type A
To operate the electric rearview mirror
The mirror defaults to the ON positionwhenever the ignition switch is turned
on.
Press the ON/OFF button (1) to turn the automatic dimming function off.
The mirror indicator light will turn off.
Press the ON/OFF button (1) to turn
the automatic dimming function on.
The mirror indicator light will illuminate. Type B
To operate the electric rearview mirror
The mirror defaults to the ON position
whenever the ignition switch is turned
on.
Press the ON/OFF button (1) to turn the automatic dimming function off
unless vehicle is in reverse.
The mirror indicator light will turn off.
Press the ON/OFF button (1) to turn
the automatic dimming function on
unless vehicle is in reverse.
The mirror indicator light will illuminate. Press the ON/OFF button (1) to turn
rearview display off while vehicle is in
reverse,.
Press the ON/OFF button (1) to turn
rearview display on while vehicle is in
reverse.
1KMA3084OVQ020601N
Rearview display
Indicator Sensor
Page 121 of 382
Features of your vehicle
112
3
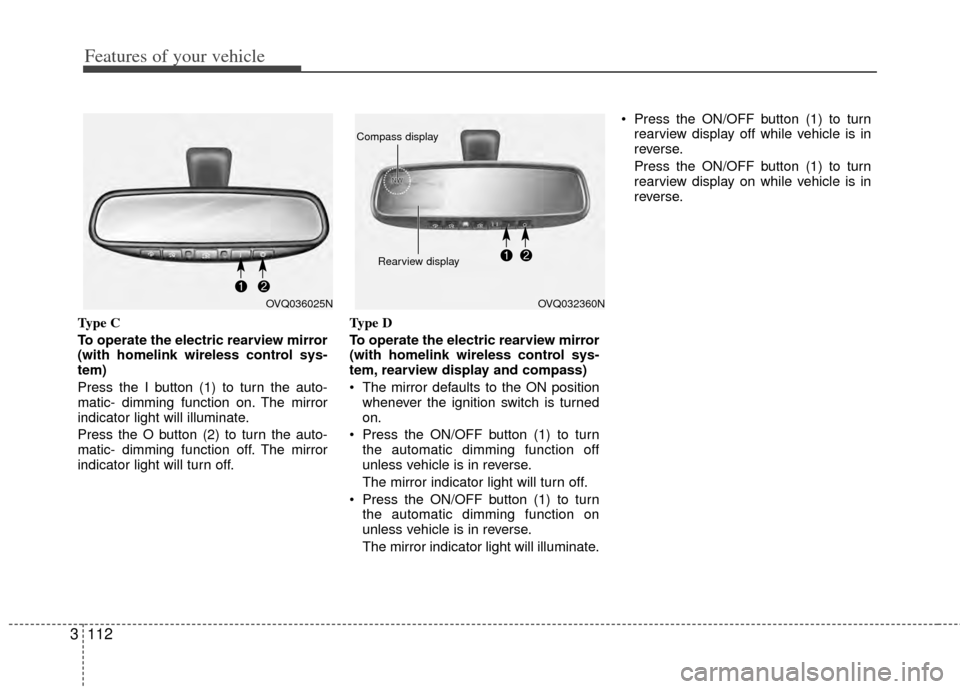
Type C
To operate the electric rearview mirror
(with homelink wireless control sys-
tem)
Press the I button (1) to turn the auto-
matic- dimming function on. The mirror
indicator light will illuminate.
Press the O button (2) to turn the auto-
matic- dimming function off. The mirror
indicator light will turn off. Type D
To operate the electric rearview mirror
(with homelink wireless control sys-
tem, rearview display and compass)
The mirror defaults to the ON position
whenever the ignition switch is turned
on.
Press the ON/OFF button (1) to turn the automatic dimming function off
unless vehicle is in reverse.
The mirror indicator light will turn off.
Press the ON/OFF button (1) to turn the automatic dimming function on
unless vehicle is in reverse.
The mirror indicator light will illuminate. Press the ON/OFF button (1) to turn
rearview display off while vehicle is in
reverse.
Press the ON/OFF button (1) to turn
rearview display on while vehicle is in
reverse.
OVQ036025NOVQ032360N
Rearview display
Compass display
Page 122 of 382
3113
Features of your vehicle
Compass (if equipped)
To operate Compass feature
Press and release the button (2), then
the vehicle's directional heading will be
displayed.
Pressing and releasing the button again
will turn off the display.
Heading display
- E : East
- W : West
- S : South
- N : North
ex) NE : North East
Calibration procedure
Press and hold the button (2) between 9
and 12 seconds. Release the button
when a "C" appears in the display, which
indicates the compass needs calibration.
1. Driving the vehicle in a circle at lessthan 8km/h 2 times or until the com-
pass heading appears.
2. Driving in a circle in right-handed direction and opposite direction are
possible, and if the calibration is com-
pleted, the compass heading will
appear.
3. Keep driving in a circle until a compass heading appears.
Setting the compass zone
1. Determine the desired Zone Numberbased upon your current location on
the Zone Maps below.
2. Press and hold the button (2) for more than 6 but less than 9 seconds, the
current Zone Number will appear on
the display.
3. Pressing and holding the button (2) again will cause the numbers to incre-
ment (Note: they will repeat …13, 14,
15, 1, 2, …). Releasing the button
when the desired Zone Number
appears on the display will set the new
Zone.
4. Within about 5 seconds the compass will start displaying a compass heading
again.
Page 123 of 382
Features of your vehicle
114
3
Re-calibrating the Compass.
There are some conditions that can
cause changes to the vehicle's magnetic
field. Items such as installing a ski rack or
a CB antenna or even some body repair
work on the vehicle can cause changes
to the vehicle's magnetic field. In these
situations, the compass will need to be
re-calibrated to quickly correct for these
changes. To re-calibrate the compass:
1. Press and hold the button (2) between
9 and 12 seconds. Release the button
when a "C" appears in the display,
which indicates the compass needs
calibration.
2. To re-calibrate the compass, drive the vehicle is 2 complete circles at less
than 5 MPH.
B520C05NF
Page 127 of 382
Features of your vehicle
118
3
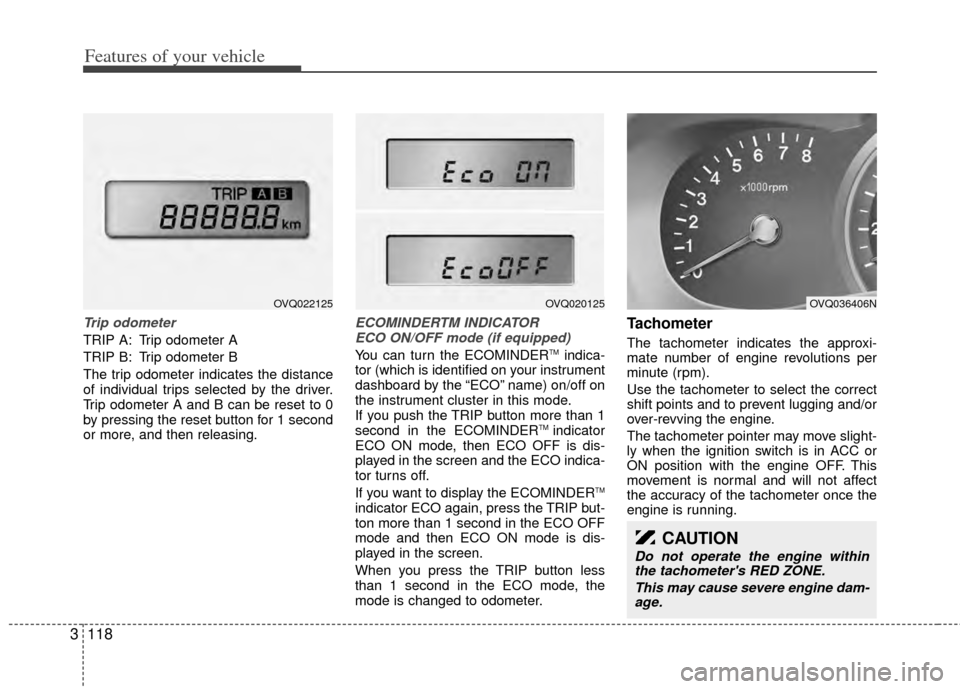
Trip odometer
TRIP A: Trip odometer A
TRIP B: Trip odometer B
The trip odometer indicates the distance
of individual trips selected by the driver.
Trip odometer A and B can be reset to 0
by pressing the reset button for 1 second
or more, and then releasing.
ECOMINDERTM INDICATOR
ECO ON/OFF mode (if equipped)
You can turn the ECOMINDERTMindica-
tor (which is identified on your instrument
dashboard by the “ECO” name) on/off on
the instrument cluster in this mode.
If you push the TRIP button more than 1
second in the ECOMINDER
TM indicator
ECO ON mode, then ECO OFF is dis-
played in the screen and the ECO indica-
tor turns off.
If you want to display the ECOMINDER
TM
indicator ECO again, press the TRIP but-
ton more than 1 second in the ECO OFF
mode and then ECO ON mode is dis-
played in the screen.
When you press the TRIP button less
than 1 second in the ECO mode, the
mode is changed to odometer.
Tachometer
The tachometer indicates the approxi-
mate number of engine revolutions per
minute (rpm).
Use the tachometer to select the correct
shift points and to prevent lugging and/or
over-revving the engine.
The tachometer pointer may move slight-
ly when the ignition switch is in ACC or
ON position with the engine OFF. This
movement is normal and will not affect
the accuracy of the tachometer once the
engine is running.
CAUTION
Do not operate the engine within the tachometer's RED ZONE.
This may cause severe engine dam-age.
OVQ036406NOVQ020125OVQ022125
Page 130 of 382

3121
Features of your vehicle
The trip computer is a microcomputer-
controlled driver information system that
displays information related to driving,
including compass, distance to empty,
driving time, average fuel consumption
and outside temperature on the display
when the ignition switch is in ON posi-
tion. All stored driving information is reset
if the battery is disconnected.
Mode selection
The compass is always displayed until
the display is turned off.
Push the MODE button to select distance
to empty, driving time, average fuel con-
sumption and outside temperature func-
tions.
Compass (if equipped)
The vehicle compass displays the direc-
tion the vehicle is heading.
Heading display
- E : East
- W : West
- S : South
- N : North
ex) NE : North East
✽ ✽NOTICE
If new vehicle is first driven, perform
calibration procedure as follows.
TRIP COMPUTER (IF EQUIPPED)
OVQ020318Driving time (ET)
Average fuel consumption
(AVG)
Outside temperature
OFF
Distance to empty (RANGE)
1VQA2211
Page 131 of 382
Features of your vehicle
122
3
Calibration procedure
The compass may not indicate the cor-
rect compass direction when you are dri-
ving in certain areas (tunnel, parking
garage, underground parking lot, near
transformer substation, etc.), and the fol-
lowing may occur:
The compass headings become inac-
curate.
The compass heading doesn't change when the vehicle changes direction.
Some compass headings are not dis- played.
The compass headings are inaccurate in long distance driving.
If the vehicle's compass headings
become inaccurate continuously, the
compass should be manually calibrated
as follows: 1. Move the vehicle away from any large
steel structures or power generating
cables or equipment.
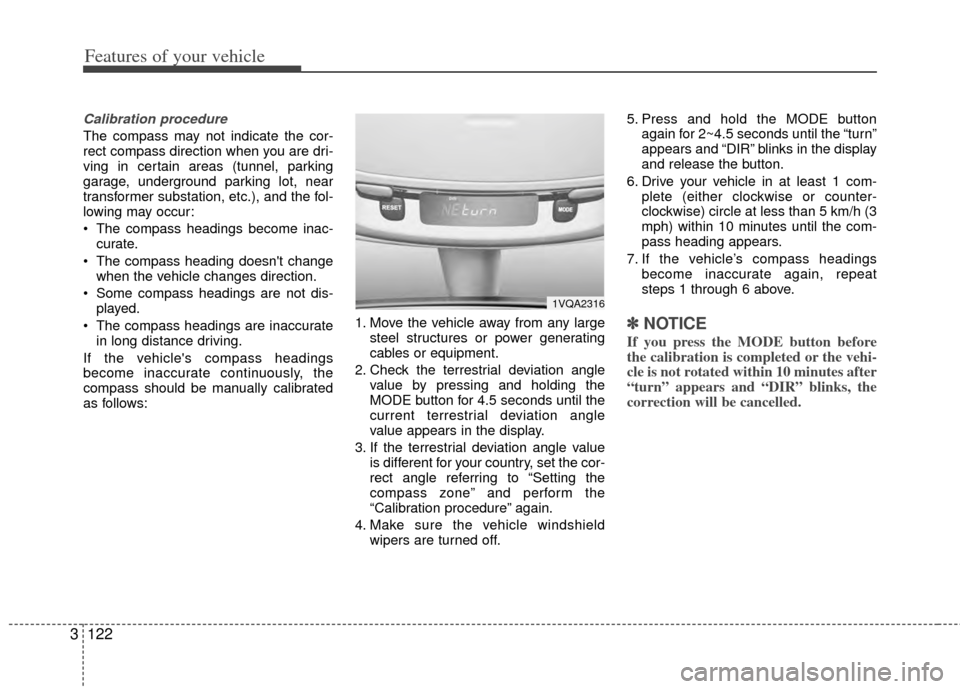
2. Check the terrestrial deviation angle value by pressing and holding the
MODE button for 4.5 seconds until the
current terrestrial deviation angle
value appears in the display.
3. If the terrestrial deviation angle value is different for your country, set the cor-
rect angle referring to “Setting the
compass zone” and perform the
“Calibration procedure” again.
4. Make sure the vehicle windshield wipers are turned off. 5. Press and hold the MODE button
again for 2~4.5 seconds until the “turn”
appears and “DIR” blinks in the display
and release the button.
6. Drive your vehicle in at least 1 com- plete (either clockwise or counter-
clockwise) circle at less than 5 km/h (3
mph) within 10 minutes until the com-
pass heading appears.
7. If the vehicle’s compass headings become inaccurate again, repeat
steps 1 through 6 above.
✽ ✽NOTICE
If you press the MODE button before
the calibration is completed or the vehi-
cle is not rotated within 10 minutes after
“turn” appears and “DIR” blinks, the
correction will be cancelled.
1VQA2316