2014 KIA MOHAVE ignition
[x] Cancel search: ignitionPage 99 of 417
Features of your vehicle
22
4
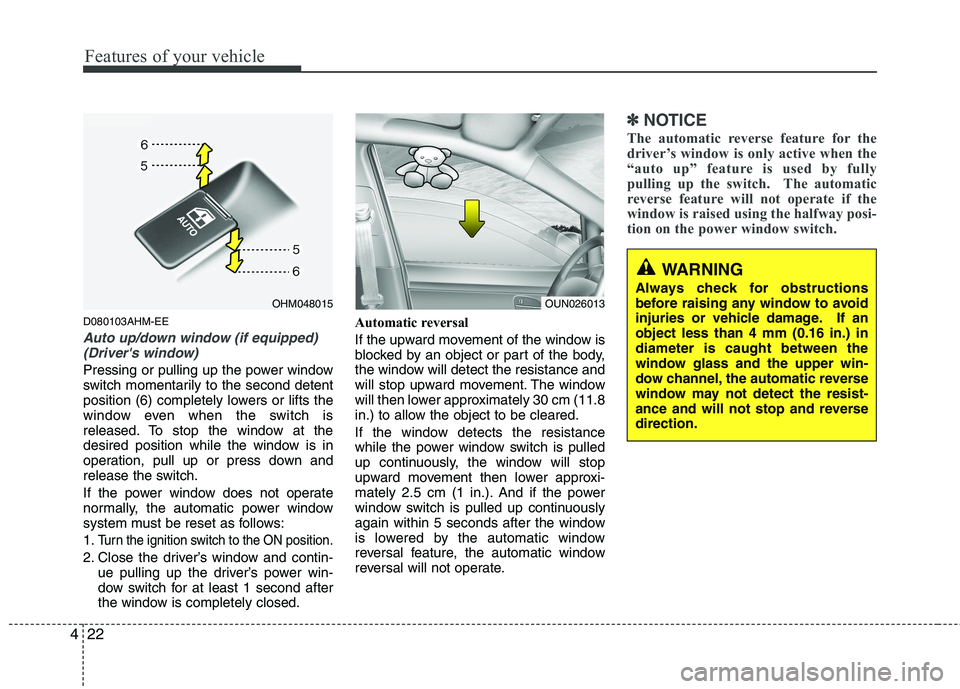
D080103AHM-EE
Auto up/down window (if equipped)
(Driver's window)
Pressing or pulling up the power window
switch momentarily to the second detent
position (6) completely lowers or lifts the
window even when the switch is
released. To stop the window at the
desired position while the window is in
operation, pull up or press down and
release the switch.
If the power window does not operate
normally, the automatic power window
system must be reset as follows: 1.
Turn the ignition switch to the ON position.
2. Close the driver’s window and contin- ue pulling up the driver’s power win-
dow switch for at least 1 second after
the window is completely closed. Automatic reversal
If the upward movement of the window is
blocked by an object or part of the body,
the window will detect the resistance and
will stop upward movement. The window
will then lower approximately 30 cm (11.8
in.) to allow the object to be cleared.
If the window detects the resistance
while the power window switch is pulled
up continuously, the window will stop
upward movement then lower approxi-
mately 2.5 cm (1 in.). And if the power
window switch is pulled up continuously
again within 5 seconds after the window
is lowered by the automatic window
reversal feature, the automatic window
reversal will not operate.
✽✽
NOTICE
The automatic reverse feature for the
driver’s window is only active when the
“auto up” feature is used by fully
pulling up the switch. The automatic
reverse feature will not operate if the
window is raised using the halfway posi-
tion on the power window switch.
OHM048015
WARNING
Always check for obstructions
before raising any window to avoid
injuries or vehicle damage. If anobject less than 4 mm (0.16 in.) indiameter is caught between the
window glass and the upper win-
dow channel, the automatic reverse
window may not detect the resist-
ance and will not stop and reversedirection.
OUN026013
Page 106 of 417
429
Features of your vehicle
D110000BHM-EE
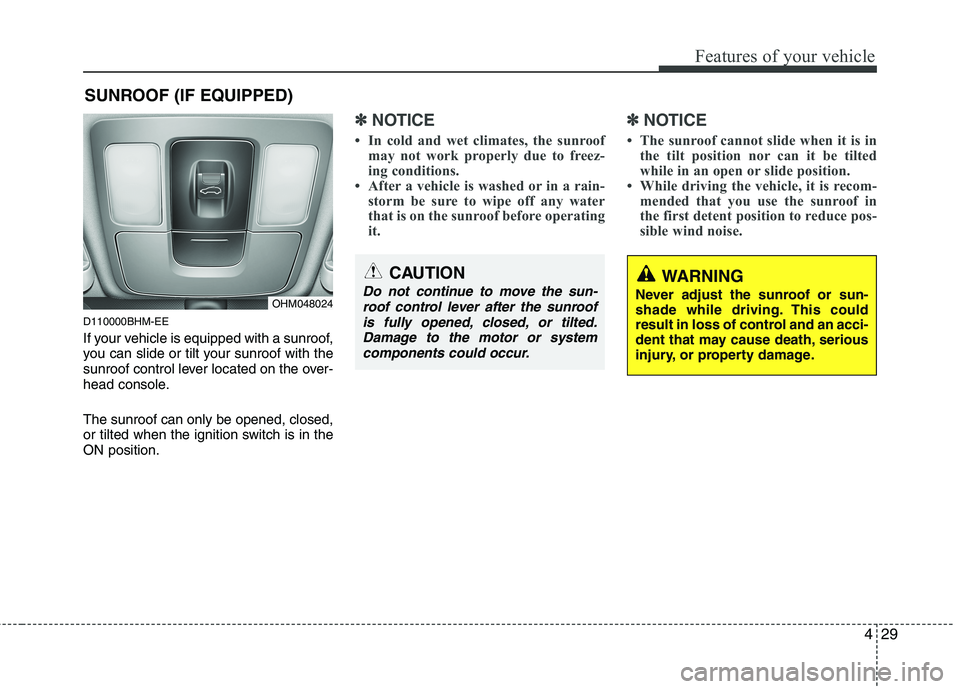
If your vehicle is equipped with a sunroof,
you can slide or tilt your sunroof with the
sunroof control lever located on the over-
head console. The sunroof can only be opened, closed,
or tilted when the ignition switch is in theON position.
✽✽NOTICE
In cold and wet climates, the sunroof may not work properly due to freez-
ing conditions.
After a vehicle is washed or in a rain- storm be sure to wipe off any water
that is on the sunroof before operating
it. ✽✽
NOTICE
The sunroof cannot slide when it is in the tilt position nor can it be tilted
while in an open or slide position.
While driving the vehicle, it is recom- mended that you use the sunroof in
the first detent position to reduce pos-
sible wind noise.
SUNROOF (IF EQUIPPED)
OHM048024
CAUTION
Do not continue to move the sun-
roof control lever after the sunroof is fully opened, closed, or tilted.Damage to the motor or systemcomponents could occur.WARNING
Never adjust the sunroof or sun-
shade while driving. This could
result in loss of control and an acci-
dent that may cause death, serious
injury, or property damage.
Page 109 of 417
Features of your vehicle
32
4
D110500AHM-EE
Resetting the sunroof
Whenever the vehicle battery is discon-
nected or discharged, you must reset
your sunroof system as follows:
1. Turn the ignition switch to the ON
position.
2. According to the position of the sun- roof, do the following.
1) In case the sunroof is closed com-pletely or tilted:
Push the sunroof control lever
upward until the sunroof tilts com-
pletely upward.
2) In case the sunroof is open: Push the sunroof control lever for-
ward until the sunroof closes com-
pletely. Push the sunroof control
lever upward until the sunroof tilts
completely upward.
3. Release the sunroof control lever.
4. Push the sunroof control lever upward (about 10 seconds) until the sunroof
has returned to the original tilt posi-
tion after it is raised a little higher than
the maximum tilt position. Then,
release the lever. 5. Push the sunroof control lever upward
(about 6 seconds) until the sunroof
operates as follows;
TILT DOWN �SLIDE OPEN �
SLIDE CLOSE
Then, release the lever.
When this is complete, the sunroof sys- tem has been reset.
Page 110 of 417
433
Features of your vehicle
D120000AHM
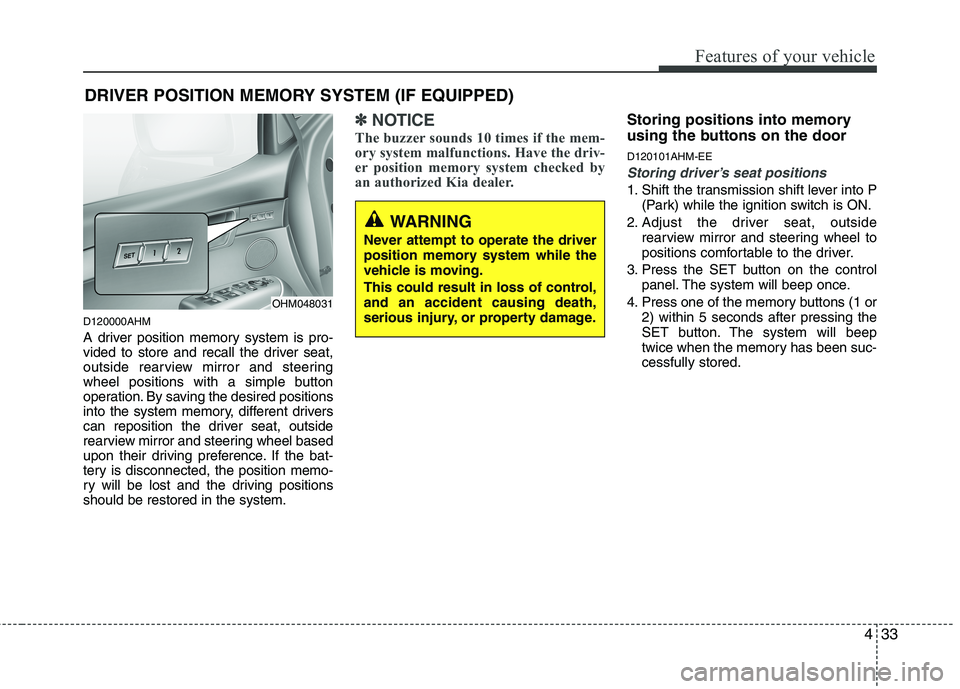
A driver position memory system is pro-
vided to store and recall the driver seat,
outside rearview mirror and steering
wheel positions with a simple button
operation. By saving the desired positions
into the system memory, different drivers
can reposition the driver seat, outside
rearview mirror and steering wheel based
upon their driving preference. If the bat-
tery is disconnected, the position memo-
ry will be lost and the driving positionsshould be restored in the system.
✽✽NOTICE
The buzzer sounds 10 times if the mem-
ory system malfunctions. Have the driv-
er position memory system checked by
an authorized Kia dealer.Storing positions into memory
using the buttons on the door D120101AHM-EE
Storing driver’s seat positions
1. Shift the transmission shift lever into P (Park) while the ignition switch is ON.
2. Adjust the driver seat, outside rearview mirror and steering wheel to
positions comfortable to the driver.
3. Press the SET button on the control panel. The system will beep once.
4. Press one of the memory buttons (1 or 2) within 5 seconds after pressing the
SET button. The system will beep
twice when the memory has been suc-cessfully stored.
DRIVER POSITION MEMORY SYSTEM (IF EQUIPPED)
OHM048031
WARNING
Never attempt to operate the driver
position memory system while the
vehicle is moving.
This could result in loss of control, and an accident causing death,
serious injury, or property damage.
Page 111 of 417

Features of your vehicle
34
4
D120102AHM-EE
Recalling positions from memory
1. Shift the transmission shift lever into P
(Park) under one of the followings:
The ignition switch is ON.
The driver’s door is opened while the ignition switch is in the LOCK or ACC position.
Within 30 seconds after the driver’s door is closed while the ignition switch
is in the LOCK or ACC position.
2. To recall the position in memory, press the desired memory button (1 or 2).
The system will beep once, then the
driver seat, outside rearview mirror
and steering wheel will automatically
adjust to the stored positions.
Adjusting one of the control switches for
the driver seat, outside rearview mirror
and steering wheel while the system isrecalling the stored positions will cause
the movement for that component to stop
and move in the direction that the control
switch is moved. Other components will
continue to the recalled position. D120300AHM Easy access function (if equipped)
With the shift lever in P (Park) position,
the system will move the driver’s seat
and the steering wheel forward or rear-
ward automatically so you can comfort-
ably enter and exit the vehicle.
Without smart key system
- The steering wheel will move awayfrom the driver and the seat will move
rearward, when the ignition key is
removed.
- The steering wheel will move toward the driver and the seat will move for-
ward, when the ignition key is insert-ed.
With smart key system - The steering wheel will move awayfrom the driver and the seat will move
rearward, when the ENGINE START/
STOP button is in the OFF position.
- The steering wheel will move toward the driver and the seat will move for-
ward, when the ENGINE START/
STOP button is in the ACC position.
WARNING
Use caution when recalling adjust-
ment memory while sitting in the
vehicle. Adjust the seat position to
the desired position immediately if
the seat moves too far in any direc-tion.
Page 112 of 417
435
Features of your vehicle
To deactivate or activate the easy access function
1. Shift the transmission shift lever into P(Park) while the ignition switch is ON.
2. Press the SET button and hold it for 10 seconds or more.
3. Release the button after one or two beep sounds. The system will beep
once to indicate the function deactivat-ed or twice to indicate the function
activated.
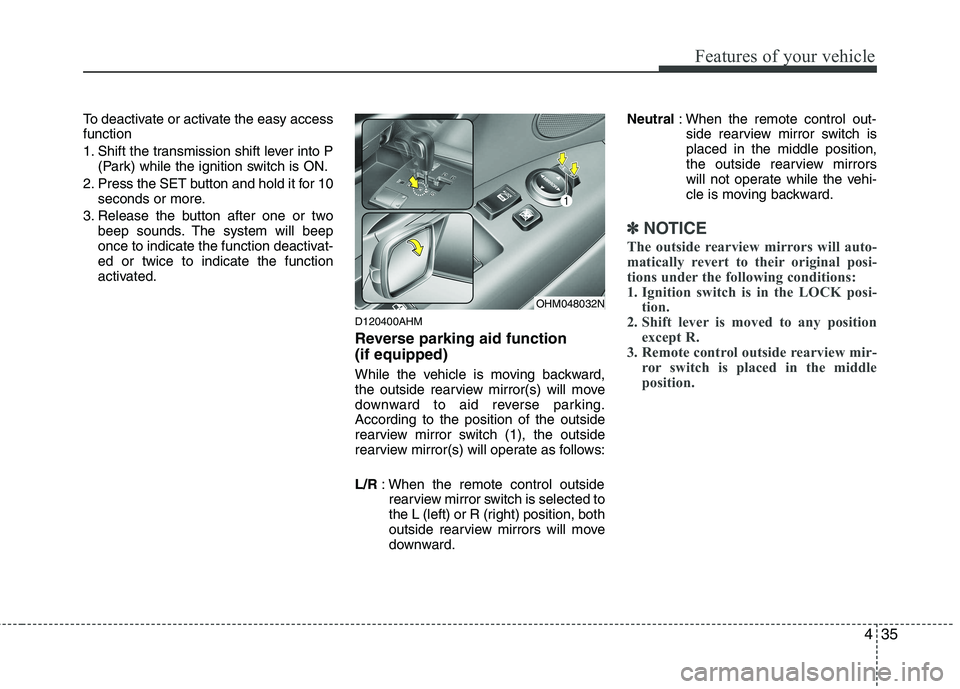
D120400AHM
Reverse parking aid function (if equipped)
While the vehicle is moving backward,
the outside rearview mirror(s) will move
downward to aid reverse parking.According to the position of the outside
rearview mirror switch (1), the outside
rearview mirror(s) will operate as follows: L/R: When the remote control outside
rearview mirror switch is selected to
the L (left) or R (right) position, both
outside rearview mirrors will move
downward. Neutral
: When the remote control out-
side rearview mirror switch isplaced in the middle position,
the outside rearview mirrors
will not operate while the vehi-
cle is moving backward.
✽✽ NOTICE
The outside rearview mirrors will auto-
matically revert to their original posi-
tions under the following conditions:
1. Ignition switch is in the LOCK posi- tion.
2. Shift lever is moved to any position
except R.
3. Remote control outside rearview mir-
ror switch is placed in the middle
position.
OHM048032N
Page 113 of 417

Features of your vehicle
36
4
D310000AHM-EE
You may adjust the position of the accel-
erator and brake pedals by pressing the
switch. The position of the pedals can be adjust-
ed in any position of the ignition switch.
But the transmission shift lever must be
in the P (Park) position when the ignition
switch is in the ON position.
If you press the portion of the
switch, the pedals will move toward the
driver.
If you press the portion of the switch, the pedals will move away from
the driver. D310100AHM
Setting the adjustable pedal posi- tion
1. Be sure the parking brake is engaged.
2. Move the accelerator and brake ped-
als to the front most position by press-
ing the portion of the switch.
3. Adjust the seat position and the steer- ing wheel angle properly.
4. Move the pedals toward you until you can fully depress the brake pedal by
pushing the portion of the switch.
5. Depress the pedals a few times to get used to the pedals after the adjust-ment.
POWER ADJUSTABLE PEDALS (IF EQUIPPED)
OHM048033N
WARNING
Adjust the pedals after parking the vehicle on level ground.
Never attempt to adjust the ped-
als while the vehicle is moving.
Never adjust the pedals with your foot on the accelerator pedal as
this may result in increasing theengine speed and acceleration.
Make sure that you can fully depress the brake pedal before
driving. Otherwise, you may not
be able to hold down the brake
pedal firmly in an emergencystop.
Page 115 of 417
Features of your vehicle
38
4
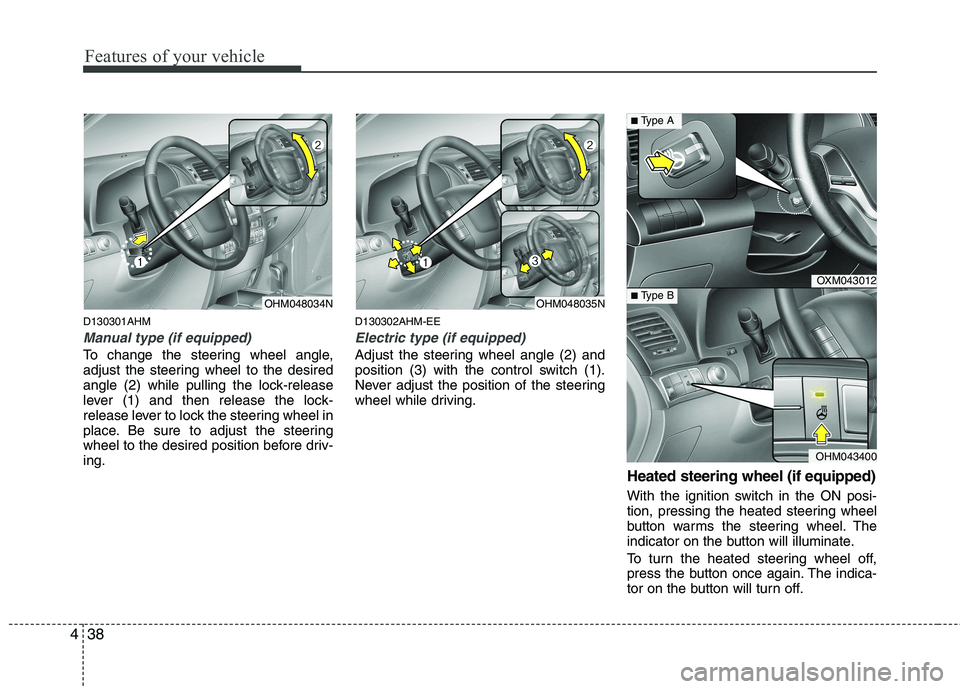
D130301AHM
Manual type (if equipped)
To change the steering wheel angle,
adjust the steering wheel to the desired
angle (2) while pulling the lock-release
lever (1) and then release the lock-
release lever to lock the steering wheel in
place. Be sure to adjust the steering
wheel to the desired position before driv-ing. D130302AHM-EE
Electric type (if equipped)
Adjust the steering wheel angle (2) and
position (3) with the control switch (1).
Never adjust the position of the steering
wheel while driving.
Heated steering wheel (if equipped)
With the ignition switch in the ON posi-
tion, pressing the heated steering wheel
button warms the steering wheel. The
indicator on the button will illuminate.
To turn the heated steering wheel off,
press the button once again. The indica-
tor on the button will turn off.
OHM048034NOHM048035N
OXM043012
OHM043400
■Type A
■ Type B