2014 INFINITI Q50 HYBRID navigation update
[x] Cancel search: navigation updatePage 96 of 274

.For some applications, the system may
not support all of the functions of
applications that are installed on your
smartphone. Additionally, due to service
provider policies, the contents of appli-
cation services may be changed or
terminated.
. If the smartphone is out of the range of
communication, some functions cannot
be used.
. While driving, some operations are lim-
ited in order to prevent distracting the
driver. While driving, avoid keeping a
close watch on the display.
. Before exchanging ownership of the
vehicle, delete application data (e-mail
data, etc.) stored in the in-vehicle device.
. Some application services may be sub-
ject to change or termination without
prior notice.USING APPLICATIONS
NOTE:
To use APP functions on the models without
navigation system, calendar setting is neces-
sary for checking SSL expiration date.
“Clock settings” (page 2-20)
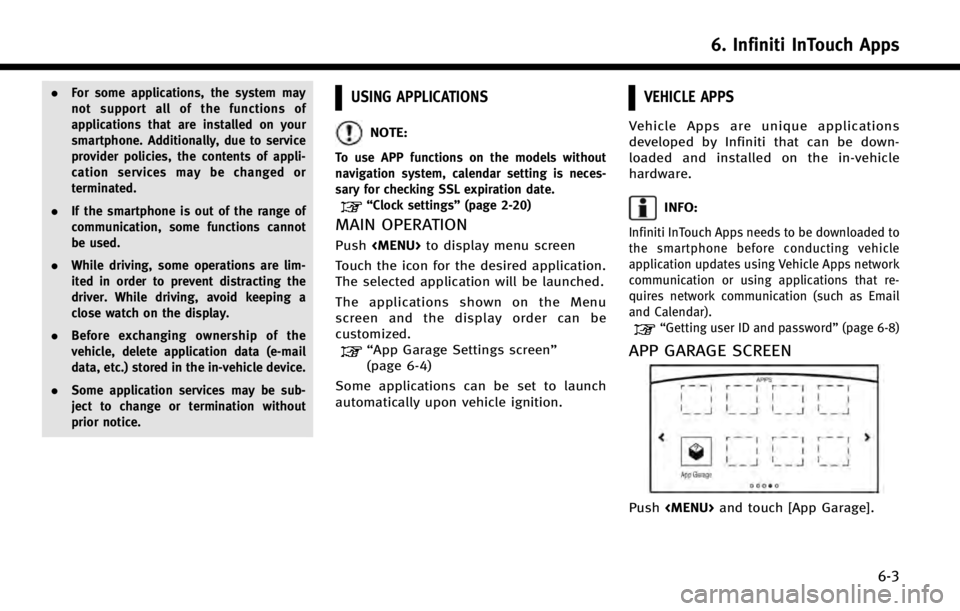
MAIN OPERATION
Push
Page 152 of 274

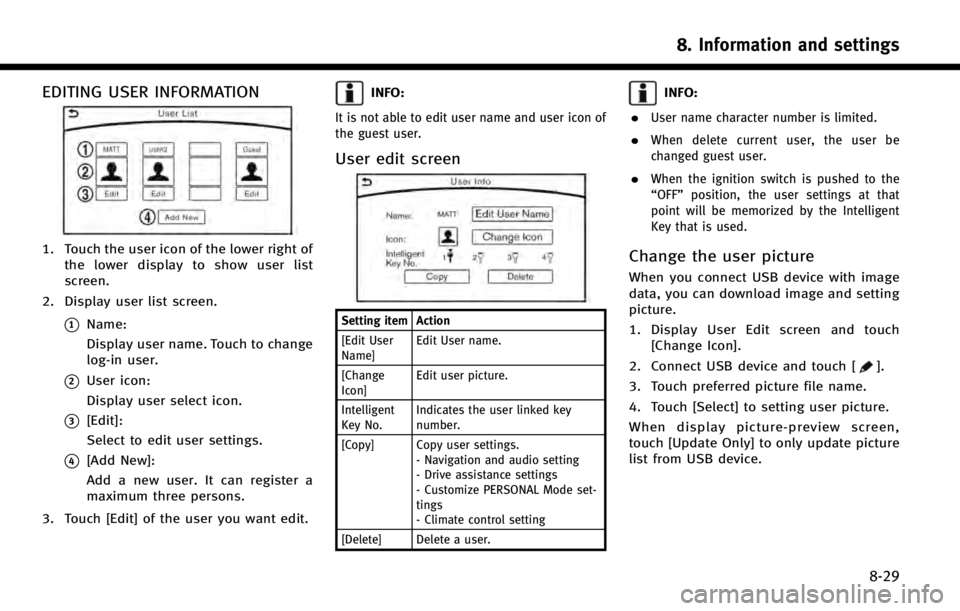
EDITING USER INFORMATION
1. Touch the user icon of the lower right ofthe lower display to show user list
screen.
2. Display user list screen.
*1Name:
Display user name. Touch to change
log-in user.
*2User icon:
Display user select icon.
*3[Edit]:
Select to edit user settings.
*4[Add New]:
Add a new user. It can register a
maximum three persons.
3. Touch [Edit] of the user you want edit.
INFO:
It is not able to edit user name and user icon of
the guest user.
User edit screen
Setting item Action
[Edit User
Name] Edit User name.
[Change
Icon] Edit user picture.
Intelligent
Key No. Indicates the user linked key
number.
[Copy] Copy user settings. - Navigation and audio setting
- Drive assistance settings
- Customize PERSONAL Mode set-
tings
- Climate control setting
[Delete] Delete a user.
INFO:
.
User name character number is limited.
.When delete current user, the user be
changed guest user.
.When the ignition switch is pushed to the
“OFF” position, the user settings at that
point will be memorized by the Intelligent
Key that is used.
Change the user picture
When you connect USB device with image
data, you can download image and setting
picture.
1. Display User Edit screen and touch [Change Icon].
2. Connect USB device and touch [
].
3. Touch preferred picture file name.
4. Touch [Select] to setting user picture.
When display picture-preview screen,
touch [Update Only] to only update picture
list from USB device.
8. Information and settings
8-29
Page 177 of 274
![INFINITI Q50 HYBRID 2014 Infiniti Intouch 9. Navigation (if so equipped)
9-22
1. Push<MENU>and touch [Destination].
2. Touch [Nearby Places]. The category list is displayed.
3. Select [Emergency Facilities] for exam-ple.
4. Select preferred c INFINITI Q50 HYBRID 2014 Infiniti Intouch 9. Navigation (if so equipped)
9-22
1. Push<MENU>and touch [Destination].
2. Touch [Nearby Places]. The category list is displayed.
3. Select [Emergency Facilities] for exam-ple.
4. Select preferred c](/manual-img/42/34966/w960_34966-176.png)
9. Navigation (if so equipped)
9-22
1. Push
2. Touch [Nearby Places]. The category list is displayed.
3. Select [Emergency Facilities] for exam-ple.
4. Select preferred category from the sub category list.
Upper display
5. Touch the preferred destination fromthe list. The position of the selected
location is displayed in the preview on
the upper display.
INFO:
.If the suggested route is already set, by
touching [Along Route] on the lower
display, the system displays only the
facilities located along the route.
.A maximum of 100 facilities can bedisplayed on the list screen.
6. Touch [Start] to start route guidance.
INFO:
You can also set the destination by touching
[] when scrolling the map and selecting
[Nearby Places] from the shorcut menu.
USING JOURNEY PLANNER
It is possible to set the route according to
the route plan created in advance by the
INFINITI Owner’s Portal Website.
INFO:
Use of Infiniti ConnectionTMfeatures is depen-
dent upon a valid subscription and the tele-
matics device being in operative condition, as
well as cellular connectivity, navigation map
data and GPS satellite signal reception being
available.
1. Push
2. Touch [Journey Planner]. The system will connect to the Infiniti Connection
Data Center and display the Journey
Planner list screen.
3. Select the preferred route plan from thelist.
INFO:
.Touch [Update List] to update the list
information.
.Touch [Details] to preview the route onthe upper display.
.Touchto display facility information.
4. The selected route plan is displayed.
Touch [Start] after confirming the loca-
tion of the displayed destination.
Page 181 of 274
![INFINITI Q50 HYBRID 2014 Infiniti Intouch 9. Navigation (if so equipped)
9-26
INFO:
The search history can also be reused by
touch [History].
4. Touch the preferred destination fromthe list.
INFO:
.Touch [info] to display the facility infor-m INFINITI Q50 HYBRID 2014 Infiniti Intouch 9. Navigation (if so equipped)
9-26
INFO:
The search history can also be reused by
touch [History].
4. Touch the preferred destination fromthe list.
INFO:
.Touch [info] to display the facility infor-m](/manual-img/42/34966/w960_34966-180.png)
9. Navigation (if so equipped)
9-26
INFO:
The search history can also be reused by
touch [History].
4. Touch the preferred destination fromthe list.
INFO:
.Touch [info] to display the facility infor-mation on the upper display.
.Touch [Details] to display the informationfeeds screen.
“Screen information” (page 8-17)
5. The entire destination is shown on the
upper display. Touch [Start] to start
route guidance.
Searching by using IVR soft button
on map
It is possible to set a destination by touching the IVR (Interactive Voice Re-
sponse) soft button
*1on the map. You
can choose from the options provided by
the voice guidance and speak your choice,
or ask the Infiniti Connection Response
Specialists directly to search for your
destination.
“ Connecting to Interactive Voice
Menu” (page 8-15)
Using Google send-to-car
It is possible to search for a location using
Google maps, and to download the infor-
mation to set the destination via the
INFINITI Connection Data Center.
1. Push
nection].
2. Touch [Send to Car]. The system connects to the Infiniti
Connection Data Center and the desti-
nation list is downloaded.
3. Select the preferred destinations fromthe list. The position of the selected
location is displayed in the preview on
the upper display.
INFO:
Select [Update List] to update the list
information.
4. The selected destination is displayed.Touch [Start] to start route guidance.
INFO:
Refer to the INFINITI Owner’s Portal Website for
the destination setting using Google send to
car.
Page 182 of 274

Using Destination Send to Car
Destination Send-to-Vehicle enables you to
search for destinations from a point of
interest (POI) database accessed within the
Infiniti Connection Web site.
1. Push
2. Touch [Infiniti Connection].
3. Touch [Destination Send to Car].
4. Select preferred folder.
5. Select preferred channel. The list of destinations which you set at the Infniti
Connection Web site are displaed.
6. Select preferred destination from the list.
INFO:
Select [Update List] to update the list of point of
interest.
SETTING POINT ON MAP
It is possible to set a location scrolled to
on the map as the destination and have the
system calculate a route.
Upper display
1. Scroll the map, place the cross pointerover the preferred location, and touch
[
].
INFO:
.The point on the blinking road where thecenter of the cross pointer is located can
be set as a destination.
2. Touch [New Destination].
3. The entire route is shown on the upper display. Touch [Start] to start route
guidance.
INFO:
.
If a point on a freeway is set as the
destination, a confirmation message is
displayed.
PROCEDURES AFTER SETTING
ROUTE
The system sets the destination to the
selected location and starts calculating a
route. After performing a route search,
route guidance can be started. Also, it is
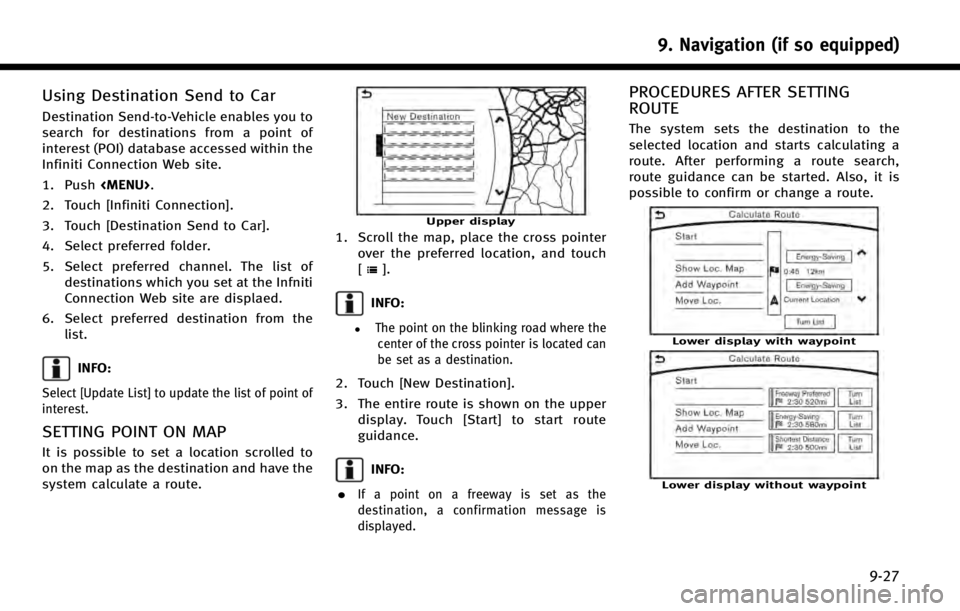
possible to confirm or change a route.
Lower display with waypoint
Lower display without waypoint
9. Navigation (if so equipped)
9-27
Page 221 of 274

9. Navigation (if so equipped)
9-66
MAP DATA
How to handle the Map SD card
An SD card that includes the map data is
inserted. When handling the Map SD card,
please be careful and adhere to the
following instructions:. An SD card is inserted in the slot. This
is the SDHC card that is exclusively
used for this device. This card includes
the map data. The SDHC card is
necessary to operate the device. Do
not remove this card except when
updateing the map data is required.
. Never analyze, modify, delete or format
the map data. Doing so may cause an
improper operation of the device.
. The SDHC card that is exclusively used
for this device does not work properly if
it is inserted in another device.
. The map data cannot be used even if it
is copied to another SDHC card.
. Do not remove the SDHC card contain-
ing map data from the system. Using
the system with the SDHC card contain-
ing map data removed will prevent
some functions from operating.
NOTE:
Do not remove the SD card containing map data
that is inserted in the slot. When this SD card
containing map data is removed the navigation
system will not operate. If the SD card contain-
ing map data is accidentally removed, after
reinserting the SD card containing map data
into the slot, place the ignition switch in the
OFF position and then place it back in the ON
position again.
How to order map data updates
To order updated map data, contact the
INFINITI NAVIGATION SYSTEM HELPDESK.
See the contact information on the inside
front cover of this manual.
About map data
1. This map data has been prepared by
CLARION CO., LTD. (CLARION), under
license from NAVTEQ. has added, pro-
cessed and digitized data based on the
digital road map data of NAVTEQ. Due
to the production timing of the map
data, some new roads may not be
included in this map data or some of
the names or roads may be different
from those at the time you use this map
data. 2. Traffic control and regulation data used
in this map data may be different from
those at the time you use this map data
due to the data production timing.
When driving your vehicle, follow the
actual traffic control signs and notices
on the roads.
3. Reproducing or copying this map soft- ware is strictly prohibited by law.
Published by Nissan North America, Inc.
*
C2012 NAVTEQ. All Rights Reserved.
*
CZENRIN CO., LTD.2013. All rights re-
served.
Certain business data provided by In-
fogroup *
C2012, All Rights Reserved.
WARNING!
.This navigation system should not be
used as a substitute for your own
judgement. Any route suggestions made
by this navigation system may never
override any local traffic regulations,
your own judgement, and/or knowledge
of safe driving practices. Disregard route
suggestions by the navigation system if
such suggestions would: cause you to
perform an hazardous or illegal maneu-
ver, place you in an hazardous situation,
Page 245 of 274

11. Troubleshooting guide
11-2
CUSTOMER ASSISTANCE
For assistance or inquiries about the
INFINITI Navigation System, or to order
updated map data, contact the INFINITI
NAVIGATION SYSTEM HELPDESK. See the
contact information on the inside front
cover of this manual.
Page 261 of 274

11. Troubleshooting guide
11-18
VEHICLE ICON
SymptomPossible cause Possible solution
Names of roads and locations differ be-
tween Plan View and Birdview
TM. This is because the quantity of the displayed information is
reduced so that the screen does not become too cluttered.
There is also a chance that names of the roads or locations may
be displayed multiple times, and the names appearing on the
screen may be different because of a processing procedure. This is not a malfunction.
The vehicle icon is not displayed in the
correct position. The vehicle was transported after the ignition switch was
pushed off, for example, by a ferry or car transporter. Drive the vehicle for a period of time on a road
where GPS signals can be received.
The position and direction of the vehicle icon may be incorrect
depending on the driving environments and the levels of
positioning accuracy of the navigation system. This is not a malfunction. Drive the vehicle for a
period of time to automatically correct the
position and direction of the vehicle icon.
“Current vehicle location”
(page 9-59)
When the vehicle is traveling on a new
road, the vehicle icon is located on another
road nearby. Because the new road is not stored in the map data, the system
automatically places the vehicle icon on the nearest road
available. Updated road information will be included in the
next version of the map data.
The screen does not switch to the night
screen even after turning on the headlights. The daytime screen was set the last time the headlights were
turned on. Set the screen to the night screen mode using
<
>
when turning on the headlights.“Screen Settings” (page 2-16)
The map does not scroll even when the
vehicle is moving. The current location map screen is not displayed.
Push