Page 149 of 711
Features of your vehicle
48 4
Inside rearview mirror
Adjust the rearview mirror so that the
center view through the rear window
is seen. Make this adjustment before
you start driving.
Day/night rearview mirror
(if equipped)
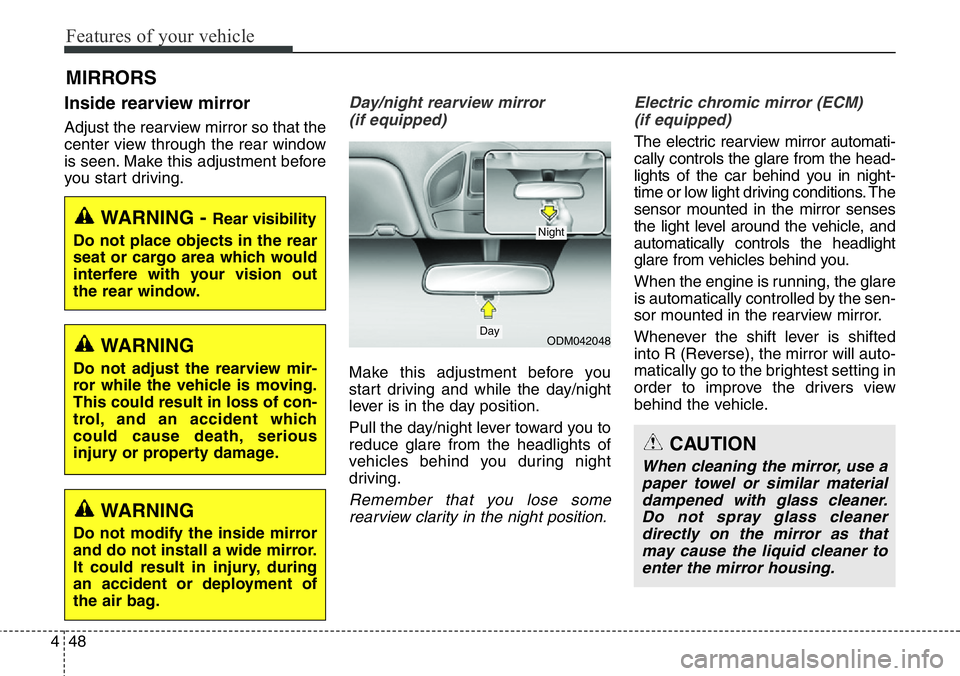
Make this adjustment before you
start driving and while the day/night
lever is in the day position.
Pull the day/night lever toward you to
reduce glare from the headlights of
vehicles behind you during night
driving.
Remember that you lose some
rearview clarity in the night position.Electric chromic mirror (ECM)
(if equipped)
The electric rearview mirror automati-
cally controls the glare from the head-
lights of the car behind you in night-
time or low light driving conditions. The
sensor mounted in the mirror senses
the light level around the vehicle, and
automatically controls the headlight
glare from vehicles behind you.
When the engine is running, the glare
is automatically controlled by the sen-
sor mounted in the rearview mirror.
Whenever the shift lever is shifted
into R (Reverse), the mirror will auto-
matically go to the brightest setting in
order to improve the drivers view
behind the vehicle.
MIRRORS
WARNING - Rear visibility
Do not place objects in the rear
seat or cargo area which would
interfere with your vision out
the rear window.
ODM042048
CAUTION
When cleaning the mirror, use a
paper towel or similar material
dampened with glass cleaner.
Do not spray glass cleaner
directly on the mirror as that
may cause the liquid cleaner to
enter the mirror housing.
Day
Night
WARNING
Do not adjust the rearview mir-
ror while the vehicle is moving.
This could result in loss of con-
trol, and an accident which
could cause death, serious
injury or property damage.
WARNING
Do not modify the inside mirror
and do not install a wide mirror.
It could result in injury, during
an accident or deployment of
the air bag.
Page 150 of 711
449
Features of your vehicle
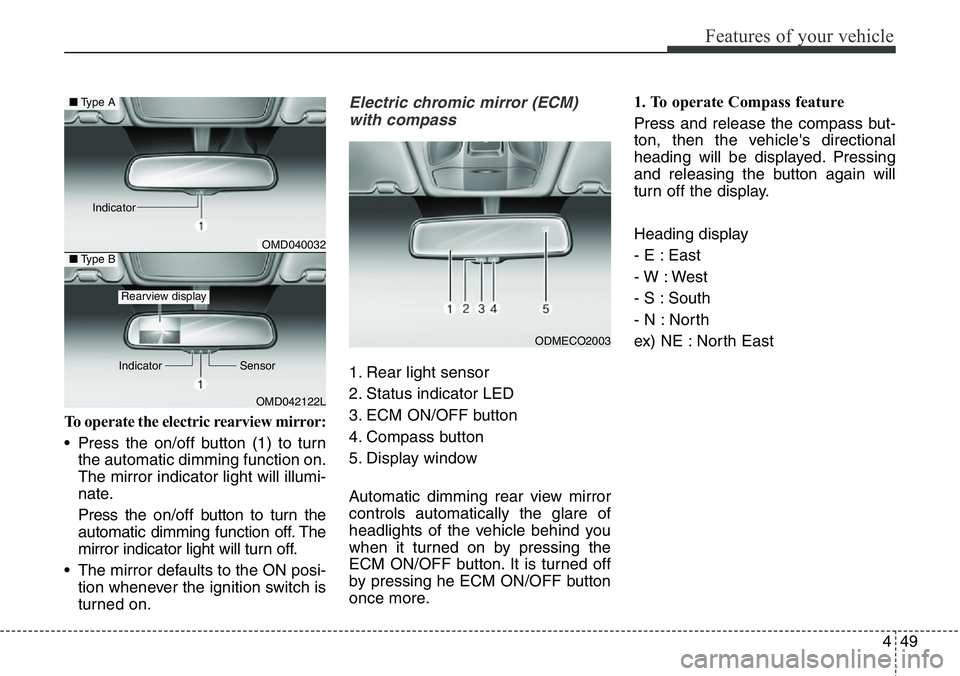
To operate the electric rearview mirror:
• Press the on/off button (1) to turn
the automatic dimming function on.
The mirror indicator light will illumi-
nate.
Press the on/off button to turn the
automatic dimming function off. The
mirror indicator light will turn off.
• The mirror defaults to the ON posi-
tion whenever the ignition switch is
turned on.
Electric chromic mirror (ECM)
with compass
1. Rear light sensor
2. Status indicator LED
3. ECM ON/OFF button
4. Compass button
5. Display window
Automatic dimming rear view mirror
controls automatically the glare of
headlights of the vehicle behind you
when it turned on by pressing the
ECM ON/OFF button. It is turned off
by pressing he ECM ON/OFF button
once more.1. To operate Compass feature
Press and release the compass but-
ton, then the vehicle's directional
heading will be displayed. Pressing
and releasing the button again will
turn off the display.
Heading display
- E : East
- W : West
- S : South
- N : North
ex) NE : North East
ODMECO2003
OMD040032
OMD042122L
■Type A
■Type B
Rearview display
Indicator Sensor Indicator
Page 157 of 711
Features of your vehicle
56 4
INSTRUMENT CLUSTER
1. Tachometer
2. Speedometer
3. Engine coolant temperature gauge
4. Fuel gauge
5. LCD display
6. Warning and indicator lights (if equipped)
7. Turn signal indicator lights
ODMEMM2346/ODMEMM2054
■Type A
- Gasoline engine
❈The actual cluster in the vehicle may differ
from the illustration.
For more details, refer to the "Gauges" in
this chapter.
- Diesel engine
Page 158 of 711
457
Features of your vehicle
1. Tachometer
2. Speedometer
3. Engine coolant temperature gauge
4. Fuel gauge
5. LCD display
6. Warning and indicator lights (if equipped)
7. Turn signal indicator lights
ODMEMM2347/ODMEMM2055
■Type B
- Gasoline engine
❈The actual cluster in the vehicle may differ
from the illustration.
For more details, refer to the "Gauges" in
this chapter.
- Diesel engine
Page 159 of 711
Features of your vehicle
58 4
Instrument Cluster ControlAdjusting Instrument Cluster
Illumination (if equipped)
The brightness of the instrument
panel illumination is changed by
moving the illumination control knob
right or left when the ignition switch
or Engine Start/Stop button is ON, or
the tale lights are turned on.• The brightness has 20 levels : 1
(MIN) ~ 20 (MAX)
• If you hold the illumination control
knob on the right end (+) or left end
(-), the brightness will be changed
continuously.
• If the brightness reaches to the
maximum or minimum level, an
alarm will sound.
ODMEDI2001/ODMEDI2029 ■Type A
■Type B
ODM042056
WARNING
Never adjust the instrument clus-
ter while driving. This could
result in loss of control and lead
to an accident that may cause
death, serious injury, or property
damage.
Page 163 of 711
Features of your vehicle
62 4
✽NOTICE
• The fuel tank capacity is given in
chapter 8.
• The fuel gauge is supplemented by
a low fuel warning light, which
will illuminate when the fuel tank
is nearly empty.
• On inclines or curves, the fuel
gauge pointer may fluctuate or the
low fuel warning light may come
on earlier than usual due to the
movement of fuel in the tank.
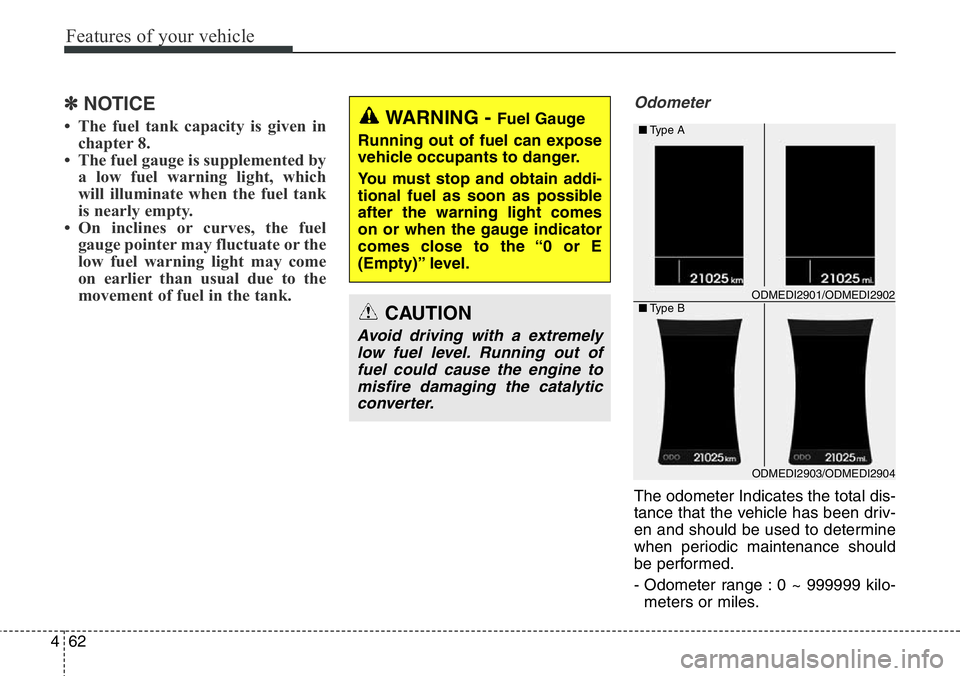
Odometer
The odometer Indicates the total dis-
tance that the vehicle has been driv-
en and should be used to determine
when periodic maintenance should
be performed.
- Odometer range : 0 ~ 999999 kilo-
meters or miles.
WARNING - Fuel Gauge
Running out of fuel can expose
vehicle occupants to danger.
You must stop and obtain addi-
tional fuel as soon as possible
after the warning light comes
on or when the gauge indicator
comes close to the “0 or E
(Empty)” level.
CAUTION
Avoid driving with a extremely
low fuel level. Running out of
fuel could cause the engine to
misfire damaging the catalytic
converter.
ODMEDI2903/ODMEDI2904 ■Type A
■Type B
ODMEDI2901/ODMEDI2902
Page 164 of 711
463
Features of your vehicle
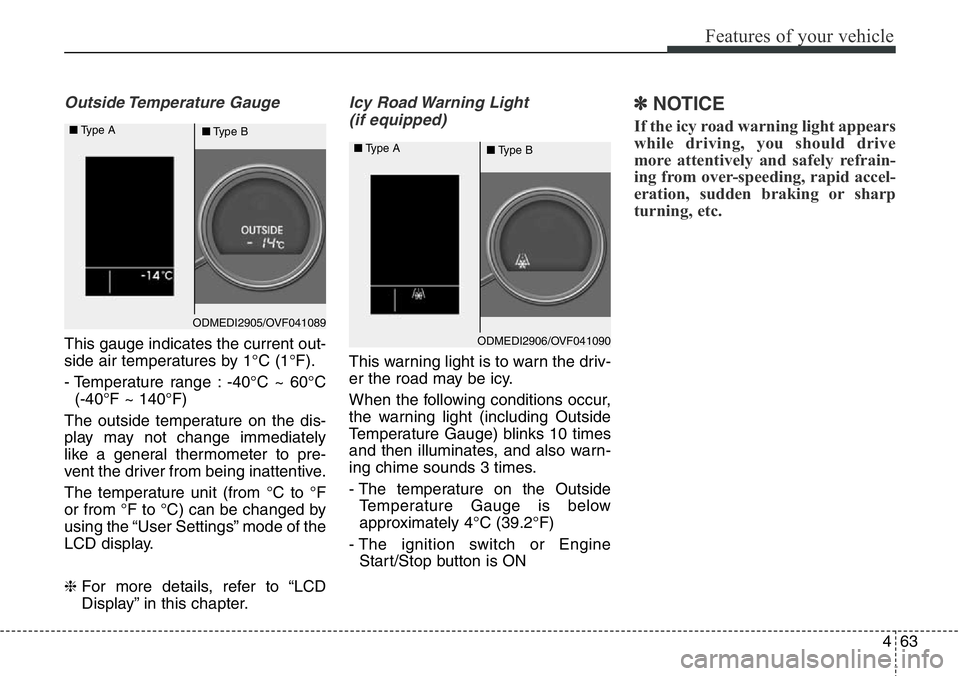
Outside Temperature Gauge
This gauge indicates the current out-
side air temperatures by 1°C (1°F).
- Temperature range : -40°C ~ 60°C
(-40°F ~ 140°F)
The outside temperature on the dis-
play may not change immediately
like a general thermometer to pre-
vent the driver from being inattentive.
The temperature unit (from °C to °F
or from °F to °C) can be changed by
using the “User Settings” mode of the
LCD display.
❈For more details, refer to “LCD
Display” in this chapter.
Icy Road Warning Light
(if equipped)
This warning light is to warn the driv-
er the road may be icy.
When the following conditions occur,
the warning light (including Outside
Temperature Gauge) blinks 10 times
and then illuminates, and also warn-
ing chime sounds 3 times.
- The temperature on the Outside
Temperature Gauge is below
approximately 4°C (39.2°F)
- The ignition switch or Engine
Start/Stop button is ON
✽NOTICE
If the icy road warning light appears
while driving, you should drive
more attentively and safely refrain-
ing from over-speeding, rapid accel-
eration, sudden braking or sharp
turning, etc.
ODMEDI2905/OVF041089 ■Type A
■Type B
ODMEDI2906/OVF041090 ■Type A
■Type B
Page 170 of 711
469
Features of your vehicle
Auto Door Unlock (if equipped)
• Off:
The auto door unlock operation will
be canceled.
• Key Out or Power Off:
All doors will be automatically
unlocked when the ignition key is
removed from ignition switch or
Engine Star/Stop Button is set to
the OFF position.
• Driver Door Unlock:
All doors will be automatically
unlocked if the driver's door is
unlocked.
• Shift Lever:
All doors will be automatically
unlocked if the automatic transaxle
shift lever is shifted to the P (Park)
position.Horn Feedback (if equipped)
If this item is checked, the horn feed-
back operation will be activated.
After locking the door by pressing the
lock button on the transmitter, if you
press the lock button again within 4
seconds, the warning sound will
operate once to indicate that all
doors are locked.Lamp
Head Lamp Delay (if equipped)
If this item is checked, the headlamp
delay and headlamp welcome func-
tion will be activated.
Welcome Light (if equipped)
If this item is checked, the welcome
light function of the puddle lamp will
be activated.
Auto Triple Turn (One-touch triple
turn signal) (if equipped)
If this item is checked, the lane
change signals will blink 3 times
when the turn signal lever is moved
slightly.
Travel Mode (if equipped)
If this item is checked, the traffic
change function will be activated.
For more details, refer to "Lighting" in
this chapter.