2014 Hyundai Santa Fe light
[x] Cancel search: lightPage 103 of 711
Mirrors . . . . . . . . . . . . . . . . . . . . . . . . . . . . . . . . . . 4-48
• Inside rearview mirror . . . . . . . . . . . . . . . . . . . . . . . . 4-48
• Outside rearview mirror . . . . . . . . . . . . . . . . . . . . . . . 4-52
Instrument cluster . . . . . . . . . . . . . . . . . . . . . . . . . 4-56
• Instrument Cluster Control . . . . . . . . . . . . . . . . . . . . 4-58
• LCD Display Control . . . . . . . . . . . . . . . . . . . . . . . . . 4-59
• Gauges . . . . . . . . . . . . . . . . . . . . . . . . . . . . . . . . . . . . . 4-59
• Transaxle Shift Indicator . . . . . . . . . . . . . . . . . . . . . . 4-64
LCD display . . . . . . . . . . . . . . . . . . . . . . . . . . . . . . 4-66
• LCD Modes . . . . . . . . . . . . . . . . . . . . . . . . . . . . . . . . . 4-66
• Service Mode . . . . . . . . . . . . . . . . . . . . . . . . . . . . . . . . 4-67
• User Settings Mode . . . . . . . . . . . . . . . . . . . . . . . . . . . 4-68
• A/V Mode . . . . . . . . . . . . . . . . . . . . . . . . . . . . . . . . . . . 4-71
• Turn By Turn Mode. . . . . . . . . . . . . . . . . . . . . . . . . . . 4-71
• Warning Messages . . . . . . . . . . . . . . . . . . . . . . . . . . . . 4-72
Trip computer . . . . . . . . . . . . . . . . . . . . . . . . . . . . . 4-79
• Overview. . . . . . . . . . . . . . . . . . . . . . . . . . . . . . . . . . . . 4-79
• Trip A/B . . . . . . . . . . . . . . . . . . . . . . . . . . . . . . . . . . . . 4-80
• Fuel Economy . . . . . . . . . . . . . . . . . . . . . . . . . . . . . . . 4-81
Warning and indicator lights . . . . . . . . . . . . . . . . 4-83
• Warning lights . . . . . . . . . . . . . . . . . . . . . . . . . . . . . . . 4-83
• Indicator Lights . . . . . . . . . . . . . . . . . . . . . . . . . . . . . . 4-93
Rear parking assist system . . . . . . . . . . . . . . . . . . 4-98
• Operation . . . . . . . . . . . . . . . . . . . . . . . . . . . . . . . . . . . 4-98
• Non-operational conditions . . . . . . . . . . . . . . . . . . . . 4-99• Self-diagnosis . . . . . . . . . . . . . . . . . . . . . . . . . . . . . . . 4-100
Parking assist system . . . . . . . . . . . . . . . . . . . . . . 4-101
• Operation . . . . . . . . . . . . . . . . . . . . . . . . . . . . . . . . . . 4-101
• Non-operational conditions . . . . . . . . . . . . . . . . . . . 4-103
• Self-diagnosis . . . . . . . . . . . . . . . . . . . . . . . . . . . . . . . 4-105
Smart parking assist system(SPAS) . . . . . . . . . . 4-106
• Operation . . . . . . . . . . . . . . . . . . . . . . . . . . . . . . . . . . 4-107
• Non-operational conditions . . . . . . . . . . . . . . . . . . . 4-107
• How the system works . . . . . . . . . . . . . . . . . . . . . . . 4-110
• Additional instructions . . . . . . . . . . . . . . . . . . . . . . . 4-117
• System malfunction . . . . . . . . . . . . . . . . . . . . . . . . . . 4-118
Rearview camera . . . . . . . . . . . . . . . . . . . . . . . . . 4-119
Hazard warning flasher . . . . . . . . . . . . . . . . . . . . 4-120
Lighting . . . . . . . . . . . . . . . . . . . . . . . . . . . . . . . . . 4-121
• Battery saver function. . . . . . . . . . . . . . . . . . . . . . . . 4-121
• Headlamp escort function. . . . . . . . . . . . . . . . . . . . . 4-121
• Smart cornering light . . . . . . . . . . . . . . . . . . . . . . . . 4-121
• Lighting control . . . . . . . . . . . . . . . . . . . . . . . . . . . . . 4-122
• Traffic change . . . . . . . . . . . . . . . . . . . . . . . . . . . . . . 4-124
• High - beam operation . . . . . . . . . . . . . . . . . . . . . . . 4-125
• Turn signals and lane change signals . . . . . . . . . . . 4-126
• Front fog light . . . . . . . . . . . . . . . . . . . . . . . . . . . . . . 4-127
• Rear fog light . . . . . . . . . . . . . . . . . . . . . . . . . . . . . . . 4-128
• Daytime running light . . . . . . . . . . . . . . . . . . . . . . . . 4-128
• Headlight leveling device . . . . . . . . . . . . . . . . . . . . . 4-129
4
Page 104 of 711
• Adaptive Front Lighting System (AFLS) . . . . . . . . 4-130
Wipers and washers . . . . . . . . . . . . . . . . . . . . . . . 4-131
• Windshield wipers (front) . . . . . . . . . . . . . . . . . . . . . 4-132
• Windshield washers (front) . . . . . . . . . . . . . . . . . . . 4-133
• Rear window wiper and washer switch . . . . . . . . . 4-135
Interior light . . . . . . . . . . . . . . . . . . . . . . . . . . . . . 4-136
• Interior lamp AUTO cut . . . . . . . . . . . . . . . . . . . . . . 4-136
• Map lamp . . . . . . . . . . . . . . . . . . . . . . . . . . . . . . . . . . 4-136
• Room lamp . . . . . . . . . . . . . . . . . . . . . . . . . . . . . . . . . 4-137
• Vanity mirror lamp . . . . . . . . . . . . . . . . . . . . . . . . . . 4-138
• Luggage room lamp . . . . . . . . . . . . . . . . . . . . . . . . . 4-138
• Glove box lamp . . . . . . . . . . . . . . . . . . . . . . . . . . . . . 4-139
• Door courtesy lamp . . . . . . . . . . . . . . . . . . . . . . . . . . 4-139
Welcome system . . . . . . . . . . . . . . . . . . . . . . . . . . 4-140
• Headlamp welcome . . . . . . . . . . . . . . . . . . . . . . . . . . 4-140
• Interior light. . . . . . . . . . . . . . . . . . . . . . . . . . . . . . . . 4-140
• Puddle lamp and pocket lamp . . . . . . . . . . . . . . . . . 4-140
Defroster . . . . . . . . . . . . . . . . . . . . . . . . . . . . . . . . 4-141
• Rear window defroster . . . . . . . . . . . . . . . . . . . . . . . 4-141
Manual climate control system . . . . . . . . . . . . . . 4-143
• Heating and air conditioning . . . . . . . . . . . . . . . . . . 4-144
• 3rd row air conditioning . . . . . . . . . . . . . . . . . . . . . . 4-149
• System operation . . . . . . . . . . . . . . . . . . . . . . . . . . . . 4-150
• Climate control air filter . . . . . . . . . . . . . . . . . . . . . . 4-152
• Air conditioning refrigerant label . . . . . . . . . . . . . . 4-153• Checking the amount of air conditioner refrigerant
and compressor lubricant . . . . . . . . . . . . . . . . . . . 4-154
Automatic climate control system. . . . . . . . . . . . 4-155
• Automatic heating and air conditioning . . . . . . . . . 4-157
• Manual heating and air conditioning . . . . . . . . . . . 4-158
• 3rd row air conditioning . . . . . . . . . . . . . . . . . . . . . . 4-164
• System operation . . . . . . . . . . . . . . . . . . . . . . . . . . . . 4-165
• Climate control air filter . . . . . . . . . . . . . . . . . . . . . . 4-167
• Air conditioning refrigerant label . . . . . . . . . . . . . . 4-168
• Checking the amount of air conditioner
refrigerant and compressor lubricant . . . . . . . . . 4-169
Windshield defrosting and defogging . . . . . . . . . 4-170
• Manual climate control system . . . . . . . . . . . . . . . . 4-170
• Automatic climate control system . . . . . . . . . . . . . . 4-171
Clean air . . . . . . . . . . . . . . . . . . . . . . . . . . . . . . . . 4-173
Storage compartment. . . . . . . . . . . . . . . . . . . . . . 4-174
• Center console storage . . . . . . . . . . . . . . . . . . . . . . . 4-174
• Glove box . . . . . . . . . . . . . . . . . . . . . . . . . . . . . . . . . . 4-174
• Cool box . . . . . . . . . . . . . . . . . . . . . . . . . . . . . . . . . . . 4-175
• Multi box . . . . . . . . . . . . . . . . . . . . . . . . . . . . . . . . . . 4-176
• Sunglass holder . . . . . . . . . . . . . . . . . . . . . . . . . . . . . 4-176
• Luggage tray . . . . . . . . . . . . . . . . . . . . . . . . . . . . . . . 4-177
Interior features . . . . . . . . . . . . . . . . . . . . . . . . . . 4-178
• Cigarette lighter. . . . . . . . . . . . . . . . . . . . . . . . . . . . . 4-178
• Ashtray . . . . . . . . . . . . . . . . . . . . . . . . . . . . . . . . . . . . 4-178
4
Page 110 of 711
49
Features of your vehicle
3. The hazard warning light will blink
once to indicate that all doors are
locked (the engine hood and tail-
gate must be closed).
Also, the outside rearview mirror
will automatically fold when the
outside rearview mirror folding
switch is in the AUTO position (if
equipped).
✽NOTICE
The doors will not lock if any door is
opened.
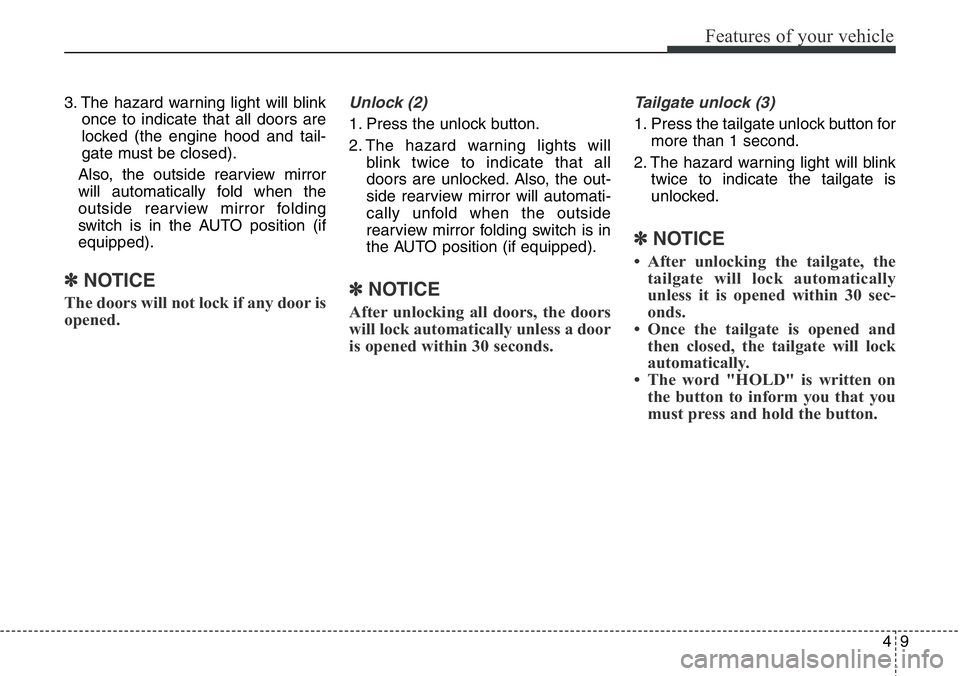
Unlock (2)
1. Press the unlock button.
2. The hazard warning lights will
blink twice to indicate that all
doors are unlocked. Also, the out-
side rearview mirror will automati-
cally unfold when the outside
rearview mirror folding switch is in
the AUTO position (if equipped).
✽NOTICE
After unlocking all doors, the doors
will lock automatically unless a door
is opened within 30 seconds.
Tailgate unlock (3)
1. Press the tailgate unlock button for
more than 1 second.
2. The hazard warning light will blink
twice to indicate the tailgate is
unlocked.
✽NOTICE
• After unlocking the tailgate, the
tailgate will lock automatically
unless it is opened within 30 sec-
onds.
• Once the tailgate is opened and
then closed, the tailgate will lock
automatically.
• The word "HOLD" is written on
the button to inform you that you
must press and hold the button.
Page 112 of 711
411
Features of your vehicle
Battery replacement
A battery should last for several
years, but if the transmitter or smart
key is not working properly, try
replacing the battery with a new one.If you are unsure how to use or
replace the battery, we recommend
that you contact an authorized
HYUNDAI dealer.
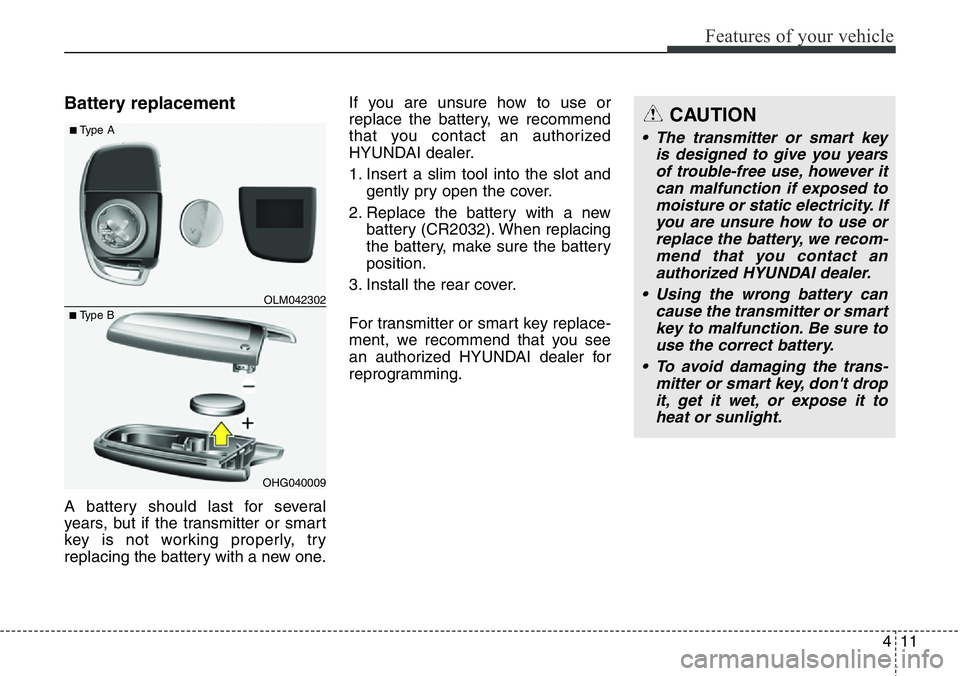
1. Insert a slim tool into the slot and
gently pry open the cover.
2. Replace the battery with a new
battery (CR2032). When replacing
the battery, make sure the battery
position.
3. Install the rear cover.
For transmitter or smart key replace-
ment, we recommend that you see
an authorized HYUNDAI dealer for
reprogramming.
OHG040009
■Type BOLM042302
■Type ACAUTION
• The transmitter or smart key
is designed to give you years
of trouble-free use, however it
can malfunction if exposed to
moisture or static electricity. If
you are unsure how to use or
replace the battery, we recom-
mend that you contact an
authorized HYUNDAI dealer.
• Using the wrong battery can
cause the transmitter or smart
key to malfunction. Be sure to
use the correct battery.
• To avoid damaging the trans-
mitter or smart key, don't drop
it, get it wet, or expose it to
heat or sunlight.
Page 114 of 711
413
Features of your vehicle
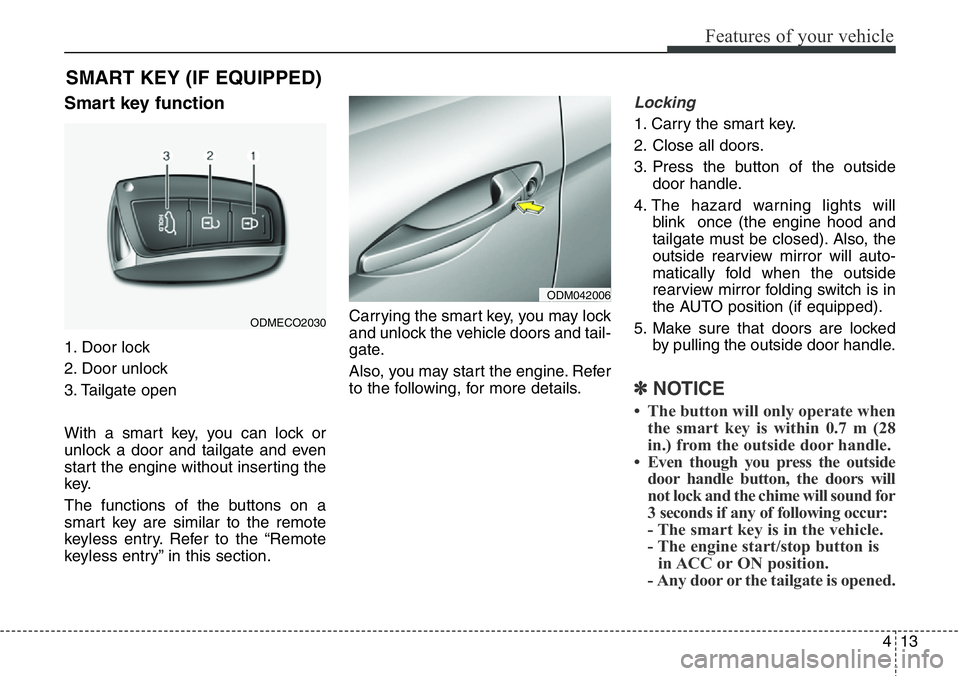
Smart key function
1. Door lock
2. Door unlock
3. Tailgate open
With a smart key, you can lock or
unlock a door and tailgate and even
start the engine without inserting the
key.
The functions of the buttons on a
smart key are similar to the remote
keyless entry. Refer to the “Remote
keyless entry” in this section.Carrying the smart key, you may lock
and unlock the vehicle doors and tail-
gate.
Also, you may start the engine. Refer
to the following, for more details.
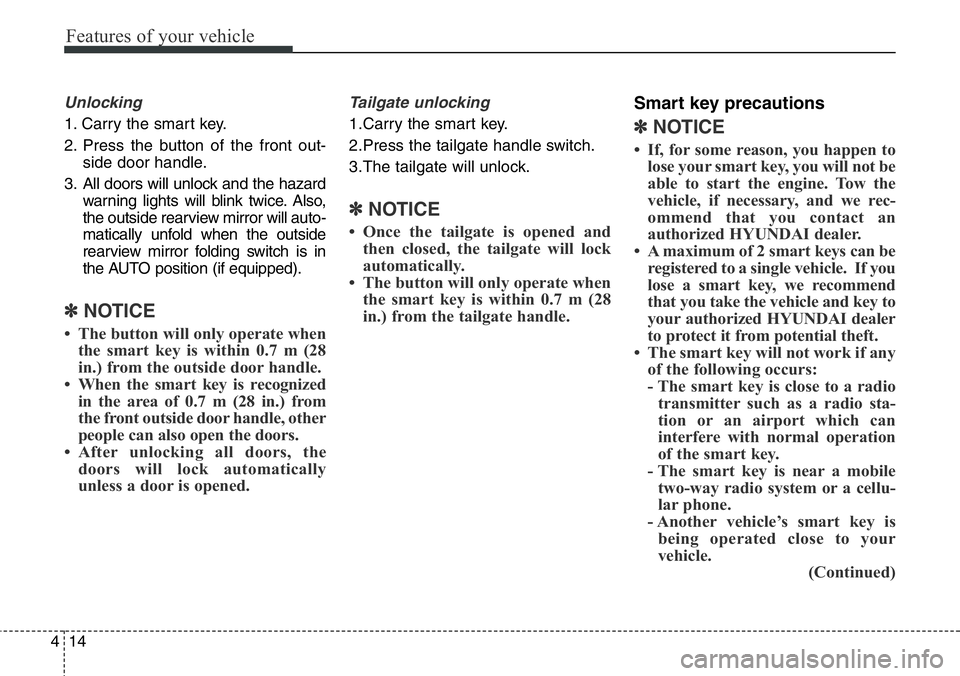
Locking
1. Carry the smart key.
2. Close all doors.
3. Press the button of the outside
door handle.
4. The hazard warning lights will
blink once (the engine hood and
tailgate must be closed). Also, the
outside rearview mirror will auto-
matically fold when the outside
rearview mirror folding switch is in
the AUTO position (if equipped).
5. Make sure that doors are locked
by pulling the outside door handle.
✽NOTICE
• The button will only operate when
the smart key is within 0.7 m (28
in.) from the outside door handle.
• Even though you press the outside
door handle button, the doors will
not lock and the chime will sound for
3 seconds if any of following occur:
- The smart key is in the vehicle.
- The engine start/stop button is
in ACC or ON position.
- Any door or the tailgate is opened.
SMART KEY (IF EQUIPPED)
ODM042006
ODMECO2030
Page 115 of 711
Features of your vehicle
14 4
Unlocking
1. Carry the smart key.
2. Press the button of the front out-
side door handle.
3. All doors will unlock and the hazard
warning lights will blink twice. Also,
the outside rearview mirror will auto-
matically unfold when the outside
rearview mirror folding switch is in
the AUTO position (if equipped).
✽NOTICE
• The button will only operate when
the smart key is within 0.7 m (28
in.) from the outside door handle.
• When the smart key is recognized
in the area of 0.7 m (28 in.) from
the front outside door handle, other
people can also open the doors.
• After unlocking all doors, the
doors will lock automatically
unless a door is opened.
Tailgate unlocking
1.Carry the smart key.
2.Press the tailgate handle switch.
3.The tailgate will unlock.
✽NOTICE
• Once the tailgate is opened and
then closed, the tailgate will lock
automatically.
• The button will only operate when
the smart key is within 0.7 m (28
in.) from the tailgate handle.
Smart key precautions
✽NOTICE
• If, for some reason, you happen to
lose your smart key, you will not be
able to start the engine. Tow the
vehicle, if necessary, and we rec-
ommend that you contact an
authorized HYUNDAI dealer.
• A maximum of 2 smart keys can be
registered to a single vehicle. If you
lose a smart key, we recommend
that you take the vehicle and key to
your authorized HYUNDAI dealer
to protect it from potential theft.
• The smart key will not work if any
of the following occurs:
- The smart key is close to a radio
transmitter such as a radio sta-
tion or an airport which can
interfere with normal operation
of the smart key.
- The smart key is near a mobile
two-way radio system or a cellu-
lar phone.
- Another vehicle’s smart key is
being operated close to your
vehicle.
(Continued)
Page 117 of 711
Features of your vehicle
16 4
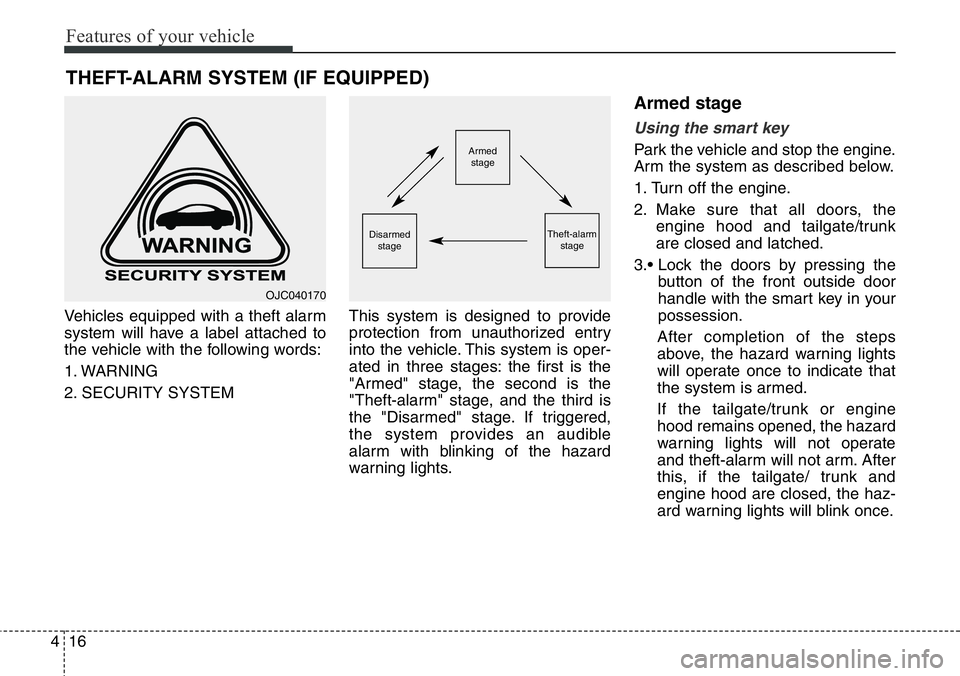
Vehicles equipped with a theft alarm
system will have a label attached to
the vehicle with the following words:
1. WARNING
2. SECURITY SYSTEMThis system is designed to provide
protection from unauthorized entry
into the vehicle. This system is oper-
ated in three stages: the first is the
"Armed" stage, the second is the
"Theft-alarm" stage, and the third is
the "Disarmed" stage. If triggered,
the system provides an audible
alarm with blinking of the hazard
warning lights.
Armed stage
Using the smart key
Park the vehicle and stop the engine.
Arm the system as described below.
1. Turn off the engine.
2. Make sure that all doors, the
engine hood and tailgate/trunk
are closed and latched.
3.• Lock the doors by pressing the
button of the front outside door
handle with the smart key in your
possession.
After completion of the steps
above, the hazard warning lights
will operate once to indicate that
the system is armed.
If the tailgate/trunk or engine
hood remains opened, the hazard
warning lights will not operate
and theft-alarm will not arm. After
this, if the tailgate/ trunk and
engine hood are closed, the haz-
ard warning lights will blink once.
THEFT-ALARM SYSTEM (IF EQUIPPED)
Armed
stage
Theft-alarm
stageDisarmed
stage
OJC040170
Page 118 of 711
417
Features of your vehicle
• Lock the doors by pressing the
lock button on the smart key.
After completion of the steps
above, the hazard warning lights
will operate once to indicate that
the system is armed.
If any door, tailgate/trunk or engine
hood remains open, the hazard
warning lights won't operate and
theft-alarm will not arm. After this,
if all doors, tailgate/trunk and
engine hood are closed, the haz-
ard warning lights will blink once.Using the transmitter
Park the vehicle and stop the engine.
Arm the system as described below.
1.Turn off the engine and remove the
ignition key from the ignition switch.
2.Make sure that all doors, the
engine hood and tailgate/trunk are
closed and latched.
3.Lock the doors by pressing the lock
button on the transmitter.
After completion of the steps
above, the hazard warning lights
will blink once to indicate that the
system is armed.
If any door, tailgate/trunk or engine
hood remains opened, the hazard
warning lights will not operate and
theft-alarm will not arm. After this, if
all doors, tailgate/trunk and engine
hood are closed, the hazard warn-
ing lights will blink once.• Do not arm the system until all
passengers have left the vehi-
cle. If the system is armed while
a passenger(s) remains in the
vehicle, the alarm may be acti-
vated when the remaining pas-
senger(s) leave the vehicle. If
any door, tailgate/trunk lid or
engine hood is opened within 30
seconds after entering the
armed stage, the system is dis-
armed to prevent unnecessary
alarm.