2014 HYUNDAI IX35 charging
[x] Cancel search: chargingPage 7 of 1534

17
Introduction
INDICATOR SYMBOLS ON THE INSTRUMENT CLUSTER
Engine oil pressure warning light
Seat belt warning light
Door and tailgate open position light
High beam indicator
Light on indicator*
Turn signal indicator
ABS warning light
Parking brake & Brake fluid
warning light
4WD system warning light* 4WD LOCK indicator*
Malfunction indicator*
Air bag warning light
Cruise SET indicator*
Low fuel level warning light
Charging system warning light
Door ajar warning light
Glow indicator (Diesel only)
Fuel filter warning light (Diesel only)
Cruise indicator*
ESC indicator*
ESC OFF indicator*
Immobiliser indicator*
Shift pattern indicator*
Front fog light indicator*
Rear fog light indicator*
Low beam indicator*
Electric power steering (EPS)
system warning light*
Key out warning*
KEY
OUT
DBC indicator*
Tailgate open warning light
Sunroof open warning light
Engine oil level warning light (Diesel engine*)Manual transaxle shift indicator*/
Auto transaxle shift indicator*
EL(FL) Aust 1.QXP 7/26/2013 2:00 PM Page 7
Page 19 of 1534

Safety features of your vehicle
6
3
Lumbar support (if equipped)
The lumbar support can be adjusted by
moving the lever on the side of seatback.
Pivoting the lever increases or decreases
lumbar support.
Automatic adjustment (if equipped)
The front seat can be adjusted by using
the control switches located on the out-
side of the seat cushion. Before driving,adjust the seat to the proper position so
as to easily control the steering wheel,
pedals and switches on the instrumentpanel.
WARNING
The power seat is operable with the
ignition OFF.
Therefore, children should never be
left unattended in the vehicle.
CAUTION
The power seat is driven by an electric motor. Stop operating
once the adjustment is complet- ed. Excessive operation maydamage the electrical equipment.
When in operation, the power seat consumes a large amount ofelectrical power. To prevent unnecessary charging systemdrain, don’t adjust the power seat
longer than necessary whilst the engine is not running.
Do not operate two or more power seat control switches at the same
time. Doing so may result in power seat motor or electricalcomponent malfunction.
OEL039005/H
EL(FL) Aust 3.QXP 7/26/2013 2:03 PM Page 6
Page 144 of 1534

Features of your vehicle
72
4
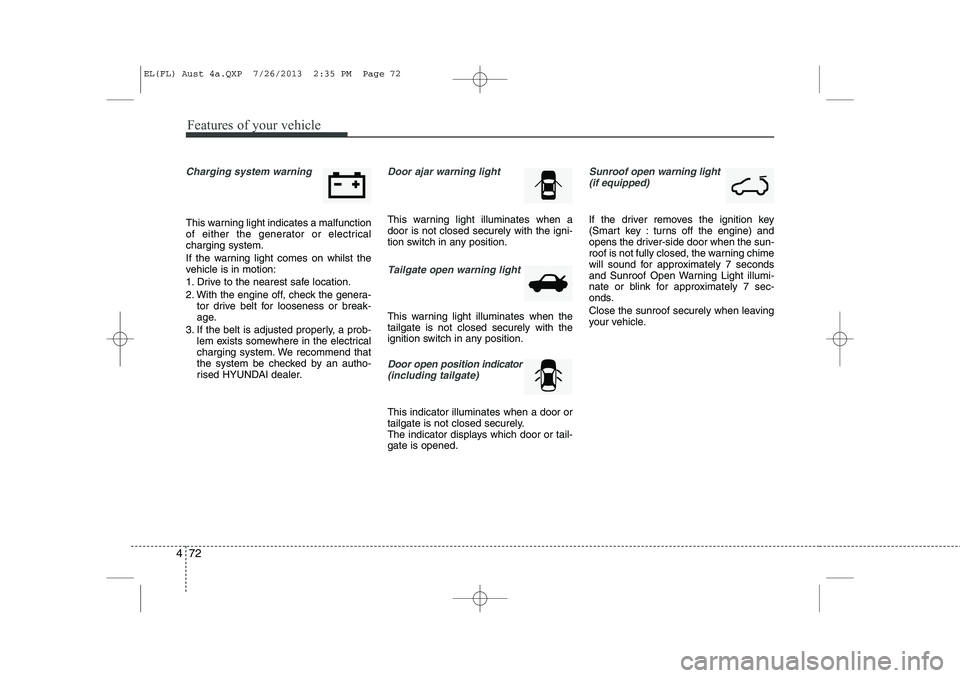
Charging system warning
This warning light indicates a malfunction
of either the generator or electricalcharging system.
If the warning light comes on whilst the
vehicle is in motion:
1. Drive to the nearest safe location.
2. With the engine off, check the genera-
tor drive belt for looseness or break-
age.
3. If the belt is adjusted properly, a prob- lem exists somewhere in the electrical
charging system. We recommend that
the system be checked by an autho-
rised HYUNDAI dealer.
Door ajar warning light
This warning light illuminates when a door is not closed securely with the igni-
tion switch in any position.
Tailgate open warning light
This warning light illuminates when the tailgate is not closed securely with the
ignition switch in any position.
Door open position indicator
(including tailgate)
This indicator illuminates when a door or
tailgate is not closed securely.
The indicator displays which door or tail-gate is opened.
Sunroof open warning light (if equipped)
If the driver removes the ignition key
(Smart key : turns off the engine) and
opens the driver-side door when the sun-
roof is not fully closed, the warning chime
will sound for approximately 7 seconds
and Sunroof Open Warning Light illumi-
nate or blink for approximately 7 sec-
onds.
Close the sunroof securely when leaving
your vehicle.
EL(FL) Aust 4a.QXP 7/26/2013 2:35 PM Page 72
Page 282 of 1534

What to do in an emergency
6
6
Jump starting procedure
1. Make sure the booster battery is 12-
volt and that its negative terminal is
grounded.
2. If the booster battery is in another vehicle, do not allow the vehicles totouch.
3. Turn off all unnecessary electrical loads.
4. Connect the jumper cables in the exact sequence shown in the illustration.First connect one end of a jumper
cable to the positive terminal of the
discharged battery (1), then connect
the other end to the positive terminal
on the booster battery (2). Proceed toconnect one end of the other jumper
cable to the negative terminal of the
booster battery (3), then the other end
to a solid, stationary, metallic point (for
example, the engine lifting bracket)
away from the battery (4). Do not con-
nect it to or near any part that moves
when the engine is cranked.
Do not allow the jumper cables to con-
tact anything except the correct battery
terminals or the correct ground. Do not
lean over the battery when making
connections. 5. Start the engine of the vehicle with the
booster battery and let it run at 2,000
rpm, then start the engine of the vehi-
cle with the discharged battery.
If the cause of your battery discharging is
not apparent, we recommend that thesystem be checked by an authorised
HYUNDAI dealer.
Push-starting
Your manual transaxle-equipped vehicle
should not be push-started because itmight damage the emission control sys-
tem. Vehicles equipped with automatic
transaxle cannot be push-started. Follow
the directions in this section for jump-
starting.
WARNING
Never tow a vehicle to start it
because the sudden surge forward
when the engine starts could cause
a collision with the tow vehicle.
CAUTION - Battery cables
Do not connect the jumper cable
from the negative terminal of the
booster battery to the negative ter-minal of the discharged battery. Thiscan cause the discharged battery to overheat and crack, releasing bat-
tery acid.
EL(FL) Aust 6.QXP 7/26/2013 2:11 PM Page 6
Page 332 of 1534

Maintenance
38
7
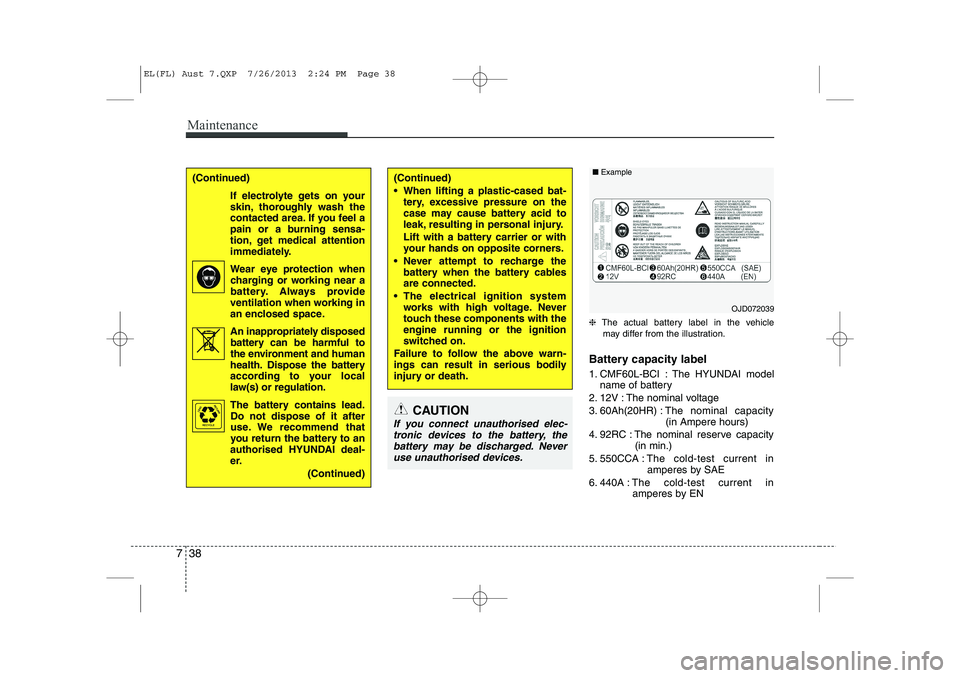
❈ The actual battery label in the vehicle
may differ from the illustration.
Battery capacity label
1. CMF60L-BCI : The HYUNDAI model name of battery
2. 12V : The nominal voltage
3. 60Ah(20HR) : The nominal capacity
(in Ampere hours)
4. 92RC : The nominal reserve capacity (in min.)
5. 550CCA : The cold-test current in
amperes by SAE
6. 440A : The cold-test current in
amperes by EN
(Continued)
When lifting a plastic-cased bat- tery, excessive pressure on the
case may cause battery acid to
leak, resulting in personal injury.
Lift with a battery carrier or with
your hands on opposite corners.
Never attempt to recharge the battery when the battery cablesare connected.
The electrical ignition system works with high voltage. Never
touch these components with theengine running or the ignition
switched on.
Failure to follow the above warn-
ings can result in serious bodily
injury or death.(Continued)
If electrolyte gets on your
skin, thoroughly wash the
contacted area. If you feel a
pain or a burning sensa-
tion, get medical attention
immediately.
Wear eye protection whencharging or working near a
battery. Always provide
ventilation when working in
an enclosed space.
An inappropriately disposed battery can be harmful to
the environment and human
health. Dispose the battery
according to your local
law(s) or regulation.
The battery contains lead.
Do not dispose of it after
use. We recommend that
you return the battery to an
authorised HYUNDAI deal-
er.
(Continued)
Pb
CAUTION
If you connect unauthorised elec-tronic devices to the battery, the battery may be discharged. Neveruse unauthorised devices.
OJD072039
■
Example
EL(FL) Aust 7.QXP 7/26/2013 2:24 PM Page 38
Page 333 of 1534

739
Maintenance
Battery recharging
Your vehicle has a maintenance-free,
calcium-based battery.
If the battery becomes discharged in ashort time (because, for example, the
headlights or interior lights were left on
whilst the vehicle was not in use),
recharge it by slow charging (trickle)
for 10 hours.
If the battery gradually discharges because of high electric load whilst the
vehicle is being used, recharge it at 20-
30A for two hours. Reset items
Items should be reset after the battery
has been discharged or the battery hasbeen disconnected.
Auto up/down window (See section 4)
Sunroof (See section 4)
Trip computer (See section 4)
Climate control system
(See section 4)
Clock (See section 4)
Audio (See section 4)(Continued)
Before performing maintenance or recharging the battery, turn off all accessories and stop the
engine.
The negative battery cable must be removed first and installed
last when the battery is discon-nected.WARNING - Recharging
battery
When recharging the battery,
observe the following precautions:
The battery must be removed from the vehicle and placed in an area with good ventilation.
Do not allow cigarettes, sparks, or flame near the battery.
Watch the battery during charg- ing, and stop or reduce the charg-
ing rate if the battery cells begin
gassing (boiling) violently or if
the temperature of the electrolyte
of any cell exceeds 49°C (120°F).
Wear eye protection when check- ing the battery during charging.
Disconnect the battery charger in the following order.
1. Turn off the battery charger main switch.
2. Unhook the negative clamp from the negative battery ter- minal.
3. Unhook the positive clamp from the positive battery termi-nal.
(Continued)
EL(FL) Aust 7.QXP 7/26/2013 2:24 PM Page 39
Page 415 of 1534

17
Introduction
INDICATOR SYMBOLS ON THE INSTRUMENT CLUSTER
Engine oil pressure warning light
Seat belt warning light
Door and tailgate open position light
High beam indicator
Light on indicator*
Turn signal indicator
ABS warning light
Parking brake & Brake fluid
warning light
4WD system warning light* 4WD LOCK indicator*
Malfunction indicator*
Air bag warning light
Cruise SET indicator*
Low fuel level warning light
Charging system warning light
Door ajar warning light
Glow indicator (Diesel only)
Fuel filter warning light (Diesel only)
Cruise indicator*
ESC indicator*
ESC OFF indicator*
Immobilizer indicator*
Shift pattern indicator*
Front fog light indicator*
Rear fog light indicator*
Low beam indicator*
Electric power steering (EPS)
system warning light*
Key out warning*
KEY
OUT
DBC indicator*
Tailgate open warning light
Sunroof open warning light
Engine oil level warning light*Manual transaxle shift indicator*/
Auto transaxle shift indicator*
EL(FL) Eng 1.QXP 8/8/2013 6:52 PM Page 7
Page 431 of 1534

Safety features of your vehicle
6
3
Lumbar support (if equipped)
The lumbar support can be adjusted by
moving the lever on the side of seatback.
Pivoting the lever increases or decreases
lumbar support.
Automatic adjustment (if equipped)
The front seat can be adjusted by using
the control switches located on the out-
side of the seat cushion. Before driving,adjust the seat to the proper position so
as to easily control the steering wheel,
pedals and switches on the instrumentpanel.
WARNING
The power seat is operable with the
ignition OFF.
Therefore, children should never be
left unattended in the vehicle.
CAUTION
The power seat is driven by an electric motor. Stop operating
once the adjustment is complet- ed. Excessive operation maydamage the electrical equipment.
When in operation, the power seat consumes a large amount ofelectrical power. To prevent unnecessary charging systemdrain, don’t adjust the power seat
longer than necessary while the engine is not running.
Do not operate two or more power seat control switches at the same
time. Doing so may result in power seat motor or electricalcomponent malfunction.
OEL039005
EL(FL) Eng 3.QXP 7/11/2013 10:54 AM Page 6