Page 209 of 479
Features of your vehicle
120 4
Headlamp position ( )
When the light switch is in the head-
lamp position, the head, position,
license and instrument panel lights
will turn ON.
✽NOTICE
The engine start/stop button must
be in the ON position to turn on the
headlamps.
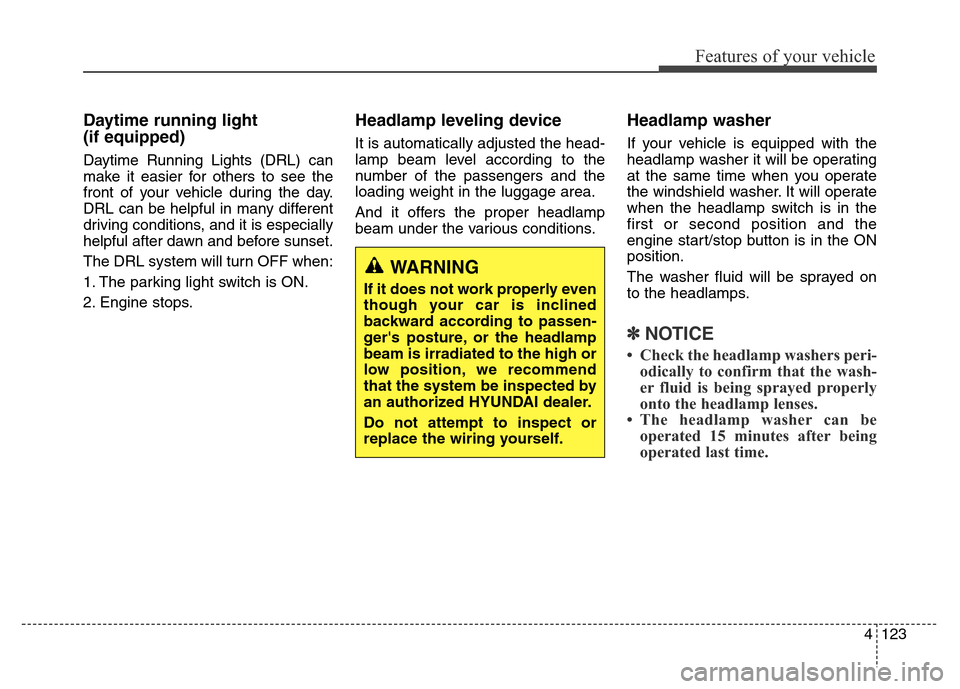
High beam operation
To turn on the high beam headlights,
push the lever away from you. Pull it
back for low beams.
The high beam indicator will light
when the headlamp high beams are
switched on.
To prevent the battery from being
discharged, do not leave the lights
on for a prolonged time while the
engine is not running.
ODM042246OVI043426
WARNING
Do not use high beam when
there are other vehicles. Using
high beam could obstruct the
other driver’s vision.
Page 210 of 479

4121
Features of your vehicle
To flash the headlamp, pull the lever
towards you. It will return to the normal
(low beam) position when released.
The headlamp switch does not need
to be on to use this flashing feature.
Turn signals and lane change
signals
The engine start/stop button must be
on for the turn signals to function. To
turn on the turn signals, move the
lever up or down (A). The green
arrow indicators on the instrument
panel indicate which turn signal is
operating.
They will self-cancel after a turn is
completed. If the indicator continues
to flash after a turn, manually return
the lever to the OFF position.
To signal a lane change, move the
turn signal lever slightly and hold it in
position (B). The lever will return to
the OFF position when released.If an indicator stays on and does not
flash or if it flashes abnormally, one of
the turn signal bulbs may be burned
out and will require replacement.
One-touch turn signal
To activate an one-touch turn signal
move the turn signal lever slightly
and then release it. The lane change
signals will blink 3, 5 or 7 times.
You can set the number of operating
times. Refer to "LCD Display" in this
chapter.
✽NOTICE
If an indicator flash is abnormally
quick or slow, a bulb may be burned
out or have a poor electrical connec-
tion in the circuit.
ODM042248
ODM042250
Page 212 of 479

4123
Features of your vehicle
Daytime running light
(if equipped)
Daytime Running Lights (DRL) can
make it easier for others to see the
front of your vehicle during the day.
DRL can be helpful in many different
driving conditions, and it is especially
helpful after dawn and before sunset.
The DRL system will turn OFF when:
1. The parking light switch is ON.
2. Engine stops.
Headlamp leveling device
It is automatically adjusted the head-
lamp beam level according to the
number of the passengers and the
loading weight in the luggage area.
And it offers the proper headlamp
beam under the various conditions.
Headlamp washer
If your vehicle is equipped with the
headlamp washer it will be operating
at the same time when you operate
the windshield washer. It will operate
when the headlamp switch is in the
first or second position and the
engine start/stop button is in the ON
position.
The washer fluid will be sprayed on
to the headlamps.
✽NOTICE
• Check the headlamp washers peri-
odically to confirm that the wash-
er fluid is being sprayed properly
onto the headlamp lenses.
• The headlamp washer can be
operated 15 minutes after being
operated last time.
WARNING
If it does not work properly even
though your car is inclined
backward according to passen-
ger's posture, or the headlamp
beam is irradiated to the high or
low position, we recommend
that the system be inspected by
an authorized HYUNDAI dealer.
Do not attempt to inspect or
replace the wiring yourself.
Page 213 of 479

Features of your vehicle
124 4
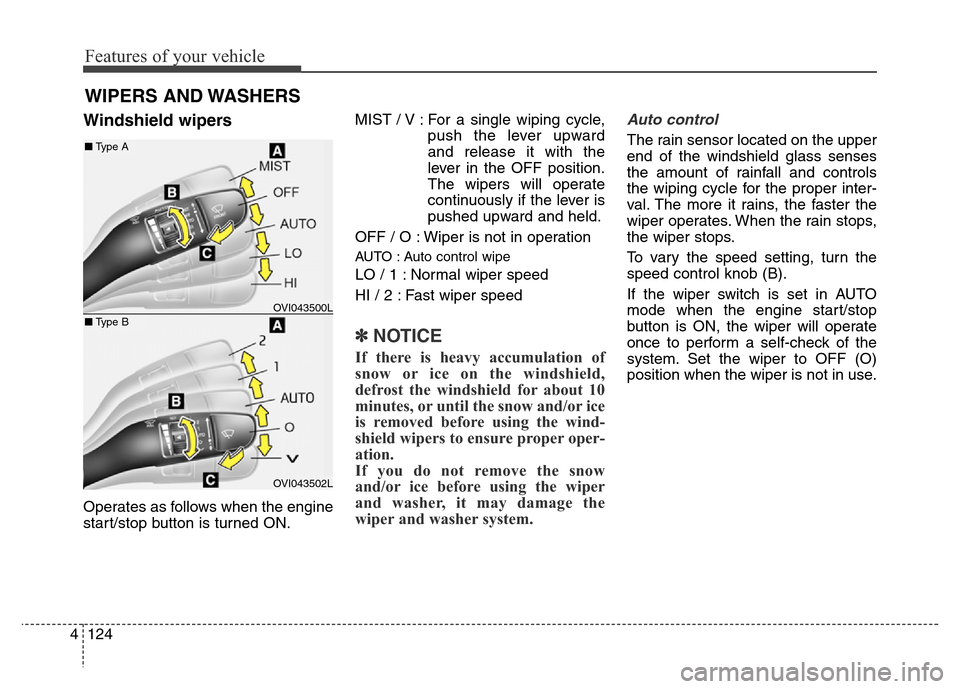
Windshield wipers
Operates as follows when the engine
start/stop button is turned ON.MIST / V : For a single wiping cycle,
push the lever upward
and release it with the
lever in the OFF position.
The wipers will operate
continuously if the lever is
pushed upward and held.
OFF / O : Wiper is not in operation
AUTO : Auto control wipe
LO / 1 : Normal wiper speed
HI / 2 : Fast wiper speed
✽NOTICE
If there is heavy accumulation of
snow or ice on the windshield,
defrost the windshield for about 10
minutes, or until the snow and/or ice
is removed before using the wind-
shield wipers to ensure proper oper-
ation.
If you do not remove the snow
and/or ice before using the wiper
and washer, it may damage the
wiper and washer system.
Auto control
The rain sensor located on the upper
end of the windshield glass senses
the amount of rainfall and controls
the wiping cycle for the proper inter-
val. The more it rains, the faster the
wiper operates. When the rain stops,
the wiper stops.
To vary the speed setting, turn the
speed control knob (B).
If the wiper switch is set in AUTO
mode when the engine start/stop
button is ON, the wiper will operate
once to perform a self-check of the
system. Set the wiper to OFF (O)
position when the wiper is not in use.
WIPERS AND WASHERS
OVI043500L
OVI043502L
■Type A
■Type B
Page 216 of 479

4127
Features of your vehicle
INTERIOR LIGHT
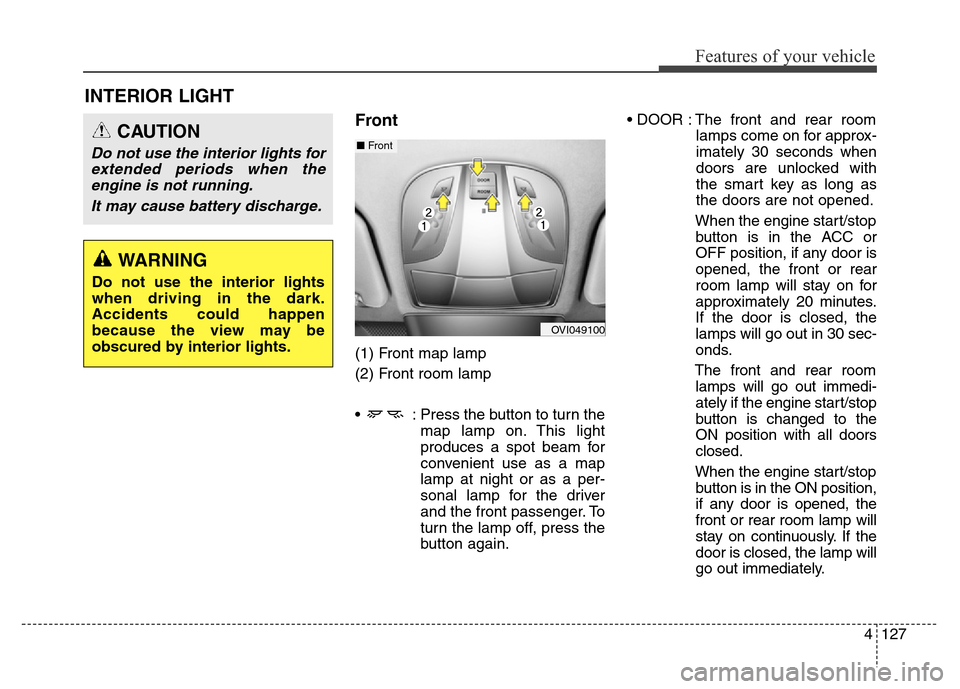
Front
(1) Front map lamp
(2) Front room lamp
• : Press the button to turn the
map lamp on. This light
produces a spot beam for
convenient use as a map
lamp at night or as a per-
sonal lamp for the driver
and the front passenger. To
turn the lamp off, press the
button again.• DOOR : The front and rear room
lamps come on for approx-
imately 30 seconds when
doors are unlocked with
the smart key as long as
the doors are not opened.
When the engine start/stop
button is in the ACC or
OFF position, if any door is
opened, the front or rear
room lamp will stay on for
approximately 20 minutes.
If the door is closed, the
lamps will go out in 30 sec-
onds.
The front and rear room
lamps will go out immedi-
ately if the engine start/stop
button is changed to the
ON position with all doors
closed.
When the engine start/stop
button is in the ON position,
if any door is opened, the
front or rear room lamp will
stay on continuously. If the
door is closed, the lamp will
go out immediately.
CAUTION
Do not use the interior lights for
extended periods when the
engine is not running.
It may cause battery discharge.
OVI049100
■Front
WARNING
Do not use the interior lights
when driving in the dark.
Accidents could happen
because the view may be
obscured by interior lights.
Page 224 of 479

4135
Features of your vehicle
✽NOTICE
Never place anything near the sensor
to ensure better control of the heating
and cooling system.
Manual heating and air condi-
tioning
The heating and cooling system can be
controlled manually by pushing buttons
other than the AUTO button. In this
case, the system works sequentially
according to the order of buttons select-
ed. When pressing any button except
the AUTO button while using automatic
operation, the functions not selected
will be controlled automatically.
1. Start the engine.
2. Set the mode to the desired position.
For improving the effectiveness of
heating and cooling;
- Heating:
- Cooling:
3. Set the temperature control to the
desired position.
4. Set the air intake control to the
outside (fresh) air position.
5. Set the fan speed control to the
desired speed.
6. If air conditioning is desired, turn
the air conditioning system on.
Press the AUTO button in order to
convert to full automatic control of
the system.
3 Zone control button
1. Press the 3 zone button to operate
the front passenger's temperature,
rear side temperature, and rear
side mode individually. The indica-
tor on the 3 zone button will be illu-
minated. Pressing the rear side
control button or turning the front
passenger's temperature knob will
activate the 3 zone mode as well.
2. Press the 3 zone button again to
deactivate the 3 zone mode. The
front passenger's temperature,
rear side temperature, and rear
side mode will be set like the dri-
ver's side.
OVI043109
OVI043405
Page 255 of 479
Features of your vehicle
166 4
✽NOTICE
• If you install an aftermarket HID
headlamp, your vehicle’s audio
and electronic device may mal-
function.
• Prevent chemicals such as per-
fume, cosmetic oil, sun cream,
hand cleaner, and air freshener
from contacting the interior parts
because they may cause damage
or discoloration.
Aux, USB and iPod®port
You can use an aux port to connect
audio devices a USB port to plug in a
USB, and an iPod
®port to plug in an
iPod®.
✽NOTICE
When using a portable audio device
connected to the power outlet, noise
may occur during playback. If this
happens, use the power source of the
portable audio device.
❈iPod®is a trademark of Apple Inc.
Antenna
When the radio is turned on with the
engine start/stop button in the ON or
ACC position, your car will receive
both AM and FM broadcast signals
through the antenna.
MULTIMEDIA SYSTEM
OVI044409
OVI043149L
OVI043149E ■Type A
■Type B
Page 263 of 479

Driving your vehicle
6 5
ENGINE START/STOP BUTTON
Illuminated engine start/stop
button
Whenever the front door is opened,
the engine start/stop button will illu-
minate for your convenience. The
light will go off after about 30 sec-
onds when the door is closed.
Engine start/stop button posi-
tion
OFF
To turn off the engine (START/RUN
position) or vehicle power (ON posi-
tion), press the engine start/stop but-
ton with the shift lever in P(Park).
When you press the engine
start/stop button without the shift
lever in P(Park), the engine
start/stop button does not turn to the
OFF position but to the ACC posi-
tion.
If you open the driver’s door when
the engine start/stop button is off, the
steering wheel will lock.
✽NOTICE
• If difficulty is experienced turning
the engine start/stop button to the
ACC position, turn the steering
wheel right and left to release the
tension while pressing the engine
start/stop button.
• When you turn off the engine, the
vehicle should be stopped.
OVI053001K