2014 Hyundai Equus warning
[x] Cancel search: warningPage 344 of 479

587
Driving your vehicle
✽NOTICE
The ESC system should be turned
OFF prior to rocking the vehicle.
Smooth cornering
Avoid braking or gear changing in
corners, especially when roads are
wet. Ideally, corners should always
be taken under gentle acceleration. If
you follow these suggestions, tire
wear will be held to a minimum.
WARNING- Spinning
tires
Do not spin the wheels, espe-
cially at speeds more than 56
km/h (35 mph). Spinning the
wheels at high speeds when the
vehicle is stationary could
cause a tire to overheat which
could result in tire damage that
may injure bystanders.
WARNING
If your vehicle becomes stuck in
snow, mud, sand, etc., then you
may attempt to rock the vehicle
free by moving it forward and
backward. Do not attempt this
procedure if people or objects
are anywhere near the vehicle.
During the rocking operation
the vehicle may suddenly move
forward of backward as it
becomes unstuck, causing
injury or damage to nearby peo-
ple or objects.
OVI059044L
Page 347 of 479

Driving your vehicle
90 5
Fuel, engine coolant and engine
oil
High speed travel consumes more
fuel than urban motoring. Do not for-
get to check both engine coolant and
engine oil.
Drive belt
A loose or damaged drive belt may
result in overheating of the engine.
WARNING
• Underinflated or overinflated
tires can cause poor handling,
loss of vehicle control, and
sudden tire failure leading to
accidents, injuries, and even
death. Always check tires for
proper inflation before driv-
ing. For proper tire pressures,
refer to “Tires and wheels” in
section 8.
• Driving on tires with no or
insufficient tread is danger-
ous. Worn-out tires can result
in loss of vehicle control, col-
lisions, injury, and even death.
Worn-out tires should be
replaced as soon as possible
and should never be used for
driving. Always check the tire
tread before driving your car.
For further information and
tread limits, refer to “Tires and
wheels” in section 7.
Page 348 of 479

591
Driving your vehicle
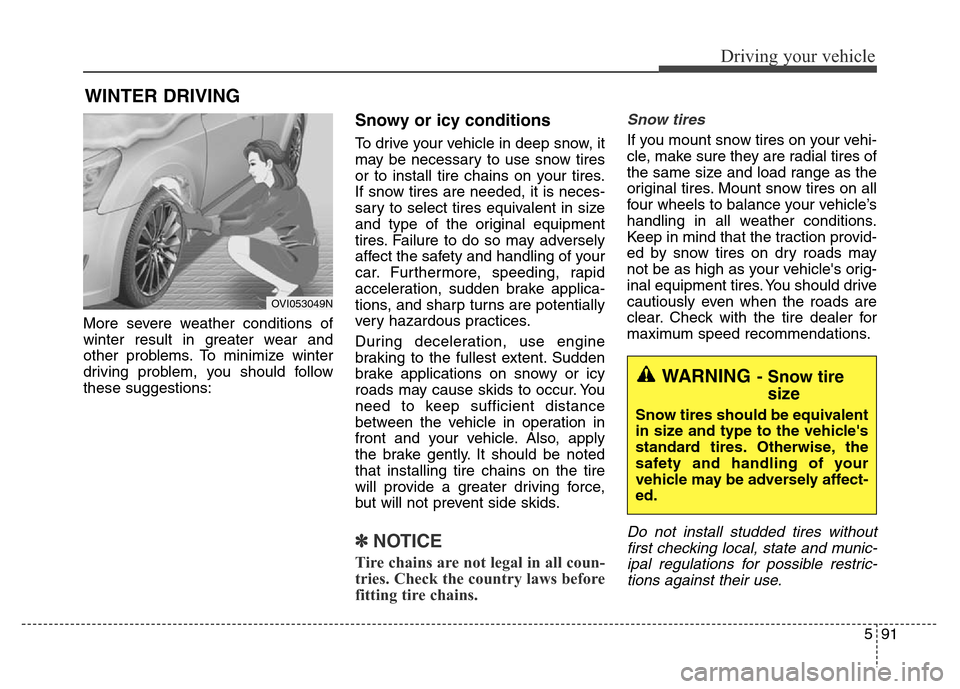
More severe weather conditions of
winter result in greater wear and
other problems. To minimize winter
driving problem, you should follow
these suggestions:
Snowy or icy conditions
To drive your vehicle in deep snow, it
may be necessary to use snow tires
or to install tire chains on your tires.
If snow tires are needed, it is neces-
sary to select tires equivalent in size
and type of the original equipment
tires. Failure to do so may adversely
affect the safety and handling of your
car. Furthermore, speeding, rapid
acceleration, sudden brake applica-
tions, and sharp turns are potentially
very hazardous practices.
During deceleration, use engine
braking to the fullest extent. Sudden
brake applications on snowy or icy
roads may cause skids to occur. You
need to keep sufficient distance
between the vehicle in operation in
front and your vehicle. Also, apply
the brake gently. It should be noted
that installing tire chains on the tire
will provide a greater driving force,
but will not prevent side skids.
✽NOTICE
Tire chains are not legal in all coun-
tries. Check the country laws before
fitting tire chains.
Snow tires
If you mount snow tires on your vehi-
cle, make sure they are radial tires of
the same size and load range as the
original tires. Mount snow tires on all
four wheels to balance your vehicle’s
handling in all weather conditions.
Keep in mind that the traction provid-
ed by snow tires on dry roads may
not be as high as your vehicle's orig-
inal equipment tires. You should drive
cautiously even when the roads are
clear. Check with the tire dealer for
maximum speed recommendations.
Do not install studded tires without
first checking local, state and munic-
ipal regulations for possible restric-
tions against their use.
WINTER DRIVING
WARNING- Snow tire
size
Snow tires should be equivalent
in size and type to the vehicle's
standard tires. Otherwise, the
safety and handling of your
vehicle may be adversely affect-
ed.
OVI053049N
Page 349 of 479

Driving your vehicle
92 5
245/50R18 Tire chains
Since the sidewalls of radial tires are
thinner, they can be damaged by
mounting some types of snow chains
on them. Therefore, the use of snow
tires is recommended instead of
snow chains. Do not mount tire
chains on vehicles equipped with
aluminum wheels; snow chains may
cause damage to the wheels. If snow
chains must be used, use wire-type
chains with a thickness of less than
12 mm (0.47 in). Damage to your
vehicle caused by improper snow
chain use is not covered by your
vehicle manufacturers warranty.
Install tire chains only on the rear
tires.Chain installation
When installing chains, follow the
manufacturer's instructions and
mount them as tightly as you can.
Drive slowly with chains installed. If
you hear the chains contacting the
body or chassis, stop and tighten
them. If they still make contact, slow
down until it stops. Remove the
chains as soon as you begin driving
on cleared roads.
CAUTION
• Make sure the snow chains
are the correct size and type
for your tires. Incorrect snow
chains can cause damage to
the vehicle body and suspen-
sion and may not be covered
by your vehicle manufacturer
warranty. Also, the snow chain
connecting hooks may be
damaged from contacting
vehicle components causing
the snow chains to come
loose from the tire. Make sure
the snow chains are SAE
class “S” certified.
• Always check chain installa-
tion for proper mounting after
driving approximately 0.5 to 1
km (0.3 to 0.6 miles) to ensure
safe mounting. Retighten or
remount the chains if they are
loose.
WARNING
- Mounting chains
When mounting snow chains,
park the vehicle on level ground
away from traffic. Turn on the
vehicle Hazard Warning flashers
and place a triangular emer-
gency warning device behind
the vehicle if available. Always
place the vehicle in P (Park),
apply the parking brake and
turn off the engine before
installing snow chains.
OVI059051
Page 350 of 479

593
Driving your vehicle
245/45R19 Tire chains
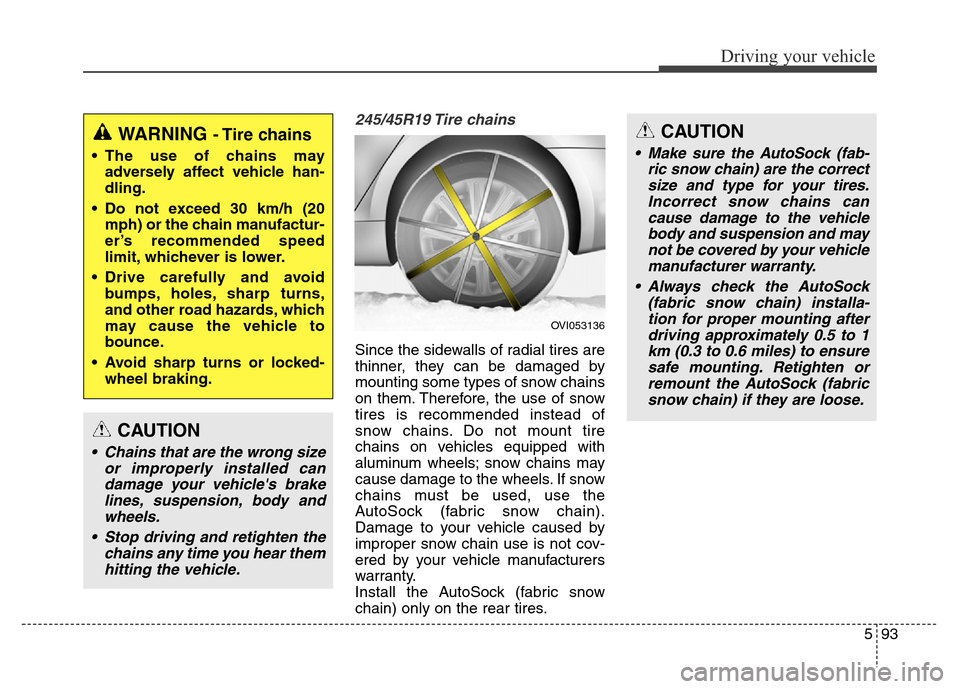
Since the sidewalls of radial tires are
thinner, they can be damaged by
mounting some types of snow chains
on them. Therefore, the use of snow
tires is recommended instead of
snow chains. Do not mount tire
chains on vehicles equipped with
aluminum wheels; snow chains may
cause damage to the wheels. If snow
chains must be used, use the
AutoSock (fabric snow chain).
Damage to your vehicle caused by
improper snow chain use is not cov-
ered by your vehicle manufacturers
warranty.
Install the AutoSock (fabric snow
chain) only on the rear tires.
WARNING - Tire chains
• The use of chains may
adversely affect vehicle han-
dling.
• Do not exceed 30 km/h (20
mph) or the chain manufactur-
er’s recommended speed
limit, whichever is lower.
• Drive carefully and avoid
bumps, holes, sharp turns,
and other road hazards, which
may cause the vehicle to
bounce.
• Avoid sharp turns or locked-
wheel braking.
CAUTION
• Chains that are the wrong size
or improperly installed can
damage your vehicle's brake
lines, suspension, body and
wheels.
• Stop driving and retighten the
chains any time you hear them
hitting the vehicle.
CAUTION
• Make sure the AutoSock (fab-
ric snow chain) are the correct
size and type for your tires.
Incorrect snow chains can
cause damage to the vehicle
body and suspension and may
not be covered by your vehicle
manufacturer warranty.
• Always check the AutoSock
(fabric snow chain) installa-
tion for proper mounting after
driving approximately 0.5 to 1
km (0.3 to 0.6 miles) to ensure
safe mounting. Retighten or
remount the AutoSock (fabric
snow chain) if they are loose.
OVI053136
Page 351 of 479

Driving your vehicle
94 5
Chain installation
When installing the AutoSock (fabric
snow chain), follow the manufactur-
er's instructions and mount them as
tightly as you can. Drive slowly with
the AutoSock (fabric snow chain)
installed. If you hear the AutoSock
(fabric snow chain) contacting the
body or chassis, stop and tighten
them. If they still make contact, slow
down until it stops. Remove the
AutoSock (fabric snow chain) as
soon as you begin driving on cleared
roads.Use high quality ethylene gly-
col coolant
Your vehicle is delivered with high
quality ethylene glycol coolant in the
cooling system. It is the only type of
coolant that should be used because
it helps prevent corrosion in the cool-
ing system, lubricates the water
pump and prevents freezing. Be sure
to replace or replenish your coolant
in accordance with the maintenance
schedule in section 7. Before winter,
have your coolant tested to assure
that its freezing point is sufficient for
the temperatures anticipated during
the winter.
Check battery and cables
Winter puts additional burdens on
the battery system. Visually inspect
the battery and cables as described
in section 7. The level of charge in
your battery can be checked by an
authorized HYUNDAI dealer or a
service station.CAUTION
• The AutoSock (fabric snow
chain) that are the wrong size
or improperly installed can
damage your vehicle's brake
lines, suspension, body and
wheels.
• Stop driving and retighten the
AutoSock (fabric snow chain)
any time you hear them hitting
the vehicle.
WARNING - Tire chains
• The use of the AutoSock (fab-
ric snow chain) may adversely
affect vehicle handling.
• Do not exceed 30 km/h (20
mph) or the AutoSock (fabric
snow chain) manufacturer’s
recommended speed limit,
whichever is lower.
• Drive carefully and avoid
bumps, holes, sharp turns, and
other road hazards, which may
cause the vehicle to bounce.
• Avoid sharp turns or locked-
wheel braking.
WARNING
- Mounting chains
When mounting the AutoSock
(fabric snow chain), park the
vehicle on level ground away
from traffic. Turn on the vehicle
Hazard Warning flashers and
place a triangular emergency
warning device behind the vehi-
cle if available. Always place the
vehicle in P (Park), apply the
parking brake and turn off the
engine before installing the
AutoSock (fabric snow chain).
Page 354 of 479

597
Driving your vehicle
This section will guide you in the
proper loading of your vehicle, to
keep your loaded vehicle weight
within its design rating capability.
Properly loading your vehicle will
provide maximum return of the vehi-
cle design performance. Before load-
ing your vehicle, familiarize yourself
with the following terms for determin-
ing your vehicle's weight ratings,
from the vehicle's specifications and
the certification label:
Base curb weight
This is the weight of the vehicle
including a full tank of fuel and all
standard equipment. It does not
include passengers, cargo, or option-
al equipment.
Vehicle curb weight
This is the weight of your new vehicle
when you picked it up from your deal-
er plus any aftermarket equipment.
Cargo weight
This figure includes all weight added
to the Base Curb Weight, including
cargo and optional equipment.
GAW (Gross axle weight)
This is the total weight placed on
each axle (front and rear) - including
vehicle curb weight and all payload.
GAWR
(Gross axle weight rating)
This is the maximum allowable
weight that can be carried by a single
axle (front or rear). These numbers
are shown on the certification label.
The total load on each axle must
never exceed its GAWR.
GVW (Gross vehicle weight)
This is the Base Curb Weight plus
actual Cargo Weight plus passen-
gers.
GVWR
(Gross vehicle weight rating)
This is the maximum allowable
weight of the fully loaded vehicle
(including all options, equipment,
passengers and cargo). The GVWR
is shown on the certification label
located on the driver’s (or front pas-
senger’s) door sill.
Overloading
VEHICLE WEIGHT
WARNING - Vehicle
weight
The gross axle weight rating
(GAWR) and the gross vehicle
weight rating (GVWR) for your
vehicle are on the certification
label attached to the driver's (or
front passenger’s) door.
Exceeding these ratings can
cause an accident or damage
the vehicle. You can calculate
the weight of your load by
weighing the items (and people)
before putting them in the vehi-
cle. Be careful not to overload
your vehicle.
Page 356 of 479

What to do in an emergency
Road warning . . . . . . . . . . . . . . . . . . . . . . . . . . . . . 6-2
• Hazard warning flasher . . . . . . . . . . . . . . . . . . . . . . . 6-2
In case of an emergency while driving . . . . . . . . . . 6-3
• If the engine stalls at a crossroad or crossing. . . . . . . 6-3
• If you have a flat tire while driving . . . . . . . . . . . . . . . 6-3
• If engine stalls while driving . . . . . . . . . . . . . . . . . . . . 6-3
If the engine will not start . . . . . . . . . . . . . . . . . . . . 6-4
• If engine doesn't turn over or turns over slowly . . . . 6-4
• If engine turns over normally but does not start . . . . 6-4
Emergency starting . . . . . . . . . . . . . . . . . . . . . . . . . 6-5
• Jump starting . . . . . . . . . . . . . . . . . . . . . . . . . . . . . . . . 6-5
• Push-starting . . . . . . . . . . . . . . . . . . . . . . . . . . . . . . . . 6-7
If the engine overheats . . . . . . . . . . . . . . . . . . . . . . . 6-8
Tire Pressure Monitoring System (TPMS) . . . . . . 6-9
• Low tire pressure telltale . . . . . . . . . . . . . . . . . . . . . . 6-10
• Low tire pressure position telltale . . . . . . . . . . . . . . . 6-10
• TPMS (Tire Pressure Monitoring System)
malfunction indicator . . . . . . . . . . . . . . . . . . . . . . . . 6-11
• Changing a tire with TPMS . . . . . . . . . . . . . . . . . . . . 6-12
If you have a flat tire . . . . . . . . . . . . . . . . . . . . . . . 6-15
• Jack and tools . . . . . . . . . . . . . . . . . . . . . . . . . . . . . . . 6-15
• Removing and storing the spare tire . . . . . . . . . . . . 6-16
• Changing tires . . . . . . . . . . . . . . . . . . . . . . . . . . . . . . . 6-16
• Jack label . . . . . . . . . . . . . . . . . . . . . . . . . . . . . . . . . . . 6-22
• EC Declaration of conformity for Jack . . . . . . . . . . . 6-23
Towing . . . . . . . . . . . . . . . . . . . . . . . . . . . . . . . . . . . 6-24
• Towing service . . . . . . . . . . . . . . . . . . . . . . . . . . . . . . . 6-24
• Removable towing hook . . . . . . . . . . . . . . . . . . . . . . . 6-26
• Emergency towing . . . . . . . . . . . . . . . . . . . . . . . . . . . . 6-27
Emergency commodity . . . . . . . . . . . . . . . . . . . . . 6-30
• Fire extinguisher . . . . . . . . . . . . . . . . . . . . . . . . . . . . . 6-30
• First aid kit . . . . . . . . . . . . . . . . . . . . . . . . . . . . . . . . . 6-30
• Triangle reflector . . . . . . . . . . . . . . . . . . . . . . . . . . . . 6-30
• Tire pressure gauge . . . . . . . . . . . . . . . . . . . . . . . . . . . 6-30
6