2014 HYUNDAI ELANTRA GT ECO mode
[x] Cancel search: ECO modePage 40 of 476

321
Safety features of your vehicle
Seat belts - Front passenger and
rear seat 3-point system with
combination locking retractor
To fasten your seat belt:
Combination retractor type seat belts
are installed in the rear seat positions
to help accommodate the installation
of child restraint systems. Although a
combination retractor is also installed
in the front passenger seat position, it
is strongly recommended that children
always be seated in the rear seat.
NEVER place any infant restraint sys-
tem in the front seat of the vehicle.
This type of seat belt combines the
features of both an emergency lock-
ing retractor seat belt and an auto-
matic locking retractor seat belt. To
fasten your seat belt, pull it out of the
retractor and insert the metal tab into
the buckle. There will be an audible
"click" when the tab locks into the
buckle. When not securing a child
restraint, the seat belt operates in the
same way as the driver's seat belt
(Emergency Locking Retractor Type).
It automatically adjusts to the proper
length only after the lap belt portion of
the seat belt is adjusted manually so
that it fits snugly around your hips.When the seat belt is fully extended
from the retractor to allow the instal-
lation of a child restraint system, the
seat belt operation changes to allow
the belt to retract, but not to extend
(Automatic Locking Retractor Type).
Refer to “Using a child restraint sys-
tem” in this section.
To convert from the automatic lock-
ing feature to the emergency locking
operation mode, allow the unbuckled
seat belt to fully retract.
When using the rear center seat belt,
the buckle with the “CENTER” mark
must be used.
OFD037056
Page 50 of 476

331
Safety features of your vehicle
Using a child restraint system
For small children and babies, the
use of a child seat or infant seat is
required. This child seat or infant
seat should be of appropriate size for
the child and should be installed in
accordance with the manufacturer's
instructions.For safety reasons, we recommend
that the child restraint system be
used in the rear seats.
Since all passenger seat belts move
freely under normal conditions and
only lock under extreme or emer-
gency conditions (emergency locking
mode), you must manually change
these seat belts to the automatic lock-
ing mode to secure a child restraint.
WARNING - Child seat
installation
A child can be seriously
injured or killed in a collision
if the child restraint is not
properly anchored to the vehi-
cle and the child is not prop-
erly restrained in the child
restraint. Before installing the
child restraint system, read
the instructions supplied by
the child restraint system
manufacturer.
If the seat belt does not oper-
ate as described in this sec-
tion, have the system checked
immediately by your author-
ized HYUNDAI dealer.
Failure to observe this manu-
al's instructions regarding
child restraint systems and
the instructions provided with
the child restraint system
could increase the chance
and/or severity of injury in an
accident.
WARNING
Never place a rear-facing child
restraint in the front passenger
seat, because of the danger that
an inflating passenger-side air
bag could impact the rear-facing
child restraint and kill the child.
CRS09
OMD030019
Forward-facing child restraint system
Rearward-facing child restraint system
Page 71 of 476

Safety features of your vehicle
52 3
Driver's and passenger's front
air bag
Your vehicle is equipped with a
Supplemental Restraint (Air Bag)
System and the lap/shoulder belts at
both the driver and passenger seat-
ing positions.
The indications of the system's pres-
ence are the letters "SRS AIR BAG"
embossed on the air bag pad cover
in the steering wheel, on the knee
bolster below the steering wheel col-
umn and the passenger's side front
panel pad above the glove box.
The SRS consists of air bags
installed under the pad covers in the
center of the steering wheel , in the
knee bolster below the steering
wheel column and the passenger's
side front panel above the glove box.
The purpose of the SRS is to provide
the vehicle's driver and/or the front
passenger with additional protection
than that offered by the seat belt sys-
tem alone in case of a frontal impact
of sufficient severity.The seat belt buckle sensors deter-
mine if the driver and front passen-
ger's seat belts are fastened. These
sensors provide the ability to control
the SRS deployment based on
whether or not the seat belts are fas-
tened, and how severe the impact is.
The advanced SRS offers the ability
to control the air bag inflation within
two levels. A first stage level is pro-
vided for moderate-severity impacts.
A second stage level is provided for
more severe impacts.
According to the impact severity and
seat belt usage, the SRSCM (SRS
Control Module) controls the air bag
inflation. Failure to properly wear
seat belts can increase the risk or
severity of injury in an accident.
OGD031030
OGD031031
OGD031032
■Driver’s knee air bag
■Driver’s front air bag
■Passenger’s front air bag
Page 130 of 476

445
Features of your vehicle
Horn
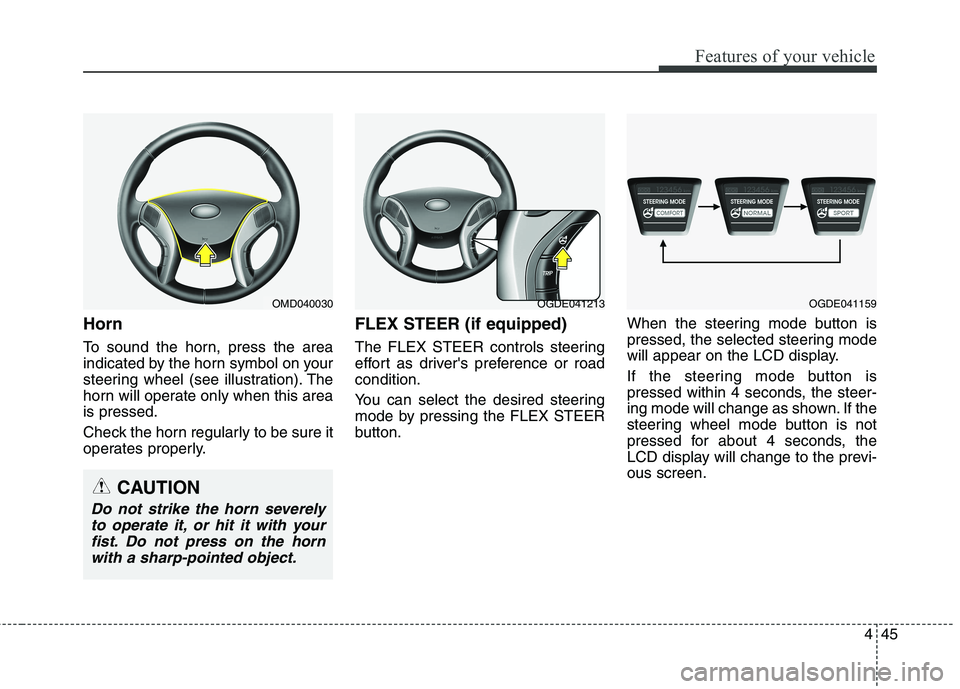
To sound the horn, press the area
indicated by the horn symbol on your
steering wheel (see illustration). The
horn will operate only when this area
is pressed.
Check the horn regularly to be sure it
operates properly.
FLEX STEER (if equipped)
The FLEX STEER controls steering
effort as driver's preference or road
condition.
You can select the desired steering
mode by pressing the FLEX STEER
button.When the steering mode button is
pressed, the selected steering mode
will appear on the LCD display.
If the steering mode button is
pressed within 4 seconds, the steer-
ing mode will change as shown. If the
steering wheel mode button is not
pressed for about 4 seconds, the
LCD display will change to the previ-
ous screen.
OGDE041213OGDE041159OMD040030
CAUTION
Do not strike the horn severely
to operate it, or hit it with your
fist. Do not press on the horn
with a sharp-pointed object.
Page 138 of 476

453
Features of your vehicle
Erasing programmed HomeLink
buttons
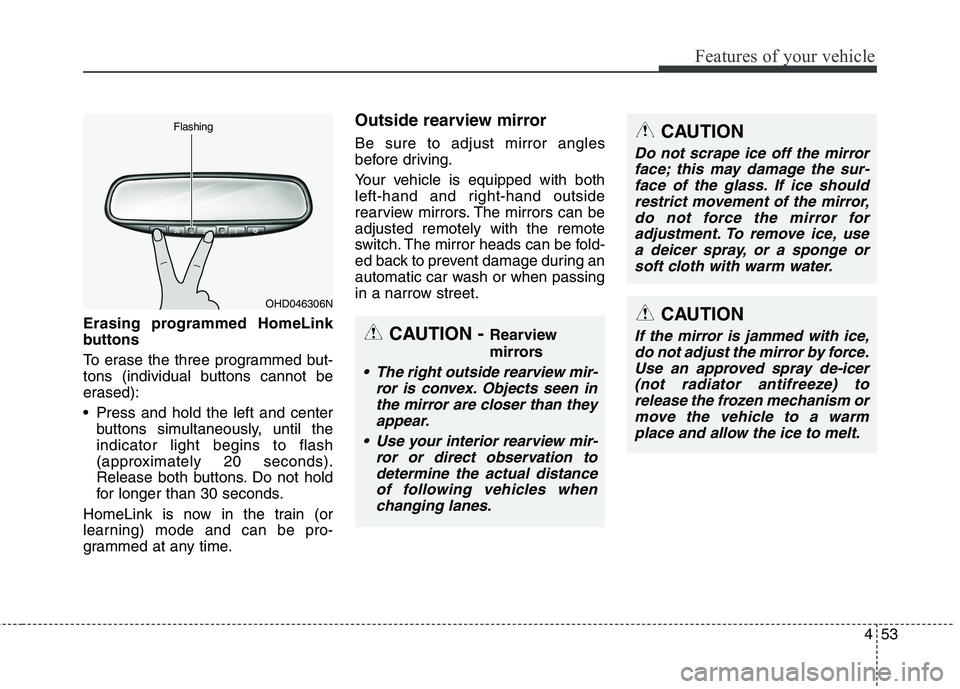
To erase the three programmed but-
tons (individual buttons cannot be
erased):
Press and hold the left and center
buttons simultaneously, until the
indicator light begins to flash
(approximately 20 seconds).
Release both buttons. Do not hold
for longer than 30 seconds.
HomeLink is now in the train (or
learning) mode and can be pro-
grammed at any time.
Outside rearview mirror
Be sure to adjust mirror angles
before driving.
Your vehicle is equipped with both
left-hand and right-hand outside
rearview mirrors. The mirrors can be
adjusted remotely with the remote
switch. The mirror heads can be fold-
ed back to prevent damage during an
automatic car wash or when passing
in a narrow street.
OHD046306N Flashing
CAUTION - Rearview
mirrors
The right outside rearview mir-
ror is convex. Objects seen in
the mirror are closer than they
appear.
Use your interior rearview mir-
ror or direct observation to
determine the actual distance
of following vehicles when
changing lanes.
CAUTION
Do not scrape ice off the mirror
face; this may damage the sur-
face of the glass. If ice should
restrict movement of the mirror,
do not force the mirror for
adjustment. To remove ice, use
a deicer spray, or a sponge or
soft cloth with warm water.
CAUTION
If the mirror is jammed with ice,
do not adjust the mirror by force.
Use an approved spray de-icer
(not radiator antifreeze) to
release the frozen mechanism or
move the vehicle to a warm
place and allow the ice to melt.
Page 146 of 476

461
Features of your vehicle
Trip computer
The trip computer is a microcomput-
er in the driver information system. It
displays information related to driv-
ing on the LCD screen when the igni-
tion switch is in the ON position. If the
battery is disconnected, all stored
information (except odometer) is
reset.Press the TRIP button for less than 1
second to select any mode as fol-
lows:
Type AType B
OMD040052
* if equipped
Tripmeter B
Instant fuel consumption*
Tripmeter A
Distance to empty
Average fuel consumption*
User setting
Elapsed time*
Average speed*
Tripmeter B
Tripmeter A
Distance to empty*
Average fuel consumption* &
Instant fuel consumption*
User setting
* if equipped
Elapsed time*
Average speed*
Page 147 of 476

Features of your vehicle
62 4
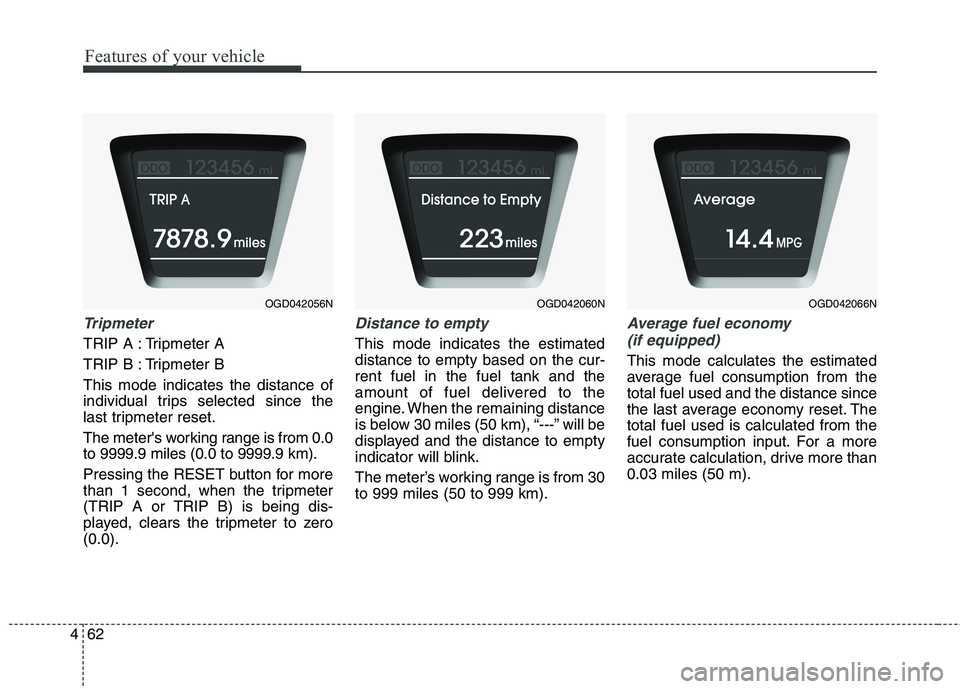
Tripmeter
TRIP A : Tripmeter A
TRIP B : Tripmeter B
This mode indicates the distance of
individual trips selected since the
last tripmeter reset.
The meter's working range is from 0.0
to 9999.9 miles (0.0 to 9999.9 km).
Pressing the RESET button for more
than 1 second, when the tripmeter
(TRIP A or TRIP B) is being dis-
played, clears the tripmeter to zero
(0.0).
Distance to empty
This mode indicates the estimated
distance to empty based on the cur-
rent fuel in the fuel tank and the
amount of fuel delivered to the
engine. When the remaining distance
is below 30 miles (50 km), “---” will be
displayed and the distance to empty
indicator will blink.
The meter’s working range is from 30
to 999 miles (50 to 999 km).
Average fuel economy
(if equipped)
This mode calculates the estimated
average fuel consumption from the
total fuel used and the distance since
the last average economy reset. The
total fuel used is calculated from the
fuel consumption input. For a more
accurate calculation, drive more than
0.03 miles (50 m).
OGD042056NOGD042060NOGD042066N
Page 148 of 476

463
Features of your vehicle
• When the “AVG Fuel Economy” of
“User Setting” is in the “Auto Reset”
If the vehicle speed exceeds 1.6
MPH (1 km/h) after refueling more
than 1.6 gallons (6 l), the average
fuel consumption will be cleared to
zero (---).
• When the “AVG Fuel Economy” of
“User Setting” is in the “Manual
Reset”
Pressing the RESET button for more
than 1 second when the average fuel
consumption is displayed clears the
average fuel consumption to zero (--.-).
Instant fuel consumption
(if equipped)
This mode calculates the estimated
instant fuel consumption of the last
few seconds.
✽ ✽
NOTICE
• If the vehicle is not on level ground
or the battery power has been
interrupted, the “Distance to
empty” function may not operate
correctly.
The trip computer may not regis-
ter additional fuel if less than 1.6
gallons (6 liters) of fuel are added
to the vehicle.
• The fuel consumption and dis-
tance to empty values may vary
significantly based on driving con-
ditions, driving habits, and condi-
tion of the vehicle.
• The distance to empty value is an
estimate of the available driving
distance. This value may differ
from the actual driving distance
available.
OGD042069N