2014 HYUNDAI ELANTRA GT ECU
[x] Cancel search: ECUPage 77 of 476

Safety features of your vehicle
58 3
They are designed to help protect the
heads of the front seat occupants
and the rear outboard seat occupants
in certain side impact collisions.
The curtain air bags are designed to
deploy only during certain side
impact collisions, depending on the
crash severity, angle, speed and
impact. The curtain air bags are not
designed to deploy in all side impact
situations or collisions from the front
or rear of the vehicle.(Continued)
Do not allow the passengers
to lean their heads or bodies
onto doors, put their arms on
the doors, stretch their arms
out of the window, or place
objects between the doors
and passengers when they are
seated on seats equipped with
side and/or curtain air bags.
Never try to open or repair any
components of the side cur-
tain air bag system. This
should only be done by an
authorized HYUNDAI dealer.
Failure to follow the above
instructions can result in injury
or death to the vehicle occu-
pants in an accident.WARNING
In order for side and curtain
air bags to provide the best
protection, front seat occu-
pants and outboard rear occu-
pants should sit in an upright
position with the seat belts
properly fastened. mportantly,
children should sit in a proper
child restraint system in the
rear seat.
When children are seated in
the rear outboard seats, they
must be seated in the proper
child restraint system. Make
sure to put the child restraint
system as far away from the
door side as possible, and
secure the child restraint sys-
tem in a locked position.
(Continued)
Page 106 of 476
421
Features of your vehicle
Operating door locks from
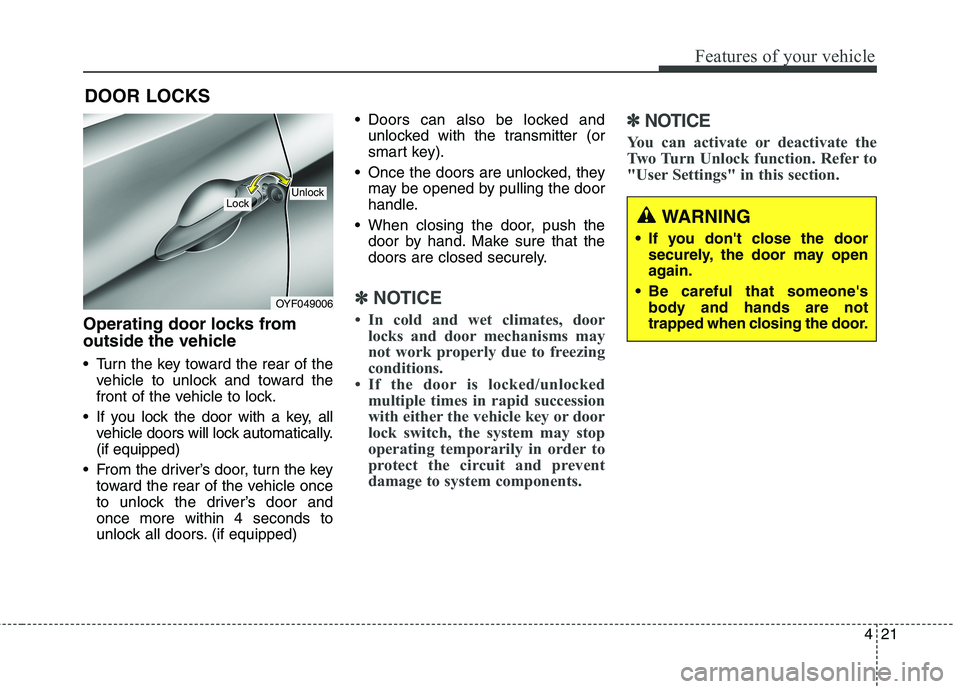
outside the vehicle
Turn the key toward the rear of the
vehicle to unlock and toward the
front of the vehicle to lock.
If you lock the door with a key, all
vehicle doors will lock automatically.
(if equipped)
From the driver’s door, turn the key
toward the rear of the vehicle once
to unlock the driver’s door and
once more within 4 seconds to
unlock all doors. (if equipped) Doors can also be locked and
unlocked with the transmitter (or
smart key).
Once the doors are unlocked, they
may be opened by pulling the door
handle.
When closing the door, push the
door by hand. Make sure that the
doors are closed securely.
✽ ✽
NOTICE
• In cold and wet climates, door
locks and door mechanisms may
not work properly due to freezing
conditions.
• If the door is locked/unlocked
multiple times in rapid succession
with either the vehicle key or door
lock switch, the system may stop
operating temporarily in order to
protect the circuit and prevent
damage to system components.
✽ ✽
NOTICE
You can activate or deactivate the
Two Turn Unlock function. Refer to
"User Settings" in this section.
DOOR LOCKS
OYF049006
LockUnlock
WARNING
If you don't close the door
securely, the door may open
again.
Be careful that someone's
body and hands are not
trapped when closing the door.
Page 110 of 476
425
Features of your vehicle
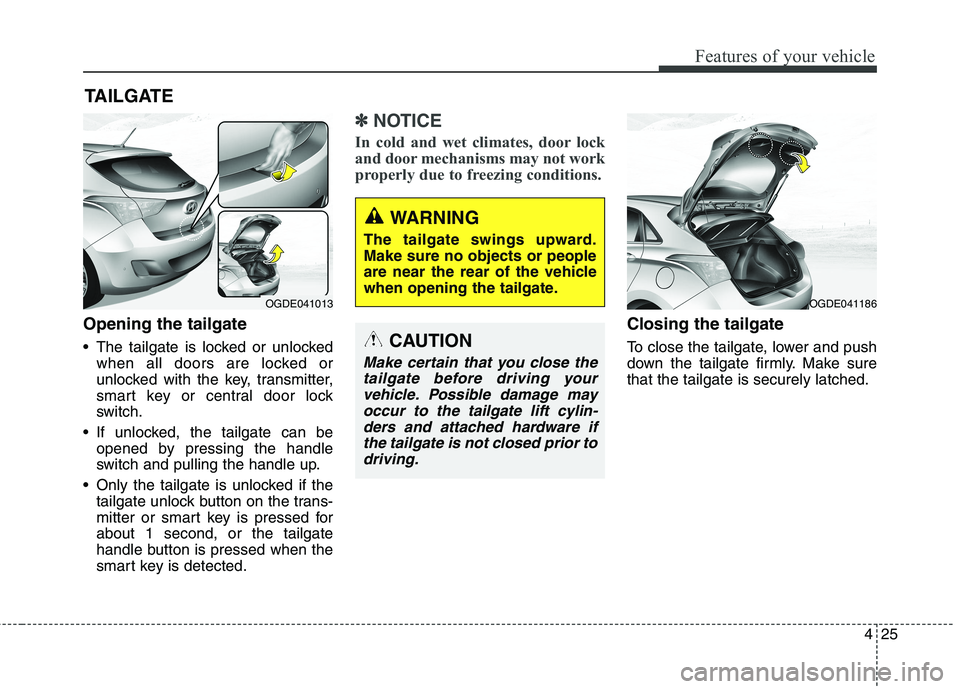
Opening the tailgate
The tailgate is locked or unlocked
when all doors are locked or
unlocked with the key, transmitter,
smart key or central door lock
switch.
If unlocked, the tailgate can be
opened by pressing the handle
switch and pulling the handle up.
Only the tailgate is unlocked if the
tailgate unlock button on the trans-
mitter or smart key is pressed for
about 1 second, or the tailgate
handle button is pressed when the
smart key is detected.
✽ ✽
NOTICE
In cold and wet climates, door lock
and door mechanisms may not work
properly due to freezing conditions.
Closing the tailgate
To close the tailgate, lower and push
down the tailgate firmly. Make sure
that the tailgate is securely latched.
TAILGATE
OGDE041013OGDE041186
WARNING
The tailgate swings upward.
Make sure no objects or people
are near the rear of the vehicle
when opening the tailgate.
CAUTION
Make certain that you close the
tailgate before driving your
vehicle. Possible damage may
occur to the tailgate lift cylin-
ders and attached hardware if
the tailgate is not closed prior to
driving.
Page 120 of 476
435
Features of your vehicle
Closing the fuel filler lid
1. To install the cap, turn it clockwise
fully until it “clicks” one time. This
indicates that the cap is securely
tightened.
2. Close the fuel filler lid and push it
in lightly making sure that it is
securely closed.WARNING - Refueling
If pressurized fuel sprays out,
it can cover your clothes or
skin and thus subject you to
the risk of fire and burns.
Always remove the fuel cap
carefully and slowly. If the cap
is venting fuel or if you hear a
hissing sound, wait until the
condition stops before com-
pletely removing the cap.
Do not "top off" after the noz-
zle automatically shuts off
when refueling.
Tighten the cap until it clicks
one time, otherwise the
Malfunction Indicator Light
will illuminate.
Always check that the fuel cap
is installed securely to pre-
vent fuel spillage in the event
of an accident.WARNING - Refueling
dangers
Automotive fuels are flammable
materials. When refueling, please
note the following guidelines
carefully. Failure to follow these
guidelines may result in severe
personal injury, severe burns or
death by fire or explosion.
Read and follow all warnings
posted at the gas station facility.
Before refueling, note the
location of the Emergency
Gasoline Shut-Off, if available,
at the gas station facility.
Before touching the fuel noz-
zle, you should eliminate
potentially dangerous static
electricity discharge by touch-
ing another metal part of the
vehicle, a safe distance away
from the fuel filler neck, noz-
zle, or other gas source.
(Continued)
Page 121 of 476

Features of your vehicle
36 4
(Continued)
When refueling, always shut
the engine off. Sparks pro-
duced by electrical compo-
nents related to the engine
can ignite fuel vapors causing
a fire. Once refueling is com-
plete, check to make sure the
filler cap and filler door are
securely closed, before start-
ing the engine.
DO NOT use matches or a
lighter and DO NOT SMOKE or
leave a lit cigarette in your
vehicle while at a gas station
especially during refueling.
Automotive fuel is highly
flammable and can, when
ignited, result in fire.
If a fire breaks out during refu-
eling, leave the vicinity of the
vehicle, and immediately con-
tact the manager of the gas
station and then contact the
local fire department or 911.
Follow any safety instructions
they provide.(Continued)
Do not get back into a vehicle
once you have begun refuel-
ing since you can generate
static electricity by touching,
rubbing or sliding against any
item or fabric (polyester, satin,
nylon, etc.) capable of produc-
ing static electricity. Static
electricity discharge can
ignite fuel vapors resulting in
rapid burning. If you must re-
enter the vehicle, you should
once again eliminate poten-
tially dangerous static elec-
tricity discharge by touching a
metal part of the vehicle, away
from the fuel filler neck, noz-
zle or other gasoline source.
(Continued)(Continued)
When using an approved
portable fuel container, be sure
to place the container on the
ground prior to refueling. Static
electricity discharge from the
container can ignite fuel vapors
causing a fire. Once refueling
has begun, contact with the
vehicle should be maintained
until the filling is complete.
Use only approved portable
plastic fuel containers designed
to carry and store gasoline.
Do not use cellular phones
while refueling. Electric cur-
rent and/or electronic interfer-
ence from cellular phones can
potentially ignite fuel vapors
causing a fire.
(Continued)
Page 123 of 476
Features of your vehicle
38 4
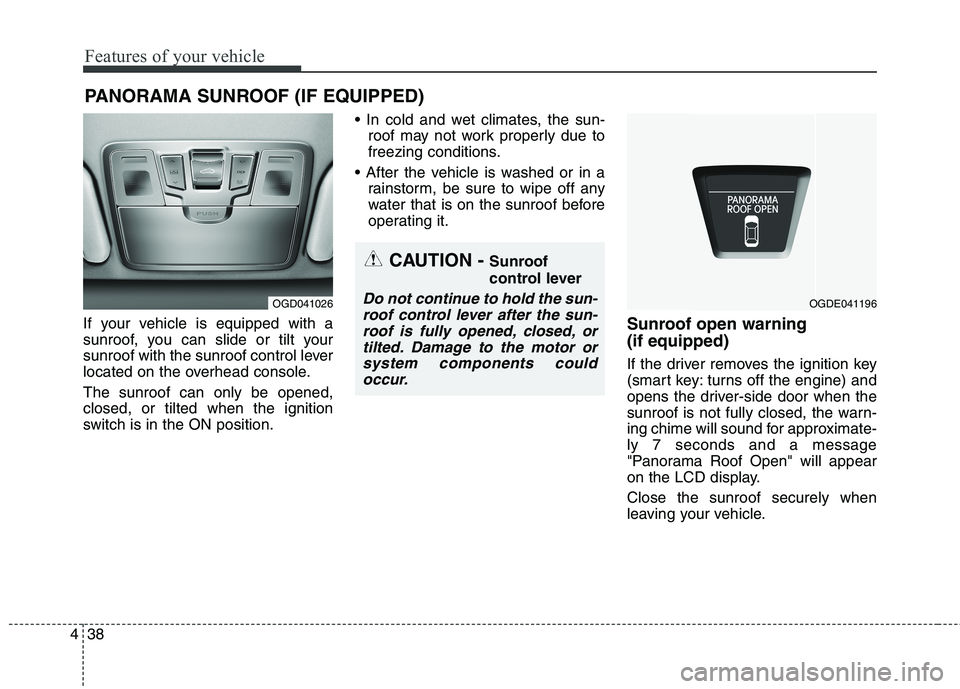
If your vehicle is equipped with a
sunroof, you can slide or tilt your
sunroof with the sunroof control lever
located on the overhead console.
The sunroof can only be opened,
closed, or tilted when the ignition
switch is in the ON position.
roof may not work properly due to
freezing conditions.
rainstorm, be sure to wipe off any
water that is on the sunroof before
operating it.Sunroof open warning
(if equipped)
If the driver removes the ignition key
(smart key: turns off the engine) and
opens the driver-side door when the
sunroof is not fully closed, the warn-
ing chime will sound for approximate-
ly 7 seconds and a message
"Panorama Roof Open" will appear
on the LCD display.
Close the sunroof securely when
leaving your vehicle.
PANORAMA SUNROOF (IF EQUIPPED)
OGD041026
CAUTION - Sunroof
control lever
Do not continue to hold the sun-
roof control lever after the sun-
roof is fully opened, closed, or
tilted. Damage to the motor or
system components could
occur.OGDE041196
Page 135 of 476
Features of your vehicle
50 4
Retain the original transmitter for
future programming procedures (i.e.,
new vehicle purchase). It is also sug-
gested that upon the sale of the vehi-
cle, the programmed HomeLink but-
tons be erased for security purposes
(follow step 1 in the “Programming”
portion of this text).Programming
Your vehicle may require the ignition
switch to be turned to the ACC posi-
tion for programming and/or opera-
tion of HomeLink. It is also recom-
mended that a new battery be
replaced in the hand-held transmitter
of the device being programmed to
HomeLink for quicker training and
accurate transmission of the radio-
frequency.
Follow these steps to train your
HomeLink mirror:
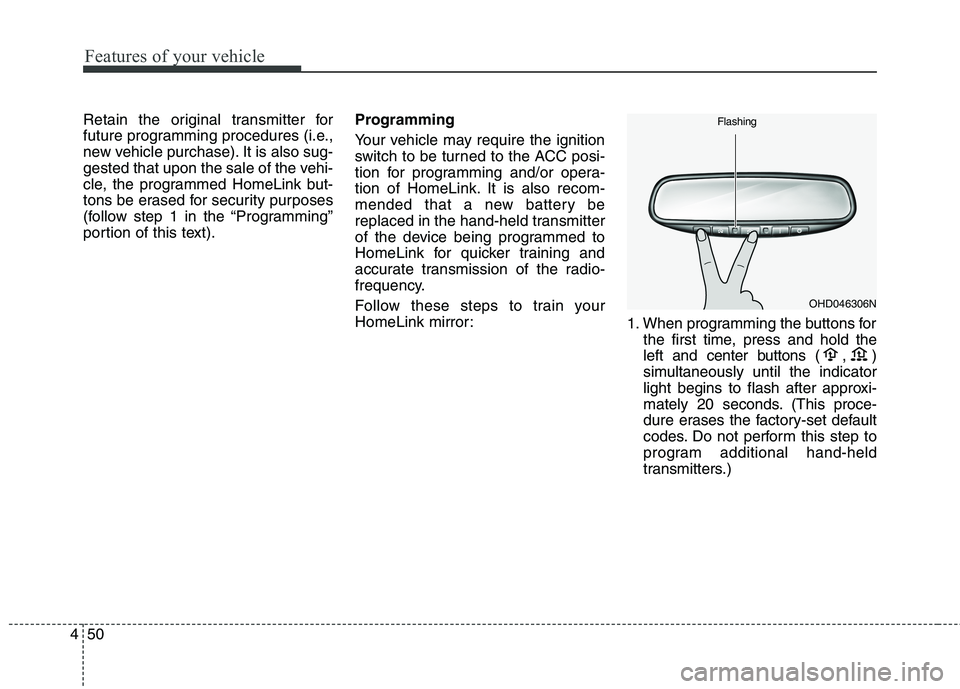
1. When programming the buttons for
the first time, press and hold
the
left and center buttons (
,)
simultaneously until the indicator
light begins to flash after approxi-
mately 20 seconds. (This proce-
dure erases the factory-set default
codes. Do not perform this step to
program additional hand-held
transmitters.)
OHD046306N Flashing
Page 137 of 476
Features of your vehicle
52 4
Rolling code programming
To train a garage door opener (or
other rolling code equipped devices)
with the rolling code feature, follow
these instructions after completing
the “Programming” portion of this
text. (A second person may make the
following training procedures quicker
& easier.)
4. Locate the “learn” or “smart” but-
ton on the device’s motor head
unit. Exact location and color of
the button may vary by product
brand. If there is difficulty locating
the “learn” or “smart” button, refer-
ence the device’s owner’s manual
or contact HomeLink at 1-800-
355-3515 or on the internet at
www.homelink.com.
5. Press and release the “learn” or
“smart” button on the device’s
motor head unit.You have 30
seconds to complete step num-
ber 6.6. Return to the vehicle and firmly
press and release the pro-
grammed HomeLink button up to
three times. The rolling code
equipped device should now rec-
ognize the HomeLink signal and
activate when the HomeLink but-
ton is pressed. The remaining two
buttons may now be programmed
if this has not previously been
done. Refer to the “Programming”
portion of this text.Operating HomeLink
To operate, simply press the pro-
grammed HomeLink button.
Activation will now occur for the
trained product (garage door, securi-
ty system, entry door lock, estate
gate, or home or office lighting). For
convenience, the hand-held trans-
mitter of the device may also be used
at any time. The HomeLink Wireless
Controls System (once programmed)
or the original hand-held transmitter
may be used to activate the device
(e.g. garage door, entry door lock,
etc.). In the event that there are still
programming difficulties, contact
HomeLink at 1-800-355-3515 or on
the internet at www.homelink.com.